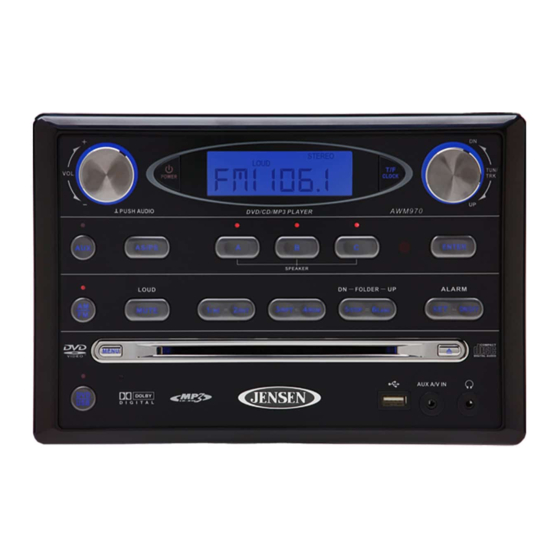
Jensen AWM970 Owner's Manual
Jensen mobile audio system owner's manual
Hide thumbs
Also See for AWM970:
- Owner's manual (18 pages) ,
- Quick reference manual (2 pages) ,
- Quick reference manual (2 pages)
Table of Contents
Advertisement
Available languages
Available languages
Installation . . . . . . . . . . . . . . . . . . . . . . . . . . . . . . . . . . . . . . . . . . . . . . . . . . . . . . . . . . . . . . 3
Wiring . . . . . . . . . . . . . . . . . . . . . . . . . . . . . . . . . . . . . . . . . . . . . . . . . . . . . . . . . . . . . . . . . . 4
Basic Operation. . . . . . . . . . . . . . . . . . . . . . . . . . . . . . . . . . . . . . . . . . . . . . . . . . . . . . . . . . 5
Tuner Operation . . . . . . . . . . . . . . . . . . . . . . . . . . . . . . . . . . . . . . . . . . . . . . . . . . . . . . . . . 7
CD Operation . . . . . . . . . . . . . . . . . . . . . . . . . . . . . . . . . . . . . . . . . . . . . . . . . . . . . . . . . . . . 8
DVD/VCD Operation . . . . . . . . . . . . . . . . . . . . . . . . . . . . . . . . . . . . . . . . . . . . . . . . . . . . . 10
MP3/USB Operation . . . . . . . . . . . . . . . . . . . . . . . . . . . . . . . . . . . . . . . . . . . . . . . . . . . . . 12
iPod Operation . . . . . . . . . . . . . . . . . . . . . . . . . . . . . . . . . . . . . . . . . . . . . . . . . . . . . . . . . 14
Owner's Manual
Remote Control Operation . . . . . . . . . . . . . . . . . . . . . . . . . . . . . . . . . . . . . . . . . . . . . . . . 15
Setup Menu . . . . . . . . . . . . . . . . . . . . . . . . . . . . . . . . . . . . . . . . . . . . . . . . . . . . . . . . . . . . 16
Guide du Propriétaire
Specifications . . . . . . . . . . . . . . . . . . . . . . . . . . . . . . . . . . . . . . . . . . . . . . . . . . . . . . . . . . 18
Installation . . . . . . . . . . . . . . . . . . . . . . . . . . . . . . . . . . . . . . . . . . . . . . . . . . . . . . . . . . . . . 20
Câblage . . . . . . . . . . . . . . . . . . . . . . . . . . . . . . . . . . . . . . . . . . . . . . . . . . . . . . . . . . . . . . . 21
Opération de base. . . . . . . . . . . . . . . . . . . . . . . . . . . . . . . . . . . . . . . . . . . . . . . . . . . . . . . 22
Opération tuner . . . . . . . . . . . . . . . . . . . . . . . . . . . . . . . . . . . . . . . . . . . . . . . . . . . . . . . . . 24
Opération CD . . . . . . . . . . . . . . . . . . . . . . . . . . . . . . . . . . . . . . . . . . . . . . . . . . . . . . . . . . . 25
Opération DVD/VCD . . . . . . . . . . . . . . . . . . . . . . . . . . . . . . . . . . . . . . . . . . . . . . . . . . . . . 27
Opération MP3/USB . . . . . . . . . . . . . . . . . . . . . . . . . . . . . . . . . . . . . . . . . . . . . . . . . . . . . 29
Opération iPod . . . . . . . . . . . . . . . . . . . . . . . . . . . . . . . . . . . . . . . . . . . . . . . . . . . . . . . . . 31
Opération télécommande . . . . . . . . . . . . . . . . . . . . . . . . . . . . . . . . . . . . . . . . . . . . . . . . . 32
Menu Configuration . . . . . . . . . . . . . . . . . . . . . . . . . . . . . . . . . . . . . . . . . . . . . . . . . . . . . 33
Spécifications . . . . . . . . . . . . . . . . . . . . . . . . . . . . . . . . . . . . . . . . . . . . . . . . . . . . . . . . . . 35
Advertisement
Table of Contents

Subscribe to Our Youtube Channel
Related Manuals for Jensen AWM970


Summary of Contents for Jensen AWM970
-
Page 1: Table Of Contents
DVD/VCD Operation ........... . . 10 AWM970 MP3/USB Operation . -
Page 2: Disconnecting The Battery
To prevent a short circuit, be sure to turn off the ignition and remove the negative (-) battery cable prior to installation. NOTE: If the AWM970 is to be installed in a vehicle equipped with an on-board drive or navigation computer, do not disconnect the battery cable. If the cable is disconnected, the computer memory may be lost. -
Page 3: Installation
Installation It’s a good idea to read all of the instructions before beginning the installation. We recommend having your JENSEN AWM970 installed by a reputable installation shop. Selecting the Mounting Location Select a mounting location, taking care to avoid the following: •... -
Page 4: Wiring
AWM970 Wiring The wiring diagram depicts all the wiring connections required for proper operation of the unit. -
Page 5: Basic Operation
Apple Video iPodJ cable type, as shown in the inset drawing. USB Interface Connector You can connect a USB device directly to USB interface (7) on the front of the AWM970 for playback of compatible files. Playback begins automatically. Press the DVD/USB button (24) to switch to USB mode from another source. - Page 6 The new time will be saved five seconds after the last adjustment is made. Setting the Sleep Time The Sleep Timer will automatically turn off the AWM970 in the designated number of minutes. To set the Sleep Time, press the ALARM SET button (9a) and the sleep time will appear in the display with the number representing the minutes (SLEEP 0).
-
Page 7: Tuner Operation
AWM970 Tuner Operation Selecting a Band Press the AM/FM button (11) to directly access tuner mode from any other function mode or to change between two AM bands (AM1 and AM2) and three FM bands (FM1, FM2 and FM3). Tuning / Preset Stations Manual Tuning Rotate the TUN/TRK (12) control clockwise or UP to tune the frequency one step higher. -
Page 8: Cd Operation
Press the GOTO button (26) on the remote control. The On Screen Display information will appear with the track number highlighted. Use the number keys on the remote control to enter the 3-digit track number directly (i.e. for track 10, enter “010”. Press the ENTER button (5) to confirm and begin playback. AWM970... - Page 9 AWM970 CD Operation (continued) CD Playback Information The following information is displayed at the top of the screen during CD playback: • TRK ##/## – “1/18” indicates the first of 18 tracks on the CD is currently playing. • – “X” indicates repeat play is OFF, “1” indicates repeat track, and “A” indicates repeat disc.
-
Page 10: Language Selection
SUBTITLE: Press to select an alternate subtitle language, if available. ANGLE: Press to select an alternate viewing angle, if available. ZOOM: Press to zoom the picture at ZOOM 2, ZOOM 3, ZOOM 4, ZOOM 1/2, ZOOM 1/3 or ZOOM 1/4, or select OFF to return to normal view. AWM970... -
Page 11: Awm970 Dvd/Vcd Operation
AWM970 DVD/VCD Operation (continued) Playback Information During DVD and VCD playback, press the button (27) on the remote control to display playback information on the screen, including the media playing and current playback time. Continue pressing the button to display additional information, as indicated below. -
Page 12: Mp3/Usb Operation
TUN/TRK control (12) to search in current folder. During rotate the TUN/TRK control to access the previous/next file. The selected file number to access a higher folder level (FOLDER UP). LANG button (23) 5/STOP button (20) to access a lower folder level (FOLDER DN). AWM970... - Page 13 AWM970 MP3/USB Operation (continued) Fast Forward/Reverse Rotate the TUN/TRK control for more than three seconds or press the >> or << buttons on the remote control (17) to fast forward or fast reverse. Press and hold once for FORWARD X 2.
-
Page 14: Ipod Operation
NOTE: The iPod will continuously recharge when connected to the unit, as long as the vehicle ignition is turned on. Please note that the AWM970 will not support charging of the iPod Nano 4th generation (Chromatic) or any iPod models released after September 2008. -
Page 15: Remote Control Operation
AWM970 Remote Control Operation REF DESCRIPTION TUNER Power Turn radio on/standy mode. Turn radio on/standby mode. VOL +/- Adjust volume up/down. Adjust volume up/down. Press for Audio Control Setup menu. Press for Audio Control Setup menu. TUNE + Search higher station. -
Page 16: Setup Menu
AUDIO SETUP SPDIF/OFF AUDIO OUT SPDIF/RAW SPDIF/PCM Audio Out: This item defines the digital output format. Key: This item changes the audio output key. AWM970 The Language Setup menu controls the following features: The Audio Setup menu controls the following features:... -
Page 17: Digital Setup
AWM970 Setup Menu (continued) Video Setup The Video Setup menu controls the following features: VIDEO SETUP BRIGHTNESS CONTRAST SATURATION SHARPNESS Brightness: Adjust the brightness of the screen from the following levels: 12, 10, 8, 6, 4, 2 or 0. Contrast: Adjust the contrast of the screen from the following levels: 12, 10, 8, 6, 4, 2 or 0. -
Page 18: Specifications
AWM970 Specifications General Power Supply Requirements......DC 12 Volts, Negative Ground Operating Voltage ..........10-16VDC Overall Dimensions . - Page 19 Pour éviter un court-circuit soyez sûr de mettre l'allumage en arrêt et d'enlever le câble negative de la pile avant l'installation. A NOTER : Si le AWM970 est à installer dans un véhicule équipé d'un lecteur sur bord ou un ordinateur de navigation, ne débranchez pas le câble pile. Si le câble pile est débranché, la mémoire de l'ordinateur peut être perdue.
-
Page 20: Installation
M3 x 20mm Ecrou x 4 Installation C'est une bonne idée de lire toutes les instructions avant de commencer l'installation. Nous recommandons que vous installiez votre JENSEN AWM970 par une boutique d'installation de bonne réputation. Selectionner l'emplacement de montage Sélectionnez un emplacement de montage en prenant soin d'éviter le suivant : •... -
Page 21: Câblage
AWM970 Câblage Le diagramme de câblage dépeint toutes les connexions de câblage exigées pour une bonne operation de l'appareil. VOIR FIL A-A VUE D'INSERTION COULEUR FONCTION NOIR TERRE PUISSANCE (-12VDC) PILE PUISSANCE +12VDC JAUNE ROUGE PUISSANCE BASCULEE +12VCD HAUT PARLEUR (B) DROITE (+) -
Page 22: Opération De Base
à « AUX 3 IN ». Veuillez noter qu'il y a des cables standardizes A/V differents. Le AWM970 est conçu pour soutenir des cables de type Apple Vidéo iPod comme montré dans le dessin que voici. -
Page 23: Affichage De L'horloge
Régler l'heure de sommeil La minuterie sommeil va arrêter le AWM970 automatiquement dans le nombre de minutes désigné. Pour régler la minuteirie de sommeil, appuyez sur le bouton ALARM SET (9a) et ll'heure de sommeil va apparaître dans l'affichage avec le numéro représentant les minutes... -
Page 24: Opération Tuner
AS/PS. Balayage pré-réglé Appuyez brièvement sur AS/PS pour balayer toutes les stations pré-réglées dans la bande courante. Pour arrêter cette fonction et jouer la station actuelle, appuyez de nouveau sur le bouton AS/PS. AWM970... -
Page 25: Opération Cd
AWM970 Opération CD Insérer un CD Insérez un CD avec l'étiquette en haut dans la fente du disque (14) et le disque se mettra à jouer. Ejecter un CD Appuyez sur le bouton ejection (15) pour arrêter la reproduction CD et éjecter le CD. - Page 26 C –00 :34 :37 – de reproduction total écoulé pour la piste actuelle • T 00:02:18 – total elapsed playing time for current track • C –00 :34 :37 – temps de reproduction qui rest pour la piste actuelle AWM970...
-
Page 27: Opération Dvd/Vcd
AWM970 Opération DVD/VCD Insérez un disque Insérez un disque l'étiquette en haut dans la fente du disque (14) et le disque va commencer à jouer. A NOTER : Appuyez sur le bouton DVD/USB (24) pour alterner entre la source USB et DVD. - Page 28 Utilisez le pave numérique sur la télécommande pour entrer le numéro de fichier à 3 chiffres directement (c'est à dire, pour le fichier 10 entrer « 010 »). Appuyez sur le bouton ENTER pour confirmer et commencer la reproduction. AWM970...
-
Page 29: Opération Mp3/Usb
AWM970 Opération MP3/USB Insérez/ejecter disque Insérez un disque etiquette en haut dans la fente du disque (14), et le disque se mettra à jouer. Appuyez le bouton d'éjection (15) pour arrêter la reproduction et éjecter le disque. Insérez/enlevez engin USB Pour brancher un engine USB;... - Page 30 écoulé/ qui reste : • 00:02:18 - temps de reproduction total écoulé pour le disque • C -00 :34 :37 - temps de reproduction qui reste pour le disque AWM970...
-
Page 31: Opération Ipod
A NOTER : L'iPod va se charger d'une manière continue lorsqu'il est branché à l'appareil, aussi longtemps que l'allumage du véhicule est en marche. Veuillez noter que le AWM970 ne soutiendra pas la recharge de la quatrième génération d'iPod Nano (chromatique) ou d'aucun modèle d'iPod distribué après septembre 2008. -
Page 32: Opération Télécommande
Sélectionner la piste prochaine/précédente Déplacer jusqu'à l'article de menu desire et puis appuyez sur ENTER pour confirmer. Avance rapide/Recul rapide. Faire pause/ reprendre la reproduction Arrêtez la reproduction Répéter le titre Sélectionner source pour reproduction. AWM970 LOUD ENTER TITLE SOURCE ZOOM ANGLE GOTO... -
Page 33: Menu Configuration
AWM970 Menu Configuration Appuyez sue le bouton (configuration) (11) sur la télécommande pour accéder au menu SETUP et ajuster les réglages du système pour les categories suivantes : • System Setup • Language Setup • Audio Setup • Video Setup •... - Page 34 DUAL MONO OP Mode : Sélectionnez LINE OUT ou RF REMOD. Dynamic Range : Selectionnez FULL, 6/8, 4/8, 2/8 ou OFF. Dual Mono : Selectionnez STEREO, MONO/L, MONO/R ou MIX MONO. AWM970 Le menu Configuration Digitale contrôle les fonctions suivantes :...
-
Page 35: Spécifications
AWM970 Spécifications Général Exigence d'alimentation ....... DC 12 Volts, Terre négative Voltage d'opération . - Page 36 www.asaelectronics.com © 2009 ASA Electronics Corporation v.030909...
Need help?
Do you have a question about the AWM970 and is the answer not in the manual?
Questions and answers
How much is it