Table of Contents
Advertisement
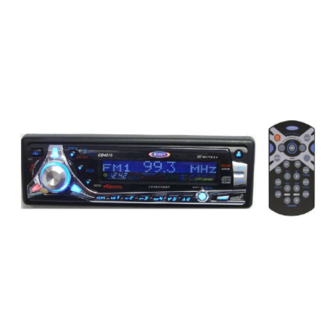
CD4610
Owner's Manual
CD4610
X
CD TEXT
SCAN
Audiovox Electronics Corporation
150 Marcus Boulevard
Hauppauge, NY 11788
1-800-323-4815
www.jensen.com
© 2004 Audiovox
Thank You!
Thank you for choosing a Jensen product. We hope you will find the instructions in this owner's
manual clear and easy to follow. If you take a few minutes to look through it, you'll learn how to
use all the features of your new Jensen receiver for maximum enjoyment.
Preparation. . . . . . . . . . . . . . . . . . . . . . . . . . . . . . . . . . . . . . . . . . . . . . . . . . . . . . . . . . . . . . . 1
Wiring . . . . . . . . . . . . . . . . . . . . . . . . . . . . . . . . . . . . . . . . . . . . . . . . . . . . . . . . . . . . . . . . . . . 3
Installation . . . . . . . . . . . . . . . . . . . . . . . . . . . . . . . . . . . . . . . . . . . . . . . . . . . . . . . . . . . . . . . 5
Basic Operation . . . . . . . . . . . . . . . . . . . . . . . . . . . . . . . . . . . . . . . . . . . . . . . . . . . . . . . . . . . 6
Tuner Operation. . . . . . . . . . . . . . . . . . . . . . . . . . . . . . . . . . . . . . . . . . . . . . . . . . . . . . . . . . . 14
CD Player Operation . . . . . . . . . . . . . . . . . . . . . . . . . . . . . . . . . . . . . . . . . . . . . . . . . . . . . . . 16
CD Changer Operation . . . . . . . . . . . . . . . . . . . . . . . . . . . . . . . . . . . . . . . . . . . . . . . . . . . . . 18
Remote Control . . . . . . . . . . . . . . . . . . . . . . . . . . . . . . . . . . . . . . . . . . . . . . . . . . . . . . . . . . . 18
Troubleshooting . . . . . . . . . . . . . . . . . . . . . . . . . . . . . . . . . . . . . . . . . . . . . . . . . . . . . . . . . . 19
Specifications . . . . . . . . . . . . . . . . . . . . . . . . . . . . . . . . . . . . . . . . . . . . . . . . . . . . . . . . . . . . 19
Warranty . . . . . . . . . . . . . . . . . . . . . . . . . . . . . . . . . . . . . . . . . . . . . . . . . . . . . . . . . . . . . . . . . 19
50
WATTS X 4
AUX IN
CD-R/RW
CD RECEIVER
v.011404
Preparation
Getting Started
It's a good idea to read all of the instructions before beginning the installation.
Tools and Supplies
The following tools and supplies are needed to install the radio.
•
Torx type, Flat-head and Phillips screwdrivers
•
Wire cutters and strippers
•
Tools to remove existing radio (screwdriver, socket wrench set or other tools)
•
Electrical tape
•
Crimping tool
•
Volt meter/test light
TUNE
•
Crimp connections
•
18 gauge wire for power connections
•
16-18 gauge speaker wire
Speaker Requirements: Only connect speakers rated in the load impedance of 4 ohms.
Speakers with a load impedance less than 4 ohms could damage the unit.
Disconnect Battery
Before you begin, always disconnect the battery negative terminal.
Remove Radio from Sleeve
Lift latches on both sides of sleeve to remove half-sleeve from radio.
CD
TEX
T
SC AN
Remove Radio from Sleeve
Remueva el Radio de la Manga
Enlever la radio du manchon
TUN E
CD-
R/R
W
Advertisement
Table of Contents

Related Manuals for Jensen CD4610


Summary of Contents for Jensen CD4610
-
Page 1: Table Of Contents
Thank You! Thank you for choosing a Jensen product. We hope you will find the instructions in this owner’s manual clear and easy to follow. If you take a few minutes to look through it, you’ll learn how to use all the features of your new Jensen receiver for maximum enjoyment. -
Page 2: Manual Del Usuario
Merci d'avoir choisi un produit Jensen . Nous espérons que vous allez trouver les instructions dans ce guide de propriétaire claires et faciles à suivre . Prenez quelques minutes à le consulter, vous apprendrez à utiliser toutes les fonctions de votre nouvelle radio Jensen pour en tirer une jouissance maximum. -
Page 3: Wiring
Fuses When replacing a fuse, make sure the new fuse is the correct type and amperage. Using an incorrect fuse could damage radio. The CD4610 uses one 15 amp fuse located below the wiring connector: 15 amp fast blow ATO. - Page 4 Lors du remplacement d’un fusible, assurez-cous que le fusible de remplacement est du type et de la puissance appropriés. L’utilisation d’un fusible non approprié pourrait endommager la radio. Le CD4610 est doté d’un fusible de 15 A, situé sous le connecteur du câblage (15 A à fusion rapide, type ATO).
-
Page 5: Installation
Installation Final Installation Connect wiring adapter to existing wiring harness. Connect antenna lead. Slide radio chassis into half-sleeve. Secure radio to bracket using nut (if possible). Replace any items you removed from the dashboard. Final ISO-DIN Installation Remove trim ring. Mount factory brackets on new radio using existing screws from old radio. -
Page 6: Basic Operation
Bass, Treble, Balance, Fader and back to Volume. When adjusting audio functions, the unit will automatically exit audio control mode after five seconds of inactivity. Basic Operation Operación Básica Opération de Base CD4610 CD TEXT SCAN CD RECEIVER Operación Básica 1. - Page 7 CD4610 Basic Operation (continued) 4. Volume / Audio Control (continued) Subwoofer Press the volume control twice, then rotate it clockwise or counterclockwise to adjust the subwoofer level from 0 to 12. The subwoofer option will only appear in the audio control menu if the subwoofer feature is currently activated by pressing and holding iX-BASS.
- Page 8 Rock. Lorsque la fonction égalisateur est activé, les niveaux de bass et d'aigu le plus récemment choisi seront ignorés. Lorsque la fonction égalisateur n'est pas en opération, l'appareil reviendra aux niveaux de bass et d'aigu le plus récemment choisis. CD4610...
- Page 9 CD4610 Basic Operation (continued) 7. Animation / Menu Operation Press DISPLAY/MENU (7a) momentarily to navigate through the following animation options: EQ animation, Animation 1, Animation 2 and back to the default display. The selected animation will appear in the display when the unit is turned on.
- Page 10 Local n'apparaisse sur l'affichage. Espacement des fréquences Cette option permet la sélection d'un espacement fréquence approprié à votre région. "AREA U.S.A.” est l'espacement par défaut. Tournez le contrôle volume pour sélectionner les options Amérique Latine, Europe ou Orit. CD4610...
- Page 11 CD4610 Basic Operation (continued) 7. Animation / Menu Operation (continued) Programmable Turn-on Volume This option allows selection of the volume level the radio will automatically assume when first turned on. “Vol Last” is the default setting, which will turn the radio on at the volume level selected when the unit was last turned off.
- Page 12 LCD will scroll through the following messages if the selectable clock display feature is activated: Radio Off, Visit us at Jensen.com, Enjoy Driving and Have a Nice Trip. When the ignition is turned off, the message “See you! Have a nice day!” will be displayed before the unit turns off completely.
- Page 13 CD4610 Basic Operation (continued) 9. Detaching the Front Panel To detach the front panel, press the front panel release button (9), which will release the front panel. Grasp the edge of the front panel, and pull it to release. When the front panel is removed, it should be stored carefully to protect it from dirt and damage.
-
Page 14: Fonctionnement De La Radio
Select a band (if needed), then select a station. Hold a preset button (16) for three seconds. The preset number will appear in the display. Tuner Operation Operación de la radio Fonctionnement de la radio CD4610 CD TEXT SCAN CD RECEIVER Operación de la radio 13. - Page 15 CD4610 Tuner Operation (continued) 16. Preset Stations (continued) Recall a Station Select a band (if needed). Press a preset button (16) to select the corresponding stored station. 17. Automatically Store / Preset Scan Automatically Store Automatically select six strong stations and store them in the current band. Select a band (if needed).
-
Page 16: Fonctionnement Du Lecteur Cd
Press RDM (23) during disc play to play all tracks on a CD in random, shuffled order. Press RDM again to stop random play. CD Player Operation Operación del Reproductor de CD Fonctionnement du lecteur CD CD4610 CD TEXT SCAN CD RECEIVER Operación del Reproductor de CD 19. - Page 17 CD4610 CD Player Operation (Continued) 24. Intro Scan (INT) During disc play, press INT (24) to play the first 10 seconds to each track on the disc. When the desired track is reached, press INT again to end the scan and play the selected track.
-
Page 18: Fonctionnement De Changeur De Cd
Refer to the CD Player Operation sec- tion of this manual for details. Remote Control The remote control will allow you to control the basic functions of the CD4610. Remote Control Prêt à être télécommandé... -
Page 19: Month Limited Warranty
Troubleshooting Problem Cause Does not operate No power to yellow wire; no (display does not light) power to red wire Inline fuse blown No power to unit Inline fuse blown No speakers operate Speaker harness not (display lights normally) connected Not all speakers Incorrect splices or operate... -
Page 20: Garantia Limitade De 12 Meses
Corrección de Problemas Problema Causa El equipo no functiona No hay corrriente en el cable (el visualizador no se amarilo. No hay corriente en enciende) el cable rojo. El fusible está quemado La alimentación no va a El fusible está quemado la unidad Ninguno de los El colector del altoparlante... -
Page 21: Dépannage
Dépannage Probléme Cause L’appareil ne fonctionne Aucune alimentation au fil pas (l’affichage ne jaune Aucune alimentation s’allume pas) au fil rouge Fusible grillé Les haute-parleurs ne Les fils des haut-parleurs ne fonctionnent pas sont pas raccordés (l’affichage s’allume mormalement) Les haut-parleurs ne Épissures ou connexions fonctionnent pas tous incorrectes...
Need help?
Do you have a question about the CD4610 and is the answer not in the manual?
Questions and answers