Table of Contents
Advertisement
Quick Links
Advertisement
Table of Contents

Related Manuals for Baumatic BO788SS


Summary of Contents for Baumatic BO788SS
- Page 1 BO788SS 60 cm Built under twin cavity gas oven...
-
Page 2: Gas Oven
User Manual for your Baumatic BO788SS 60 cm Built under twin cavity gas oven NOTE : This User Instruction Manual contains important information, including safety & installation points, which will enable you to get the most out of your appliance. Please keep it in a safe place so that it is easily available for future reference;... -
Page 3: Table Of Contents
Contents Environmental note Important safety information 5 – 8 Specifications 9 – 13 Product and aperture dimensions Product specifications Standard accessories Optional extra Electrical details Gas details Cooling fan Description of the oven 11 - 12 Control panel Oven programmer/timer Initial set-up of your oven 13 –... -
Page 4: Environmental Note
Environmental note o The packaging materials that Baumatic uses are environmentally friendly and can be recycled. o Please discard all packaging material with due regard for the environment. -
Page 5: Important Safety Information
Baumatic’s Conditions Of Guarantee. The foregoing does not affect your statutory rights. o Repairs may only be carried out by Baumatic service engineers or their authorised service agent. - Page 6 Warning and safety instructions o This appliance complies with all current European safety legislation. Baumatic do wish to emphasise that this compliance does not remove the fact that the appliance surfaces will become hot during use and retain heat after operation.
- Page 7 o Do not place heavy objects on the oven door or lean on the oven door when it is open, as this can cause damage to the oven door hinges. Nobody should be allowed to sit or stand on any part of the oven.
- Page 8 Please see the specific section of this booklet that refers to installation. o Baumatic Ltd. declines any responsibility for injury or damage, to person or property, as a result of improper use or installation of this appliance.
-
Page 9: Specifications
Specifications Product Dimensions Aperture Dimensions Height: 716 mm Height: 720 mm MIN Width: 598 mm Width: 560 mm MIN Depth: 547 mm Depth: 560 mm MIN Product specifications: o LED minute minder o Cooling fan o Flame failure safety device (oven and grill) o Auto-ignition o Gas oven with lower burner o Gas grill... -
Page 10: Standard Accessories
Standard accessories: o Removable side racks o 2 x Safety shelves o 2 x Enamelled baking trays with handle o Trivet o LPG conversion jets Optional extra: o BPS2 Pizza stone Electrical details: Rated Voltage: 220 - 240 Vac 50 - 60 Hz Supply Connection: 3 A (double pole switched fused outlet with 3mm contact gap) -
Page 11: Description Of The Oven
For future reference please record the following information which can be found on the rating plate and the date of purchase which can be found on your sales invoice. The rating plate for your oven can be located by opening the oven door and looking on the frame of the main oven chassis. -
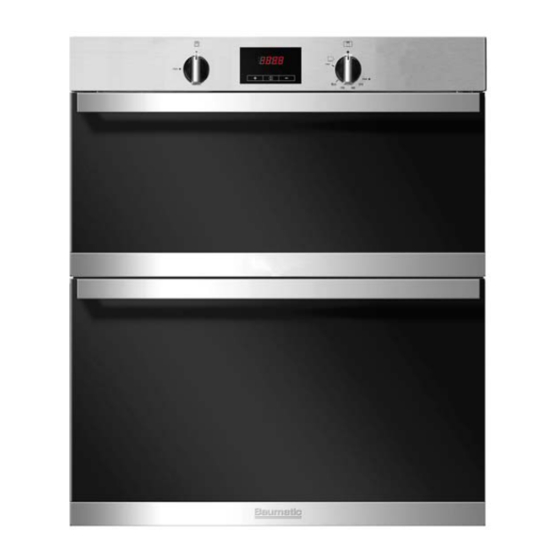
Page 12: Control Panel
Accessories Main oven: Top oven: o Position the accessories (drip tray or grill) in the correct support levels as shown in the images above. Control Panel Gas grill control knob Gas oven control knob Oven timer LED display... -
Page 13: Oven Programmer/Timer
Oven programmer/timer 1 = Decimal point symbol 2 = Minute minder symbol 3 = Programme button 4 = Minus button 5 = Plus button Initial set-up of your oven Setting the time of day After your appliance is connected to your mains supply for the first time, you must set the time of day before you can use the oven. -
Page 14: Before First Use
Before first use o To remove any residue from the cavities that may have been left from the manufacturing process, you should set the gas oven to its maximum temperature setting. The gas grill should be set separately to its maximum temperature setting. o It is perfectly normal for a smell to be produced during this process. -
Page 15: Timer Functions
Timer functions The minute minder function The minute minder function is a countdown time that can be set on the oven programmer/timer. When the countdown time has finished, an audible signal will sound. o Press and hold down the programme button (3) until the decimal point starts to flash to enter programming mode. -
Page 16: Adjusting The Volume Of The Audible Signal
Adjusting the volume of the audible signal The volume of the audible signal has 3 levels, low, medium and high. To adjust the volume, you should proceed as follows:- o IMPORTANT: The oven timer/programmer must not be in countdown mode. o Press and hold down the minus (4) and plus (5) buttons simultaneously until the decimal point starts to flash. -
Page 17: Using Your Gas Oven
Using your gas oven Switching the gas oven on The oven has automatic ignition, to light it you should do the following:- o Open the oven door. o Push the gas oven control knob down slightly and then turn it anticlockwise to the word MAX. -
Page 18: Base Burner Appliances
o IMPORTANT: If there is a power cut whilst the oven is in use, the cooling fans will not operate. You should immediately turn the appliance off until power is restored. Base burner appliances IMPORTANT: Your appliance is a Continental style base burner gas oven. -
Page 19: Switching The Gas Grill On
Switching the gas grill on The grill has automatic ignition, to light it you should do the following:- o Open the grill door o Push the gas grill control knob down slightly and then turn it anticlockwise to the word MAX. o Whilst it is pointed to the word MAX, fully push down this knob and hold it down. -
Page 20: Cooking Guidelines
o IMPORTANT: If there is a power cut whilst the grill is in use, the cooling fans will not operate. You should immediately turn the appliance off until power is restored. Cooking guidelines o Please refer to the information given on food packaging for guidance on cooking temperatures and times. -
Page 21: Gas Mark Temperatures
o During cooking, never place pans or cookware directly onto the bottom of your oven. They should always be placed on the shelves provided. o The grill becomes extremely hot during operation, avoid touching it inadvertently when handling the food which you are grilling. o Important: Be careful when opening the door, to avoid contact with hot parts and steam. -
Page 22: Cooking Tables
Cooking table Main oven: Temperature Approximate cooking time (°C) Small cakes 170 – 180 20 – 25 minutes Whisked sponge 15 – 20 minutes Swiss roll 8 – 12 minutes Victoria sandwich 25 – 35 minutes (2 x 205 mm/8” Shallow tins) Semi-rich fruit cake 2 ½... -
Page 23: Cleaning And Maintenance
o Frozen poultry should be thoroughly thawed before cooking; the time required depends on the size of the bird. For example, a large turkey may take up to 48 hours to thaw. o Adjust the shelf position, so that the meat or the poultry will be in the centre of the oven. -
Page 24: Replacing The Oven Bulb
Any damage that is caused to the appliance by a cleaning product will not be fixed by Baumatic free of charge, even if the appliance is within the guarantee period. Replacing the oven bulb... -
Page 25: Removing The Oven Door For Cleaning (Main Oven Only)
o Reassemble the protective cover (A). Removing the oven door for cleaning (main oven only) To facilitate the cleaning of the inside of the oven and the outer frame of the oven, the door can be removed as follows:- o The hinges (A) have two movable bolts on them (B). o If you raise both of the movable bolts (B), then the hinges (A) are released from the oven housing. -
Page 26: Removing The Inner Door Glass For Cleaning (Main Oven Only)
o IMPORTANT: The movable bolts (B) must be closed back into their original positions before closing the door. o Take care not to dislodge the hinge locking system when removing door, as the hinge mechanism has a strong spring. o Do not immerse the door in water at any time. - Page 27 o Repeat this process for the other three slots and you will be able to lift the plastic sealing section away from the top of the door. o This will allow you to access the inner door glass. Carefully lift the door glass slightly at the top of the oven door and then slide the door glass towards you, removing it from the oven door.
-
Page 28: Installation
Installation The installation must be carried out by a suitably qualified person, in accordance with the current version of the following. o UK Regulations and Safety Standards or their European Norm Replacements. o Building Regulations (issued by the Department of the Environment). -
Page 29: Positioning
o Care must be taken to ensure that the temperature of the mains supply cable does not exceed 50°C. o If the mains supply cable is damaged, then it must be replaced by an appropriate replacement. Positioning The adjacent furniture and all materials used in the installation must be able to withstand a minimum temperature 85°C... -
Page 30: Installing The Oven Into The Kitchen Cabinet
Installing the oven into the kitchen cabinet Positioning the appliance o Ensure that the aperture that you will be fitting the oven into is of the size given in the above diagram. o The oven must be fitted into an oven housing with the ventilation cut-outs shown in the “Ventilation requirements”... -
Page 31: Installation Between Two Separate Cabinet Units
o IMPORTANT: Before installing the appliance into the housing unit, YOU MUST attach the “drip catcher” to the lower front edge of the oven using the 3 screws supplied. The above line drawing shows how you attach the “drip catcher”. Installation between two separate cabinet units o Measure a distance of 720 mm from the underside of the work top and mark the position of the lower support brackets. -
Page 32: Installation Between Two Side Panels And One Cabinet Unit
Installation between two side panels and one cabinet unit o Measure a distance of 720 mm from the underside of the work top and mark the position of the lower support brackets. o Fix the lower support brackets in this position to the side panels of the cabinet unit. -
Page 33: Ventilation Requirements
Conversion for use on LPG and other gases must only be undertaken by a qualified person. For information on the use of other gases, please contact the Baumatic Advice Line. o The oven must be installed by a qualified person, in accordance with the current edition of the Gas Safety (Installation and Use) Regulations and the relevant building/I.E.E. -
Page 34: Room Ventilation Requirements
Baumatic’s guarantee and lead to prosecution under the regulations quoted above. o In the UK, only GASSAFE registered installers are authorised to undertake the installation and service work, in compliance with the above regulations. Room ventilation requirements... -
Page 35: Gas Safety (Installation And Use) Regulations
Gas Safety (Installation and Use) Regulations o It is a legal requirement that all gas appliances are installed by competent persons in accordance with the current edition of the Gas Safety Installation and Use Regulations. o For reasons of safety, it is in your best interests to ensure compliance with the law. -
Page 36: Gas Adjustment (Conversion To Lpg And Gas Adjustment)
o If the cooker has been converted for use with LPG, then it should be connected to the gas supply using an appropriate bayonet type hose. The hose MUST be suitable for use with LPG gas, these are identifiable by a red band or stripe. o A hose length of 0.9m to 1.25m is recommended. - Page 37 Substituting the main oven injector o Open the door of the lower cavity fully. o Remove the oven burner shield from inside of the oven. o Remove the burner by moving the restraint spring to the left and sliding the burner out of its housing. In order to slide it out, lift up the left side and then slide it over to the left.
-
Page 38: Regulating The Oven Burner Minimum Setting
o Put the oven burner back together, taking care not to change the position of the igniter and safety device which are attached to the burner. Replace the flame guard. o Ensure that the appliance is in a safe condition, and then reconnect it to the electricity supply. -
Page 39: Substituting The Grill Burner
o Fully open and close the oven door several times and check that the flame is maintained. If the flame is maintained, then switch the oven burner off. o Reconnect the oven to the electricity supply. o IMPORTANT: It is now necessary to carry out a full function test of the appliance (this should include a gas tightness test). -
Page 40: My Appliance Isn't Working Correctly
o Put the oven burner back together, taking care not to change the position of the igniter and safety device which are attached to the burner. My appliance isn’t working correctly The gas oven burner or grill burner do not light. * Check that the oven is switched on at your mains supply. - Page 41 Or any installation other than the one specified by Baumatic Ltd. has been completed. Please refer to the conditions of guarantee that appear on the...
-
Page 42: Contact Details
Czech Republic United Kingdom Baumatic CR s.r.o. Baumatic Ltd., Lípová 665 Baumatic Buildings, 460 01 Liberec 4 6 Bennet Road, Czech Republic Reading, Berkshire RG2 0QX +420 483 577 200 United Kingdom www.baumatic.cz Sales Telephone (0118) 933 6900 Slovakia Sales Fax Baumatic Slovakia, s.r.o.
Need help?
Do you have a question about the BO788SS and is the answer not in the manual?
Questions and answers