
Subscribe to Our Youtube Channel
Related Manuals for Baumatic BO612.5SS-BL


Summary of Contents for Baumatic BO612.5SS-BL
- Page 1 BO612.5SS-BL / BO616.5SS / BO624.5SS / BO636.5SS-BL-R-W 60 cm OVEN User Manual for the...
- Page 2 User manual for your Baumatic BO612.5SS-BL / BO616.5SS 60 cm Fan oven BO624.5SS / BO636.5SS-BL-R-W 60 cm Multifunction oven NOTE This User Instruction Manual contains important information, including safety & installation points, which will enable you to get the most out of your appliance. Please keep it in a safe place so that it is easily available for future reference;...
-
Page 3: Table Of Contents
Cooling fan Control panel Initial set up of your oven 13–15 Before first use Setting the Minute Minder ( BO612.5SS-BL & BO624.5SS Oven programmer/Timer display (BO616.5SS & BO636.5SS-BL-R-W Setting the time of day Timer functions ( 16-21 BO616.5SS & BO636.5SS-BL-R-W... -
Page 4: Environmental Note
Environmental note o The packaging materials that Baumatic uses are environmentally friendly and can be recycled. o Please discard all packaging material with due regard for the environment. -
Page 5: Important Safety Information
IMPORTANT SAFETY INFORMATION Your safety is of the utmost importance to Baumatic. Please make sure that you read this instruction booklet before attempting to install or use the appliance. If you are unsure of any of the information contained in this booklet, please contact the Baumatic Customer Care epartment. - Page 6 Child Safety o Baumatic strongly recommend that babies and young children are prevented from being near to the appliance and not allowed to touch the appliance at any time. o If it is nece ssary for younger family members to be in the kitchen, please ensure that they are kept under close supervision at all times.
- Page 7 Baumatic Ltd declines any respon sibility for injury or damage, to person or property, as a result of improper use or installation of this appliance.
-
Page 8: Product Specifications
Specifications – BO612.5SS-BL Product Dimensions Height: 594 mm Width: 594 mm Depth: 556 mm Aperture Dimensions eight: 595 mm idth: 560 mm epth: 560 mm Product specifications o 4 oven functions o Energy efficiency class: A o Oven gross capacity: 67 litres... -
Page 9: Bo616.5Ss
Specifications – BO616.5SS Product Dimensions Height: 594 mm Width: 594 mm Depth: 556 mm Aperture Dimensions eight: 595 mm idth: 560 mm epth: 560 mm Product specifications o 4 oven functions o Energy efficiency class: A o Oven gross capacity: 67 litres Oven net capacity: 58 litres o LED full programmer Cooling fan... -
Page 10: Bo624.5Ss
Specifications – BO624.5SS Product Dimensions Height: 594 mm Width: 594 mm Depth: 556 mm Aperture Dimensions eight: 595 mm idth: 560 mm epth: 560 mm Product specifications o 5 oven functions o Energy efficiency class: A o Oven gross capacity: 67 litres Oven net capacity: 58 litres o Minute minder Cooling fan... -
Page 11: Bo636.5Ss-Bl-R-W
Specifications – BO636.5SS-BL-R- Product Dimensions Height: 594 mm Width: 594 mm Depth: 556 mm Aperture Dimensions eight: 595 mm idth: 560 mm epth: 560 mm Product specifications o 7 oven functions o Energy efficiency class: A o Oven gross capacity: 67 litres Oven net capacity: 58 litres o LED full programmer Cooling fan... -
Page 12: Cooling Fan
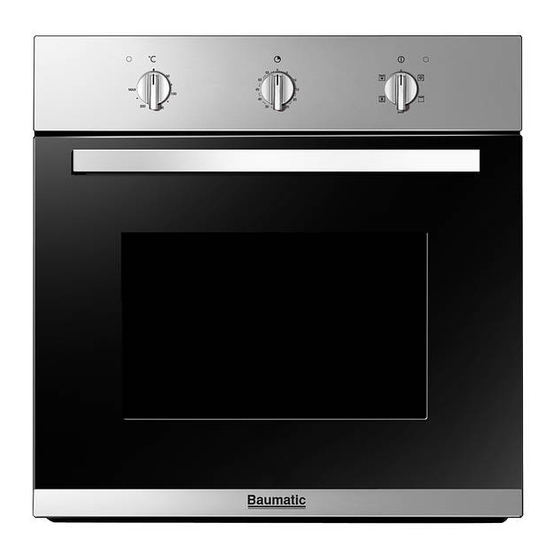
The rating plate for your oven can be cated by opening the oven door and looking around the outer edge of e oven chassis. odel Number ………………………………. erial Number ………………………………. Date of Purcha ………………………………. Control Panel BO612.5SS-BL & BO624.5SS BO616.5SS & BO636.5SS-BL-R-W... -
Page 13: Initial Set Up Of Your Oven
Using your oven Before first use o To remove any residue from the oven that may have been left from manufacturing process, should select conventional or fan oven function and set the thermostat to its maximum temperature setting. o It is perfectly normal for a smell to be produced during this process. -
Page 14: Setting The Minute Minder ( Bo612.5Ss-Bl & Bo624.5Ss )
Setting the minute minder function: (BO612.5SS-BL & BO624.5SS only) You are able to set the minute minder at any time, regardless of whether an oven function has been selected. You can set a period of time using the minute minder function and a buzzer will sound when that period of time has elapsed. -
Page 15: Oven Programmer/Timer Display (Bo616.5Ss & Bo636.5Ss-Bl-R-W )
Oven programmer/timer display: (BO616.5SS & BO636.5SS-BL-R-W only) 1) Auto cooking symbol 2) Oven in use symbol 3) Decimal point symbol 4) Minute minder symbol 5) Minus button 6) Programme button 7) Plus button Initial set-up of your oven (BO616.5SS & BO636.5SS-BL-R-W) Setting the time of day After your appliance is connected to your mains supply for the first time, you must set the time of day before you can use the oven. -
Page 16: The Minute Minder Function
Timer functions (BO616.5SS & BO636.5SS-BL-R-W) The minute minder function The minute minder function is a countdown time that can be set on the oven programmer/timer. When the countdown time has finished, an audible signal will sound. o Press and hold down the programme button (6) until the decimal point starts to flash to enter programming mode. -
Page 17: The Semi-Automatic Cooking Function
The semi-automatic cooking function This function will allow you to set a countdown time similar to the minute minder function, however the oven will switch off at the end of the cooking time. o Place the food that you want to cook inside of the oven and close the door. -
Page 18: The End Of Cooking Function
The end of cooking function This function is similar to the semi-automatic function, however instead of setting a countdown time, you select the time of day that you want the oven to switch off at. o Place the food that you want to cook inside of the oven and close the door. -
Page 19: The Automatic Cooking Function
The automatic cooking function This function will allow you to set the time of day that you want the oven to switch off at and how long you want the oven to cook for. o Place the food that you want to cook inside of the oven and close the door. -
Page 20: Cancelling The Semi-Automatic And Automatic Function
o To reset the oven and cancel the audible alarm, press the programme button until the oven in use symbol appears on the LED display and the automatic cooking symbol goes out. o IMPORTANT: If you have not turned the oven function selector knob and thermostat control knob to their OFF positions, when you reset the oven it will continue to heat. -
Page 21: Changing The Time Of Day
When a function is selected, the power indicator light will come on and the oven light. Oven functions: BO612.5SS-BL & BO616SS OVEN LIGHT: Separate light control which allows the light to be switched on, even when the oven is not in use. -
Page 22: Bo624.5Ss
BO624.5SS OVEN LIGHT: Separate light control which allows the light to be switched on, even when the oven is not in use. CONVENTIONAL OVEN This method of cooking provides traditional cooking, with heat from the top and lower elements. This function is suitable for roasting and ba king on one shelf only. -
Page 23: Bo636.5Ss-Bl-R-W
BO636.5SS-BL-R-W OVEN LIGHT: Separate light control which allows the light to be switched on, even when the oven is not in use. CONVENTIONAL OVEN This method of cooking provides traditional cooking, with heat from the top and lower elements. This function is suitable for roasting and baking on one shelf only. -
Page 24: Thermostat Control Knob
Thermostat control knob o The oven thermostat control knob sets the required temperature of the oven. It is possible to regulate the temperature within a range of 50 - 250°C. o Turn the control knob clockwise. Oven operating light o This light will come on to indicate that the oven’s heating elements are in operation. -
Page 25: Warnings
o Make sure that frozen foods are thoroughly thawed before cooking, unless the instructions on the food packaging advise that you can “cook from frozen”. o Before cooking, check that any accessories that are not required are removed from the oven. o Place cooking trays in the centre of the oven and leave gaps between the trays to allow air to circulate. -
Page 26: Shelf Positions
Shelf positions o The numbers 1 – 4, indicate the different shelf positions that you can utilise within the oven. o You should use the shelf position(s) that you find are best suited to your personal cooking preferences. o We recommend that food is placed on shelf level 3 when using the grill function. -
Page 27: Replacing The Oven Bulb
Any damage that is caused to the appliance by a cleaning product will not be fixed by Baumatic free of charge, even if the appliance is within the guarantee period. Replacing the oven bulb... -
Page 28: Removing The Oven Door For Cleaning
Removing the oven door for cleaning To facilitate the cleaning of the inside of the oven and the outer frame of the oven, th e door can be removed s follows:- o The hinges have two movable bolts on them. o If raise both... -
Page 29: Installation
NSTALLATION The installation must be carried out by a suitably qualified person, in accordance with the current ersion of the following. UK Regulations an d Safety Standards or their European Norm Replacements. Building Reg ulations (issued by the Department of the Environment). - Page 30 Care must be taken to ensure that the temperature of the mains supply cable does not exceed 50°C. o If the mains supply cable is damaged, then it must be replaced by an appropriate replacement which can be obtained from the Baumatic Spares Department.
-
Page 31: Installing The Oven Into The Kitchen Cabinet
Installing the oven into the kitchen cabinet Positioning the appliance o Ensure that the aperture that you will be fitting the oven into is of the size given in the diagram above. o The oven must be fitted into an oven housing with the ventilation cut-outs shown diagram... -
Page 32: Ventilation Requirements
Ventilation requirements (Figure shows the ventilation and cut-out requirements for the installation of the appliance into a standard kitchen unit). (Figure shows ventilation and cut- out requirements for the installation of the appliance into a tall housing unit). -
Page 33: My Appliance Isn't Working Correctly
My appliance isn’t working correctly o The oven isn’t coming on. * Check that you have selected a cooking function and a cooking temperature. o There appears to be no power to the oven and grill. * Check that the appliance has been connected to the electrical mains supply correctly. - Page 34 Please refer to the conditions of guarantee that appear on the warranty card that you receive with the appliance. IMPORTANT: Baumatic Ltd operates a policy of continuous improvement and reserves the right to adjust and modify its products without prior notification.
-
Page 35: Baumatic Consumables
BC005 Stainless Steel Cleaner and Protector (250 ml) o BC007 E-Cloth – General Purpose Cloth o BC008 Microwave Cover To order a Baumatic consumable product please call 0123 5437 244 and quote the product code. You can also order online from eshop.baumatic.co.uk... -
Page 36: Contact Details
Czech Republic United Kingdom Baumatic CR spol s.r.o. Baumatic Ltd., Lípovà 665 Baumatic Buildings, 460 01 Liberec 4 6 Bennet Road, Czech Republic Reading, Berkshire RG2 0QX +420 483 577 200 United Kingdom www.baumatic.cz Sales Telephone Slovakia (0118) 933 6900 Baumatic Slovakia, s.r.o.
Need help?
Do you have a question about the BO612.5SS-BL and is the answer not in the manual?
Questions and answers