Panasonic DP--8020E Operating Instructions Manual
Digital imaging systems for user authentication
Hide thumbs
Also See for DP--8020E:
- Service manual (499 pages) ,
- Operating instructions manual (88 pages) ,
- Quick manual (54 pages)
Table of Contents
Advertisement
Quick Links
Before operating this machine, please read this manual completely and keep this manual for future reference.
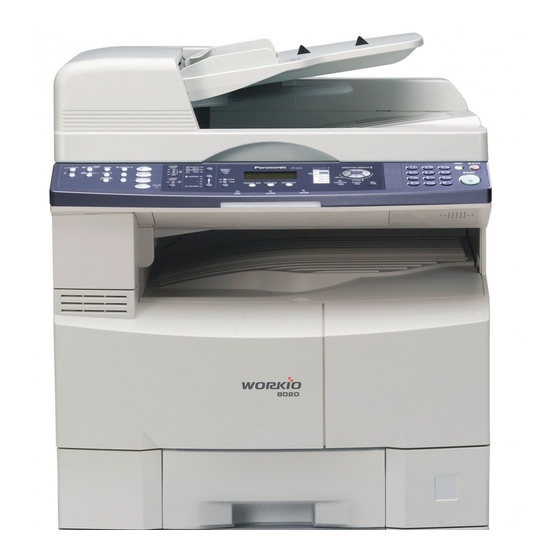
(Illustration shows optional accessories that may not be installed on your machine.)
Operating Instructions
DP-8020E / 8020P / 8016P
Model No.
Digital Imaging Systems
(For User Authentication)
English
Advertisement
Table of Contents

Related Manuals for Panasonic DP--8020E


Summary of Contents for Panasonic DP--8020E
-
Page 1: Operating Instructions
Operating Instructions Digital Imaging Systems (For User Authentication) DP-8020E / 8020P / 8016P Model No. Before operating this machine, please read this manual completely and keep this manual for future reference. (Illustration shows optional accessories that may not be installed on your machine.) English... - Page 2 Memo...
-
Page 3: Table Of Contents
Table of Contents General Description User Authentication ......................... Job Tracking ............................ RightFax Server ..........................Using Machine Login Procedure (Using Copy/Fax/Scanner/Printer) ............... Sending a Document via RightFax ....................Setting Machine Authentication Setting ........................Registration of Domain Name ......................ID Timeout Setting........................... Auto Reset Time Setting ......................... -
Page 4: User Authentication
Authentication Device Users Users login to the Panasonic machine using their Windows account (user ID and password). System Administrator The system administrator can manage user accounts by using the Windows Server. User authentication can be set independently for each function (copying, faxing, scanning, and printing).* The Job Tracking function allows the system administrator to receive a machine usage log and send/receive log via Email.*... -
Page 5: Job Tracking
Job Tracking While using User Authentication, it is also possible to use the Job Tracking function as well. The Job Tracking function allows the system administrator to receive the machine's usage log, and send/receive log via Email. The Email to the administrator includes the name of the machine user, destination, and communication time, together with the image of the document that was sent, or received. -
Page 6: Rightfax Server
RightFax Server By enabling the RightFax Server function, all the faxes will be sent via the RightFax Server. All the fax logs can be easily be managed by a single server. When using it with the User Authentication function, it will increase the security by controlling the usage and identifying the users. - Page 7 Memo...
-
Page 8: Login Procedure (Using Copy/Fax/Scanner/Printer)
. (Up to 40 characters) panasonic The user name is NOT case-sensitive. Ex: panasonic Note: Accepts following characters. , \ & ( ) : ! / _ . - + % = ' " $ ; < > ? [ ] ^ ` { | } * # and alphanumeric characters... - Page 9 READY TO COPY This completes the authentication. COPIES:001 After completing the authentication, you can use the selected function (copying, faxing, scanning, or printing) . Note: If the authentication fails, one of the following messages may appear. Message Explanation LOGIN FAILED The login failed.
-
Page 10: Sending A Document Via Rightfax
Sending a Document via RightFax When the RightFax server is used to send a fax, the following details are entered in the recipient (TO) field and sender (FROM) field. Field Content Recipient Station Name registered for One-Touch or ABBR. dialing. If manual number dialing is used, you can enter the user name from the control panel. - Page 11 Memo...
-
Page 12: Authentication Setting
Authentication Setting The system administrator can enable/disable the user authentication for each function (copying, faxing, scanning, and printing). READY TO COPY Press COPY COPIES:001 GENERAL PARAM. (0-9) Press FUNCTION ENTER NO. 09 KEY OPERATOR MODE Press ENTER PASSWORD= KEY OPR. MODE(00-34) Enter the key operator code (3-digit), and then press ENTER NO. - Page 13 Specify the TIME ZONE, the system administrator name, and password. TIME ZONE TO SCROLL Press to select the Time Zone. TIME ZONE GMT-5 Eastern US&CN Press ADMINISTRATOR NAME Enter the administrator name you wish to use, and then press (Up to 40 characters) ADMIN.
- Page 14 The next function appears (return to step 6). To continue with the setup, press , select (INVALID) or (VALID) for each function, and then press 33 USER AUTH 2:FAX Press 33 USER AUTH 1:INVALID Select (INVALID) or (VALID), and then press 33 USER AUTH 3:PRINTER Press...
-
Page 15: Registration Of Domain Name
Ex: pana01 ENTER DNS DOMAIN Enter the DNS domain name, and then press . (Up to 60 characters) 01 panasonic.com Ex: panasonic.com Note: If your Windows network is configured with Windows NT Server 4.0 and Exchange Server 5.5, enter the Exchange Server Name (FQDN), on the Step 8. -
Page 16: Id Timeout Setting
ID Timeout Setting If the ID Timeout Setting is set to "AUTO RESET TIME", authentication is cancelled if no operation is performed on the machine for a specified time period after performing authentication. The ID timeout period is set by the "AUTO RESET TIME Setting"... -
Page 17: Auto Reset Time Setting
Auto Reset Time Setting This sets the ID timeout period when "AUTO RESET TIME" is selected for the ID Timeout Setting. Note: When the User Authentication function is enabled, you must login to the machine to change settings. See the following sections for details about how to login. See "Administrator Login"... -
Page 18: Lockout Attempts Setting
Lockout Attempts Setting The system is locked if the permitted number of logon attempts is exceeded during the user authentication. This sets the number of permitted number of logon attempts. Note: When the User Authentication function is enabled, you must login to the machine to change settings. See the following sections for details about how to login. -
Page 19: Lockout Time Setting
Lockout Time Setting This sets the time period (minutes) for the system lockout when the permitted number of logon attempts is exceeded during the user authentication. Wait for the Lockout Time period to lapse before you are permitted to logon to user authentication. Note: When the User Authentication function is enabled, you must login to the machine to change settings. -
Page 20: Authentication Method Setting
Authentication Method Setting This specifies which authentication method to use by the User Authentication function. Note: When the User Authentication function is enabled, you must login to the machine to change settings. See the following sections for details about how to login. See "Administrator Login"... -
Page 21: Job Tracking Setting
Job Tracking Setting This enables or disables Job Tracking. If Job Tracking is enabled, also set the type of log to record and the Email address to which it is to be sent. Note: Before performing this setup, you first need to set the machine's access code (Fax Parameter No. 38, ACCESS CODE). See "Access Code Setting"... - Page 22 Specify the Email address to which to send the log. <01> panasonic user@panasonic.com Select the destination Email address to which to send the log from the addresses previously set in the Auto Dialers. Press Select the printout method for the received document(s). This parameter RX LOCAL PRINT=1 1:INC.
-
Page 23: Rightfax Server Setting
RightFax Server Setting This enables or disables the RightFax server. Note: When the User Authentication function is enabled, you must login to the machine to change settings. See the following sections for details about how to login. See "Administrator Login" on page 24 for Logging in as the system administrator. See "Login Procedure"... -
Page 24: Administrator Login
Administrator Login This confirms the system administrator who manages the Panasonic machine. After logging in to the machine, the system administrator can set up the authentication function. Note: Refer to Authentication Setting (see page 13) for the registration of Administrator's Name and Password. -
Page 25: Administrator Name & Password
A default value of the key operator code is "000". Press 38 ADMIN. NAME panasonic The currently set administrator name is displayed. Ex: panasonic Enter the new administrator name, and then press The name is NOT case-sensitive. 39 ADMIN. PASSWORD Enter the administrator password, and then press ***** The password is case-sensitive. -
Page 26: Access Code Setting
Access Code Setting Before you can setup the User Authentication, Job Tracking, or RightFax Server function, you first need to set the machine's access code. Note: To clear the access code, change the setting of the User Authentication (Fax Parameter No. 131, JOB TRACKING) and RightFax Server (Fax Parameter No. -
Page 27: Description Of Job Tracking Notice
Description of Job Tracking Notice Fax Transmission via general phone line (PSTN) Reception from Internet Reception via general phone line Email Transmission to Fax / PC (PSTN) Internet Fax / PC Sender's Name Fax: ID Number of the remote station FWD: Sender's Email Address Login Name in the User Sender's ID Unknown (In case the... - Page 28 INCLUDING, BUT NOT LIMITED TO DIRECT, INDIRECT, SPECIAL, INCI-DENTAL OR CONSEQUENTIAL DAMAGES OR LOSS OF PROFITS SUSTAINED BY THE CUSTOMER IN CONNECTION WITH THE USE OR APPLICATION OF THIS PANASONIC MACHINE. SEE YOUR DEALER FOR DETAILS OF DEALER’S WARRANTY. For Service, Call: Panasonic Digital Document Company, Panasonic Canada Inc.
Need help?
Do you have a question about the DP--8020E and is the answer not in the manual?
Questions and answers