Table of Contents
Advertisement
Quick Links
Advertisement
Table of Contents

Subscribe to Our Youtube Channel
Related Manuals for Telecom R83


Summary of Contents for Telecom R83
- Page 1 Telecom Mobile Phone User Manual...
-
Page 2: Legal Information
LEGAL INFORMATION Copyright © 2013 ZTE CORPORATION. All rights reserved. No part of this publication may be quoted, reproduced, translated or used in any form or by any means, electronic or mechanical, including photocopying and microfilm, without the prior written permission of ZTE Corporation. ZTE Corporation reserves the right to make modifications on print errors or update specifications in this guide without prior notice. -
Page 3: Table Of Contents
Contents Device Overview ............5 The Home Screen ..........14 Customise your device with Settings ....15 Making Calls ............31 Messaging .............. 38 People ..............53 Using the Drive Mode App ........60 Accounts ..............60 Email ............... 62 Gmail .............. - Page 4 Google ‘Play Music’ ..........92 FM Radio ..............94 Other Apps ............. 96 Settings Summary ..........102 Troubleshooting ........... 104 General Safety Warnings........107 Technical Specifications ........116 IMPORTANT NOTICE – LIQUID AND DUST PROTECTION Your device is waterproof to 1m depth but should never be deliberately immersed in any liquid.
-
Page 5: Device Overview
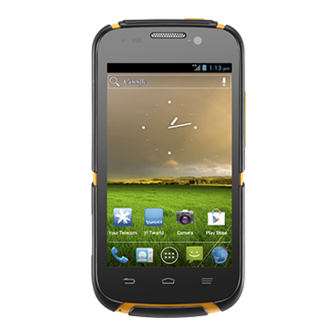
Device Overview... -
Page 6: Key Function
Key Functions Function Press to wake up your phone Power Key Press and hold to select Silent, Vibrate or Flight mode, to Restart your device or power on & off Press to switch your phone to Sleep mode. Touch to go to the previous screen Back Touch to exit applications Touch to return to the Home Screen... - Page 7 Insert the SIM Card and microSD Card* 1. Locate and open the SIM port on the left hand side of the phone. 2. Hold the SIM card with the gold contacts facing down and the cut corner facing the top of the phone as shown and slide it into the card holder.
- Page 8 Charging the Battery The back cover is sealed and the battery is not user replaceable. Do not attempt to open the back cover which will void your warranty. To charge the battery: 1. Insert the charger lead carefully. Ensure that the plug is inserted with the correct orientation.
- Page 9 Battery and Charging Tips • Only use the AC charger and USB lead supplied. Insert the charger lead carefully. • Be careful to avoid tripping over or pulling on the lead whilst it is plugged in. • Physical damage to the charging port is NOT covered by warranty.
- Page 10 External Antenna Port Your device provides an external RF antenna port for connecting to approved devices. Using an external antenna can enhance your coverage, provide better quality service and higher data rates in marginal signal areas. External RF Port • Only use approved connectors suitable for ZTE devices.
-
Page 11: Setting Up For The First Time
Powering On/Off • Press and hold the Power Key to turn on your phone. • To turn it off, press and hold the Power Key to open the options menu. Touch Power off and then touch OK. TIP If you see FTM during power up this indicates Factory Test Mode and is initiated by holding the Volume Down key during power on. - Page 12 Using the Touch Screen Your phone’s touch screen lets you control actions through a variety of touch gestures. Touch • When you want to type using the onscreen keyboard, select items, or press onscreen buttons, simply touch them with your finger. Press and Hold (long press) •...
- Page 13 Locking/Unlocking your phone Press the Power Key to turn the screen on or off and to lock and unlock the device. The default screen lock is set to Long Press. Press and hold the padlock icon to unlock your device. Swipe the padlock icon to unlock your device directly to your chosen application (eg Phone, Messages, Camera, Calendar etc).
-
Page 14: The Home Screen
The Home Screen The home screen is the starting point for applications, functions, and menus. You can customize your home screen by adding application icons, shortcuts, folders, widgets, and more. Swipe the screen left or right to display additional screens. Status &... -
Page 15: Customise Your Device With Settings
Customise your device with Settings Use the Settings menu to set up your device exactly as you like it. The quickest way to access the Settings menu is to swipe down on the home screen and touch the Settings icon . -
Page 16: Changing The System Language
Adjusting Volumes 1. Touch Home > Apps > Settings > Sound > Volumes 2. Set the volume for music, video, games & other media or the ringtone and notification volume independently. 3. Touch OK to save. TIP: When the handset is idle, touch the volume keys to adjust the ring volume. -
Page 17: Changing Screen Brightness
Setting the Date and Time 1. Touch Home > Apps > Settings > Date & time. 2. Clear the Automatic date & time and Automatic time zone check boxes to manually set the date, time and time zone 3. Set the date, time, time zone, and date/time format. Change your background Wallpaper Touch Home to return to your home screen Press and hold on the home screen (long press) - Page 18 Protect Your Phone With Screen Locks You can change the default (long press) screen lock to a variety of alternate screen locks. The phone supports face recognition, pattern lock, a numeric PIN or a password. 1. Touch Home > Apps > Settings > Security. 2.
- Page 19 Protect Your Phone With Encryption After encryption is applied you need to enter a numeric PIN or password each time you power on your phone and without the password the data is encrypted so cannot be read by anyone else. WARNING! Encryption is irreversible.
- Page 20 Touch Encrypt phone. Enter your lock screen PIN or password and touch Next. Touch Encrypt phone again. The encryption process starts and displays its progress, the phone may restart several times. When encryption is complete, you are prompted to enter your PIN or password.
- Page 21 Monitor the Phone Status The status bar at the top of the home screen provides phone and service status information on the right side. You can monitor the phone status by checking the following status icons. GPRS network No Network signal EDGE network Signal strength (no data) 3G network...
-
Page 22: Notification Icons
Manage Notifications Notification Icons The status bar at the top of the home screen provides notification alerts on the left. You can view the following notification icons. New SMS microSD card not mounted New MMS microSD card removed New Email Upcoming event New Gmail message Call on hold... -
Page 23: Respond To Or Remove A Notification
Open/Close the Notifications Panel Notifications report the arrival of new messages, calendar events, and alarms, as well as ongoing events, such as when you've configured your phone as a Wi-Fi hotspot. You can open the notifications panel to view the details of notifications. To open the notifications panel, swipe your finger down from •... - Page 24 Managing Shortcuts and Widgets Add Shortcuts and Widgets 1. Touch Home Key > > Select the Widgets tab at the top of the screen. 2. Swipe right to view all available widgets 3. Press and hold a widget or shortcut and drag it to your chosen Home Screen.
-
Page 25: Entering Text
Rearrange the Favourites Tray The Home Screen includes a customisable favourites tray visible from all extended Home Screens. You can drag apps, shortcuts, folders, and other priority items in or out of the favourites tray for instant access from any Home Screen. To remove items from the favourites tray: Press and hold an item in the favourites tray and drag it out of the tray. - Page 26 Android Keyboard The Android Keyboard provides a layout similar to a desktop computer keyboard. Turn the phone sideways and the keyboard will change from portrait to landscape. The landscape keyboard is not supported in all applications. • Touch the alphabet keys to enter letters. Press and hold specific keys to enter associated accented letters or numbers.
- Page 27 • Touch to use Google’s networked voice to text. • Press and hold to change the input languages or set up the Android keyboard. • In the Android keyboard you can press and hold the Space Bar to select alternate input methods. Change to the TouchPal Keyboard From any text entry mode pull down the Notifications bar and touch ‘Choose input method’.
- Page 28 TouchPal 12-Key PhonePad • Touch a key repeatedly until the desired letter or symbol appears. If word prediction is enabled ( ), just touch the keys once and choose the right word. TouchPal CooTek T+ • Touch to enter the left letter on the key; Double-tap or flick right to enter the right letter/symbol on the key.
- Page 29 TouchPal Curve: In the TouchPal keyboard screen, touch and tick the Curve check box, and then touch Close. Move your finger from letter to letter on the keyboard to trace a word. Lift your finger at the end of the word. A space is added automatically when you begin to trace the next word.
- Page 30 Editing Text • Move the insertion point: Touch where you want to type. The cursor blinks in the new position, and a tab appears below it. Drag the tab to move the cursor. • Select text: Press and hold or double-tap within the text. The nearest word highlights, with a tab at each end of the selection.
-
Page 31: Making Calls
Making Calls 1. Touch Home > 2. If the numbers are not visible touch the phone icon at the top or swipe the screen to move between the tabs. 3. Enter digits on the dial pad. The phone displays best matches for existing contacts. -
Page 32: Make A Call From Call History
Incoming Calls Drag the handset icon answer the call. Press the volume keys to mute the incoming ring. Drag the handset icon to reject the call. Drag the handset icon reject the call and send a preset text message to the caller. TIP: The default text responses can be edited at Dialler >... - Page 33 Other Actions in Call History 1. Touch Home > > for call history. 2. Touch the call record for more details: • Touch the number to call it • Touch to send a message • Touch to view contact details •...
-
Page 34: Options During A Call
Call a Favourite Contact 1. Touch Home > and then touch the Contact tab 2. Your favourite and frequently called contacts or numbers are listed at the top of the screen. Touch a contact or number to call it. Options During a Call During a call, you will see a number of onscreen options. -
Page 35: Set Up A Conference Call
Switch Between Current Calls When you’re on a call, your phone screen informs you that another call is coming in and displays the caller ID. To respond to an incoming call while you’re on a call: Drag over to answer the call. (This puts the first caller on hold and answers the second call.) To switch between two calls: Touch Options >... -
Page 36: Set Dtmf Tones
Use Fixed Dialling Numbers Fixed Dialling Numbers (FDN) allows you to restrict outgoing calls to a limited set of phone numbers. This feature requires carrier support and the PIN2 code. Touch Home > > Options > Settings > Fixed Dialling Numbers. The following options are available: •... -
Page 37: Using Speed Dial
Using Speed Dial Press and hold the 1 ~ 9 keys from the dialer to call the corresponding speed dial number. Key 1 is programmed for your voicemail and key 3 is programmed for international message bank. Key 3 can be changed if required. To assign a speed dial key: 1. -
Page 38: Messaging
Caller ID and Call Waiting 1. Touch Home > > Options > Settings > Additional settings 2. Caller ID determines if your number is displayed to other parties. 3. Call waiting notifies you of incoming calls during a call and is enabled by default. -
Page 39: Reply To A Message
Pictures Select a picture to add to your message Capture picture Take a photo and add to your message Videos Select a video clip to attach to your message Capture video Shoot a video clip and add to your message Audio Select an audio file to add to your message Record audio... -
Page 40: Viewing Details About A Message
Forward a Message 1. Touch from the Home Screen, touch the thread that you want to forward 2. Press and hold the message 3. Touch Forward in the menu that opens 4. Enter a recipient for the message and edit the content if required 5. - Page 41 Connect to a Wi-Fi network 1. Touch Home > Apps > Settings > Wi-Fi. 2. Slide the Wi-Fi switch to the ON position to turn on Wi-Fi. 3. Touch Wi-Fi to view available networks. Previously connected networks will connect automatically. 4.
-
Page 42: Forget A Wi-Fi Network
Enter the network SSID (name). If necessary, enter security or other network configuration details. Touch Done when finished. Forget a Wi-Fi Network To delete a Wi-Fi network that you no longer use or if you don’t want to connect to it automatically: Touch Home >... -
Page 43: Using Apps
The other device will receive a Wi-Fi Direct connection prompt and need to accept the request for connection. 5. Once connected the device is displayed as “Connected” in the Wi-Fi Direct devices list. 6. Wi-Fi Direct requires other compatible applications and devices to use the feature. - Page 44 Control Mobile Data Use To enable or disable data access: Touch Home > Apps > Settings > Mobile networks Touch the Data enabled check box to enable or disable data access over the mobile network. To enable data services when roaming: Touch Home >...
-
Page 45: Using Bluetooth
Using Bluetooth ® Bluetooth is a short-range wireless communication technology. Phones or other devices with Bluetooth capabilities can exchange information wirelessly within a distance of about 10 meters. The Bluetooth devices must be paired before the communication is performed. Turning Bluetooth On/Off 1. -
Page 46: Pair With A Bluetooth Device
Slide the Bluetooth switch ON, touch Bluetooth Touch Options > Rename phone. Edit the name and touch Rename. Pair with a Bluetooth Device Touch Home > Apps > Settings > Bluetooth. Slide the Bluetooth switch ON, touch Bluetooth Your phone displays available Bluetooth devices in range. Touch the device you want to pair with. - Page 47 Remove Pairing from a Bluetooth Device Delete a pairing connection with a Bluetooth device. To connect to the device again, you may need to enter or confirm a passcode again. Touch Home > Apps > Settings > Bluetooth. In the list of paired devices, touch Options Touch Unpair.
-
Page 48: Disconnect Your Phone From The Computer
• Media device (MTP): Transfer media files on Windows, or using Android File Transfer on Mac. • Camera (PTP): Transfer photos using camera software, and transfer any files on the computers that don’t support MTP. • USB tethering: Share your handset internet connection via the USB port to your PC. - Page 49 Share Your Mobile Data via Bluetooth If your computer supports Bluetooth tethering you can configure your phone to share it's mobile data connection with your computer. Pair your phone with your computer via Bluetooth. Configure your computer to obtain its network connection via Bluetooth.
- Page 50 Remove the microSD Card From Your Phone If you need to remove the microSD card while the phone is on, you should unmount it first. Touch Home > Apps > Settings > Storage. Slide down the screen, select Unmount SD card > OK Erase microSD Card Touch Home >...
-
Page 51: Connect To A Vpn
Add a VPN Touch Home > Apps > Settings > More > VPN. Touch Add VPN profile and fill in the information provided by your network administrator. Touch Save - The VPN is added to the list on the VPN screen. - Page 52 Internet Call Settings To add an Internet calling (SIP) account: Touch Home > > Options > Settings > Accounts. Touch ADD ACCOUNT. Follow the instructions from your service provider. Touch SAVE. To configure which calls use Internet calling: You can configure your phone to place all calls using Internet calling (when you’re connected to a Wi-Fi network), just calls to Internet calling addresses, or to ask each time you place a call.
-
Page 53: People
People Add contacts to your phone and synchronise them with your Google account or other accounts that support contact syncing. To see your contacts, touch Home > . From there, touch the tabs on the top of the screen to quickly switch to contact groups or favourites Touch Home >... -
Page 54: Import Contacts From The Microsd Card
Setting Up Your Own Profile You can create your own name card in your phone. Touch Home > and touch the all contacts tab Scroll to the top of the screen and touch Set up my profile. Edit your profile information and touch DONE. Import, Export, and Share Contacts You can import/export contacts from/to your SIM or microSD card. -
Page 55: Share Contacts
Export Contacts to the SIM Card Touch Home > > Options Touch Import/export > Export to SIM card. Touch to select the contacts and then touch Export Contacts to the microSD Card Touch Home > > Options Touch Import/export > Export to SD card. The phone will prompt you with the name of the vCard file. -
Page 56: Using Groups
Remove a Contact From Favourites Touch Home > > touch the favourites tab Touch a favourite contact and then touch Using Groups Touch Home > and touch the contact groups tab Touch to create a new group. Touch the account field on the top of the screen to choose an account for the group. -
Page 57: Searching For A Contact
Delete a Group Touch Home > > touch the contact groups tab Touch a group and then touch Options > Disband group. Touch OK to disband the group. The contacts in the group will not be deleted. Edit a Group Touch Home >... -
Page 58: Delete A Contact
Set a Ringtone for a Contact Touch Home > Touch a contact to set a ringtone and then touch Options > Set ringtone (Contact must be saved on the phone) Select a ringtone and touch OK. Delete a Contact Touch Home > Touch a contact to delete and touch Options >... - Page 59 You can merge all the separate information of multiple accounts into one record in the Contacts list. Touch Home > Touch a contact to set as the prime contact. This is the contact you will see in the list after the joining. Touch Options >...
-
Page 60: Using The Drive Mode App
Using the Drive Mode App The Drive Mode application supports voice commands for Calling, Navigation, Weather and Music. It also has a safe mode which will ignore all incoming calls and SMS messages so you are not disturbed while driving. 1. -
Page 61: Remove An Account
Add an Account 1. Home > Apps > Settings > + Add Account 2. Touch the type of account you want to add. 3. Follow the onscreen steps to enter the required information. Most accounts require a username and password, but the details may vary. -
Page 62: Email
Change an Account’s Sync Settings 1. Home > Apps > Settings > Accounts 2. Touch the account you want to change. The Sync settings screen appears, showing a list of information the account can sync. 3. Check or uncheck items as required. Checked items will be kept in sync when auto-sync is turned on. -
Page 63: Mark An Email As Unread
Checking Your Emails Your device can automatically check for new emails at the interval you set when setting up the account. You can also check new emails manually by touching in any of the email account’s boxes. Touch Load more messages at the bottom of the email list to download earlier messages. -
Page 64: Edit An Email Account
Writing and Sending an Email 1. Open your email Inbox. 2. Touch to open the compose screen. 3. If you have more than one email accounts added on the device, touch the sender line to select the account you want to use for sending the message. -
Page 65: Remove An Email Account
Add a Signature to your Emails You can set a plain text signature for every outgoing email message, such as your name and contact information. 1. Open the Email app. 2. Touch Options > Settings > select the account 3. Touch Signature and enter the text. 4. -
Page 66: Gmail Tm
Gmail After you sign in to your Google account on the device, you can send and retrieve Gmail messages with the Gmail app. Open Your Gmail Inbox Home > Apps > Gmail. The Inbox screen appears. If you haven’t signed in, you will be prompted to do so or create a new account. -
Page 67: Reply Or Forward A Message
Separate each recipient with a comma. 4. Enter the email subject and compose the email text. 5. Touch Options > Attach file to add an attachment. 6. Touch at the top right to send the message. Adding a Signature to Your Gmail Messaging You can set a few lines of plain text as signature for every outgoing Gmail message. - Page 68 Working With Received Attachments When a message has an attachment, Gmail displays information about that attachment at the top of the message. Depending on the attachment type, the applications installed on your device as well as your settings, you may preview, view, play, save the attachment, or check information about the attachment.
-
Page 69: Working With Labels
Working With Labels Message labels include both labels you create and default labels such as Sent, Starred, and Outbox. You can organise your emails by labelling them or adding stars to them. Labels also help you sort your messages, just like folders. To label or change labels: 1. -
Page 70: Calendar
Changing Gmail Settings Touch Options > Settings in any Gmail screen to change General settings, which apply to all Gmail accounts, or other settings that only apply to specific accounts. Calendar Calendar on the phone works with the web-based Google Calendar service for creating and managing events, meetings, and appointments. -
Page 71: View Event Details
Change Calendar Views Touch icons at the bottom for Month, Week, Day, and Agenda. From Month view touch any day to jump to that day’s events. TIPS: • In Month view, swipe vertically to see earlier months and later months. •... -
Page 72: Google Talk
Edit, Delete or Share a Calendar Event 1. Find and touch the event to edit, delete or share. 2. Touch to edit the details 3. Touch to delete the event 4. Touch to share the event Changing Calendar Settings To change Calendar settings, open a Calendar view (Day, Week, Month, or Agenda) then touch Options >... -
Page 73: Changing Your Online Status
Adding a Friend In the friends list, touch at the top right of the screen. Enter your friend’s address and touch DONE. Your friend’s address in Google Talk is a Gmail or other email address that is configured to connect to Google Talk. NOTE: If other people try to add you as a friend, you receive a notification in the status bar and the invitation appears in your friends list. -
Page 74: End The Chat
Switch Between Active Chats If you have more than one active chat you can switch between chats as follows: • Touch the Back Key to return from one chat to the friends list. Then touch the other friend you want to chat with. •... -
Page 75: Google
Google+ Google+ is a social networking service offered by Google. The Google+ application on your device enables you to manage your data, chat with online contacts, organise them in different circles, and share your selected information. Touch in the Home Screen and select Google+. The first time you open the Google+ app, select the instant upload and contact sync options. -
Page 76: Checking Photos
Chatting With Contacts You can chat with your Google+ contacts through instant messaging, similar to sending a text with the Messaging app. 1. Touch the g+ icon > Messenger or select from Apps > Messenger. 2. Touch to create a new message. 3. -
Page 77: Using The Chrome Browser
Using the Chrome Browser The browser also opens when you touch a web link - for example, in an email or a text message. 1. Select the Chrome icon from the Home Screen 2. Tap the address bar to enter web addresses using the keypad 3. -
Page 78: Browser Settings
Browser Settings Press Options to access your browser Settings: Other devices Sync your Chrome searches across multiple devices Find in page Search the current page Request desktop site Request a full size version of the page Settings View Chrome settings Help Access the Chrome Help guide on line. -
Page 79: Google Location Services
Google Location Services Switch location services on to use Navigation, Places, Latitude, and Google Maps. 1. Touch Home > Apps > Settings > Location services 2. Select the location options you want to use. Check Google’s location service to use Wi-Fi and mobile networks to determine your approximate location;... - Page 80 5. Touch the search icon on the keyboard. Markers with letter labels indicating search results appear on the map. 6. Touch a marker to open a balloon that contains a label with summary information about the location. 7. Touch the balloon to open more information, as well as options for obtaining directions and on line content.
-
Page 81: Sharing Location
3. Select a place category to search You can also use the button at the top to search. NOTE: Touch Options > Add a search to add new place categories. 4. Tap a result to check out the details and reviews. You can also see the place on Maps, find out how to get there, give that place a call, add your rating and more. -
Page 82: Searching With Text
Searching With Text 1. Start the Search app in one of the following ways. • in the Home Screen and select Search. Touch • Touch the Google Search box at the top of the Home Screen. • Touch the Search Key in certain apps to search for related information. -
Page 83: Using The Camera
Using the Camera You can take photos and record videos. Photos and videos are stored to the phone’s memory card or the phone’s internal storage. You can copy them to your computer or access them in the Gallery app. Capture a Photo from the Home Screen and select Camera. - Page 84 Camera Settings Scene mode Set auto or night setting Grid Show a composition grid on the display Shutter tones Select different shutter sounds Picture size Change the image resolution size Face Enable blink detection, which will delay the shot if detected Image Manually change the Exposure, Brightness, Contrast, Saturation, and Sharpness.
- Page 85 Camera Mode* Normal Normal camera setting Panorama Compose a panorama shot using multiple images Timing mode Set a 2, 5 or 10 second self timer for auto shutter. Touch the screen to change the timer. Rapid Capture Capture a series of shots in rapid succession Smile Take a shot automatically when a smile is Detection...
- Page 86 Recording a Video 1. Touch in the Home Screen and select Camera 2. Select Video mode on the camera / video switch 3. Touch the video icon to start / stop recording 4. Touch the Volume keys to zoom in and out Video Settings Video Quality 720P, 480P, VGA, QVGA, QCIF...
-
Page 87: Gallery
Gallery Touch in the Home Screen and select Gallery to view your pictures and videos. Touch an individual picture to Press and hold the photo to view it, delete, edit, share, or select multiple shots to share set as wallpaper, or Contact. or delete. - Page 88 Touch options to select Share options: multiple shots or to sort by date or location.
- Page 89 Play and Share Videos 1. Open the gallery, videos are shown by the play icon 2. Press and hold to share , or delete the video 3. Touch the video to start playing. 4. Touch the screen to view the playback and other controls:...
-
Page 90: Music
Music (Note there are two music players, Music and Play Music) Copying Music Files to Your Phone Before using Music or Play Music, you need to copy audio files from your computer to your phone. See Connecting to Your Computer via USB for details on establishing the connection. Use the computer to copy music and other audio files onto the memory card. -
Page 91: Add A Song To A Playlist
Create a Playlist 1. From the Song tab view, touch Options > Add to playlist 2. Touch New. 3. Type the playlist name and touch Save. The playlist is created and the song you selected is added to the playlist. Use the same method to add Artists or Albums to a playlist from the Artists or Albums tabs. -
Page 92: Google 'Play Music
Google ‘Play Music’ The Play Music application works with Google’s online music store and streaming service. Touch in the Home Screen and select Play Music. If you are prompted, select an account to access its online music library. The app searches your online library and your device for music and playlists before displaying your combined music library, organised by Playlists, Recent, Artists, Albums, Songs, Genres. -
Page 93: Managing Playlists
• In other apps, flick down the notification panel. Touch the song title to restore the playback screen, or just pause/ resume playback or skip to the next/previous song. • When the screen is locked, the playback controls and summary info is displayed on top of the screen. Managing Playlists Create playlists to organise your music files into sets of songs, so that you can play the songs you like in the order you prefer. -
Page 94: Fm Radio
FM Radio Use the FM radio to search and listen to your favourite FM stations. Insert the 3.5mm headset which acts as the antenna. If you receive an incoming call while listening to the radio, the radio will be suspended during the call. Scanning and Saving Channels 1. -
Page 95: Other Options And Settings
or down with the arrow buttons. 3. Press the + button to add the station to your favourites. 4. Press and hold on the new channel button to rename if required. Other Options and Settings To remove a channel from favourites: 1. -
Page 96: Other Apps
Other Apps Using the Alarm 1. Touch in the Home Screen and select Alarm or touch the analogue clock directly from the Home Screen 2. Touch a default alarm to configure it, or touch + Add Alarm to create a new alarm. 3. -
Page 97: File Manager
Calculator Touch in the Home Screen and select Calculator. TIPS: Touch , or swipe left or right to switch between different panels. You can also hold the device on its side to see all calculator buttons. File Manager Quickly access all of your images, videos, audio clips, and other types of files on your device and the memory card. -
Page 98: Play Books
Notepad Touch in the Home Screen and select Note pad to save and view text notes. Touch +New to create a new note, enter your text and touch Save when done. Touch a note to view its content, touch Edit, Delete, Share, or Export from the options. -
Page 99: Software Update Service
Play Store Touch in the Home Screen and select Play Store. You can buy or rent music, books, movies, apps, and download them to your device. Record a Voice Memo with Sound 1. Touch in the Home Screen and select Sound recorder. 2. -
Page 100: World Time
Timer (Countdown and Stopwatch) Touch in the Home Screen and select Timer to use stopwatch or countdown timer. Stopwatch allows you to record lap times, while Countdown allows you to set a time and count down to 0. Touch the field to set the countdown value in HH:MM:SS Torch Open the built in torch application from the Apps menu or from the Quick Launch panel when you pull down the top of the screen. -
Page 101: Managing Your Downloads
Browsing and Searching for Apps Touch in the Home Screen and select Play Store. You can buy or rent music, books, movies, apps, and download them to your device. 1. Touch Download (free apps) or the price (paid apps) in the app details screen. -
Page 102: Settings Summary
Settings Summary Touch in the Home Screen and select Settings. The Settings app contains most of the tools for customising and configuring your device. Flight Mode Switch all radio services on or off Wi-Fi Switch Wi-Fi on or off Bluetooth Switch Bluetooth on or off Mobile networks Check mobile network and data... - Page 103 (More) USB tethering Share your internet connection via (More) Bluetooth Share your internet connection via tethering Bluetooth Storage View your memory storage usage Battery View battery status and what has been consuming your power Apps View the storage details for all Apps Connect to PC Set the PC connection behaviour Location services...
-
Page 104: Troubleshooting
Troubleshooting If you encounter problems while using the phone, or if it performs abnormally, you can refer to the chart below. If your particular problem cannot be resolved, contact the dealer where you purchased the phone, search our FAQ’s at zte.co.nz Problem Possible causes Possible solution... - Page 105 Problem Possible causes Possible solution Have to Battery life is related to Switch off Wi-Fi, charge the network signal Bluetooth or select battery too strength and Flight mode to frequently, applications you are conserve power. low battery running. life. In high-temperature Battery will not charge environments battery above 45°C and will...
- Page 106 Problem Possible causes Possible solution Unable to USIM card invalid. Contact your service connect to provider. the network No service from your Check coverage with provider. your service provider. Poor signal. Move to an open space, or if you are inside a building, move closer to a window.
-
Page 107: General Safety Warnings
General Safety Warnings Do not make or receive Do not use your phone at calls while driving. Do petrol stations. not text while driving. Keep your phone at Your phone may produce least 15 mm away from bright or flashing lights. your ear when calling. - Page 108 Radio Frequency (RF) Exposure Specific Absorption Rate (SAR) Your mobile phone is a radio transmitter and receiver. It is designed not to exceed the limits for exposure to radio waves recommended by international guidelines, EN50360. These guidelines were developed by the independent scientific organisation ICNIRP and include safety margins designed to assure the protection of all persons, regardless of age and health.
-
Page 109: Normal Use Position
Normal Use Position Wrapping your hand around the whole device can block the antenna which will reduce your coverage, call quality, data rates and battery life. Use a light, open hand grip to prevent blocking the antenna and microphones. Antenna Antenna Driving Full attention must be given to driving at all times in order to... - Page 110 General Statements on Handling and Use You alone are responsible for how you use your phone and any consequences of its use. You must always switch off your phone wherever the use of a phone is prohibited. Use of your phone is subject to safety measures designed to protect users and their environment.
-
Page 111: Small Children
Small Children Do not leave your phone and its accessories within the reach of small children or allow them to play with it. They could hurt themselves or others, or could accidentally damage the phone. Your phone contains small parts and sharp edges may cause an injury or may become detached and create a choking hazard. -
Page 112: Emergency Calls
Repetitive Strain Injuries To minimise the risk of Repetitive Strain Injury (RSI) when texting or playing games with your phone: Do not grip the phone too tightly. • Press the buttons and screen lightly. • Use features designed to minimise repeated pressing of •... -
Page 113: Connection To A Car
Accessories Use only approved accessories. Do not connect with incompatible products or accessories. Take care not to touch or allow metal objects, such as coins or key rings, to contact or short-circuit in the battery terminals. Connection to a Car Seek professional advice when connecting a phone interface to the vehicle electrical system. -
Page 114: Hearing Aids
Hearing Aids People with hearing aids or cochlear implants may experience noise when using wireless devices or when one is nearby. The level of interference will depend on the type of hearing device and the distance from the interference source, increasing the separation between them may reduce the interference. -
Page 115: Interference In Cars
Interference in Cars Please note that because of possible interference to electronic equipment, some vehicle manufacturers forbid the use of mobile phones in their vehicles unless a hands-free kit with an external antenna is included in the installation. Petrol Stations and Explosive Atmospheres Obey all warning signs in high risk areas such as fuelling areas, below decks on boats, fuel or chemical transfer or storage facilities, areas where the air contains chemicals or particles,... -
Page 116: Technical Specifications
Technical Specifications Network LTE 1800, 2600 MHz. up to 100Mbps data. 3G UMTS 850, 2100 MHz. 42 Mbps data. 2G GSM 900, 1800 MHz Dimensions Approx 128.4 x 66.1 x 12.1mm. 160g Features Snapdragon 1.2GHz dual core processor with 1GB RAM. Android 4.1 OS. 5.0/0.3MP dual cameras. -
Page 117: Disposal Of Your Old Device
Starship. Phones can be left in recycle bins located in Telecom stores and offices nationwide. More information on the Starship Mobile Phone Appeal can be...
Need help?
Do you have a question about the R83 and is the answer not in the manual?
Questions and answers