GRASS VALLEY HD Digital Wireless camera system User Manual
Hd digital wireless camera system
Hide thumbs
Also See for HD Digital Wireless camera system:
- Datasheet (2 pages) ,
- User manual (84 pages)

Related Manuals for GRASS VALLEY HD Digital Wireless camera system


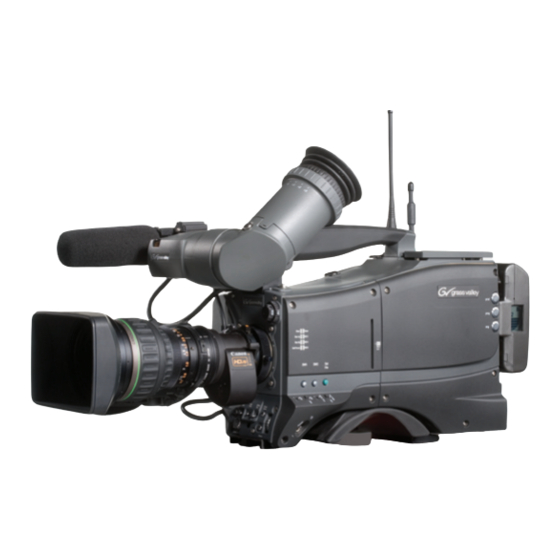
Summary of Contents for GRASS VALLEY HD Digital Wireless camera system
- Page 1 User’s Guide 3922 496 30771 August 2014 v6.2 System v1.3 WIRELESS HD Wireless HD Digital Wireless camera system...
-
Page 2: Declaration Of Conformity
Declaration of Conformity We, Grass Valley Nederland B.V., Kapittelweg 10, 4827 HG Breda, The Netherlands, declare under our sole responsibility that the LDK 4453/20, LDK 4453/22, LDK 4453/25, LDK 4454/60, LDK 5455/X0, LDK 4460/XX, LDK 4470/XX, LDK 5464/XX, LDK 5465/20, LDK5466/00, LDK 5466/22 and LDK 5466/25 are in compliance with the following standards: - EN 60950: Safety... -
Page 3: Table Of Contents
Table of contents Chapter 1 – Introduction Technology............15 1.1.1 System configuration . - Page 4 Wireless Camera Adapter (WCA) ........39 4.2.1 Select video frequency channel .
- Page 5 WCU connectors ........... . . 70 6.3.1 Triax connector 1+2 .
- Page 6 If the shipping container shows signs of damage or stress, notify the carrier as well. If a unit is being returned to Grass Valley for servicing, try to use the containers and materials of the original packaging. Attach a tag indicating the type of service required, return address, model number, full serial number and the return number which will be supplied by your Grass Valley service centre.
-
Page 7: Important Information
Important information Read these instructions carefully and retain them for future reference. Safety Summary This information is intended as a guide for trained and qualified personnel who are aware of the dangers involved in handling potentially hazardous electrical/electronic equipment. It is not intended to contain a complete list of all safety precautions which should be observed by personnel in using this or other electronic equipment. - Page 8 Warnings • Do not modify this equipment. • Do not use this equipment in areas where it may endanger safety such as hospitals or airports. • This equipment generates electromagnetic radio frequencies. Installation must conform to the instructions given in this manual. •...
- Page 9 Triax cable systems • Only connect a Triax cable from the same LDK camera family to the unit. • Do not allow system earth currents to exceed 1.5 A in the outer shield of the Triax cable or 0.2 A in other cable shields. •...
- Page 10 Mains lead wiring for UK users The wires in the mains lead are colored in accordance with the following code: GREEN and YELLOW- EARTH BLUE- NEUTRAL BROWN- LIVE As the colors of the wires in the mains lead of this apparatus may not correspond with the colored markings identifying the terminals in your plug proceed as follows: •...
- Page 11 Sicherheit Diese Informationen sind als Leitfaden für qualifiziertes Fachpersonal gedacht, das die Gefahren beim Umgang mit potenziell gefährlicher elektrischer/elektronischer Ausrüstung kennt. Es handelt sich dabei nicht um eine vollständige Zusammenstellung aller Sicherheitsvorkehrungen, die beim Gebrauch dieser oder anderer elektronischer Geräte zu beachten sind.
- Page 12 • Die Montage dieser Ausrüstung darf nur von Fachpersonal vorgenommen werden. • Es darf nur das vom Hersteller empfohlene Zubehör verwendet werden. • Die Stromstärke und Spannungen in dieser Ausrüstung sind gefährlich. Die Sicherheitsvorschriften sind vom Personal stets einzuhalten. • Vor dem Abnehmen von Abdeckungen oder Verkleidungen ist stets die Stromzufuhr abzuschalten.
- Page 13 Zusammenstellung von in diesem Handbuch verwendeten Warnhinweisen: • Immer von der Netzversorgung trennen, bevor der Adapter geöffnet wird. • Stecker zwischen Kamerakopf und Adapter mit äußerster Vorsicht handhaben. Darauf achten, dass die Steckerstifte nicht durch die Führungsstifte beschädigt werden. • Diese Schritte in der angegebenen Reihenfolge ausführen.
- Page 14 HD Wireless User’s Guide (v6.2)
-
Page 15: Chapter 1 - Introduction
1.1 Technology 1.1.1 System configuration The HD wireless system docks to the Grass Valley cameras LDK 8000 (Elite), LDK 4000 (Elite) and LDK 6000 to form an HD Digital Wireless Camera System. It supports 1080i50/59.94, 720p50/59.94 and 1080psF25/29.97 acquisition while using an innovative approach both to compression and transmission. -
Page 16: Features
Chapter 1 - Introduction utilizes the same operational control panels as other Grass Valley LDK series cameras using the C2IP system. The HD Wireless camera system integrates perfectly into your existing set-up. It is a flexible camera system that is equally at home in the studio or out on location in an outside broadcast environment. -
Page 17: System Composition
RS 422 screened cable with a 9-pin D-sub connector. • An LDK 4470 wireless control unit (WCU). • A cable (ordering code 47233914AB) for use with Grass Valley’s Wireless Insight software. For a complete Digital Wireless Camera system the following elements must be added: •... -
Page 18: Unit Identification
Chapter 1 - Introduction 1.4 Unit identification Unit Type number HD Wireless Control Unit (Fischer) LDK 4470/10 HD Wireless Control Unit (Trilock) LDK 4470/20 HD Wireless Control Unit (ARD) LDK 4470/30 HD Wireless Control Unit (Lemo/4E) LDK 4470/40 HD Wireless Control Unit (Lemo/BBC) LDK 4470/50 HD Wireless Control Unit (Lemo/3T) LDK 4470/60... -
Page 19: Chapter 2 - Installation
Chapter 2 - Installation Chapter 2 Installation 2.1 Configurations This wireless transmission system combines with an HD LDK camera head to form a HD Digital Wireless Camera system. The camera head with the attached Wireless Camera Adapter (WCA), communicates wirelessly with the Antenna Management Unit (AMU). The AMU is connected to the Wireless Control Unit (WCU) via a Triax cable. - Page 20 Chapter 2 - Installation Figure 2-1. Camera wireless system Digital wireless data link LDK 4460 RF Data Emitter to camera Antenna Management LDK 4454 RF Data Emitter Unit (AMU) LDK 4453 Digital wireless video link RF Receiver Camera to RF Receiver Triax 600 m with 11 mm Cable...
-
Page 21: Wireless Camera Adapter (Wca)
Chapter 2 - Installation 2.2 Wireless camera adapter (WCA) If you decide to change frequency bands, then refer to the Appendix - Exchanging the frequency module. Carry out the following steps to prepare the camera for use: • Attach the adapter to the camera. •... -
Page 22: Attaching Antennas To The Adapter
Chapter 2 - Installation 2.2.2 Attaching antennas to the adapter The wireless camera adapter uses two different antennas: a Data link antenna and a Video link antenna. Attach both antennas securely to the wireless adapter. Figure 2-3. Attaching the antennas Data RF antenna Video RF antenna Video RF antenna... -
Page 23: Attaching A Battery To The Camera Adapter
Chapter 2 - Installation 2.2.3 Attaching a battery to the camera adapter Attach a battery pack to the rear of the camera adapter or supply a +12 VDC nominal voltage to the DC in connector on the rear of the adapter. Due to possible high power consumption a high-density battery pack is recommended. -
Page 24: Antenna Management Unit (Amu)
Chapter 2 - Installation 2.3 Antenna Management Unit (AMU) 2.3.1 Antenna positioning To get the best benefits from reflections the receiving set is equipped with a three-antenna diversity system. The AMU uses the MRC (Maximum Ratio Combining) system for optimal transmission robustness. - Page 25 Chapter 2 - Installation AMU connectors Connect the three coaxial cables from the antennas to the upper row of BNC video connectors on the AMU. Connect the cable from the data emitter unit to the 9-pin sub-D connector on the AMU. Connect the Triax cable to the Triax output of the AMU (TRIAX output).
-
Page 26: Wireless Control Unit (Wcu)
Chapter 2 - Installation 2.4 Wireless Control Unit (WCU) An optional mounting kit is available for mounting the WCU into a standard 19-inch rack. Caution When installing the WCU always allow 1 RU space above and below the WCU to properly ventilate the unit. - Page 27 Chapter 2 - Installation HD Wireless User’s Guide (v6.2)
-
Page 28: Connecting The Studio Intercom System
Chapter 2 - Installation 2.4.1 Connecting the studio intercom system Connect the studio intercom system to the I/Com connector on the rear of the WCU. The wiring of the panel connector is shown below for two-wire and four-wire systems. Figure 2-8. Intercom connection - two-wire system Housing Housing PROG... -
Page 29: Connecting The Studio Signalling
Chapter 2 - Installation 2.4.2 Connecting the studio signalling Connect the studio signalling system to the Sign. connector on the rear of the WCU. The wiring of the panel connector is shown. Figure 2-11. Signalling connection Preview out Preview out ret. Call out Call out ret. - Page 30 Chapter 2 - Installation Dry contact Table 2-13. Dry contact (no ground, no voltage)* Menu setting Input shorted Input open Function ON Function OFF Function OFF Function ON * a common return (not ground!) can be used for the three functions. Figure 2-14.
- Page 31 Chapter 2 - Installation Voltage level send lead Table 2-17 . Voltage level Send lead (0 to 2.5 VDC, 4 to 24 VDC)* Menu setting Input 0 to 2.5 V Input 4 to 24 V Function ON Function OFF Function OFF Function ON * isolated from ground.
-
Page 32: Audio Gain (External)
Chapter 2 - Installation 2.4.3 Audio gain (external) To control the audio gain externally via the WCU: In the camera system menu, set the menu item INSTALL > AUDIO > AUDIO GAIN MODE to EXT. Apply a DC voltage to pins 6 and 14 of the signalling connector to control the levels of audio channels 1 and 2 respectively, as shown in the figure below. -
Page 33: Chapter 3 - Using Menus
Chapter 3 - Using menus Chapter 3 Using menus 3.1 Menus Use the camera and WCU menus to set up the wireless system. The menu of the WCU can be viewed by connecting a video monitor to the unit. Refer to section 5.2 for the complete contents of the WCU menu. -
Page 34: Using An Ocp 400 To Set Up The Wcu
Chapter 3 - Using menus System Menu (NN) When NN is displayed, push the rotary/push button twice to enter the System Menu. The rotary/push button can be used to navigate through the menu system which is displayed on the attached video monitor. 3.2.2 Using an OCP 400 to set up the WCU An operational control panel (OCP 400) can be used to set up the WCU instead of the rotary/ push button. -
Page 35: Navigating The Wcu Menus
Chapter 3 - Using menus 3.3 Navigating the WCU menus The menu system is used for configuring the WCU. As there are a number of functions and set-up options available, it may require some time for you to become familiar with them all. 3.3.1 Entering the system menu The system functions of the WCU are grouped into menus and sub-menus. -
Page 36: Leaving The Systems Menu
Chapter 3 - Using menus Figure 3-3. System menu PREVIOUS Camera Number Camera Power MCP Available Yellow On Air Timing System Clock Video Mode 10i59 Teleprompter The SYSTEM menu above shows the items displayed when you first enter the menu and the other items that are available by scrolling up or down with the Rotary control. -
Page 37: Using The Recall File To Undo Changes
Chapter 3 - Using menus If there are only two values associated with the function, then pressing the rotary/push button toggles between these two values. If a value is displayed next to a function that is one of several possible values, then pressing the rotary/push button places the cursor in a list menu indicating the value currently selected. - Page 38 Chapter 3 - Using menus HD Wireless User’s Guide (v6.2)
-
Page 39: Chapter 4 - Setting Up
The software package Wireless Insight can be used on a notebook (personal) computer to monitor the wireless’ system performance during operation. The software package can be obtained from the Grass Valley customer support organization. Refer to the help included in the software package for more details. -
Page 40: Select Video Frequency Channel
Chapter 4 - Setting up 4.2.1 Select video frequency channel Decide which (center) frequencies you wish to use. If two cameras are used at the same time, keep the largest possible distance (and at least one channel, ie. 20 MHz) between the selected video frequencies. -
Page 41: Select Camera Number
Chapter 4 - Setting up The Q_Latency profile allows you to balance the picture quality and the latency of the transmission. It takes advantage of temporal redundancy between consecutive fields. It has no influence on the transmission parameters. Q_Latency profile Description Latency Standard 3 fields (default) - Page 42 Chapter 4 - Setting up The following table summarizes supported choices: Adapter XLR socket Camera XLR socket AUDIO 1(2) Level Phantom Level Phantom SOURCE Source range power Source range power Line Enabled Fixed 0 dBu Disabled Enabled Variable Disabled Variable (Mic levels) (Mic levels) Mic48...
-
Page 43: Intercom
Chapter 4 - Setting up 4.2.6 Intercom Three intercom channels – production (PROD), programme sound (PROG) and engineering (ENG) – are sent to the camera operator's headset. Intercom volume controls are on the back of the adapter.The camera operator's intercom microphone signal is sent back to the WCU. Figure 4-1. -
Page 44: Viewfinder Indications
Chapter 4 - Setting up If CAM MIC is set to PROD in the install menu it overrides other assigned routing switches (whatever their state is) and switches off the downlink intercom to PROD; Intercom headset socket Connect the intercom headset to this XLR-5 socket. Camera intercom menu The Intercom section of the Install menu contains various settings for the intercom channels. -
Page 45: Antenna Management Unit (Amu)
Chapter 4 - Setting up 4.3 Antenna Management Unit (AMU) 4.3.1 AMU indicators AMU IDENTIFIER lock error ANT 1 All unlocked POWER Check video link Profile mismatch AMU IDENTIFIER The display shows the cell number of the AMU (to identify AMUs when there are two AMUs in a system). -
Page 46: Selecting Amu Identifier
Chapter 4 - Setting up POWER LED This indicator lights when power from the WCU is supplied to the AMU via the triax cable. 4.3.2 Selecting AMU identifier If more than one AMU is used in a dual AMU system, each AMU must be given a unique identification number. -
Page 47: Wireless Control Unit (Wcu)
Chapter 4 - Setting up 4.4 Wireless Control Unit (WCU) 4.4.1 Select a video scanning mode The video mode for the camera is set in the WCU System menu. The mode set here overrides the mode set in the camera when a connection is established. Menu path: SYSTEM >... -
Page 48: Wcu Audio Menu
Chapter 4 - Setting up 4.4.5 WCU audio menu Select 1 or 2 audio channels, audio output level and delay The number of audio channels can be selected in the menu of the WCU: Menu path: AUDIO_INTERCOM > AUDIO > AUDIO MODE Set the audio output level to enable (+6 dB) or to disable (0 dB): Menu path: AUDIO_INTERCOM >... -
Page 49: Signalling
Chapter 4 - Setting up Isolate the Intercom system from the studio The intercom I/O can be isolated from the studio intercom network: Menu path: AUDIO_INTERCOM > INTERCOM > ISOLATE Generating 1 kHz test-tone In order to test the data link, a 1 kHz test-tone can be generated internally: Menu path: AUDIO_INTERCOM >... - Page 50 Chapter 4 - Setting up PC OK When a remote PC is connected to the front plug of the WCU Audio Board, this LED lights to indicate the status of the connection. When no PC is connected, it lights to indicate an internal fault.
- Page 51 Chapter 4 - Setting up TRIAX 2 OK / SELECTED These indicators operate in the same way as for Triax input 1 above. VIDEO CHANNEL (rotary switch not used) DATA CHANNEL (rotary switch not used) VIDEO PARAMS (rotary switch not used) PC COM Connector for attaching a PC to the WCU.
- Page 52 Chapter 4 - Setting up HORIZONTAL PHASE (not used) CAMERA Normally and permanently ON, this light indicates that the WCU is powered. This indicator flashes to indicate excessive consumption at the WCU. This indicator lights when the AMU is not drawing power. This indicator flashes to indicate that the AMU power consumption is excessively low (<...
-
Page 53: Chapter 5 - Menu Contents
Chapter 5 - Menu contents Chapter 5 Menu contents 5.1 Wireless Control Unit menu structure Access to the functions in the menus can be restricted according to the user level that has been set. The menus are as follows: Video menu The video menu contains functions for configuring video outputs and freeze mode. -
Page 54: Wcu User Levels
Chapter 5 - Menu contents 5.1.1 WCU user levels Access to the functions on these menus is determined by the user level that has been set. The menu items are divided into two user levels. The operator level Oper is default accessible. Menu items with user level Install are only accessible if the menu level is set to Install. -
Page 55: Wcu Menu Contents
Chapter 5 - Menu contents 5.2 WCU menu contents In the values column, the default value of the item is shown in bold. 5.2.1 WCU Video menu Menu item Values Description Level File SDI 1 & 2 SD, HD Select video standard for SDI outputs 1 and Install 2. -
Page 56: Wcu Audio/Intercom Menu
Chapter 5 - Menu contents Menu item Values Description Level File Cam number On, Off Displays the camera number in the status Oper 5.2.3 WCU Audio/Intercom menu Menu item Values Description Level File Audio Delay On. Off Switches audio delay on or off. Install On: a delay is added to the Audio down link signal which compensates for the Video... -
Page 57: Wcu Sdtv Menu
Chapter 5 - Menu contents 5.2.4 WCU SDTV menu Menu item Values Description Level File Detail Detail On, Off Switches horizontal detail on SDTV outputs Oper on or off. Level 0..99 (50) Sets horizontal detail level on SDTV Oper outputs. HD Wireless User’s Guide (v6.2) -
Page 58: Wcu System Menu
Chapter 5 - Menu contents 5.2.5 WCU System menu Menu item Values Description Level File Camera Number 0..99 (1) Selects camera number Oper ControlMode C2IP , S9000 Selects camera control system Oper IP address IP Config Mode Auto, Manual Oper IP Digit 1 0..255... -
Page 59: Wcu Files Menu
Chapter 5 - Menu contents Menu item Values Description Level File VideoMode 720p50, 720p59, 1080i50, Selects video mode if the camera is not install 1080i59 connected. Wireless MOD802.16 Test On, Off Turns MOD802.16 test on or off. Warning: service this mode is for service purposes only! VideoFreqRangeSelect Auto, Manual Auto: frequency range is taken from... - Page 60 Chapter 5 - Menu contents Menu item Values Description Level File Store exec Stores the selected standard operator file. Oper User System Files System File 1..4 (1) Selects user system file to use. Install Recall exec Recalls the selected user system file. Install Store exec...
-
Page 61: Wcu Diagnostics Menu
Chapter 5 - Menu contents 5.2.7 WCU Diagnostics menu Menu item Values Description Level File Board ID Data Board [ID] Displays board 12nc, date, S/N ... Oper AudioIcom Board [ID] Displays board 12nc, date, S/N ... Oper TriaxRack Board [ID] Displays board 12nc, date, S/N ... - Page 62 Chapter 5 - Menu contents Menu item Values Description Level File AMU 1(2) DC2 unknown | 2.0-2.2 | 2.2-2.4 Detected frequency range of down- Install | 2.4-2.5 | 2.5-2.7 | 2.7-2.9 converter 2 of AMU 1(2) Disconnected DC will be reported as unknown.
-
Page 63: Camera Install Menu For Wca
Chapter 5 - Menu contents 5.3 Camera install menu for WCA Only the WCA install menus are expanded in this table. Refer to the user’s guide of your HD camera for detailed information on the other menu items. Install Values Description Level File... - Page 64 Chapter 5 - Menu contents HD Wireless User’s Guide (v6.2)
-
Page 65: Chapter 6 - Connectors
Chapter 6 - Connectors Chapter 6 Connectors 6.1 WCA connectors Figure 6-1. WCA connector location DC power and Tally output socket or Viewfinder video SDTV analog return output connector (BNC) video input DC out (HD-)SDI output Prod connector (BNC) DC power input socket 11V-17V I/Com... -
Page 66: Viewfinder Video Output Connector
Chapter 6 - Connectors 6.1.1 Viewfinder video output connector This socket provides an analog 1.0 Vpp output viewfinder HD video signal from the WCA. Text overlay is provided on this output BNC connector signal. 6.1.2 HD-SDI connector This socket is used to output the camera HD-SDI video signal according to SMPTE 292M. -
Page 67: Power Input Connector
Chapter 6 - Connectors 6.1.5 Power input connector This socket accepts a DC voltage of Pin Description 15 V nominal. Not connected Not connected 11.5 to 17 V XLR 4-pin male Caution The input voltage must not exceed 17 V. 6.1.6 DC power and tally output connector Shield of cable directly to the Pin Description... -
Page 68: Amu Connectors
Chapter 6 - Connectors 6.2 AMU connectors Data emitter socket TRIAX OUTPUT DATA Triax RF input RF output connectors (only connector connectors for measurment purposes) 6.2.1 Triax connector This socket is used to connect Pin Description the triax cable to the triax input of the WCU. -
Page 69: Data Emitter Socket (Data)
Chapter 6 - Connectors 6.2.2 Data emitter socket (DATA) Pin Description Pin Description SPI_SS Output Data Output SubD 9-pin female SPI_SCK Output 12 V connector SPI_MOSI Output 12 V SPI_MISO Output This socket is used to connect the AMU to the data emitter unit of the antenna assembly.... -
Page 70: Wcu Connectors
Chapter 6 - Connectors 6.3 WCU connectors Power Data Reference Audio outputs Ethernet Triax 1 GENLOCK TRIAX CVBS (OSD) SERIAL DIGITAL OUTPUT Auxiliary intercom CVBS outputs Signalling SDI outputs Triax 2 connector 1+2+3 6.3.1 Triax connector 1+2 This socket is used to connect Pin Description the triax cable from the triax output of the AMU. -
Page 71: Mains Power Connector
Chapter 6 - Connectors 6.3.2 Mains power connector Connect a 100-125 VAC 60Hz or a 200- Pin Description 240 VAC 50Hz power supply to this connector (internal automatic Neutral switching). Line Fuse type: T6.3 AH250V (remove Earth power supply plug to access the fuse and the spare fuse.) IEC style 3-pin male 6.3.3 Intercom connector... -
Page 72: Audio Output Connectors 1+2
Chapter 6 - Connectors 6.3.5 Audio output connectors 1+2 Nominal level 0dBu (+6dBu Pin Description selectable) Audio shield Shield of cable directly to the connector housing. Audio output (+) Audio return (-) If the same signal is applied at pin2 of Audio input 1 and 2 (WCA), then Signal at pin 2 of audio output 1 is in XLR 3-pin male... -
Page 73: Cvbs Output Connectors (2X)
Chapter 6 - Connectors 6.3.9 CVBS output connectors (2x) These two BNC connectors provide an analog 1 Vpp CVBS output signal for monitoring purposes. The menu text is superimposed on this signal when the menu is switched on. BNC connectors 6.3.10 SDI output connectors 1 + 2 These two BNC connectors provide a 0.8 Vpp SDI (SD or HD) output video signal according to SMPTE 259M-C or SMPTE 292M.... - Page 74 Chapter 6 - Connectors HD Wireless User’s Guide (v6.2)
-
Page 75: Chapter 7 - Specifications
Chapter 7 - Specifications Chapter 7 Specifications 7.1 Wireless Camera Adapter (WCA) ☞ Note An RF Module (LDK 5466/xx) and an RF DATA CAM MODULE (LDK 5465/20) must be attached to the WCA. Item Value Dimensions (H x W x L) 180 x 120 x 191 mm (7 .1 x 4.7 x 7 .5 in) Weight 2.2 kg (4.9 lbs) -
Page 76: Wireless Rf Module (Ldk 5466/Xx, Attached To Wca)
Chapter 7 - Specifications Item Value Bitrate (depending on selected profile) Out / Q_R = HiR : 31.4 Mb/s Out / Q_R = Std : 47 .0 Mb/s Out / Q_R = HiQ : 55.8 Mb/s In / Q_R = HiR : 37 .2 Mb/s In / Q_R = Std : 49.7 Mb/s In / Q_R = HiQ : 66.4 Mb/s Intercom... -
Page 77: Antenna Management Unit (Amu)
Chapter 7 - Specifications 7.2 Antenna Management Unit (AMU) Item Value Dimensions (H x W x L) 250 x 200 x 480 mm (9.8 in 7 .8 x 18.9 in) Weight (approx.) 7 .5 kg (16.5 lbs) Operating temperature -20 to +45 °C (0 to +113 °F) Storage temperature -20 to +60 °C (0 to +140 °F) Environment... -
Page 78: Wireless Control Unit (Wcu)
Chapter 7 - Specifications Item Value Bandwidth < 100 kHz (@250 nW max. (according to EN 300 220) < 50 kHz (@-26dBc Baud rate 28,800 baud Emitted power 24 dBm ± 2 dBm (conducted) Applicable standards Radio: ETS 300 220 RF antenna BNC connector Data input... - Page 79 Chapter 7 - Specifications Item Value Frequency range 2.0 to 2.7 GHz Power consumption 25 W (typ.) Battery types LDK 5455/50 (Anton Bauer version); LDK 5455/60 (IDX version) Battery input voltage 10.5 VDC to 17 VDC Battery input current 3 A max. RF input level +18 dBm input for 0.5 W (+27 dBm) typical output RF input...
- Page 80 Chapter 7 - Specifications HD Wireless User’s Guide (v6.2)
-
Page 81: Chapter 8 - Exchanging The Rf Module
Chapter 8 - Exchanging the RF module Chapter 8 Exchanging the RF module In some situations you may choose to use a different frequency band. To use a different band, you need to exchange the right side cover (= camera RF module) of the wireless camera adapter. - Page 82 Chapter 8 - Exchanging the RF module Fold the cable into the space between the printed circuit board and the upper guiding rail to make sure that it will not get stuck. Mount the module on the adapter and secure it with the five screws. Change the RF receivers on the antenna bracket accordingly.
-
Page 83: Chapter 9 - Installing The Video Booster
Chapter 9 - Installing the Video booster Chapter 9 Installing the Video booster 9.1 Introduction The Video Booster for wireless cameras is a highly linear RF amplifier designed to be used as an accessory to the HD Wireless Camera Adapter. The Video Booster operates over a range from 2,000 to 2,700 MHz and delivers up to 500 mW of conducted power. -
Page 84: Assembly
Chapter 9 - Installing the Video booster 9.2 Assembly Switch off the camera. Remove the battery from the camera adapter. Plug the booster onto the camera adapter battery plate. RF coaxial cable Flexible antenna XLR-4 Power cable Plug the XLR-4 power cable from the booster in the XLR-4 power receptacle on the camera adapter. -
Page 85: Output Power
Chapter 9 - Installing the Video booster 9.3 Output power The HD Wireless Camera Adapter has an internal digital attenuator. It allows you to reduce RF output power to a value that is sufficient for your particular operating conditions. Maximum power is not always needed and it is good practice to reduce output power to the minimum required to reduce exposure and possible interaction between adjacent cameras. - Page 86 Chapter 9 - Installing the Video booster HD Wireless User’s Guide (v6.2)
Need help?
Do you have a question about the HD Digital Wireless camera system and is the answer not in the manual?
Questions and answers