Table of Contents
Advertisement
Viking Use & Care Manual
Viking Range Corporation
111 Front Street
Greenwood, Mississippi 38930 USA
(662) 455-1200
For product information,
call 1-888-VIKING1 (845-4641)
or visit the Viking Web site at
vikingrange.com
Professional Custom Freestanding Gas
& Gas Self-Clean Sealed Burner Ranges
F20542G EN
(122112)
Advertisement
Table of Contents

Related Manuals for Viking Professional Custom Freestanding Gas & Gas Self-Clean Sealed Burner Ranges


Summary of Contents for Viking Professional Custom Freestanding Gas & Gas Self-Clean Sealed Burner Ranges
- Page 1 Viking Use & Care Manual Viking Range Corporation 111 Front Street Greenwood, Mississippi 38930 USA (662) 455-1200 For product information, call 1-888-VIKING1 (845-4641) or visit the Viking Web site at vikingrange.com Professional Custom Freestanding Gas & Gas Self-Clean Sealed Burner Ranges F20542G EN (122112)
-
Page 2: Table Of Contents
1-888-VIKING1 (845-4641). Surface Burners-Automatic Reignition ________________________21 Vari-Simmer™_____________________________________________21 We appreciate your choice of a Viking range and hope that you will TruPower Plus™ Burner (where applicable) ___________________21 again select our products for your other major range needs. Surface Cooking Tips ______________________________________22... -
Page 3: Warnings
Warnings Warnings Warning and Important Safety Instructions appearing in this manual WARNING are not meant to cover all possible conditions and situations that may occur. Common sense, caution, and care must be exercised when installing, maintaining, or operating the appliance. If the information in this manual is not followed exactly, a fire or explosion may result causing property damage, ALWAYS contact the manufacturer about problems or conditions you do not... - Page 4 Warnings Warnings To Prevent Fire or Smoke Damage Child Safety (cont.) • Be sure all packing materials are removed from the appliance before • Children must be taught that the appliance and utensils in it can be hot. operating it. Let hot utensils cool in a safe place, out of reach of small children.
- Page 5 Warnings Warnings Cooking Safety Utensil Safety (cont.) (cont.) • ALWAYS place oven racks in the desired positions while oven is cool. • Only certain types of glass, glass/ceramic, ceramic or glazed utensils are Slide oven rack out to add or remove food, using dry, sturdy pot-holders. suitable for rangetop surface or oven usage without breaking due to the ALWAYS avoid reaching into the oven to add or remove food.
- Page 6 Warnings Warnings Self-Clean Oven (on VGSC self-clean models) About Your Appliance • Clean only parts listed in this guide. DO NOT clean door gasket. The door • For proper oven performance and operation, DO NOT block or obstruct the gasket is essential for a good seal. Care should be taken not to rub, damage, oven vent duct located on the right side of the air grille.
- Page 7 Warnings Warnings NOTICE WARNING NEVER cover any slots, holes or passages in the oven bottom or cover DO NOT turn the Temperature Control on during defrosting. Turning an entire rack with materials such as aluminum foil. Doing so blocks the convection fan on will accelerate the natural defrosting of the food air flow through the oven and may cause carbon monoxide poisoning.
-
Page 8: Before Using Range
Warnings Before Using Range All products are wiped clean with solvents at the factory to remove CAUTION any visible signs of dirt, oil, and grease which may have remained from the manufacturing process. Before starting to cook, clean the range DO NOT touch the exterior portions of the oven after thoroughly with hot, soapy water. -
Page 9: Range Features (Vgsc Self-Cleaning)
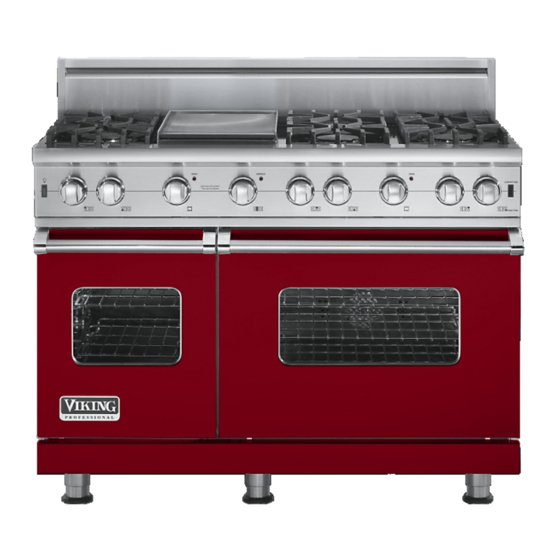
Range Features Range Features (VGSC Self-Cleaning) (VGSC Self-Cleaning) Left Oven Right Oven Center Front Burner Interior Oven Left Front Burner Right Front Burner Temperature Self-Clean Temperature Griddle Control Knob Light Switch Control Knob Control Knob Indicator Light Control Knob Indicator Light Indicator Light (15,000 BTU) (15,000 BTU) -
Page 10: Range Features (Vgcc Non-Self-Cleaning)
Range Features Range Features (VGCC Non-Self-Cleaning) (VGCC Non-Self-Cleaning) Right Front Burner Left Front Burner Left Oven Right Oven Interior Oven Griddle Temperature Control Knob Control Knob Temperature Light Switch Indicator Light Control Knob Indicator Light (15,000 BTU) (15,000 BTU) OVEN GRIDDLE OVEN Au toma ti c... -
Page 11: Oven Functions And Settings
The size of the pan and the volume of food can have a significant effect on how high or low a flame is needed for simmering. For this reason, Viking range and rangetop burners are engineered with a Vari-Simmer setting. The Vari-Simmer setting is not just one simmer setting, but provides a variable range of simmer settings. -
Page 12: Surface Cooking Tips
Surface Operation Surface Operation Griddle/Simmer Plate (on applicable models) Surface Cooking Tips The optional 15,000 BTU griddle is constructed of machined steel with a • Use low or medium flame heights when cooking in vessels that are blanchard finish and is uniquely designed to offer excellent cooking poor conductors of heat, such as glass, ceramic, and cast-iron. -
Page 13: Griddle/Simmer Plate Clean Up & Care
• Place food items on the grill, cook as desired. • For heavy duty cleaning, Viking offers a Griddle Cleaning Kit (model • To turn the grill off, turn the grill knob clockwise to the OFF position. -
Page 14: Grill Clean Up & Care
Surface Operation Surface Operation Char-Grill Assembly (cont.) Char-Grill Cooking Tips (cont.) • To test for doneness, make a small slash in the center of the meat, not the edge. This will prevent loss of juices. • Occasionally there may be flare-ups or flames above the grill due to drops of fat falling on the flavor generator plates. -
Page 15: Grill Cooking Chart
Surface Operation Surface Operation Grill Cooking Chart Grill Cooking Chart Suggested Special instructions Suggested Special instructions Weight or Flame cooking and tips Weight or Flame cooking and tips Food thickness size time (min) Food thickness size time (min) PORK BEEF Chops 1/2”(1.3 cm) 20 –... -
Page 16: Cooking Vessels
Surface Operation Using the Oven Cooking Vessels Conventional and Convection Cooking Each cook has his or her own preference for the particular cooking Because of variations in food density, surface texture and consistency, vessels that are most appropriate for the type of cooking being done. some foods may be prepared more successfully using the conventional Any and all cooking vessels are suitable for use in the range and it is bake setting. -
Page 17: Baking
Baking Baking BAKE To Use CONVECTION BAKE Function (Natural Airflow Bake) 1. Arrange the oven rack in the desired position before turning oven on. Full power heat is radiated from the U-shaped bake burners in 2. VGSC models—Set the oven function selector to “CONVECTION the bottom of the oven cavity BAKE”... -
Page 18: Convection Baking Chart
Baking Baking Conventional Baking Chart Convection Baking Chart Single Rack Time Single Rack Time Food Pan Size Position Temp (min) Food Pan Size Position Temp (min) BREADS BREADS Biscuits Cookie sheet 3 or 4 400˚ F (204˚ C) 10 - 12 Frozen Biscuits Cookie sheet 3 or 4... -
Page 19: Broiling
Baking Broiling Solving Baking Problems BROIL (Infrared Broil) Baking problems can occur for many reasons. Check the chart below The broil burner at the top of for the causes and remedies for the most common problems. It is the oven heats the metal screen important to remember that the temperature setting and cooking until it glows. - Page 20 Broiling Broiling Broiling Instructions Broiling Tips Broiling is a dry-heat cooking method using direct or radiant heat. • ALWAYS use a broiler pan and grid for broiling. They are designed It is used for small, individualized cuts such as steaks, chops, and to provide drainage of excess liquid and fat away from the cooking patties.
-
Page 21: Convection Dehydrate
Broiling Convection Dehydrate Convection Dehydrate Broiling Chart This oven is designed not only to cook, but also to dehydrate fruits and vegetables. Warm air is circulated by a motorized fan in the rear Type and Time of the oven and over a period of time, the water is removed from Cut of Meat Weight Setting... -
Page 22: Cleaning And Maintenance
Cleaning and Maintenance Cleaning and Maintenance Any piece of equipment works better and lasts longer when Note: For stubborn stains, use a non abrasive cleanser such as Bon maintained properly and kept clean. Cooking equipment is no Ami™ and a soft brush or soft Scotch Brite™ pad. exception. -
Page 23: Self-Clean Cycle (On Self-Clean Models)
Self-Clean Cycle Cleaning and Maintenance (on Self-Clean models) Stainless Steel Parts This oven features an automatic pyrolytic self-cleaning cycle. During All stainless steel body parts should be wiped regularly with hot soapy this cycle, the oven reaches elevated temperatures in order to burn-off water at the end of each cooling period and with a liquid cleaner soil and deposits. -
Page 24: Replacing Oven Lights
Replacing Oven Lights Self-Clean Cycle (on Self-Clean models) To start the Self-Clean cycle: WARNING 1. Close the door completely. ELECTRICAL SHOCK HAZARD 2. Turn the oven selector knob clockwise to the “SELF CLEAN” mode. Disconnect the electric power at the main fuse or circuit 3. -
Page 25: Door Removal
Door Removal Door Replacement and Adjustment WARNING TO PREVENT PERSONAL INJURY Before removing the doors, make sure the pins are properly installed in the hinges. Failure to do so can result in personal injury to hands and/or fingers. Open door completely. Reinstall door to range. -
Page 26: Troubleshooting
Temperature control knob is rotated too far obtain the name of an authorized service agency, or if you continue past broil position. to have service problems, contact Viking Range Corporation at 1-888-VIKING1 (845-4641), or write to: Door will not open. -
Page 27: Warranty
Viking Range Corporation, warrantor, agrees to repair or replace, at its option, any part which fails or is you. ANY IMPLIED WARRANTIES OF MERCHANTABILITY OR FITNESS FOR A PARTICULAR PURPOSE found to be defective during the warranty period. - Page 28 Notes Notes _____________________________________________________________________________________________________ _____________________________________________________________________________________________________ _____________________________________________________________________________________________________ _____________________________________________________________________________________________________ _____________________________________________________________________________________________________ _____________________________________________________________________________________________________ _____________________________________________________________________________________________________ _____________________________________________________________________________________________________ _____________________________________________________________________________________________________ _____________________________________________________________________________________________________ _____________________________________________________________________________________________________ _____________________________________________________________________________________________________ _____________________________________________________________________________________________________ _____________________________________________________________________________________________________ _____________________________________________________________________________________________________ _____________________________________________________________________________________________________ _____________________________________________________________________________________________________ _____________________________________________________________________________________________________ _____________________________________________________________________________________________________ _____________________________________________________________________________________________________ _____________________________________________________________________________________________________ _____________________________________________________________________________________________________ _____________________________________________________________________________________________________ _____________________________________________________________________________________________________ _____________________________________________________________________________________________________ _____________________________________________________________________________________________________ _____________________________________________________________________________________________________ _____________________________________________________________________________________________________ _____________________________________________________________________________________________________ _____________________________________________________________________________________________________ _____________________________________________________________________________________________________ _____________________________________________________________________________________________________ _____________________________________________________________________________________________________ _____________________________________________________________________________________________________ _____________________________________________________________________________________________________ _____________________________________________________________________________________________________...
Need help?
Do you have a question about the Professional Custom Freestanding Gas & Gas Self-Clean Sealed Burner Ranges and is the answer not in the manual?
Questions and answers