
Subscribe to Our Youtube Channel
Related Manuals for Yamaha RX-E200


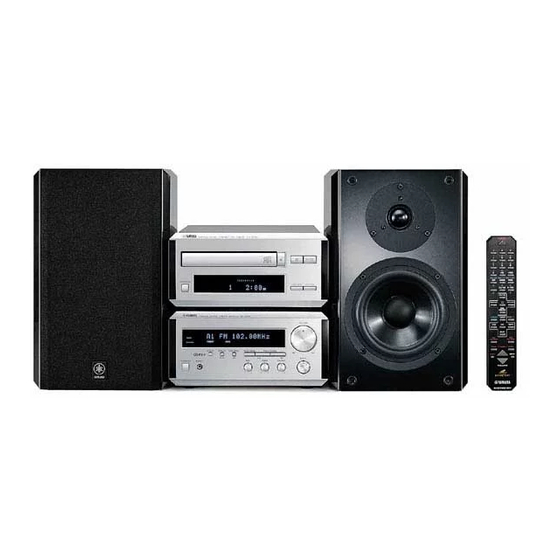
Summary of Contents for Yamaha RX-E200
- Page 1 CRX-E200 RX-E200 CDX-E200 Receiver/CD Player Récepteur/Lecteur CD OWNER’S MANUAL MODE D’EMPLOI BEDIENUNGSANLEITUNG BRUKSANVISNING MANUALE DI ISTRUZIONI MANUAL DE INSTRUCCIONES GEBRUIKSAANWIJZING...
- Page 2 On the rear panel CAUTION Use of controls or adjustments or performance of procedures other than those specified herein may CLASS 1 LASER PRODUCT result in hazardous radiation exposure. LASER KLASSE 1 PRODUKT LUOKAN 1 LASERLAITE KLASS 1 LASER APPARAT ATTENTION L’emploi de commandes, de réglages ou un choix de procédures différents des spécifications de cette...
- Page 3 ACCESORIOS INCLUIDOS • Desembale el aparato y verificar que los siguientes accesorios están en la caja. BIJGELEVERDE ACCESSOIRES • Controleer na het uitpakken of de volgende onderdelen voorhanden zijn. <RX-E200> • Remote control • AM loop antenna POWER • Télécommande •...
-
Page 4: Table Of Contents
ENGLISH INTRODUCTION Thank you for purchasing this YAMAHA product. We hope it will give you many years of trouble-free enjoyment. For the best performance, read this manual carefully. It will guide you in operating your YAMAHA product. FEATURES <RX-E200> <CDX-E200>... -
Page 5: Precautions
Install this unit in a well ventilated, cool, dry, and clean very small quantity of power. place with at least 10 cm above, behind and on both sides of the RX-E200 - away from direct sunlight, heat sources, vibration, dust, moisture, and/or cold. CAUTION FOR CARRYING THE UNIT... -
Page 6: Getting Started
Remote control operation range The remote control This remote control controls a whole system: not only NATURAL SOUND STEREO RECEIVER RX-E200 VOLUME RX-E200 but also CDX-E200. Moreover, a cassette deck TIMER (KX-E100) and MD recorder (MDX-E100) that level up STANDBY DISPLAY... -
Page 7: Connecting The Speakers
GETTING STARTED Connecting the speakers Never plug the AC power cord to the wall outlet until all connections are completed. Follow the steps as shown below to connect the system using the supplied cords and accessories. Right speaker Left speaker FM antenna AM loop antenna 75 Ω... -
Page 8: Connecting The System
Connect the AC power plug of MDX-E100 or KX-E100 (Except for the UK model). Caution • Never turn RX-E200 on until all connections between components have been completed. • Never connect or disconnect the system control cable and/or power cord while the system components are turned on. -
Page 9: Front Panel
RX-E200 NAMES OF BUTTONS AND CONTROLS Front panel y t r NATURAL SOUND STEREO RECEIVER RX-E200 VOLUME TIMER STANDBY DISPLAY MEMORY AUTO/MAN'L PRESET/BAND PRESET/TUNING TIME ADJ TIMER HOUR INPUT BASS TREBLE BALANCE STANDBY/ON PHONES – – 1 2 3 4 5 6 1 STANDBY/ON (P.8) -
Page 10: Remote Control
RX-E200 NAMES OF BUTTONS AND CONTROLS Remote control 1 POWER (P.8) POWER 2 Preset numbers (P.10) 3 FREQ/RDS (P.11) 4 PTY SEEK MODE (P.12/P.13) 5 PTY SEEK START (P.12/P.13) 6 A/B/C/D/E (P.10) 7 PRESET (P.10) +100 8 TUNER (RX-E200) (P.10) FREQ/RDS MODE –... -
Page 11: Basic Operations
RX-E200 will be put automatically into the standby mode under the following conditions: • The component connected to RX-E200 is in stop mode and not operated for 30 minutes. • TUNER or AUX is not selected as an input source. -
Page 12: Tuner Operations
You can find radio stations automatically and manually. tuning.” AUTO/MAN’L PRESET/TUNING Press AUTO/MAN’L so that “AUTO” disappears from the display. NATURAL SOUND STEREO RECEIVER RX-E200 VOLUME Press PRESET/TUNING (For a higher frequency) or (For a lower frequency) to select TIMER your desired station. -
Page 13: Presetting Stations
PRESET/TUNING After 40 stations or all FM and AM stations are stored, the display will show the preset station A1. NATURAL SOUND STEREO RECEIVER RX-E200 To recall a preset station VOLUME Press TUNER and select the desired number by pressing... -
Page 14: Receiving Rds Stations
RECEIVING RDS STATIONS Receiving RDS data The name of the RDS station being received is displayed. • If the unit cannot find a station with PS data, the unit stops RDS (Radio Data System) is a data transmission system searching and “NO PS” appears on the display. by FM stations in many countries. -
Page 15: Pty Seek Mode
RECEIVING RDS STATIONS To locate a station PTY SEEK mode Tune in the FM station. (Refer to page 9, or you can You can locate a desired station by selecting a program simply press TUNER on the remote control.) type. The unit searches all preset stations into the type of Press PTY SEEK MODE once so that “PTY”... -
Page 16: Optional Settings For Rds Functions
RECEIVING RDS STATIONS • If you receive an RDS station of some other Optional settings for country, the built-in clock is synchronized with RDS functions the time setting of the country. • If the built-in clock is not yet set for the current time or reset due to a power failure, etc., it will be defs The tuner has the following functions which make use of... -
Page 17: Using The Built-In Timer
You can adjust the brightness of the display. If you have DISPLAY HOUR connected the CD player (CDX-E200), cassette deck (KX-E100), and/or MD recorder (MDX-E100) to this unit, the brightness of the displays is automatically NATURAL SOUND STEREO RECEIVER RX-E200 VOLUME adjusted to that of this unit. DISPLAY TIMER STANDBY... -
Page 18: Before Using The Timer
You can also specify the turn off time. Press HOUR to set the hour. Press MIN to set the minute. DISPLAY HOUR NATURAL SOUND STEREO RECEIVER RX-E200 VOLUME 5. OFF Time Set the time the same way as above. TIMER... -
Page 19: Sleep Timer
USING THE BUILT-IN TIMER Sleep timer The unit can be turned off automatically at a selected SLEEP time. PRESET TUNER PRESET TAPE TAPE REC/PAUSE REC/PAUSE MODE DUBBING START SLEEP DISPLAY SLEEP VOLUME Play the desired sound source. Press SLEEP repeatedly until the desired sleep time appears in the display. -
Page 20: Front Panel
CDX-E200 NAMES OF BUTTONS AND CONTROLS Front panel NATURAL SOUND COMPACT DISC PLAYER CDX-E200 STANDBY/ON 1 STANDBY/ON (P.19) 4 ^ (Play/Pause) (P.19) 2 Display (this page) 5 & (Stop) (P.19) 3 $/! (Skip/Search Backward) (Open/Close) (P.19) 7 Disc Tray (P.19) ⁄/›... -
Page 21: Remote Control
CDX-E200 NAMES OF BUTTONS AND CONTROLS Remote control 1 POWER (P.19) POWER 2 Numeric buttons (P.19) • +100 button is used when operating MDX- E100. 3 REP (Repeat) (P.21) 4 RANDOM (Random) (P.20) 5 PROG (Program) (P.21) 6 TEXT/TIME (P.20) +100 7 ^ (Play/Pause) (P.19) FREQ/RDS MODE –... -
Page 22: Compact Disc Player Operations
Press STANDBY/ON to turn on this unit and also • This unit cannot play a CD-R or CD-RW disc unless the disc is RX-E200. finalized. Please make sure to finalize the disc on the CD recorder before playing on this unit. -
Page 23: Selecting The Time Display And Cd Text
COMPACT DISC PLAYER OPERATIONS Selecting the time Random-sequence play display and CD TEXT The unit can play all the tracks in a random sequence. You can select any of four time displays by pressing POWER TEXT/TIME. When you play a CD with CD TEXT, the disc title, artist name, and track name are also displayed. -
Page 24: Repeat Play
COMPACT DISC PLAYER OPERATIONS Repeat play Program play You can play any desired track or disc repeatedly. By creating a program, you can enjoy listening to your Press REP to select the repeat mode. favourite tracks in any desired order. As many as 30 tracks can be programmed in sequence. - Page 25 COMPACT DISC PLAYER OPERATIONS To stop program play mode Press &. Note • ⁄/› or $/! can be used during program play to skip to tracks within the program. To check program data Press & to stop program play. Press PROG. Then each time you press ⁄/› / $/!, the track number and the program number are displayed in the order of the program.
-
Page 26: Add Kx-E100 And/Or Mdx-E100 To Your System
ADD KX-E100 AND/OR MDX-E100 TO YOUR SYSTEM Operating the cassette deck, KX-E100 and MD recorder, MDX-E100 with the remote control MDX-E100 POWER 1 POWER 2 Numeric buttons 3 REP (Repeat) 4 RANDOM 5 TEXT/TIME 6 PROG (Program) +100 7 ^ (Play/Pause) FREQ/RDS MODE –... -
Page 27: Before Recording
B. Note • The displays 1~6 which include the component you have not connected to your receiver (RX-E200) will be skipped. To stop dubbing Press & on CDX-E200 or & on the recording component... -
Page 28: Tape Programming
ADD KX-E100 AND/OR MDX-E100 TO YOUR SYSTEM TAPE programming Select the desired track number using numeric buttons. • Repeat step 4 to continue programming tracks. By specifying the length of the tape, CDX-E200 programs • The remaining time is shown on the display. If the tracks or helps you to program tracks so they will fit onto track is longer than the remaining time, “Error”... -
Page 29: Additional Information
If it cannot be corrected, or if the fault is not listed in the SYMPTOM column, disconnect the power cord and contact your authorized YAMAHA dealer or service center for help. When taking the service, the MDX- E100 or KX-E100 may be needed. - Page 30 ADDITIONAL INFORMATION SYMPTOM CAUSE REMEDY Excessive static in FM broadcasts. Interference from starting motor of a nearby Position the FM antenna as high and as far away car. from nearby roads as possible. Connect using a coaxial cable. Interference from the thermostat of a nearby electrical appliance.
-
Page 31: Specifications
ADDITIONAL INFORMATION Specifications <RX-E200> Power Consumption (standby mode) [U.S.A. and Canada models] ....................1.3 W Amplifier section [U.K., Europe, Australia and General models] ....................1.4 W Minimum RMS output power per channel Dimensions (W x H x D) ..........50 W + 50 W (6Ω 1kHz 0.07% THD) ................
Need help?
Do you have a question about the RX-E200 and is the answer not in the manual?
Questions and answers