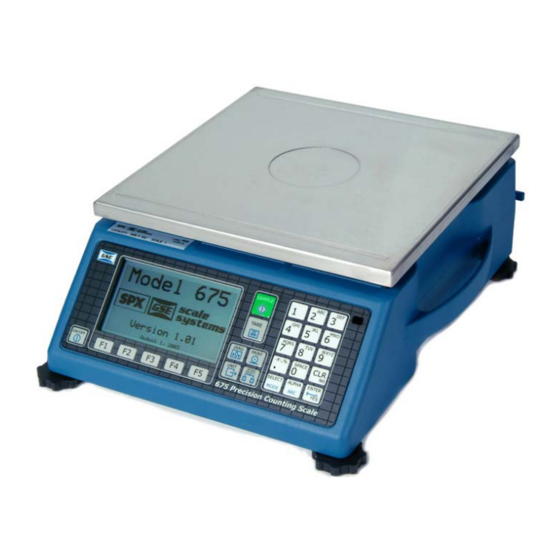
GSE 675 User Manual
Precision scale
Hide thumbs
Also See for 675:
- Technical reference manual (430 pages) ,
- User manual (48 pages) ,
- User instructions (48 pages)
Table of Contents
Advertisement
Advertisement
Table of Contents

Subscribe to Our Youtube Channel
Related Manuals for GSE 675


Summary of Contents for GSE 675
- Page 1 GSE Model 675 RECISION CALE USER’S GUIDE Version 3.1...
- Page 3 Model 675 USER’S GUIDE Version 3.1...
- Page 4 Information in this User’s Guide is subject to change without notice due to correction or enhancement. The information described in this manual is solely the property of GSE. No part of this manual may be reproduced or transmitted in any form or by any means, electronic or mechanical, including photocopying...
-
Page 5: Table Of Contents
UICK OUNT Quick Count Setup Menu ........................8 Setup the Quick Count Mode ........................8 Advanced Setup Menu .......................... 11 F2 – GSE C ............................ 12 USTOM APW L ............................12 OOKUP Setup the APW Lookup Mode ....................... 12 ... -
Page 7: Chapter 1: Reference
IMPORTANT! The Model 675 does not include an on/off switch and, therefore, must be installed near a power outlet socket that is easily accessible and in keeping with UL/CSA Safety Standards. -
Page 8: Load Cell
The load cell cable connects to J15 of the main board. The J15 connector is accessible from the load cell cavity of the Model 675 enclosure Figure 2: Model 675 Load Cell Installation Install the new load cell by placing it in the load cell cavity. Fasten the load cell by installing the bolts on the bottom plate. -
Page 9: Keypad
Chapter 1 Keypad The Model 675 comes standard with a durable and versatile polymeric switch plate. The keys are large and easy to use. The keypad is easily cleaned with a damp cloth or non-abrasive cleaner. Figure 4: Model 675 Keypad... -
Page 10: Alpha Entry
LPHA NTRY The Model 675 provides quick and easy alpha entry. The [ALPHA] key becomes the “Alpha enable/disable” key. The alpha characters assigned to each numeric key mimic a telephone layout with the addition of the [0 /s pa ce] key. -
Page 11: Rear Panel Connections
OMMUNICATION ONNECTIONS Comm port 1 and 2 are standard on the Model 675. Comm port 3 and Comm port 4 are optional. Refer to Table 4 for communication port pin outs. Table 4: Communication Ports 1 - 4 Pin Out... -
Page 12: Remote Key Connections
EMOTE KEY CONNECTIONS The Model 675 allows for two remote key inputs. The inputs can be used for invoking a macro to perform tasks such as zero, print, tare etc. See the chart below for comm port and pin assignment. Refer to the Model 672/675 technical reference manual for function key assignment. -
Page 13: Chapter 2: Configuration
Chapter 2: C ONFIGURATION The GSE 675 Precision Counting Scale comes from the factory with the Application Menu enabled. This is where you will choose the preferred method of parts counting or weighing. See the explanations of each method below. After each counting method are the instructions for setting up that method. -
Page 14: Count
Model 675 User’s Guide F1 – Quick Count The QUICK COUNT mode is designed for performing a quick sample and count. The soft keys are used in secession from left to right to increase speed and ease of parts counting. Basic functionality is offered to simplify operation. - Page 15 Choose one of the display types and press [F5] (EXIT) to save the change and return to the main menu. TYLE This is the classic GSE 2x5 display. The weight or quantity will be displayed in larger font while the prompts will be to the right of the weight display.
-
Page 16: Preset Print Formats
Model 675 User’s Guide Preset Print Formats The preset print formats are viewable on the LCD display. Use the [F3] left arrow and [F4] right arrow keys to view all transmit styles. Choose the desired format by viewing it on the screen. Press the [F5] (EXIT) key to save the format and return to the main menu. -
Page 17: Advanced Setup Menu
This tab allows access to the setup mode to make changes to parameters such as full scale, count accuracy and baud rate etc. Please refer to the Model 672/675 technical reference manual for details on more advanced setups and configurations. -
Page 18: F2 - Gse Custom
Model 675 User’s Guide F2 – GSE Custom Presently APW LOOKUP is the only application offered under GSE Custom. The APW LOOKUP offers the flexibility of storing and recalling part numbers. The average piece weight and part description will be stored and recalled with the part number. -
Page 19: Apw Lookup Setup Menu
Chapter 2 APW L OOKUP ETUP Use the [F5] Setup key from the “Application Menu” screen to gain access to different menus. Change Delete Key-In Setup Exit Sample Part# Menus Display Print Advance Exit Style Menu Setup Style Style Style Exit Modes Next... -
Page 20: Setup Menus
Display Style Different display styles are offered to help customize the Model 675 parts counter to fit your needs. Choose one of the display types and press [F5] (EXIT) to save the change and return to the main menu. By using the [SELECT] key several modes can be viewed from the “Application Menu”... -
Page 21: Set Modes
Quantity Part # TYLE This style incorporates the classic GSE 2x5 display and a second display, which will show three other parameters. Press the [SELECT] key from the “Application Menu” screen to toggle through the different parameter choices. Large Display... -
Page 22: Print Menu
Model 675 User’s Guide Print Menu DEFAULT PARAMETER DESCRIPTION KEYPRESSES SETTING Print stored part numbers to printer or Print data to comm. 1, 2 or display. Use [F1] or PRINT PART#S Not applicable computer [F2] Download part number, description, D-LOAD PART#S... -
Page 23: Advanced Setup Menu
Chapter 2 Print #4 1/31/05 <Barcode here> <Barcode here> 8888 Lot # APW: <Barcode here> 0.054139 lb TARE: <Barcode here> 1.15 lb QTY: Print #5 - 9 Reserved for future use. Custom Print CREATE A CUSTOM TRANSMIT FORMAT! → SEE THE TECH MANUAL FOR DETAILS →... -
Page 24: F3 - Gse Default
65002 (refer to the Model 672/675 technical reference manual for details). The Model 675 can still be used as a parts counter after it is factory defaulted. Refer to page 23 for more details on simple counting. -
Page 25: Chapter 3: Operation
This chapter will give detailed operation instructions on how to use each preprogrammed mode. The Model 675 is designed to operate from the 5 soft keys or the dedicated keys of the keypad. The advantage of using the soft keys is they are placed in succession for easy operation. -
Page 26: Accumulate
Model 675 User’s Guide 3. Add the sample pieces and press the [F1] Accept key to accept the sample. 4. Continue to add pieces to count. Without Auto Tare 1. If the sample size is known and a container is used: Place an empty container on the scale and press [TARE] key. -
Page 27: Apw Lookup
Chapter 3 APW Lookup Follow the steps below to perform a sample and count parts. Also the ability exists to store part numbers, lot numbers, bin numbers and average piece weight (APW). Sample Uses default sample size and prompts user to add that many pieces. Store Store a part number with average piece weight and description. -
Page 28: Without Auto Tare
Model 675 User’s Guide Without Auto Tare 1. If the sample size is known and a container is used: Place an empty container on the scale and press [TARE] key. Place the sample in the container. Key in the sample size and then press the [F1] Sample or [SAMPLE] key. The scale will accept the current weights as a sample and will display the quantity. -
Page 29: Accumulate
After accumulating, the weight must return to zero before another accumulation will be added. The display will show CLEAR WGHT! if the weight is not within the zero threshold. Remove weight and try again. This feature is necessary to avoid double accumulations. GSE Default Simple Keypad Sample ETHOD 1. - Page 30 Model 675 User’s Guide ITHOUT 1) If the sample size is known and a container is used: Place an empty container on the scale and press key. b. Place the sample in the container. Key in the sample size and then press the key.
-
Page 31: Chapter 4: Calibration
Chapter 4: C ALIBRATION The calibration mode is accessible through the configuration menu or from the weigh mode. Calibration Methods There are six methods of calibration. Press to select a calibration method. Press to begin the calibration method selected. Refer to the appropriate section for calibration instructions. •... -
Page 32: Access Calibration From Apw Lookup Or Quick Count Mode
Model 675 User’s Guide APW L CCESS ALIBRATION FROM OOKUP OR UICK OUNT 1. From the main menu press the (Setup) key. 2. Press (Setup Menus) key. 3. Press (CAL) key. 4. Enter the access code and press CCESS ALIBRATION FROM THE EIGH 1. -
Page 33: Last Zero
Chapter 4 Last Zero Last Zero allows span re-calibration without removing the applied test weight. The last zero established by pressing from the weigh mode will be used as the zero reference. This procedure is especially useful when performing routine tolerance checks on large capacity scales. A scale found to be out-of- tolerance can be easily calibrated without having to remove the test weights to reestablish a zero reference. -
Page 34: Temporary Zero
Model 675 User’s Guide Temporary Zero Temp Zero is used to calibrate without establishing a new zero. Calibration can be performed without removing the currently applied gross load. A temporary zero is established so that test weights can be added during calibration. The original zero reference determined during the previous calibration is not affected. -
Page 35: Only Zero
Chapter 4 Only Zero Only Zero is used for zero calibration only. This calibration procedure is primarily used for the zero reference after changing a scale’s dead-load, such as adding safety rails to a scale deck or installing a mixer motor on a hopper scale. -
Page 36: Known Loadcell Output
Model 675 User’s Guide Known Loadcell Output Known LCOut is used to calibrate without test weights. The exact full scale mV/V rating must be known for each load cell. All load cells must be of the same full scale capacity. This procedure works best for hopper scales where weight is evenly distributed and signal trimming is not required. - Page 37 Chapter 4 Repeat the calibration by pressing at the prompt. CAL OK? 13. Once the calibration is accepted in step5, press at the prompt and again at ENTER=SAVE prompt to save the new calibration and exit the calibration mode. ENTER=EXIT - or - To exit the calibration mode without saving the new calibration, press at the...
-
Page 39: Chapter 5: Legal For Trade
Technology (NIST). For more information, call (301) 975-3058, or visit http://www.nist.gov. The Model 675 NTEP Certificate of Conformance (C.O.C.) is 05-023A2. In order to configure the Model 675 to comply with NTEP requirements, parameter P440 (NTEP) must be enabled. This ensures the following: •... -
Page 40: Ntep Custom Setup
The Model 675 has two types of sealing provisions, a physical seal and a three event audit trail counter. Check with your local weights and measures authority to determine your requirements. -
Page 41: Audit Trails
UDIT RAILS Three separate incrementing, non-resetable audit trail parameters are used by the Model 675 to indicate changes to various parameters, P60201 – OIML, P60203 – Calibration , and P60204 – Setup. An audit trail counter will increment only once upon exiting the Setup Mode and saving changes regardless of how many settings were changed. -
Page 42: Omil Requirements
Most NTEP requirements will also apply. See the NTEP section of this chapter for additional considerations. Enabling OIML Operation In order to configure the scale to comply with OIML requirements, P410 must be enabled in the setup mode (see Model 672/675 Technical Reference Manual for details). Doing this will ensure the following:... -
Page 43: Chapter 6: Troubleshooting
Chapter 6: T ROUBLESHOOTING PERATIONAL RRORS ESSAGE ESCRIPTION Input signal less than negative full scale. If this is due to excessive loading, reduce the load. Otherwise check the load cell connections. If a 4 wire load cell cable is being used, check that the sense jumpers are in Code02 Under place. -
Page 44: Calibration Errors
Okay? ##### enter. Upon each power-up, the Model 675 tests the integrity of its firmware. If Cksum the result is not correct this message is displayed and the scale is not error usable. ReFlash the Model 675. -
Page 45: Communication Errors
COMM port number on which the problem occurred. The Model 675 did not check it’s receive data register in time, thus missing a character. To prevent the problem, try reducing the baud rate portX (P200). The ‘X’ in the error message represents the COMM port number error on which the problem occurred. - Page 46 Model 675 User’s Guide Version 3.1 Part Number 39-10-40879...
Need help?
Do you have a question about the 675 and is the answer not in the manual?
Questions and answers