Advertisement
Table of Contents
- 1 Instruction Manual
- 2 Safety Guidelines - Definitions
- 3 Slope Operation
- 4 Handle Assembly
- 5 Assembling the Grass Catcher
- 6 Operating Instructions
- 7 Mulching Tips
- 8 Cleaning and Storage
- 9 Preventing Corrosion
- 10 Maintenance
- 11 Blade Balancing
- 12 Storage Position
- 13 Service Information
- 14 Troubleshooting
- Download this manual
See also:
Instruction Manual
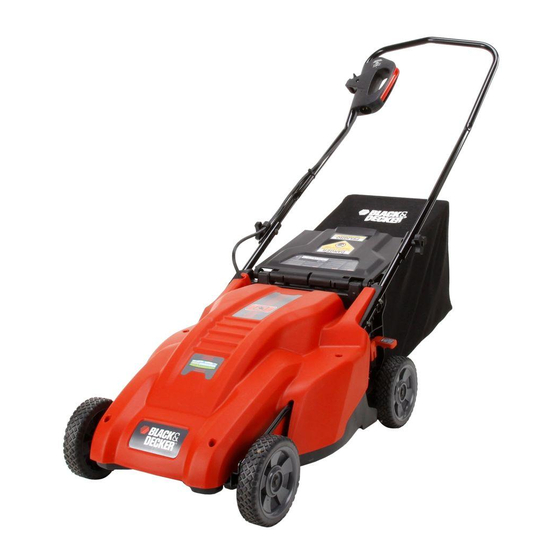
18 Inch (46cm) Mulching Rear Bag Mower
Go to www.BlackandDecker.com/NewOwner to register your new product.
PLEASE READ BEFORE RETURNING THIS PRODUCT FOR ANY REASON:
If you have a question or experience a problem with your Black & Decker purchase, go to
If you can't find the answer or do not have access to the internet, call 1-800-544-6986 from 8 a.m. to 5 p.m. EST Mon. -- Fri. to speak with an agent.
KEY INFORMATION YOU SHOULD KNOW:
• Do not operate mower unless handle is locked into position.
• For best cutting results, keep blade sharpened and balanced.
• Inspect and thoroughly clean your mower after each use (a deck with caked grass will degrade performance).
• Make sure mowing area is clear of other persons or pets prior to starting and during operation.
INSTRUCTION MANUAL
Thank you for choosing Black & Decker!
for instant answers 24 hours a day.
Please have the catalog number available when you call.
SAVE THIS INSTRUCTION MANUAL FOR FUTURE REFERENCE.
VEA EL ESPAÑOL EN LA CONTRAPORTADA.
INSTRUCTIVO DE OPERACIÓN, CENTROS DE SERVICIO Y PÓLIZA DE GARANTÍA.
ADVERTENCIA: LÉASE ESTE INSTRUCTIVO ANTES DE USAR EL PRODUCTO.
Catalog Number
MM1800
Date Code:
HTTP://WWW.BLACKANDDECKER.COM/INSTANTANSWERS
Advertisement
Table of Contents

Related Manuals for Black & Decker MM1800


Summary of Contents for Black & Decker MM1800
-
Page 1: Instruction Manual
18 Inch (46cm) Mulching Rear Bag Mower INSTRUCTION MANUAL Catalog Number MM1800 Date Code: Thank you for choosing Black & Decker! Go to www.BlackandDecker.com/NewOwner to register your new product. PLEASE READ BEFORE RETURNING THIS PRODUCT FOR ANY REASON: HTTP://WWW.BLACKANDDECKER.COM/INSTANTANSWERS If you have a question or experience a problem with your Black & Decker purchase, go to for instant answers 24 hours a day. -
Page 2: Safety Guidelines - Definitions
SAFETY GUIDELINES - DEFINITIONS It is important for you to read and understand this manual. The information it contains relates to protecting YOUR SAFETY and PREVENTING PROBLEMS. The symbols below are used to help you rec- ognize this information. DANGER: Indicates an imminently hazardous situation which, if not avoided, will result in death or serious injury. -
Page 3: Slope Operation
16. If the mower should start to vibrate abnormally, release the switch lever, wait for the blade to stop and unplug the mower, then check for the cause immediately. Vibration is generally a warning of trouble. 17. Always wear proper eye and respiratory protection when operating the mower. 18. - Page 4 indicates the Mower is “DOUBLE INSULATED” • • OUTDOOR USE EXTENSION CORDS. To reduce the risk of electric shock, use only with an extension cord intended for outdoor use, such as an extension cord of type SW-A, SOW-A, STW-A, STOW-A, SJW-A, SJOW-A, SJTW-A, or SJTOW-A. •...
-
Page 5: Handle Assembly
HANDLE ASSEMBLY - (FIGURE B) 1. Align the round holes in the lower handle section (B1) with the two threaded studs (B2) in the side wall of the deck. 2. Push the handle section onto the studs fully. 3. Thread on two lock nuts (B3) and tighten with a 1/2 inch (13mm) wrench. Repeat for other side. 4. -
Page 6: Operating Instructions
CLIP PINCE PINZA WHEEL HEIGHT ADJUSTMENT (1-1/4 IN. (32mm) TO 3-1/2 IN. (89mm) FIGURE E NOTE: Certain types of grass or grass conditions may require varying the height of the mower deck. 1. Before making any adjustments, turn mower off, wait for blade to stop, and unplug mower. -
Page 7: Mulching Tips
SWITCH USE (FIGURE G) Your mower is equipped with a special switch. To operate the switch, insert your finger into the opening (Figure G) and push the lever out so that you can grasp it with your other hand. Pull the lever back to turn the unit on and hold it against the mower handle to keep it running. -
Page 8: Cleaning And Storage
• Change your cutting pattern from week to week. Mow north to south one week and east to west the next week. This will help prevent matting and graining of the lawn. CAUTION: Do not attempt to unclog the blade chamber by dropping or tapping the mower on the ground. This can damage the mower. INSTALLING GRASS CATCHER -FIGURE J &... -
Page 9: Maintenance
MAINTENANCE Before each mowing session unplug the mower and ensure that the blade has stopped. Check all nuts, bolts and screws to ensure proper tightness, Be sure to check the blade fastening system. IMPORTANT: To assure product SAFETY and RELIABILITY, repairs, maintenance and adjustment should be performed by authorized service centers or other qualified service organizations. -
Page 10: Blade Balancing
BLADE SHARPENING - FIGURE O KEEP BLADE SHARP FOR BEST MOWER PERFORMANCE. A DULL BLADE DOES NOT CUT GRASS CLEANLY OR MULCH PROPERLY. USE PROPER EYE PROTECTION WHILE REMOVING, SHARPENING, AND INSTALLING BLADE. ENSURE MOWER IS UNPLUGGED. Sharpening the blade twice during a mowing season is usually sufficient under normal circumstances. -
Page 11: Troubleshooting
DECK WARRANTY Lifetime Warranty for DECK only against any defects in material or workmanship. TROUBLESHOOTING PROBLEM CORRECTIVE ACTION -Motor will not start - Check fuse or circuit breaker to ensure power is to outlet - Check extension cord with another electrical device to ensure cord is good. - Call customer service representative 1-800-544-6986 -Motor keeps slowing - The underside of the mower may be plugged with clippings.
Need help?
Do you have a question about the MM1800 and is the answer not in the manual?
Questions and answers