Table of Contents
Advertisement
Available languages
Available languages
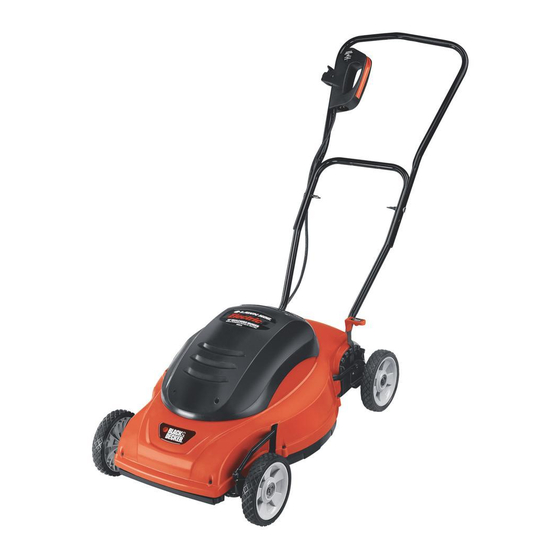
18 INCH (46cm) MULCHING MOWER
Date Code:
KEY INFORMATION YOU SHOULD KNOW:
• Lifetime 3 in 1 deck-Mulching, Discharging and Bagging (bag optional).
• Do not operate mower unless handle is locked into position.
• Ensure shroud hole covers are properly installed.
• For best cutting results, keep blade sharpened and balanced.
• Inspect and thoroughly clean your mower after each use (a deck with caked grass will degrade performance).
• Make sure mowing area is clear of other persons or pets prior to starting and during operation.
SAVE THIS MANUAL FOR FUTURE REFERENCE
INSTRUCTION MANUAL
MM575
Advertisement
Table of Contents

Related Manuals for Black & Decker MM575


Summary of Contents for Black & Decker MM575
-
Page 1: Instruction Manual
18 INCH (46cm) MULCHING MOWER INSTRUCTION MANUAL MM575 Date Code: KEY INFORMATION YOU SHOULD KNOW: • Lifetime 3 in 1 deck-Mulching, Discharging and Bagging (bag optional). • Do not operate mower unless handle is locked into position. • Ensure shroud hole covers are properly installed. •... - Page 2 5. Be sure the area surrounding the mower is clear of bystanders HANK CHOOSING HANK CHOOSING before operating. All bystanders and pets should be kept at a safe & & LACK ECKER LACK ECKER distance. Stop the mower if anyone enters the area surrounding the mower.
-
Page 3: Save These Instructions
depending on cord length and nameplate ampere rating. If in doubt, GENERAL SERVICE use the next heavier gage. The smaller the gage number, the heavier 1. Never operate mower in a closed area. the cord. 2. Keep all nuts and bolts tight to be sure the equipment is in safe working condition. - Page 4 ASSEMBLY INSTRUCTIONS REMOVING THE HANDLE (FIGURE 4) BEFORE ASSEMBLING YOUR MOWER, CHECK THAT YOU HAVE 1. UNPLUG TOOL, AND WAIT FOR BLADE TO COME TO A RECEIVED THE FOLLOWING IN THE SHIPPING CARTON. COMPLETE STOP. SEE FIGURE 1. 2. Brace the rear of the mower so that it cannot roll backward. A.
- Page 5 the switch housing and remove all the slack in this section of the RECOMMENDED APPROXIMATE CUTTING HEIGHT extension cord. The cutting height should be higher in hot weather or shade , and 4. Place the loop over the strain relief tab on the switch housing and lower for the last mow before winter.
- Page 6 From time to time turn the mower off and wait for the blade to stop. Then unplug the power cord and turn the mower on its side. Using an object such as a stick or rag, wipe out any accumulation of grass in the blade area.
- Page 7 TROUBLE SHOOTING/CORRECTIVE ACTION GUIDE: cut area of the grass will not be exposed to intense sunlight. Keep the mowing blade sharp for a nice clean cut. This improves PROBLEM CORRECTIVE ACTION the mower’s performance and enhances the look of your lawn. A -Motor will not start - Check fuse or circuit breaker to ensure dull blade shatters and bruises the tips of the grass.
- Page 8 FRANÇAIS TONDEUSE DÉCHIQUETEUSE 46 cm (18 po) GUIDE D’UTILISATION MODÈLE MM575 VOICI DES RENSEIGNEMENTS IMPORTANTS QU’IL VOUS FAUT SAVOIR : • Châssis 3 en 1 avec garantie à vie-Déchiquetage, Éjection et Ensachage (Sac optionnel). • Ne pas utiliser la tondeuse si la poignée n’est pas bloquée en position. •...
- Page 9 ’ & D ’ & D UTILISATION GÉNÉRALE ERCI VOIR CHOISI LACK ECKER ERCI VOIR CHOISI LACK ECKER 1. Lire, comprendre et respecter les directives figurant sur la ISITEZ ISITEZ tondeuse et dans le mode d’emploi avant de commencer. 2. Ne pas approcher les mains ou les pieds de la tondeuse ou de sa LACKAND ECKER WNER...
- Page 10 4. Ne pas tondre près des falaises, des fossés ou des talus. Il y a un • PRENDRE SOIN DE LA TONDEUSE. Maintenir les arêtes de coupe risque de perdre sa stabilité ou son équilibre. tranchantes et propres afin d’assurer la meilleure performance et pour réduire le risque de blessures.
- Page 11 • RÉPARATIONS ET ENTRETIEN. Les réparations, l’entretien et tout MONTAGE DE LA POIGNÉE (FIGURE 2) réglage non précisés dans ce mode d’emploi devraient être effectués 1. Le carton de la tondeuse contient la tondeuse, 2 poignées, une à un centre de réparation autorisé Black & Decker ou à tout autre goulotte d’éjection et un sac en plastique contenant des pièces.
- Page 12 UTILISATION DE L’INTERRUPTEUR (FIGURE 7) La tondeuse est équipée d’un interrupteur spécial. Pour actionner l’interrupteur, insérer le doigt dans l’ouverture (Figure 7) et pousser la manette de façon à pouvoir l’attraper avec l’autre main. Tirer la manette vers l’arrière pour allumer l’appareil et la maintenir contre la poignée de la tondeuse pour la garder en marche.
- Page 13 SAC À GAZON LATÉRAL (DISPONIBLE EN OPTION À UN PRIX RÉGLAGE DE LA HAUTEUR DE LA ROUE (FIGURE 9) 1. AVANT D’EFFECTUER DES RÉGLAGES, ÉTEINDRE, SPÉCIAL) ATTENDRE QUE LA LAME S’IMMOBILISE ET DÉBRANCHER Il est recommandé d’ensacher les herbes des tontes des premiers LA TONDEUSE.
- Page 14 3. Porter des gants et des lunettes de protection appropriées. Faire GUIDE DE DÉPANNAGE/ACTIONS CORRECTIVES : attention aux arêtes tranchantes de la lame. Placer le morceau de PROBLÈME ACTION CORRECTIVE bois et enlever l’écrou à embase comme indiqué à la figure 10. - Le moteur ne démarre pas - Vérifier le fusible ou le disjoncteur pour s’assurer que la prise est...
- Page 15 PROBLÈME ACTION CORRECTIVE INFORMATION SUR LES RÉPARATIONS -Connexion de l’éjecteur/sac - L’herbe peut être trop humide, Tous les centres de réparation Black & Decker sont dotés de essayer encore lorsque l’herbe est personnel qualifié en matière d’outillage électrique; ils sont donc en sèche.
- Page 16 ESPAÑOL PODADORA DESBROZADORA DE 46 CM (18 PULG.) MANUAL DE INSTRUCCIONES MM575 INFORMACIÓN CLAVE QUE USTED DEBE CONOCER: • Plataforma 3 en 1 para toda la vida: desbroce, descarga y embolsado (bolsa opcional). • Para operar esta podadora, el mango debe estar bloqueado en posición. •...
- Page 17 5. Antes de operar la podadora, asegúrese de que el área ¡G & D ¡G & D RACIAS ELEGIR LACK ECKER RACIAS ELEGIR LACK ECKER circundante esté libre de espectadores. Todos los espectadores y las mascotas se deben mantener a una distancia segura. Detenga la podadora si alguna persona ingresa en el área circundante.
- Page 18 de la podadora se ajustará en un cable prolongador polarizado de MANTENIMIENTO GENERAL una sola manera. Si el cable prolongador no se ajusta totalmente en 1. Nunca opere la podadora en un área cerrada. el tomacorriente, invierta el enchufe. Si aún así no se ajusta, obtenga 2.
- Page 19 corroborar su desgaste o deterioro. Si está muy desgastado, ACOPLE DEL MANGO (FIGURA 3) reemplácelo por una bolsa nueva para su seguridad. 1. DESENCHUFE LA HERRAMIENTA Y ESPERE QUE LA HOJA • TENGA MUCHO CUIDADO cuando maniobre la podadora en reversa SE DETENGA POR COMPLETO.
- Page 20 3. Alinee las flechas del conducto de descarga con las flechas de TENDIDO DEL CABLE PROLONGADOR AL TOMACORRIENTE posicionamiento en la plataforma de la podadora e inserte el (FIGURA 8) conducto de descarga, como se muestra. 1. Coloque la mayor parte del cable prolongador cerca del tomacorri- 4.
- Page 21 LIMPIEZA Y ALMACENAMIENTO PELIGRO: : Asegúrese de que la podadora esté desenchufada POSICIONES DE ALTURA DE y de que la hoja se haya detenido. CORTE Antes de guardar la podadora, quite y limpie los desechos de la parte Posición Corte externa de la podadora y del interior del protector.
- Page 22 SOLUCIÓN DE PROBLEMAS/GUÍA DE MEDIDAS CORRECTIVAS: PROBLEMA MEDIDA CORRECTIVA - El motor no arranca - Controle el fusible o el interruptor automático para asegurar que llegue corriente al tomacorriente - Controle el cable prolongador con otro dispositivo eléctrico para asegurar que funcione.
- Page 23 A CONTINUACIÓN, LE BRINDAMOS ALGUNOS CONSEJOS INFORMACIÓN DE MANTENIMIENTO ÚTILES PARA APROVECHAR AL MÁXIMO SU PODADORA Todos los Centros de mantenimiento de Black & Decker cuentan con BLACK & DECKER... Y CONSERVAR SU CÉSPED EN PERFECTAS personal altamente capacitado dispuesto a brindar a todos los clientes CONDICIONES un servicio eficiente y confiable en la reparación de herramientas El primer corte se debe realizar en primavera cuando el césped...
- Page 24 Cat No. MM575 Form No. 90512518 REV. 1 DECEMBER 2007 Copyright © 2007 Black & Decker Printed in Mexico...
Need help?
Do you have a question about the MM575 and is the answer not in the manual?
Questions and answers