Nikon Coolpix 5600 Quick Start Manual
Digital camera
Hide thumbs
Also See for Coolpix 5600:
- Manual (140 pages) ,
- Repair manual (101 pages) ,
- Owner's manual (128 pages)
Table of Contents
Advertisement
D I G I T A L
C A M E R A
Shoot
Take pictures for any occasion
– just point and shoot!
Review
View your pictures at a touch
of a button.
Transfer
Copy pictures to your computers
quickly and easily using Picture-
Project.
For information on installing PictureProject,
see pages 13-22.
En
pp. 2 - 10
pg. 11
pp. 12 - 29
Advertisement
Table of Contents

Related Manuals for Nikon Coolpix 5600


Summary of Contents for Nikon Coolpix 5600
- Page 1 D I G I T A L C A M E R A Shoot pp. 2 - 10 Take pictures for any occasion – just point and shoot! Review pg. 11 View your pictures at a touch of a button. Transfer pp.
-
Page 2: Check The Package Contents
Your Nikon COOLPIX digital camera is designed to the highest standards and includes complex elec- tronic circuitry. Only Nikon brand electronic accessories (including AC adapters) certified by Nikon specifically for use with your Nikon digital camera are engineered and proven to operate within the operational and safety requirements of this electronic circuitry. -
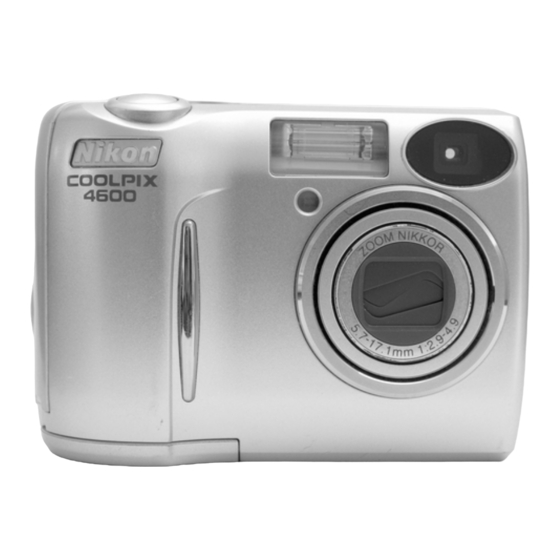
Page 3: Parts Of The Camera
Parts of the Camera The principle camera parts are listed below. See the Nikon Guide to Digital Photogra- phy with the E5600/E4600 for more information. Power switch Power-on lamp Shutter-release button Eyelet for camera strap Memory card slot cover Mode dial... -
Page 4: Take Pictures
Take Pictures *If the package contains alkaline batteries, skip Step 1 and go straight to Step 2. Step 1 Charge the batteries Connect the power cable to the MH-71 battery charger and insert the wall plug into a power outlet . - Page 5 Replacing Batteries Turn the camera off and make sure that the power-on lamp has gone out before removing or inserting batteries. Important Read Battery Warnings Read and follow all warnings and instructions supplied by the battery man- ufacturer. Damaged Batteries The following batteries can not be used: •...
-
Page 6: Attach The Camera Strap
Step 2 Attach the camera strap Attach the camera strap securely to the eyelet on the camera body as shown below. Step 3 Insert the batteries Open the battery-chamber cover Slide the battery-chamber cover latch as illus- trated ( ), pull the battery-chamber cover ( ) and open ( ). -
Page 7: Turn The Camera On
SET-UP menu. The default setting is the type of the included batteries. When any other type of battery is used, change the setting. For more information, see the Nikon Guide to Digital Photog- raphy with the E5600/E4600 (P. 102). -
Page 8: Choose A Language And Set The Clock
Step 5 Choose a language and set the clock The first time the camera is turned on, a language-selection dialog will be displayed in the monitor. Follow the steps below to choose a language and set the time and date. The multi selector is used to navigate through the camera menus. - Page 9 HOME TIME ZONE HOME TIME ZONE HOME TIME ZONE HOME TIME ZONE London, Casablanca London, Casablanca :Back :Back :Set :Set :Back :Back :Set :Set Display map of world time zones. Select home time zone. DATE DATE DATE DATE 0 1 . 2005 0 1 .
- Page 10 Secure Digital (SD) memory card is inserted in the camera, in which case pic- tures will be stored on the card. For information on inserting a memory card, see the Nikon Guide to Digital Photography with the E5600/E4600 (P.10). Check indicators in the monitor.
- Page 11 Ready the camera Hold the camera steadily in both hands. AUTO AUTO 10 10 Don't Block the Shot To avoid dark or partially obscured pictures, keep your fingers and other objects away from the lens and flash window. Frame the subject Frame the subject in the center of the monitor.
- Page 12 Focus Press the shutter-release button halfway to set focus and exposure. Focus and exposure will lock while the shutter-release button is pressed halfway. Red (!) lamp Green (AF) lamp AF AF AF AF Focus indicator AUTO AUTO 10 10 With the shutter-release button pressed halfway, check focus and flash: Flash will fire when picture is taken.
-
Page 13: View Pictures
If the USB cable provided with the camera is used to connect the camera to a printer that supports PictBridge, you can transfer pictures to the printer and print them directly from the camera. For more information, see the Nikon Guide to Dig- ital Photography with the E5600/E4600 (P.56). -
Page 14: Transfer Pictures
• Mac OS X (10.1.5 or later) • Only computers with built-in USB ports supported • Users of Mac OS 9.0–9.2, and versions 10.1.2–10.1.4 of Mac OS X can download Nikon View 6 at http://nikonim- aging.com/ . See the back cover for detailed system requirements. - Page 15 • If PictureProject 1.0 or 1.0.1 for another COOLPIX model is already installed, uninstall it. Note to Users of Other Nikon Software (Nikon View/Nikon Capture) Uninstall Nikon View before installing PictureProject. For information on using PictureProject with Nikon Capture, see the PictureProject Reference Manual (on CD).
- Page 16 Installing PictureProject (Windows) Windows XP Home Edition, Windows XP Professional, Windows 2000 Professional Important When installing, using, or uninstalling PictureProject, log on as a “Com- puter administrator” (Windows XP Home Edition, Windows XP Profes- sional) or “Administrators” (Windows 2000 Professional). Turn the computer on and wait for Windows to start up.
- Page 17 Click Easy Install. The standard install in- cludes: • PTP drivers for COOLPIX-series cameras (Win- dows XP only) • Nikon Mass Storage Camera Drivers (Win- dows 98SE only) • Panorama Maker • Apple QuickTime 6 • Nikon FotoShare (Europe only) •...
- Page 18 Click Yes to install QuickTime. The Nikon FotoShare setup program will start. Follow the on-screen instructions to complete installation. * Nikon FotoShare is available only in the European release of PictureProject. Click OK to exit the Nikon FotoShare setup program.
- Page 19 Windows The destination folder for PictureProject will be displayed under “Destination Folder.” Click Next to install PictureProject to this folder, or click Browse to select another des- tination. Click Yes to create a new folder for Picture- Project. Click Yes to create a shortcut to Picture- Project on the desktop, No to proceed with- out creating a desktop shortcut.
- Page 20 Windows Click Finish or Yes to restart the computer. Dialog displayed if DirectX is not installed Dialog displayed if DirectX is installed When the computer restarts, the PictureProject Import Assistant will be dis- played. Select import folder pop-up menu Source location Close button Import button The Import Assistant is used to catalog pictures already on the computer for...
- Page 21 • Apple QuickTime 6 (QuickTime 6 will not be installed if QuickTime 6 or later is already installed on the computer) Once installation is complete, European users can install Nikon FotoShare by copying the “FotoShare” icon to the hard disk (Step 15). Install PictureProject and transfer pictures...
- Page 22 Macintosh The Panorama Maker installer will start. Fol- low the on-screen instructions to complete installation. Click OK to complete installation of Panora- ma Maker. The message shown at right will be displayed (Europe only; users in other areas can pro- ceed directly to Step 8).
- Page 23 Macintosh Click Yes to add PictureProject to the Dock. Click Quit to complete installation of Picture- Project. Apple QuickTime 6 If an earlier version of QuickTime is in- stalled, the QuickTime 6 installer will start automatically. Follow the on-screen in- structions to complete installation.
- Page 24 PictureProject Reference Manual (on CD). After exiting the Import Assistant, open the “FotoShare” folder on the Pic- tureProject installer CD and install Nikon FotoShare by dragging the “Fo- toShare” icon to the “Applications” folder on the hard disk (note that FotoShare is included only with the European release of PictureProject).
-
Page 25: Before Connecting The Camera
Step 2 Transfer Pictures Before Connecting the Camera Pictures can be copied from the camera to the computer by: • Clicking the Transfer button in PictureProject (page 26) • Pressing the I (V) button on the camera (page 26) Which method you will use depends on your computer’s operating system and the USB option selected in the SET-UP menu of the camera. -
Page 26: Transferring Pictures
INTERFACE Video mode Mass storage :Set :Set :Set :Set Display INTERFACE menu. Display USB menu. Mass storage Mass storage :Set :Set :Set :Set Highlight PTP or Mass storage. Make selection. Transferring Pictures Turn the camera off. Use a Reliable Power Source When transferring pictures between the camera and the computer, use fully charged EN-MH1 batteries. - Page 27 Turn the computer on and wait for the operating system to start up. Connect the camera to the computer as shown in the illustration, using the USB cable provided. UC-E6 USB cable USB Hub The camera may not function as expected when connection via a USB hub or keyboard. Turn the camera on.
- Page 28 Click the Transfer button in the PictureProject Transfer. All pictures in the camera’s internal memory or on the memory card will be transferred to your computer. Windows Macintosh The Camera I I (V V ) (Transfer) Button Pictures marked with an V icon can also be transferred using the camera I (V) button.
- Page 29 When transfer is complete, the pictures will be displayed in the PictureProject window. Windows Macintosh Install PictureProject and transfer pictures...
- Page 30 Disconnect the camera Once your pictures are displayed in PictureProject, transfer is complete and you can disconnect the camera. If PTP is selected in the USB menu (see pages 23–24): Turn the camera off and disconnect the USB cable. If you have not changed the USB setting from its default setting of Mass storage: Before turning the camera off or disconnecting the USB cable, remove the cam- era from the system as described below.
- Page 31 You have now taken pictures and copied them to your computer. This completes the Quick Start Guide. To make the most of all the features of your Nikon digital camera, be sure to read the Nikon Guide to Digital Photography with the E5600/...
- Page 32 Miscellaneous Only computers with built-in USB ports supported * For the latest information on supported operating systems, see the Nikon web- sites listed in the PictureProject reference manual. Printed in Hong Kong TR4L01(11) Fuji Bldg., 2-3 Marunouchi 3-chome,...
Need help?
Do you have a question about the Coolpix 5600 and is the answer not in the manual?
Questions and answers