
Subscribe to Our Youtube Channel
Related Manuals for LG LAB-M7500


Summary of Contents for LG LAB-M7500
- Page 1 LAB-M7500_ENG Car CD/Cassette Combo Receiver OWNER’S MANUAL MODEL : LAB-M7500 Please read this instruction booklet carefully and completely before connecting, operating or adjusting this product.
-
Page 2: Table Of Contents
Table of Contents Operation with Audio CD, MP3 Disc and CD changer ..15-16 INTRODUCTION Playing an Audio CD and MP3 Disc ....15 Table of Contents . -
Page 3: Safety Precautions
Safety Precautions CAUTION RISK OF ELECTRIC SHOCK DO NOT OPEN Warning: To reduce the risk of electric shock, do not remove the CAUTION: cover or back of this product. There are no user-serviceable This unit employs a Laser System. parts inside. Refer servicing to qualified service personnel. To ensure proper use of this product, please read this owner’s manual carefully and retain for future reference should the unit require mainte- Warning: To reduce the risk of fire or electric shock, do not... -
Page 4: Before Use
Before Use To ensure proper use of this product, please read this owner’s Notes on Discs manual carefully and retain for future reference. Handling Discs Do not touch the playback side of the disc. Hold the disc by the Symbols Used in this Manual edges so that fingerprints do not get on the surface. - Page 5 Before Use Use and care of the remote control Using the remote control Point the remote control in the direction of the front panel to Installing the battery operate. Pull out the tray outward on the back of the remote control with a pencil or ball point pen and insert the battery with the plus (+) NOTES minus (-) poles pointing in the proper direction.
-
Page 6: Before Use
Before Use Protecting your unit from theft Attaching the front panel The front panel can be detached from the head unit and stored in the protective case provided to discourage theft. 1. Press RELEASE to open the front panel. RELEASE ( 1. -
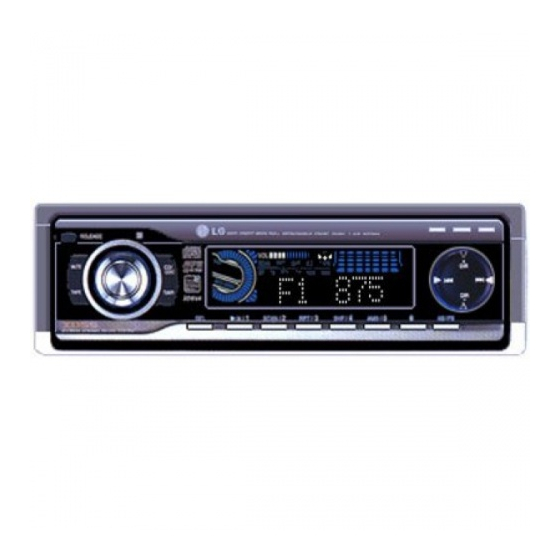
Page 7: Front Panel
Front Panel MUTE button • MP3 TRACK +10 (+D) button RELEASE ( ) button • MP3 TRACK -10 (-D) button • VOLUME KNOB SHUFFLE (SHF) button • CONTROL UP/DOWN dial REPEAT (RPT) button REMOTE SENCER INTRO SCAN (SCAN) button CD/CDC(OPTIONAL) button CD PLAY/PAUSE ( ) button DISPLAY WINDOW... -
Page 8: Remote Control
Remote Control m / M M > > ) • SKIP/SEARCH (. • POWER/MUTE ( - Backward or forward - Switches the unit ON search playback. and OFF. - Go to next track. - Press to mute the Returns to the beginning of the sound from the current track or goes to the speaker. -
Page 9: Installation
Installation Basic Installation Bend the claws Bend the claws Before installing, make sure that the ignition-switch is set to OFF and remove according to according to the thickness the thickness the car battery terminal to avoid short-circuiting. of the of the dashboard dashboard 1. -
Page 10: Connections
Connections Connecting to the Car Before connecting, make sure that the ignition switch is set to OFF, and remove the battery terminal to avoid short circuits. OPTIONAL GND (BLACK) not supplied DIMMER SWITCH (OPTIONAL) DIMMER (ORANGE) : OPTIONAL TO IGNITION (RED) IGNITION SWITCH CD CHANGER... - Page 11 Connections Connecting to the Car Connecting to Auxiliary Equipment (OPTIONAL) - Connect the AUDIO OUTPUT connector of this unit to the From antenna AUDIO INPUT connector of Auxiliary Equipment. To the wiring of vehicle Colors of leads 1 BLACK : This lead is for the Ground connection.
-
Page 12: Basic Operation
Basic Operation Turning the unit on Adjusting the volume Press POWER or any other button on the front panel or Use VOLUME to adjust the sound level. Rotate the VOLUME KNOB on the front panel to increase or POWER/MUTE ( ) on the remote control to turn the unit on. -
Page 13: Sound Adjustment
Basic Operation SOUND Adjustment SELECTION (SEL) Button Turn right Turn left Using the EQ (Equalizer) Increase the volume level. Decrease the volume level. The equalizer lets you adjust the equalization to match the acoustic characteristics of the car’s interior as desired. Increase the bass level. -
Page 14: Radio Operation
Radio Operation Listening to radio stations NOTES • The presetting is not performed if there is no station to be tuned in. 1. Press the POWER/MUTE ( ) [POWER on the front panel] but- • When automatic presetting is performed, the previous ton to turn the unit on. -
Page 15: Operation With Audio Cd, Mp3 Disc And Cd Changer
Operation with Audio CD, MP3 Disc and CD changer Playing an Audio CD and MP3 Disc Pause 1. Press PLAY/PAUSE (B B /X) during playback. 2. To return to playback, press PLAY/PAUSE (B B /X) again. The unit can play MP3 formatted recordings on CD-ROM, CD-R or CD-RW discs. - Page 16 Operation with Audio CD, MP3 Disc and CD changer MP3 TRACK -10/+10 Repeat Durning playback, press the -10 (-D) 1. a. Press RPT during playback. button to go back to the previous 10th track, and press +10 (+D) The “RPT” appears in the display window. button to go forward to the next 10th track.
-
Page 17: Tape Operation
TAPE Operation Basic Playback Auto Music Search (AMS) 1. Open the front panel by pressing RELEASE ( ) button. This unit is equipped with a function that allows you to sip forward 2. Insert a cassette tape with the exposed tape side to the or backward to locate the beginning of a particular selection on the right. -
Page 18: Troubleshooting
Troubleshooting Symptom Correction Cause Power doesn’t turn on. Confirm once more that all connections are correct. Leads and connectors are not properly The unit doesn’t Rectify the problem that caused the fuse to blow, and connected. operate. then replace it. Be very sure to install the correct fuse The fuse is blown. -
Page 19: Specifications
Specifications MP3 Disc compatibility with this unit is limited as General Output Power ......50W x 4CH(Max.) follows: Power Source . - Page 20 P/NO : 3834RR0033G...
Need help?
Do you have a question about the LAB-M7500 and is the answer not in the manual?
Questions and answers