
Subscribe to Our Youtube Channel
Related Manuals for Generac Power Systems 005411-0


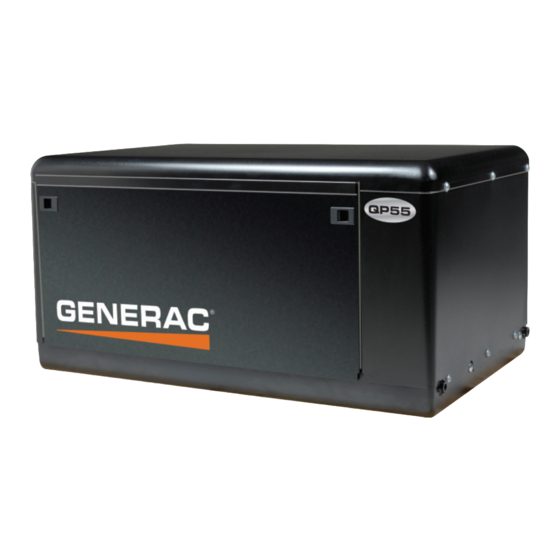
Summary of Contents for Generac Power Systems 005411-0
- Page 1 Models: 005411-0, 005413-0, 005415-0, 005751-0, 005752-0, 005753-0, 005855-0, 005856-0, 005857-0 Owner's Manual Air-cooled Recreational Vehicle Generators RV 45, 55 and 65 www.generac.com or 1-888-GENERAC...
-
Page 2: Table Of Contents
Table of Contents Part I — Operating Instructions Part II — Installation Instructions Introduction .............. 1 Safety Rules ............18 Read This Manual Thoroughly ........... 1 Notice to Installer ............. 18 Contents ................1 Operation and Maintenance ..........1 Section 1 — General Information ......20 How to Obtain Service ............ -
Page 3: Introduction
Introduction INTRODUCTION The operator (driver) is responsible for proper and safe use of the vehicle and its equipment, and the safety of all vehicle occupants. We strongly recommend that the operator read this manual and READ THIS MANUAL THOROUGHLY thoroughly understand all instructions before using this equipment. If any portion of this manual is not understood, contact the near- We also strongly recommend instructing other occupants in the est Authorized Service Dealer for starting, operating and servicing... -
Page 4: Safety Rules
Safety Rules SAVE THESE INSTRUCTIONS – The manufacturer suggests that these rules for safe operation be copied and posted in potential hazard areas of the recreational vehicle. Safety should be stressed to all operators and potential operators of this equipment. Study these SAFETY RULES carefully before installing, operating GENERAL HAZARDS or servicing this equipment. -
Page 5: Electrical Hazards
Safety Rules ELECTRICAL HAZARDS FIRE HAZARDS • The generator covered by this manual produces dangerous • For fire safety, the generator must be installed and maintained electrical voltages and can cause fatal electrical shock. Avoid properly. Installation always must comply with applicable contact with bare wires, terminals, connections, etc., while the codes, standards, laws and regulations. -
Page 6: Section 1 - General Information
General Information GENERATOR IDENTIFICATION Please record the following information from the generator DATA DECAL or information decal. 1. Model Number ____________________ 2. Serial Number _________________ 3. kW Rating _________________________ 4. Rated Voltage _________________ 5. Phase _____________________________ 6. Hertz __________________________ 10, 17 3 4 5 12 11 9, 17... -
Page 7: Generator Applicability
General Information GENERATOR APPLICABILITY INSTALLATION These generators have been designed and manufactured for sup- This Owner’s Manual has been prepared under the assumption plying electrical power for recreational vehicles. DO NOT modify that a competent, qualified technician installed the generator into the generator or use it for any application other than for what it a recreational vehicle. -
Page 8: Specifications
General Information 120/240 VAC loads — one load with a maximum total watt- NOTE age requirement equal to the generator’s rated power output, Some installations using a “shared” fuel tank may have a gen- and 240V across the generator output terminals; or two sepa- erator fuel pickup tube that is shorter than the vehicle engine’s rate loads, each with a maximum total wattage requirement pickup tube. -
Page 9: Exhaust Emissions Information (Gasoline)
General Information 1.6.3 GENERATOR SPECIFICATIONS SERIES RV45G RV55G RV65G Rotor RPM 3600 3600 3600 Rotor Poles Engine RPM 2571 2571 2571 Rated Max. Continuous AC Output Watts* 4500 5500 6500 Voltage* Rated Max. Continuous Current Amps (240V) 37.5 (18.7) 45.8 (22.9) 54.1 (27) Phase Frequency... -
Page 10: Evaporative Emissions Information
Operation EVAPORATIVE EMISSIONS Figure 2.1 – Typical Control Panel INFORMATION This generator is subject to evaporative emission standards which have been implemented by the California Air Resource Board (CARB) and the Environmental Protection Agency (EPA). If this generator is offered for sale in the state of California, it must be covered by a CARB evaporative Executive Order. -
Page 11: Optional Remote Start/Stop Panel
Operation 2.1.4 DIAGNOSTICS 2.3.2 PRECHOKE If the generator shuts down due to a fault, the indicator will flash a The choke system also has a temperature-sensitive metal strip that code to identify the problem. adjusts choke valve angle according to ambient temperatures (i.e., in cold ambient temperatures, choke valve closes more). -
Page 12: Starting The Generator
Operation 2.4.5 ENGINE EXHAUST GAS NOTE: If starting from the generator control panel, turn OFF loads Before starting the generator engine, be sure there is no way for by setting the generator’s main circuit breaker to the OFF (or exhaust gases to enter the vehicle interior and endanger people or open) position. -
Page 13: Protection Systems
Operation 2.8.3 FIELD BOOST • Most lighting, appliance, tool and motor loads indicate their required watts on their nameplate or data plate. For light bulbs, The Controller Circuit Board houses a field boost diode and resistor simply note the wattage rating of the bulb. that are not part of the automatic choke circuit. -
Page 14: Section 3 - Maintenance
Maintenance CHANGING THE ENGINE OIL 2.8.5 OPERATION IN HIGH GRASS OR BRUSH AND/OR OIL FILTER Never operate the generator while the vehicle is parked over high grass, weeds, brush, Hot oil may cause burns. Allow engine to leaves or any other combustible substance. cool before draining oil. -
Page 15: Maintaining The Engine Air Cleaner
Maintenance CHECKING THE ENGINE 10. Remove the dipstick, valve cover plug and add new oil (see “Engine Oil Requirements”) to engine. DO NOT FILL ABOVE SPARK PLUG THE “FULL” MARK. Reset the spark plug gap or replace the spark plugs as necessary. 11. -
Page 16: Clean Spark Arrestor
Maintenance CLEAN SPARK ARRESTOR The engine exhaust muffler has a spark arrestor screen. Inspect and Do NOT use a forceful spray of water to clean the screen every 200 hours of operation or once each year, clean the generator. Water will enter the gen- whichever comes first. -
Page 17: Adjusting Valve Clearance
Maintenance A battery presents a risk of electrical shock • Make sure the piston is at Top Dead Center (TDC) of its com- and high short circuit current. The following pression stroke (both valves closed). To get the piston at TDC, precautions are to be observed when work- remove the intake screen at the front of the engine to gain ing on batteries:... -
Page 18: 3.10 Major Service Manual
Maintenance 3.10 MAJOR SERVICE MANUAL 3.13.2 RETURN TO SERVICE To obtain a service manual for the generator, contact the near- To return the unit to service after storage, proceed as follows: est Authorized Service Dealer. Make sure to identify the MODEL Check the tag on the engine for oil viscosity and classification. -
Page 19: Part Ii - Installation Instructions
Part II - Installation Instructions Part II – Installation Instructions ONLY QUALIFIED ELECTRICIANS OR CONTRACTORS SHOULD ATTEMPT INSTALLATION! -
Page 20: Safety Rules
Safety Rules DANGER: For fire safety, installation of a generator into a recreational vehicle must comply strictly with article 551, NFPA 70; ANSI C1-1975; AND, ANSI A119.2-1975/NFPA 501C “Standard for Recreational Vehicles” (Part 3, “Installation of Electrical Systems”). In addition, installation must comply with the man- ufacturer’s instructions and recommendations. - Page 21 Safety Rules ELECTRICAL HAZARDS FIRE HAZARDS • The generator covered by this manual produces dangerous • For fire safety, the generator must be installed and maintained electrical voltages and can cause fatal electrical shock. Avoid properly. Installation always must comply with applicable contact with bare wires, terminals, connections, etc., while the codes, standards, laws and regulations.
-
Page 22: Section 1 - General Information
General Information PURPOSE AND SCOPE OF THE EQUIPMENT DESCRIPTION Instructions and information in this section pertain to air-cooled INSTALLATION INSTRUCTIONS generators. These generators are designed specifically for install- These Installation Instructions have been prepared especially for ing in recreational vehicles. They operate 120-volt, single-phase, the purpose of familiarizing installers and owners of the applicable 60-Hertz, AC electrical loads. -
Page 23: Section 2 - Installation
Installation Figure 1.2 - Major Features and Dimensions (Drawing No. 0G5519-D) -
Page 24: Location And Support
Installation Figure 1.3 - Connection for 120/240 Volts • The location must provide sufficient room to allow minimum clearances as outlined in "Generator Compartments". If sound insulation is to be used on the compartment walls and ceiling, the minimum recommended applies to the space between the generator and such insulation. -
Page 25: Generator Compartments
Installation GENERATOR COMPARTMENTS 2.1.3 SUSPENDED MOUNTING Whether the generator set is being installed inside a compartment If planning to suspend the generator below the horizontal sup- specifically manufactured to house a generator or inside a compart- port tubing, the suspension method to use with the vehicle frame ment that the installer constructs, the compartment MUST meet members must (a) be able to support the weight of the generator certain specifications as outlined in the following sections:... - Page 26 Installation Figure 2.5 – Typical Compartment Construction Figure 2.6 – Types of Lock Seams Do not install any flammable material directly above or around the compartment. Heat, transferred through the compartment struc- ture, may be sufficient to ignite, char or dis- color seat cushions, fiberboard and other flammable materials.
-
Page 27: Cooling And Ventilating Air
Installation 2.2.4 ACOUSTICS 2.2.5 COMPARTMENT FLOOR CUTOUTS For additional noise abatement, the installer may wish to consider Provide openings in the generator compartment for the following the following: items (Figure 2.9): • Using special sound insulating materials. • Engine exhaust and cooling air outlets •... - Page 28 Installation Figure 2.9 — Compartment Floor Cutout (Drawing 0G4432-A)
-
Page 29: Gasoline Fuel System
Installation 6.3.2 TESTING THE INSTALLATION If the generator is to share the vehicle engine's tank, separate fuel pickup tubes are required for the engine and the generator. The manufacturer recommends testing the installation to be sure The manufacturer recommends that the fuel pickup tube be two adequate cooling airflow is available to the unit before placing the to three inches (51 to 76 mm) shorter than the vehicle engine's unit into service. -
Page 30: Exhaust System
Installation EXHAUST SYSTEM Figure 2.11 - Spark Arrestor The generator exhaust system must be safely and properly installed. Only approved mufflers and other exhaust system parts must be used. A properly installed exhaust system must be vapor tight, quiet and completely safe. TAILPIPE P/N 0E0683 The generator engine gives off DEADLY... -
Page 31: Electrical Connections
Installation • Do not terminate the exhaust system under any opening, win- • From the junction box, route power supply wires through dow or vent that can be opened or is not permanently sealed approved conduit to either (a) double-pole, double-throw trans- from the vehicle interior. -
Page 32: Battery Installation
Installation 2.7.1 RECOMMENDED BATTERY Install a battery that meets the following requirements: Do NOT connect electrical loads in excess of any circuit breaker rating or problems will • The battery must be a 12-volt, automotive type storage bat- develop with circuit breaker tripping, which tery. - Page 33 Installation Figure 2.14 — Typical Transfer Switch Isolation Method Figure 2.15 — Typical Installation With Isolation Receptacle...
-
Page 34: Optional Accessories
Installation Figure 2.16 – Connecting Battery Cables Figure 2.17 – Remote Panel Plug-in Receptacle Positive Cable — Battery Chasis Ground Negative Cable 2.7.4 BATTERY COMPARTMENT Install the generator battery in its own, vented compartment. Place the battery compartment away from any source of heat, sparks or flame. -
Page 35: Section 3 - Post Installation
Post Installation POST INSTALLATION TESTS When all tests and adjustments at no-load are completed, apply electrical loads and check for proper operation under The air-cooled generator set was factory tested and adjusted. It load (see "Testing Under Load"). Run the unit at least 30 min- should not be necessary to adjust the unit any further except under utes with loads applied. -
Page 36: Installation Checklist
Post Installation INSTALLATION CHECKLIST ELECTRICAL CONNECTIONS ❑ Connections comply with local code requirements LOCATION AND SUPPORT and all National Electrical Codes. ❑ Generator is properly located. ❑ Junction box is properly installed. ❑ Generator is properly supported. ❑ Wiring meets all standards. ❑... -
Page 37: Section 4 - Troubleshooting
Troubleshooting TROUBLESHOOTING GUIDE Problem Cause Correction Engine won’t crank. 1. 7.5 amp fuse blown. Replace blown fuse. 2. Loose, or corroded or defective Tighten, clean or replace, battery cable(s). as necessary. 3. Battery is discharged or defective. Recharge or replace battery. 4. -
Page 38: Section 5 - Electrical Data
Electrical Data Wiring Diagram Drawing No. 0G4221-C... - Page 39 Electrical Data Wiring Diagram Drawing No. 0G4221-C...
- Page 40 Electrical Data Wiring Diagram Drawing No. 0H3633-A...
- Page 41 Electrical Data Wiring Diagram Drawing No. 0H3633-A...
-
Page 42: Section 6 - Exploded Views And Parts Lists
Exploded Views & Parts Lists Enclosure Drawing No. 0G3881-F... - Page 43 Exploded Views & Parts Lists Enclosure Drawing No. 0G3881-F ITEM PART NO. QTY. DESCRIPTION 0G3396 ENCLOSURE DOOR 0C5644 SLIDE LATCH, FLUSH 0G5236 FOAM ENCLOSURE DOOR 0D3700 NUT FLANGE M6-1.0 NYLOK 0G3401 DUCT, AIR IN DOOR 0G4077 GROMMET, OIL FILTER 0G4433 U CHANNEL 1/8”...
- Page 44 Exploded Views & Parts Lists Control Panel Drawing No. 0H3635-C...
- Page 45 Exploded Views & Parts Lists Control Panel Drawing No. 0H3635-C ITEM PART NO. QTY. DESCRIPTION ITEM PART NO. QTY. DESCRIPTION 045757 SCREW HHC M6-1.0 X 25 G8.8 082025 NUT HEX LOCK M5-0.8 NYINS ZINC 0F5458 SCREW PLASTITE HI-LOW #10X3/8 0F9719 ASSY PCB VREG AIR COOLED 2006 023484S BUSHING SNAP SB-1093-937...
- Page 46 Exploded Views & Parts Lists Base & Pulley Drawing No. 0G7720-B...
- Page 47 Exploded Views & Parts Lists Base & Pulley Drawing No. 0G7720-B ITEM PART NO. QTY. DESCRIPTION 0G3377 TRAY, 530 RV 081105 NUT FLANGE 5/16-18 LOCK 022259 NUT HEX 5/16-18 STEEL 022129 WASHER LOCK M8-5/16 022145 WASHER FLAT 5/16-M8 ZINC 0G5217 SCREW HHC 3/8-24 X 1-1/2 G8 0G3748 BELT V-RIBBED 4L X 43.75"...
- Page 48 Exploded Views & Parts Lists Engine Accessories Drawing No. 0G7718-K...
- Page 49 Exploded Views & Parts Lists Engine Accessories Drawing No. 0G7718-K ITEM PART NO. QTY. DESCRIPTION ITEM PART NO. QTY. DESCRIPTION 0G7670 FRAME 0G3386 OIL FILTER SUPPORT 0G3404 ENGINE WRAPPER, STARTER SIDE 0A2311 SCREW SWAGE 1/4-20 X 1 0E9507 SCREW HHFC M8-1.25 X 14 070185B OIL FILTER 023484S...
- Page 50 Exploded Views & Parts Lists 530 RV Engine Drawing No. 0G7719-B...
- Page 51 Exploded Views & Parts Lists 530 RV Engine Drawing No. 0G7719-B ITEM PART NO. QTY. DESCRIPTION 0E3812 SEAL D 35 X 48.2 0D4788 3/8” SQUARE HEAD PLUG 073144 SCREW HHFC M8 – 1.25 X 45 0G7260A GEAR COVER 078699B SLEEVE DOWEL PIN 0A5776 11/32 DIAMETER PRESSURE RELIEF BALL 0E9482...
- Page 52 Exploded Views & Parts Lists Rotor & Stator Drawing No. 0G3953-B...
- Page 53 Exploded Views & Parts Lists Rotor & Stator Drawing No. 0G3953-B ITEM PART NO. QTY. DESCRIPTION 052858 NUT TOP LOCK FL M8-1.25 075237 WASHER, SPRNG CENTER 075242 SPRING, GEN. MOUNT 0C1878 SUPPORT, SLIDE 073146 SLIDE, NYLON 052203 SCREW HHC M8-1.25 X 70 G8.8 022145 WASHER FLAT 5/16-M8 ZINC 0G3913...
-
Page 54: Section 7 - Warranty
Warranty), which is provided to you by Generac pursuant to California and federal law. See also the "Generac Limited Warranties for Generac Power Systems, Inc.," which is enclosed herewith on a separate sheet, also provided to you by Generac. Note that this warranty shall not apply to any incidental, consequential or indirect damages caused by defects in materials or workmanship or any delay in repair or replace- ment of the defective part(s). -
Page 55: Emission Control System Warranty
(1) Any warranted part that is not scheduled for replacement as required maintenance in the Owner's Manual shall be warranted for the ECS Warranty Period. If any such part fails during the ECS Warranty Period, it shall be repaired or replaced by Generac according to Subsection (4) below. Any such part repaired or replaced under the ECS Warranty shall be warranted for the remainder of the ECS Warranty Period. - Page 56 NOTE: ALL UNITS MUST BE INSTALLED BY GENERAC POWER SYSTEMS AUTHORIZED SERVICE FACILITIES. For a period of 3 (three) years of operation from the date of original sale, Generac Power Systems, Inc. (Generac) will, at its option, repair or replace any part which, upon examination, inspection and testing by Generac or a Generac Authorized Warranty Service Facility, is found to be defective under normal use and service, in accordance with the warranty schedule set forth below.
Need help?
Do you have a question about the 005411-0 and is the answer not in the manual?
Questions and answers