Table of Contents
Advertisement
Quick Links
Advertisement
Chapters
Table of Contents
Troubleshooting

Related Manuals for Samsung ML-3470 Series


Summary of Contents for Samsung ML-3470 Series
- Page 2 © 2007 Samsung Electronics Co., Ltd. All rights reserved. This user’s guide is provided for information purposes only. All information included herein is subject to change without notice. Samsung Electronics is not responsible for any changes, direct or indirect, arising from or related to use of this user’s guide.
- Page 3 SAMSUNG WORLDWIDE ONTACT If you have any comments or questions regarding Samsung products, Country Customer Care Center Web Site contact the Samsung customer care center. LITHUANIA 8-800-77777 www.samsung.com/lt Country Customer Care Center Web Site LUXEMBURG 0035 (0)2 261 03 710 www.samsung.com/be...
-
Page 4: Table Of Contents
ONTENTS 1. Introduction Special features ..............................1.1 Printer overview ..............................1.2 Understanding the Status LED ..........................1.4 Finding more information ............................1.4 Selecting a location ..............................1.5 Altitude adjustment ..............................1.5 2. System setup Using control panel menus ............................2.1 Menu overview ................................ - Page 5 7. Ordering supplies and accessories Toner cartridges ..............................7.1 Accessories ................................7.1 How to purchase ..............................7.1 8. Maintenance Printing information page ............................8.1 Cleaning the printer ..............................8.1 Maintaining the toner cartridge ..........................8.2 Maintenance parts ..............................8.4 9. Troubleshooting Clearing paper jams ..............................
-
Page 6: Safety And Regulatory Information
14 Adjust only those controls covered by the operating instructions. Safety and Regulatory Information Improper adjustment of other controls may result in damage, and may require extensive work by a qualified service technician to restore the machine to normal operation. Important Precautions and Safety Information 15 Avoid using this machine during a lightning storm. -
Page 7: Radio Frequency Emissions
If you need additional information about ozone, please digital device, pursuant to Part 15 of the FCC rules. These limits are designed contact your nearest Samsung dealer. to provide reasonable protection against harmful interference in a residential installation. This equipment generates, uses and can radiate radio frequency... - Page 8 (embedded) in your printer system. This section is only applicable if European countries: these devices are present. Refer to the system label to verify the presence of In the event of problems, you should contact the Euro QA Lab of Samsung wireless devices. Electronics Co., Ltd. in the first instance.
-
Page 9: Regulatory Compliance Statements
Wireless devices are not user serviceable. Do not modify Regulatory Compliance Statements them in any way. Modification to a wireless device will void the authorization to use it. Please contact manufacturer for Wireless Guidance service. Low power, Radio LAN type devices (radio frequency (RF) wireless Only use drivers approved for the country in which the device communication devices), operating in the 2.4 GHz/5 GHz Band, may be will be used. -
Page 11: Introduction
Save time and money Introduction • This printer allows you to use toner save mode to save toner. See page 2.5. Congratulations on the purchase of your printer! • You can print on both sides of the paper to save This chapter includes: paper. -
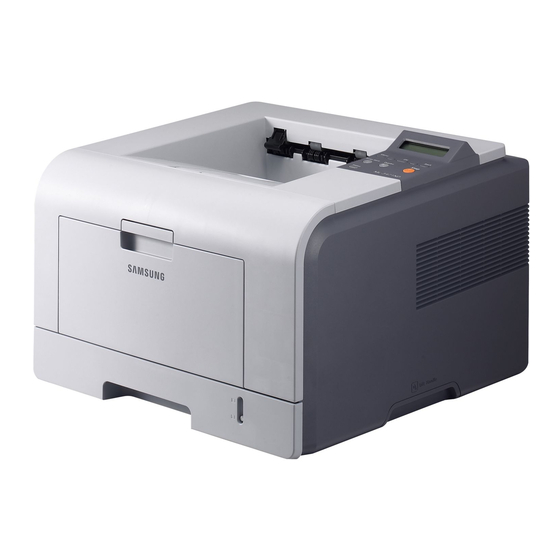
Page 12: Printer Overview
Printer features Printer overview The table below lists a general overview of features supported by your printer. (I: Installed, O: Option, NA: Not Available) Front view Features ML-3470D ML-3471ND IEEE 1284 Parallel USB 2.0 Network Interface (Ethernet 10/100 Base TX) Wireless LAN (IEEE 802.11 b/g Wireless LAN) -
Page 13: Rear View
Rear view Control panel overview ML-3470D and ML-3471ND Menu: Enters Menu mode and scrolls through the available menus. scroll buttons: Scroll through the options available in the selected menu, and increase or decrease values. OK: Confirms the selection on the display. Back: Sends you back to the upper menu level. -
Page 14: Understanding The Status Led
Samsung website Remove the old toner cartridge and install a support, printer drivers, manuals, and order new one. See page 8.3. information from the Samsung website, • The toner cartridge installed is not a genuine www.samsungprinter.com. Blinking cartridge, and you selected Continue at the NonGenuine Toner prompt. -
Page 15: Selecting A Location
Selecting a location Altitude adjustment Select a level, stable place with adequate space for air circulation. Allow The print quality is affected by atmospheric pressure, which is extra space for opening covers and trays. determined by the height of the machine above sea level. The following information will guide you on how to set your machine to the best print The area should be well-ventilated and away from direct sunlight or quality or best quality of print. -
Page 16: System Setup
Menu overview System setup The control panel menus are used to configure the printer. The control This chapter provides step by step information on setting up your printer. panel provides access to the following menus: This chapter includes: • Using control panel menus Layout Information •... -
Page 17: Information Menu
Information menu Item Explanation This menu contains printer information pages that give details about the To print on both sides of paper, choose the binding Duplex printer and its configuration. edge as follows. • : Flip on the long edge. Prints pages Long Edge Item Explanation... -
Page 18: Paper Menu
Paper menu System Setup menu Use the Paper menu to define all settings relating to print material input Use the System Setup menu to configure a variety of printer features. and output, as well as the specific print material you are using with your printer. -
Page 19: Emulation Menu
Item Explanation Item Explanation This item allows you to maintain your printer. This item selects the symbol to be used in PCL Maintenance Symbol emulation. The symbol is the group of numbers, • : Cleans the OPC drum of the Clean Drum marks, and special signs being used when printing cartridge and produces a cleaning sheet with... -
Page 20: Printing A Demo Page
Item Explanation Printing a demo page You can set the number of lines printed in one vertical Print a demo page to make sure that the printer is operating correctly. inch. Press Menu and then OK when Information appears. This item determines whether or not the printer Auto automatically performs line feed when the data Press the scroll buttons until Demo Page appears and press OK. -
Page 21: Changing The Font Setting
Changing the font setting Your machine has preset the font for your region or country. If you want to change the font which you prefer or set the font under special condition such as the DOS environment, you can change the font setting as follows: Press Menu on the control panel until you see Emulation feature. -
Page 22: Software Overview
Supplied software Software overview You must install the printer and scanner software using the supplied CDs This chapter gives you an overview of the software that comes with your after you have set up your printer and connected it to your computer. printer. -
Page 23: Printer Driver Features
Printer driver features System requirements Your printer drivers support the following standard features: Before you begin, ensure that your system meets the following requirements: • Paper source selection • Paper size, orientation and media type Windows • Number of copies Item Requirements Recommended... - Page 24 Linux Item Requirements Operating system • Red Hat 8.0 ~ 9.0 • Fedora Core 1 ~ 4 • Mandrake 9.2 ~ 10.1 • SuSE 8.2 ~ 9.2 Processor Pentium IV 1 GHz or higher 256 MB or higher Free disk page 1 GB or higher Software •...
-
Page 25: Network Setup(Ml-3471Nd Only)
Supported operating systems Network setup (ML-3471ND only) The following table shows the network environments supported by the This chapter gives you step-by-step instructions for setting up your printer: printer for network connections. This chapter includes: Item Requirements • Introduction Network interface •... -
Page 26: Configuring Tcp/Ip
Static addressing Double click Setup.exe to install this program. To enter a TCP/IP address from your printer’s control panel, take the From the Windows Start menu, select Programs > Samsung following step: Network Printer Utilities > SetIP. Press Menu until Network appears on the bottom line of the Select the name of your printer and click "... -
Page 27: Configuring Ethertalk
Configuring EtherTalk EtherTalk is AppleTalk used in an Ethernet network. This protocol is widely used in Macintosh network environments. To use EtherTalk, take the following step: Press Menu until Network appears on the bottom line of the display and press OK. Press the scroll buttons until EtherTalk appears and press OK. -
Page 28: Loading Print Media
• Some print media may meet all of the guidelines in this section and still not produce satisfactory results. This may be the result of improper handling, unacceptable temperature and humidity levels, or other variables over which Samsung has no control. • Before purchasing large quantities of print media, ensure that it meets the requirements specified in this user’s guide. -
Page 29: Supported Sizes Of Paper
Supported sizes of paper Type Size Dimensions Weight Capacity Letter 215.9 x 279 mm (8.5 x 11 inches) • 60 to 90 g/m (16 to 24 lb • 250 sheets of 80 g/m bond ) for the tray (21 lb bond) paper for the Legal 215.9 x 355.6 mm (8.5 x 14 inches) •... -
Page 30: Guidelines For Selecting And Storing Print Media
Guidelines for selecting and storing print media Guidelines for special print media When selecting or loading paper, envelopes, or other print materials, Media type Guidelines keep these guidelines in mind: • Successful printing on envelopes depends upon • Always use print media that conform with the specifications listed on the quality of the envelopes. -
Page 31: Loading Paper
Media type Guidelines Media type Guidelines • To avoid damaging the printer, use only • Letterhead must be printed with heat-resistant transparencies designed for use in laser printers. ink that will not melt, vaporize, or release • Transparencies used in the printer must be able hazardous emissions when subjected to the to withstand 200°... -
Page 32: Using The Tray 1 Or The Optional Tray 2
Press and hold the guide lock, and slide the paper length guide to Using the tray 1 or the optional tray 2 locate it in the correct paper size slot. Use the print material you use for the majority of your print jobs in the tray 1. - Page 33 Load the paper with the side to be printed on facing up. Note • Do not push the paper width guide far enough to cause the material to warp. • If you do not adjust the paper width guide, it may cause paper jams.
-
Page 34: Using Manual Feed Mode
Squeeze the multi-purpose tray paper width guides and adjust Load the paper with the side to be printed on facing up. them to the width of the paper. Do not force too much, or the paper will be bent, which will result in a paper jam or skew. Squeeze the multi-purpose tray paper width guides and adjust them to the width of the paper. -
Page 35: Selecting An Output Location
Printing to the rear cover (Face up) Selecting an output location Using the rear cover, paper comes out of the printer face up. The printer has two output locations; the rear cover (face up) and the Printing from the multi-purpose tray to the rear cover provides a straight output tray (face down). -
Page 36: Basic Printing
For Windows 2000, select Settings and then Printers. For Windows XP/2003, select Printers and Faxes. For Windows Vista, select Control Panel -> Hardware and Sound -> Printers. Double-click the Samsung ML-3470 Series icon. From the Document menu, select (Windows 2000/XP/2003/ Cancel Vista). -
Page 37: Ordering Supplies And Accessories
(ML-3471ND only) a. Depending on your country, wireless LAN cards may not be available. Contact your local Samsung dealer or the retailer where you bought your printer. <Ordering supplies and accessories>... -
Page 38: Maintenance
Cleaning the inside of the printer Maintenance There are two methods to clean the inside of the printer: This chapter provides information for maintaining your printer and the • Clean the inside manually. toner cartridge, as well as suggestions for high-quality and economical •... -
Page 39: Maintaining The Toner Cartridge
Locate the long strip of glass (LSU) inside the top of the cartridge • To prevent damage to the toner cartridge, do not expose it to light for compartment, and gently swab the glass with a cotton swab more than a few minute. checking to see if dirt turns the cotton black. -
Page 40: Replacing The Toner Cartridge
Redistributing toner cartridge Note If toner gets on your clothing, wipe it off with a dry cloth and When the toner cartridge is near the end of its life: wash clothing in cold water. Hot water sets toner into fabric. •... -
Page 41: Maintenance Parts
Fuser unit 80,000 page Hold the toner cartridge by the handle and slowly insert the Samsung highly recommends that an authorized service provider, dealer cartridge into the opening in the printer. or the retailer where you bought printer performs this maintenance activity. -
Page 42: Troubleshooting
Clearing paper jams Troubleshooting Note This chapter provides helpful information for what to do if you encounter When removing paper that is jammed in the printer, if possible an error while using your printer. always pull the paper in the direction that it normally moves so This chapter includes: as not to damage internal components. - Page 43 Remove the jammed paper by gently pulling it straight out. Make Pull the paper straight up and out. sure that all of the paper is properly aligned in the tray 1. Insert the trays back into the printer. Printing automatically If the paper does not move when you pull, or if you do not see the resumes.
-
Page 44: Around The Toner Cartridge
Around the toner cartridge In the paper exit area Open and close the front cover. The jammed paper is automatically Note ejected from the printer. The fuser area is hot. Take care when removing paper from the printer. Gently pull the paper out of the output tray. Open the front cover and pull the toner cartridge out. -
Page 45: In The Duplex Unit Area
Release the blue strap, the rear cover stopper, and fully open the Pull the jammed paper out. rear cover, as shown. If the jammed paper does not move when you pull, push the pressure lever on each side down to loose the paper, and then remove it. -
Page 46: Tips For Avoiding Paper Jams
Remove the jammed paper from the duplex unit. Pull the jammed paper out. If the paper does not come out with the duplex unit, remove the paper from the bottom of the printer. Tips for avoiding paper jams By selecting the correct media types, most paper jams can be avoided. When a paper jam occurs, follow the steps outlined on page 9.1. -
Page 47: Troubleshooting Checklist
Troubleshooting checklist Understanding display messages If the printer is not working properly, consult the following checklist. If the Messages appear on the Smart Panel program window or the control printer does not pass a step, follow the corresponding troubleshooting panel display to indicate the printer’s status or errors. Refer to the tables suggestions. - Page 48 Message Meaning Suggested solutions Message Meaning Suggested solutions A problem has Unplug the power There is no paper in Load paper in the LSU Motor Error Tray 1 occurred in the LSU cord and plug it back the tray 1. tray 1.
-
Page 49: Toner Cartridge-Related Messages
Stop is selected. Stop If you select Stop, you cannot print until the Samsung-genuine cartridge is installed. However, you can still print any kind of reports. If you select Continue, you can keep printing but the quality cannot be guaranteed, and the product support is no longer provided. -
Page 50: Solving General Printing Problems
Check the display message on The printer is not The printer is the control panel to determine if Select Samsung ML-3470 selected as the malfunctioning. the printer is indicating a Series as your default printer. - Page 51 Condition Possible cause Suggested solutions Condition Possible cause Suggested solutions Simplify the page layout and The wrong printer Check the application’s printer remove any unnecessary driver was selection menu to ensure that The page layout graphics from the document. selected. your printer is selected.
-
Page 52: Solving Print Quality Problems
Solving print quality problems Condition Suggested solutions Vertical lines Dirt inside of the printer or improper paper loading may reduce print quality. See the table below to troubleshoot problems. AaBbCc AaBbCc If black vertical streaks appear on the page: AaBbCc AaBbCc •... - Page 53 Condition Suggested solutions Condition Suggested solutions Background scatter results from bits of toner Back of • The transfer roller may be dirty. See page 8.1. distributed on the printed page. printouts are • Check for leaking toner. Clean the inside of the dirty •...
-
Page 54: Common Windows Problems
Condition Suggested solutions Common PostScript problems Curl The following situations are PostScript language specific and may occur If the printed paper is curled or paper does not when several printer languages are being used. feed into the printer: • Turn over the stack of paper in the tray. Also try Note To receive a printed or screen displayed message when rotating the paper 180°... -
Page 55: Common Linux Problems
Common Linux problems Common Macintosh problems Condition Suggested solutions Condition Suggested solutions Incompatibility between the PDF file and • Check if the printer driver is installed in your The printer does not the Acrobat products: system. Open Unified Driver Configurator print PDF file correctly. -
Page 56: Installing Accessories
Your printer is a full-featured laser printer that has been optimized to meet most of your printing needs. Recognizing that each user may have different requirements, however, Samsung makes several accessories available to enhance the printer’s capabilities. This chapter includes: •... -
Page 57: Installing A Wireless Network Interface Card
For Windows 2000, select Settings and then Printers. For Windows XP/2003, select Printers and Faxes. For Windows Vista, select Control Panel -> Hardware and Sound -> Printers. Select the Samsung ML-3470 Series printer. connector wireless network Click the right mouse button on the printer icon and select interface card Properties. - Page 58 Replace the control board cover. Configuring the wireless network parameters After installing the wireless network card, you must configure the appropriate network parameters to use your printer in a wireless network. To do this, you can use both control panel and SyncThru Web Service, an embedded web site of your printer.
- Page 59 Selecting the authentication type Hexadecimal Alphanumeric Authentication is a process of identifying the legitimacy of an user to 128-bit WEP 26 digits 13 characters access a network. You can select whether or not authentication is used. When you have finished, press Stop to return to Standby mode. Press Menu until Network appears on the bottom line of the display and press OK.
-
Page 60: Specifications
64 MB (Max 320 MB) ML-3471ND • Printer specifications 32, 64, 128, or 256 MB optional memory available. Printer specifications Use only the Samsung-approved DIMM. Fonts 1 bitmap, 45 scalable, 136 PostScript3 fonts Item Specifications and Description Interface • IEEE 1284 Bidirectional Parallel Standard... - Page 61 NDEX paper load multi-purpose tray 5.6 accessories jam, clear 9.1 tray 1/optional tray 2 5.5 installing paper size memory DIMM 10.1 setting 2.3 wireless network interface card specifications 5.2 10.2 Linux problems 9.14 paper type order information 7.1 loading paper setting 2.3 multi-purpose tray 5.6 specifications 5.2...
- Page 62 Macintosh 3.3 Windows 3.2 toner cartridge checkig remaining toner 8.2 cleaning 8.2 maintaining 8.2 redistributing 8.3 replacing 8.3, 8.4 toner save mode, use 2.5 Windows problems 9.13 wireless network interface card, install 10.2 wireless network setup 10.3...
-
Page 63: Software Section
Samsung Printer Software section... - Page 64 OFTWARE SECTION ONTENTS NSTALLING RINTER OFTWARE IN INDOWS Chapter 1: Installing Printer Software ......................4 Installing Software for Local Printing ................. 4 Installing Software for Network Printing ................7 Changing the Software Language .................... 10 Reinstalling Printer Software ....................10 Removing Printer Software .....................
- Page 65 Using Watermarks ......................... 21 Using an Existing Watermark ..................21 Creating a Watermark ....................21 Editing a Watermark ..................... 21 Deleting a Watermark ....................21 Using Overlays ........................22 What is an Overlay? ...................... 22 Creating a New Page Overlay ..................22 Using a Page Overlay ....................
- Page 66 Printers Configuration ....................29 Ports Configuration ....................... 30 Configuring Printer Properties ....................30 Printing a Document ......................31 Printing from Applications ....................31 Printing Files ........................ 31 SING RINTER WITH A ACINTOSH Chapter 8: Installing Software ........................ 32 Printer driver ....................... 32 Setting Up the Printer ......................
-
Page 67: Installing Printer Software In Windows
Typical Installation Installing Printer This is recommended for most users. All components necessary for printer operations will be installed. Software in Windows Make sure that the printer is connected to your computer and powered on. This chapter includes: Insert the supplied CD-ROM into your CD-ROM drive. •... -
Page 68: Custom Installation
If the test page prints out correctly, click Yes. If not, click No to reprint it. To register yourself as a user of Samsung Printers in order to receive information from Samsung, select the checkbox and click Finish. You are now sent to the Samsung web site. - Page 69 If the test page prints out correctly, click Yes. If not, click No to reprint it. To register yourself as a user of Samsung Printers in order : If your printer is not already connected to the to receive information from Samsung, select the checkbox computer, the following window will appear.
-
Page 70: Installing Software For Network Printing
Acrobat Reader for you. After the installation is finished, a window appears asking you to print a test page and to register yourself as a user of Samsung Printers in order to receive information from Installing Printer Software in Windows... - Page 71 Samsung. If you so desire, select the corresponding If the AutoPlay window appears in Windows Vista, click checkbox(es) and click Finish. Run Setup.exe in Install or run program field, and click Continue in the User Account Control window. Otherwise, just click Finish.
- Page 72 Samsung Printers in order to receive information from : If you cannot find your machine in network, please turn Samsung. If you so desire, select the corresponding off the firewall and click Update.
-
Page 73: Changing The Software Language
Reinstalling Printer Software : If your printer is not already connected to the computer, the following window will appear. You can reinstall the software if installation fails. Start Windows. From the Start menu select Programs or All Programs → your printer driver name → Maintenance. Select Repair and click Next The list of printers available on the network appears. -
Page 74: Removing Printer Software
Removing Printer Software Start Windows. From the Start menu select Programs or All Programs → your printer driver name → Maintenance. Select Remove and click Next. You will see a component list so that you can remove any item individually. Select the components you want to remove and then click Next. -
Page 75: Basic Printing
Open the document you want to print. Basic Printing Select Print from the File menu. The Print window is displayed. It may look slightly different depending on your application. This chapter explains the printing options and common printing The basic print settings are selected within the Print tasks in Windows. -
Page 76: Printing To A File (Prn)
Printing to a file (PRN) Printer Settings You will sometimes need to save the print data as a file for your You can use the printer properties window, which allows you to purpose. access all of the printer options you need when using your printer. -
Page 77: Layout Tab
Layout Tab Paper Tab The Layout tab provides options to adjust how the document Use the following options to set the basic paper handling appears on the printed page. The Layout Options includes specifications when you access the printer properties. See Multiple Pages per Side, Poster Printing and Booklet “Printing a Document”... -
Page 78: Graphics Tab
Graphics Tab Source Make sure that Source is set to the corresponding paper tray. Use the following Graphic options to adjust the print quality for Use Manual Feeder when printing on special materials like your specific printing needs. See “Printing a Document” on envelopes and transparencies. -
Page 79: Extras Tab
Extras Tab Advanced Options You can set advanced settings by clicking the Advanced You can select output options for your document. See “Printing Options button. a Document” on page 12 for more information about accessing • TrueType Options: This option determines what the driver the printer properties. -
Page 80: About Tab
About Tab Using a Favorite Setting Use the About tab to display the copyright notice and the The Favorites option, which is visible on each properties tab, version number of the driver. If you have an Internet browser, allows you to save the current properties settings for future you can connect to the Internet by clicking on the web site icon. -
Page 81: Advanced Printing
Advanced Printing Printing Multiple Pages on One Sheet of Paper (N-Up Printing) This chapter explains printing options and advanced printing tasks. You can select the number of pages to print on a single sheet of paper. To print more than one page per sheet, the pages will be reduced in size and arranged in the order you specify. -
Page 82: Printing Posters
Printing Posters Printing Booklets This feature allows you to print a single-page document onto 4, 9, or 16 sheets of paper, for the purpose of pasting the sheets together to form one poster-size document. : The poster printing option is available when 600 dpi is selected in the resolution option on the Graphic tab. -
Page 83: Printing On Both Sides Of Paper
Printing on Both Sides of Paper Printing a Reduced or Enlarged Document You can print on both sides of a sheet of paper. Before printing, decide how you want your document oriented. You can change the size of a page’s content to appear larger or The options are: smaller on the printed page. -
Page 84: Using Watermarks
Editing a Watermark Using Watermarks To change the print settings from your software application, access printer properties. See “Printing a The Watermark option allows you to print text over an existing Document” on page 12. document. For example, you may want to have large gray Click the Extras tab and click the Edit button in the letters reading “DRAFT”... -
Page 85: Using Overlays
Using a Page Overlay Using Overlays After an overlay has been created, it is ready to be printed with your document. To print an overlay with a document: Create or open the document you want to print. What is an Overlay? To change the print settings from your software application, access printer properties. -
Page 86: Using Windows Postscript Driver
Advanced Using Windows You can use advanced settings by clicking the Advanced button. PostScript Driver If you want to use the PostScript driver provided with your system CD-ROM to print a document. PPD’s, in combination with the PostScript driver, access printer features and allow the computer to communicate with the printer. -
Page 87: Sharing The Printer Locally
Sharing the Printer Setting Up a Host Computer Locally Start Windows. From the Start menu select Printers and Faxes. You can connect the printer directly to a selected computer, Double-click your printer driver icon. which is called “host computer,” on the network. From the Printer menu, select Sharing. -
Page 88: Using Smart Panel
OTES status of the printer, and allows you to customize the printer’s • If you have already installed more than one Samsung settings. Smart Panel is installed automatically when you printer, first select the printer model you want in order to install the printer software. -
Page 89: Opening The Troubleshooting Guide
Opening the Troubleshooting Changing the Smart Panel Guide Program Settings Using the troubleshooting guide, you can view solutions for Right-click (in Windows or Linux) or click (in Mac OS X) the error status problems. Smart Panel icon and select Options. Right-click (in Windows or Linux) or click (in Mac OS X) the The following window opens. -
Page 90: Using Your Printer In Linux
If the CD-ROM does not automatically run, click the icon at the bottom of the desktop. When the Terminal The supplied CD-ROM provides you with Samsung’s Unified screen appears, type in: Linux Driver package for using your machine with a Linux If the CD-ROM is secondary master and the location to computer. -
Page 91: Uninstalling The Unified Linux Driver
If the CD-ROM is secondary master and the location to The installation program has added the Unified Driver mount is /mnt/cdrom, Configurator desktop icon and Samsung Unified Driver group to the system menu for your convenience. If you [root@localhost root]#mount -t iso9660 /dev/hdc /mnt/... -
Page 92: Using The Unified Driver Configurator
Double-click Unified Driver Configurator on the installed printer. desktop. You can also click the Startup Menu icon and select Samsung Unified Driver and then Unified Driver Configurator. Shows the status, model name and Press each button on the Modules pane to switch to the URI of your printer. -
Page 93: Ports Configuration
Classes Tab Configuring Printer Properties The Classes tab shows a list of available printer classes. Using the properties window provided by the Printers configuration, you can change the various properties for your machine as a printer. Open the Unified Driver Configurator. Shows all of the If necessary, switch to Printers configuration. -
Page 94: Printing A Document
To abort the current job, click Cancel. Printing Files You can print many different types of files on the Samsung machine device using the standard CUPS way - directly from the command line interface. The CUPS lpr utility allows you do that. -
Page 95: Using Your Printer With A Macintosh
Using Your Printer with Installing Software a Macintosh The PostScript driver CD-ROM that came with your machine provides you with the PPD file to use the PS driver, Apple LaserWriter driver, for printing on a Macintosh computer. Your machine supports Macintosh systems with a built-in USB interface or a 10/100 Base-TX network interface card. -
Page 96: Setting Up The Printer
Select your printer name and click Add. interface. Before connecting your printer, make sure If Auto Select does not work properly, select Samsung in that your printer supports a network interface by Printer Model and your printer name in Model Name. -
Page 97: Printing
Changing Printer Settings Printing You can use advanced printing features when using your printer. From your Macintosh application, select Print from the File menu. The printer name which appears in the printer properties OTES window may differ depending on the printer in use. Except for •... - Page 98 Graphics Printer Features The Graphics tab provides options for selecting This tab provides options for selecting the paper type and Resolution(Quality) . Select Graphics form the Presets' adjusting print quality. Select Printer Features from the drop-down list to access the graphic features. Presets' drop-down list to access the following features: •Reverse Duplex Printing: Allows you to select general Resolution(Quality)
-
Page 99: Printing Multiple Pages On One Sheet Of Paper
Printing Multiple Pages on One Sheet Duplex Printing of Paper You can print on both sides of the paper. Before printing in the duplex mode, decide on which edge you will be binding your You can print more than one page on a single sheet of paper. finished document. - Page 100 OFTWARE SECTION NDEX PostScript driver installing 23 advanced printing, use 18 language, change 10 print Layout properties, set document 12 Windows 14 fit to page 20 Linux from Macintosh 34 driver, install 27 booklet printing 19 from Windows 12 printer properties 30 N-up printing 31 Macintosh 36...
- Page 101 favorites 17 image mode 15 resolution Windows 15 toner save 15 true-type option 15 software install Macintosh 32 Windows 4 reinstall Windows 10 system requirements Macintosh 32 uninstall Windows 11 status monitor, use 25 toner save, set 15 uninstall, software Windows 11 uninstalling driver...
- Page 102 Rev.1.09...
Need help?
Do you have a question about the ML-3470 Series and is the answer not in the manual?
Questions and answers