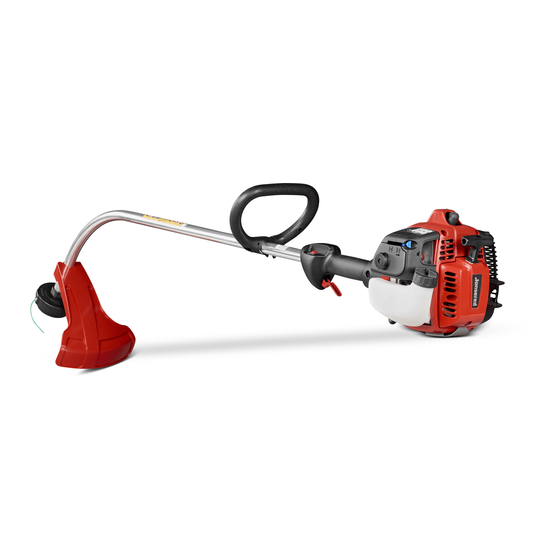
Jonsered BC2125 Operator's Manual
Trimmers
Hide thumbs
Also See for BC2125:
- Operator's manual (40 pages) ,
- Operator's manual (40 pages) ,
- Operator's manual (35 pages)

Subscribe to Our Youtube Channel
Related Manuals for Jonsered BC2125


Summary of Contents for Jonsered BC2125
- Page 1 Operator ′ s manual Please read the operator’s manual carefully and make sure you understand the instructions before using the machine. BC 2125...
-
Page 2: Key To Symbols
KEY TO SYMBOLS Symbols Noise emission to the environment according to the European Community’s Directive. The machine’s emission is specified in chapter WARNING! Careless or incorrect use can Technical data and on label. result in serious or fatal injury to the operator or others. -
Page 3: Table Of Contents
CONTENTS Contents Note the following before starting: KEY TO SYMBOLS Jonsered has a policy of continuous product development and therefore reserves the right to modify the design and Symbols ................ 2 appearance of products without prior notice. CONTENTS Contents ............... 3 Long-term exposure to noise can result in permanent hearing impairment. -
Page 4: Safety Instructions
SAFETY INSTRUCTIONS Personal protective equipment CLOTHING Wear clothes made of a strong fabric and avoid loose clothing that can catch on twigs and branches. Always wear heavy, IMPORTANT! Whenever you use a clearing saw, long pants. Do not wear jewellery, shorts sandals or go brushcutter or trimmer you must wear personal protective barefoot. - Page 5 SAFETY INSTRUCTIONS Cutting attachment guard Quick release This guard is intended to prevent loose objects from being There is an easily accessible, quick release fitted at the front thrown towards the operator. The guard also protects the as a safety precaution in case the engine catches fire, or in operator from accidental contact with the cutting attachment.
-
Page 6: Checking, Maintaining And Servicing The Machine ' S Safety Equipment
SAFETY INSTRUCTIONS Checking, maintaining and servicing WARNING! Bear in mind that: Engine the machine ′ ′ ′ ′ s safety equipment exhaust fumes contain carbon monoxide, which can cause carbon monoxide poisoning. For this reason you should not IMPORTANT! start or run the machine indoors, or All servicing and repair work on the machine requires anywhere that is poorly ventilated. -
Page 7: Cutting Equipment
SAFETY INSTRUCTIONS Muffler • See instructions under the heading Start. Start the machine and apply full throttle. Release the throttle and check that the cutting attachment stops and remains at a standstill. If the cutting attachment rotates with the throttle in the idle position then the carburettor idle setting must be •... -
Page 8: Cutting Equipment
SAFETY INSTRUCTIONS Cutting equipment 3 Maintain the correct blade setting! Follow our instructions and use the recommended blade setting tool. An incorrectly set blade increases the risk of jamming and kickback. IMPORTANT! This section describes how to choose and maintain your cutting equipment in order to: Reduce the risk of kickback. -
Page 9: General Safety Precautions
SAFETY INSTRUCTIONS General safety precautions • Adjust the blade setting. This should be 1 mm. IMPORTANT! The machine is only designed for trimming grass, grass clearing and/or forestry clearing. The only accessories you can operate with this engine unit are the cutting attachments we recommend in the chapter Sharpening grass cutters and grass on Technical data. -
Page 10: General Working Instructions
SAFETY INSTRUCTIONS • Place the machine on the ground, ensure the cutting • The transport guard must always be fitted to the cutting attachment is clear of twigs and stones. Hold the body of attachment when the machine is being transported or in the machine on the ground using your left hand storage. -
Page 11: Basic Working Techniques
SAFETY INSTRUCTIONS Adjusting the harness and clearing saw Correct balance Let the cutting attachment rest lightly on the ground. If you use a saw blade it should balance about 10 cm above the ground to prevent contact with stones and the like. Adjust the position of the support hook to balance the clearing saw correctly. -
Page 12: Grass Clearing Using A Grass Blade
SAFETY INSTRUCTIONS The ABC of clearing Grass clearing using a grass blade Always use the correct equipment. Make sure the equipment is well adjusted. • Grass blades and grass cutters must not be used on Follow the safety precautions. woody stems. Organise your work carefully. -
Page 13: Grass Trimming With A Trimmer Head
SAFETY INSTRUCTIONS Cutting WARNING! Watch out for thrown objects. Always wear eye protection. Never lean over the cutting attachment guard. Stones, rubbish, etc. can be thrown up into the eyes causing blindness or serious injury. • The trimmer is ideal for cutting grass that is difficult to reach using a normal lawn mower. -
Page 14: What Is What
WHAT IS WHAT? What is what? 1 Blade 16 Air filter cover 2 Grease filler cap 17 Handle adjustment 3 Bevel gear 18 Locking nut 4 Cutting attachment guard 19 Support flange 5 Shaft 20 Support cup 6 Handlebar 21 Drive disc 7 Throttle control 22 Trimmer head 8 Stop switch... -
Page 15: Assembly
ASSEMBLY Fitting the handlebar WARNING! Never use a cutting attachment without an approved guard. See the chapter on Technical data. If an incorrect or faulty guard is fitted this can cause serious personal injury. • Remove the screw at the rear of the throttle handle. •... -
Page 16: Fitting The Blade Guard And Saw Blade
ASSEMBLY Fitting the blade guard and saw arrow in the diagram shows the area where you should operate the socket spanner when loosening or tightening blade the nut. Fitting the trimmer guard and Tap-N- Go Pro trimmer head • Remove the mounting plate (H). Fit the adapter (I) and bracket (J) with the two screws (K) as shown. -
Page 17: Fitting Other Guards And Cutting Attachments
ASSEMBLY Adjusting the harness and clearing • Fit the bottom half of the trimmer head (K) to the cover (I) by pressing them together, with the cut-outs on the bottom half aligned with the catches on the cover. WARNING! When using a clearing saw it must always be hooked securely to the harness. -
Page 18: Fuel Handling
Mixture 1:50 (2%). When refuelling, open the fuel cap slowly so • If JONSERED two-stroke oil is not available, you may use that any excess pressure is released gently. another two-stroke oil of good quality that is intended for Tighten the fuel cap carefully after refuelling. -
Page 19: Starting And Stopping
STARTING AND STOPPING Check before starting Starting and stopping For safety reasons follow these recommendations! WARNING! The complete clutch cover and • Check the blade to ensure that no cracks have formed at shaft must be fitted before the machine is the bottom of the teeth or by the centre hole. -
Page 20: Warm Engine
STARTING AND STOPPING Warm engine Starting Ignition: Set the stop switch to the start position. Choke: Set the throttle to the start position by moving the choke control to the choke position and then returning it to its Hold the body of the machine on the ground using your left original position. -
Page 21: Maintenance
Carburettor WARNING! If the idle speed cannot be adjusted so that the cutting attachment Your Jonsered product has been designed and manufactured stops, contact your dealer/service to specifications that reduce harmful exhaust fumes. The workshop. Do not use the machine until it engine will be run in after it has used 8-10 tanks of fuel. -
Page 22: Muffler
MAINTENANCE High speed jet H Adjusting the start throttle speed Note that the engine should not be under load when you The correct start throttle speed is set by means of an adjuster adjust the high speed jet H. You should therefore remove the on the rear of the handle next to the cable. -
Page 23: Cooling System
Contact that the bevel gear is filled 3/4 full with grease. Use your dealer to inspect the muffler. A blocked mesh will cause JONSERED special grease. the machine to overheat and result in damage to the cylinder and piston. -
Page 24: Spark Plug
MAINTENANCE Put the filter in a plastic bag and pour the filter oil over it. • Sharpen all edges equally to maintain the balance of the Knead the plastic bag to distribute the oil. Squeeze the blade. excess oil out of the filter inside the plastic bag and pour off the excess before fitting the filter to the machine. -
Page 25: Maintenance Schedule
MAINTENANCE Maintenance schedule Weekly maintenance Below you will find some general maintenance instructions. If 0,5 mm you need further information please contact your service workshop. Daily maintenance 1 Check the starter and starter cord. 2 Check that the vibration damping elements are not damaged. -
Page 26: Technical Data Technical Data
TECHNICAL DATA Technical data Technical data BC 2125 Engine Cylinder displacement, cm 24,5 Cylinder bore, mm Stroke, mm Idle speed, rpm 2700 Recommended max. fast idle speed, rpm 11000-11700 Speed of output shaft, rpm 8014 Max. engine output, acc. to ISO 8893, kW/ rpm 0,9/9000 Catalytic converter muffler Speed-regulated ignition system... - Page 27 TECHNICAL DATA Approved accessories Type Cutting attachment guard, Art. no. Centre hole in blades/cutters, Ø 25,4 mm Blade shaft thread M10 Grass blade/grass cutter Grass 255-4 1" (Ø 255 4-teeth) 503 93 42-04 Grass 255-8 1" (Ø 255 8-teeth) 503 93 42-04 Trimmer head Tap-N-Go Pro 503 93 42-04 / 503 97 71-03...
-
Page 28: Ec-Declaration Of Conformity
(Applies to Europe only) We, Jonsered, SE-561 82 Huskvarna, Sweden, tel: +46-36-146500, declare that the clearing saw Jonsered BC 2125 with serial numbers dating from 2002 onwards (the year is clearly stated on the rating plate, followed by the serial number), comply with the requirements of the COUNCIL’S DIRECTIVE:... - Page 29 Trimmy H II 15 cm 6" 7,5 m ~ 3,7 m 15 cm 6"...
- Page 30 Tap-N-Go 35 8,5 m 10 cm 4" 4,3 m "Clic" 15 cm 6"...
- Page 31 8,5 m 10 cm 4" 4,2 m "Clic" 15 cm 6"...
- Page 32 4,25 m 4,25 m 15 cm 6" 15 cm 6"...
- Page 33 Auto 32 4,0 m 15 cm ~2,0 m 6 " 6,5 ' 15 cm 6 "...
- Page 34 Poly Trim <20mm >20mm 6 Nm X 10 ´®z*x{6¶6e¨ ´®z*x{6¶6e¨...
- Page 35 1088912-26 ´®z*x{6¶6e¨ ´®z*x{6¶6e¨ 2003-11-10...
Need help?
Do you have a question about the BC2125 and is the answer not in the manual?
Questions and answers