Table of Contents
Advertisement
Quick Links
Advertisement
Table of Contents

Related Manuals for AG Neovo QF-28


Summary of Contents for AG Neovo QF-28
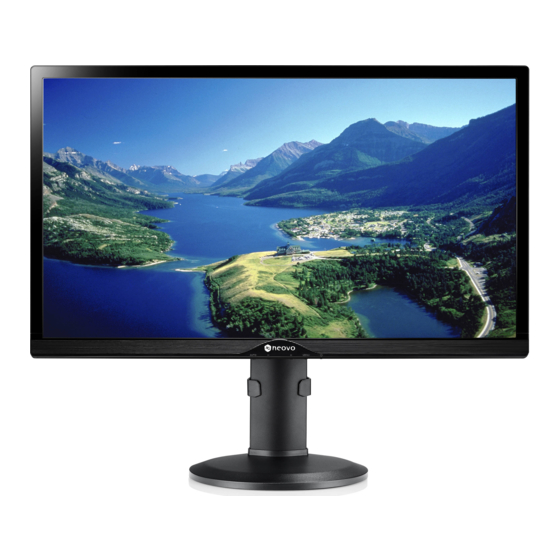
- Page 1 QF-28 4K2K LED-Backlit Display User Manual...
-
Page 2: Table Of Contents
TABLE OF CONTENTS SAFETY PRECAUTIONS.................. 3 FOR YOUR SAFETY ..................3 SPECIAL NOTES ON LCD MONITOR ............5 BEFORE YOU OPERATE THE MONITOR ............ 6 FEATURES ....................6 CHECKING THE CONTENTS OF THE PACKAGE......... 6 INSTALLATION INSTRUCTIONS ............... 6 ADJUSTING THE VIEWING ANGLE. -
Page 3: Safety Precautions
FOR YOUR SAFETY Before operating the monitor, please read this manual thoroughly. This manual should be retained for future reference. SAFETY PRECAUTIONS NOTICE: 1. The changes or modifications not expressly approved by the party responsible for compliance could void the user’s authority to operate the equipment. 2. - Page 4 FOR YOUR SAFETY PRECAUTIONS • Do not use the monitor near water, e.g. near a bathtub, washbowl, kitchen sink, laundry tub, swimming pool or in a wet basement. • Do not place the monitor on an unstable cart, stand, or table. If the monitor falls, it can injure a person and cause serious damage to the appliance.
-
Page 5: Special Notes On Lcd Monitor
FOR YOUR SAFETY WEEE DECLARATION Disposal of Waste Equipment by Users in Private Household in the European Union. This symbol on the product or on its packaging indicates that this product must not be disposed of with your other household waste.Instead, it is your responsibility to dispose of your waste equipment by handing it over to a designated collection point for the recycling of waste electrical and electronic equipment.The separate collection and recycling of your waste... -
Page 6: Before You Operate The Monitor
BEFORE YOU OPERATE THE MONITOR FEATURES • 71.0cm(28 inches) TFT Color LCD Monitor • Crisp, Clear Display for Windows • Recommended Resolutions: 3840x2160@60Hz • Ergonomic Design • Space Saving, Compact Case Design CHECKING THE CONTENTS OF THE PACKAGE The product package should include the following items: 1. -
Page 7: Adjusting The Viewing Angle
BEFORE YOU OPERATE THE MONITOR ADJUSTING THE VIEWING ANGLE For optimal viewing it is recommended to look at the full face of the monitor, then adjust the monitor’s angle to your own preference. Hold the stand so that the monitor does not topple when you change the monitor’s angle. -
Page 8: Connecting Cables
BEFORE YOU OPERATE THE MONITOR Power Source: 1. Make sure that the power cord is the correct type required in your area. 2. This LCD monitor has an universal power supply that allows operation in either 100/120V AC or 220/240V AC voltage area (No user adjustment is required.) 3. - Page 9 BEFORE YOU OPERATE THE MONITOR Figure 3 Connecting Cables...
-
Page 10: General Instructions
BEFORE YOU OPERATE THE MONITOR GENERAL INSTRUCTIONS Press the power button to turn the monitor on or off. The other control buttons are located at front panel of the monitor (See ). By changing these settings, the Figure 4 picture can be adjusted to your personal preferences. •... -
Page 11: Operating Instructions
OPERATING INSTRUCTIONS FRONT PANEL CONTROL • Auto/ Source / Exit: 1. When OSD menu is in active status, this button will act as EXIT-KEY (EXIT OSD menu). 2. When OSD menu is in off status, press this button to select input Source: D-Sub/DVI/DP/HDMI. -
Page 12: How To Adjust A Setting
OPERATING INSTRUCTIONS HOW TO ADJUST A SETTING 1. Press the MENU-button to activate the OSD window. 2. Press + or - to navigate through the functions. Once the desired function ishighlighted, press the MENU-button to activate it. If the function selected has a sub-menu, press + or - again to navigate through the submenu functions. -
Page 13: Adjusting The Picture
OPERATING INSTRUCTIONS ADJUSTING THE PICTURE The descriptions for function control. Main Main Menu Sub Menu Menu Description Item Item Menu Icon Contrast Contrast fr om Digital-register Brightness Backlight Adjustment Standard Standard Mode Text Text Mode Internet Internet Mode Luminance Game Game Mode Movie Movie Mode... - Page 14 OPERATING INSTRUCTIONS Main Main Menu Sub Menu Menu Description Item Item Menu Icon Timeout Adjust the OSD Timeout. OSD Setup Language Select the OSD language. Stop Multi-View function PIP Mode Picture-in-Picture Mode Picture-by-Picture Mode Small Small sub-window PIP Size Middle Middle sub-window Large Large sub-window...
-
Page 15: Plug And Play
OPERATING INSTRUCTIONS PLUG AND PLAY Plug & Play DDC1/2B Feature This monitor is equipped with VESA DDC2B capabilities according to the VESA DDC STANDARD. It allows the monitor to inform the host system of its identity and, depending on the level of DDC used, communicate additional information about its display capabilities. -
Page 16: Technical Support (Faq)
TECHNICAL SUPPORT (FAQ) Problem & Question Possible Solution Power LED is not on. • Check if the Power Switch is in the ON position. • Power Cord should be connected. No Plug & Play • Check if the PC system is Plug & Play compatible. •... -
Page 17: Error Message & Possible Solution
TECHNICAL SUPPORT (FAQ) ERROR MESSAGE & POSSIBLE SOLUTION CABLE NOT CONNECTED : 1. Check that the signal-cable is properly connected. If the connector is loose, tighten the connector’s screws. 2. Check the signal cable connection pins for damage. INPUT NOT SUPPORT : Your computer has been set to unsuitable display mode, set the computer to display mode given in the following table.(page 20~21) PiP/ PbP Input compatibility:... - Page 18 TECHNICAL SUPPORT (FAQ) Main Source PIP Source Support Operating Instruction If main source is HDMI, sub source is DisplayPort: 1. Activating the OSD, select the main source to DisplayPort 2. Change the PC DisplayPort resolution to 3840x2160-30Hz 3840x2160-60Hz 3. Activating the OSD, select the main source to HDMI PS: To get better view experience, to keep DisplayPort as main...
- Page 19 TECHNICAL SUPPORT (FAQ) Main Source PIP Source Support Operating Instruction 4. Change the PC DisplayPort resolution to 1920x1080-60Hz 5. Activating the OSD, turn on the PBP function, and select the main/sub source you wanted. If main source (right window) is DisplayPort, sub source is HDMI (left window): 1.
-
Page 20: Appendix
APPENDIX SPECIFICATIONS Specifications QF-28 LED-backlit Panel Type TFT LCD Panel Size 28" LCD Panel Pixel Pitch (mm) 0.16 x 0.16 Max. Resolution 3840 x 2160 Display Colour 1.073B 30KHz – 99KHz(D-SUB,DVI,DHMI) H. Freq. 30KHz – 160KHz(DisplayPort) Frequency (H/V) 56Hz – 80Hz(D-SUB)... - Page 21 APPENDIX Specifications QF-28 +/Volume+ • -/ECO • Switch AUTO/SOURCE/EXIT • MENU/ENTER • POWER BUTTON • Control Luminance • Setting Image Setup • Color Temp. • Functions OSD Setup • PIP Setup • Extra • Plug & Play VESA DDC2B Operating Temperature 0°C ~ 40°C (32°F ~ 104°F)
-
Page 22: Factory Preset Timing Table
APPENDIX FACTORY PRESET TIMING TABLE Preset Display Modes Horizontal Vertical Standard Resolution Frequency (KHz) Frequency (Hz) 640×480 @60Hz 31.469 59.940 640×480 @67Hz 35.000 66.667 640×480 @72Hz 37.861 72.809 640×480 @75Hz 37.500 75.000 Dos-mode 720×400 @70Hz 31.469 70.087 800×600 @56Hz 35.156 56.250 800×600 @60Hz 37.879... - Page 23 APPENDIX MHL Timing Table Format Resolution Vertical Frequency 480P 640 x 480 60Hz 480P 720 x 480 60Hz 576P 720 x 576 50Hz 720P 1280 x720 50Hz,60Hz 1080I 1920 x 1080 50Hz,60Hz 1080P 1920 x 1080 30Hz Video(DP / HDMI ) Timing Table Format Resolution 480P@60Hz for Digital only...
-
Page 24: Connector Pin Assignment
APPENDIX CONNECTOR PIN ASSIGNMENT Figure 6 15-Pin Color Display Signal Cable Pin No. Description Pin No. Description +5V/Sense(+5V) Green Monitor Gnd Blue Logic Gnd Logic Gnd DDC serial data Detect cable H sync Red Gnd V sync Green Gnd DDC serial Clk. Blue Gnd... - Page 25 APPENDIX Figure 7 20-Pin Display Port Signal Cable Pin No. Mnemonic Signal ML Lane 3 (n) Lane 3 - Ground ML Lane 3 (p) Lane 3 + ML Lane 2 (n) Lane 2 - Ground ML Lane 2 (p) Lane 2 + ML Lane 1 (n) Lane 1 - Ground...
- Page 26 APPENDIX Figure 8 HDMI Signal Cable Pin No. Signal Name Pin No. Signal Name TMDS Data 2+ TMDS Clock Shield TMDS Data 2 Shield TMDS Clock TMDS Data 2 TMDS Data 1+ Reserved (N.C. on device) TMDS Data 1 Shield TMDS Data 1 TMDS Data 0+ DDC/CEC Ground...
-
Page 27: Product Dimensions
APPENDIX PRODUCT DIMENSIONS QF-28 ► Front View ► Side View ► Top View Company Address: 5F-1, No. 3-1, Park Street, Nangang District, Taipei, 11503, Taiwan.
Need help?
Do you have a question about the QF-28 and is the answer not in the manual?
Questions and answers