Mitsubishi Electric PEA-RP-EA Installation Manual
Air-conditioners
Hide thumbs
Also See for PEA-RP-EA:
- Installation manual (8 pages) ,
- Technical data book (118 pages) ,
- Technical data manual (66 pages)
Advertisement
Table of Contents
- 1 Table of Contents
- 2 Safety Precautions
- 3 Installation Location
- 4 Installing the Indoor Unit
- 5 Installing the Refrigerant Piping
- 6 Installing the Refrigerant Piping
- 7 Drainage Piping Work (Fig. 5-1)
- 8 Electrical Work
- 9 Duct Work (Fig. 7-1)
- 10 Test Run
- 11 Easy Maintenance Function
- Download this manual
Advertisement
Table of Contents

Related Manuals for Mitsubishi Electric PEA-RP-EA


Summary of Contents for Mitsubishi Electric PEA-RP-EA
- Page 1 Air-Conditioners PEA-RP·EA INSTALLATION MANUAL FOR INSTALLER English For safe and correct use, read this manual and the outdoor unit installation manual thoroughly before installing the air-conditioner unit.
-
Page 2: Table Of Contents
• The unit must be securely installed on a structure that can sustain its weight. • Use only accessories authorized by Mitsubishi Electric and ask a dealer or If the unit is mounted on an unstable structure, it may fall down and cause an authorized technician to install them. -
Page 3: Installation Location
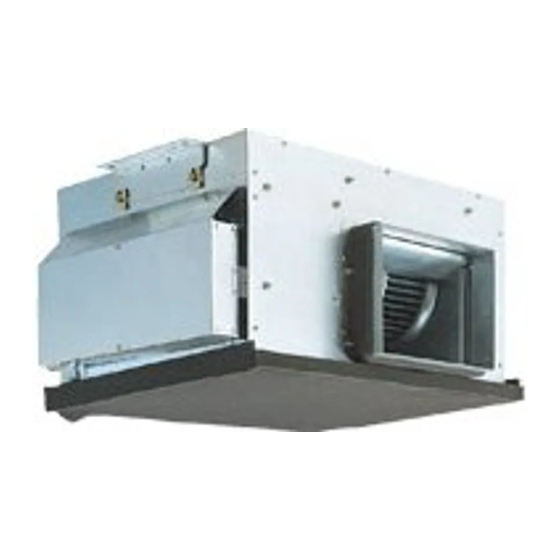
1. Safety precautions 1.3. Before electric work Caution: • Be sure to install circuit breakers. If not installed, electric shock may result. • Be sure to ground the unit. Do not connect the ground wire to gas or water • For the power lines, use standard cables of sufficient capacity. Otherwise, a pipes, lighting rods, or telephone grounding lines. - Page 4 3. Installing the indoor unit (mm) 3.2. Unit dimension and service space (Fig. 3-2) A Air intake B Air outlet C Service space D Drain pan E Electrical parts box (mm) Models RP71 RP100 1055 RP125 1255 1120 1160 RP140 1415 1306 1346...
-
Page 5: Installing The Refrigerant Piping
4. Installing the refrigerant piping 4.1. Precautions 4.1.2. For devices that use R410A refrigerant • Use ester oil, ether oil, alkylbenzene oil (small amount) as the refrigeration oil 4.1.1. For devices that use R407C refrigerant applied to the flared sections. •... -
Page 6: Drainage Piping Work (Fig. 5-1)
4. Installing the refrigerant piping 4.3. Refrigerant and drainage piping locations of indoor unit (Fig. 4-3) A Refrigerant pipe (gas) B Refrigerant pipe (liquid) C Drain pipe D Air filter (option) E Ceiling Fig. 4-3 4.4. Refrigerant piping (Fig. 4-4) Heat insulation for refrigerant pipes: 1 Wrap the enclosed large-sized pipe cover around the gas pipe, making sure that the end of the pipe cover touches the side of the unit. - Page 7 6. Electrical work 6.2. Indoor unit power supplied from outdoor unit The following connection patterns are available. The outdoor unit power supply patterns vary on models. 1:1 System A Outdoor unit power supply <For models without heater> <For models with heater> B Earth leakage breaker C Wiring circuit breaker or isolating switch D Outdoor unit...
- Page 8 6. Electrical work 6.3. Separate indoor unit/outdoor unit power supplies (For PUHZ application only) The following connection patterns are available. The outdoor unit power supply patterns vary on models. 1:1 System <For models without heater> A Outdoor unit power supply * The indoor power supply terminal kit is required.
- Page 9 6. Electrical work 6.4. Remote controller (Wired remote controller) 1) Installing procedures (1) Select an installing position for the remote controller. (Fig. 6-4) The temperature sensors are located on both remote controller and indoor unit. s Procure the following parts locally: Two piece switch box Thin copper conduit tube Lock nuts and bushings...
-
Page 10: Duct Work (Fig. 7-1)
6. Electrical work Select unit numbers 01 to 03 or all units (AL [wired remote controller]/07 [wireless remote controller]) Mode no. Setting no. Initial setting setting Mode Settings Filter sign 100Hr 2500Hr No filter sign indicator Fan speed Standard (PLH/PLA)/Silent (PCH/PCA) High ceiling 1 (PLH/PLA)/Standard (PCH/PCA) –... - Page 11 8. Test run A ON/OFF button 8.2. Test run B Test run display The following 2 methods are available. C Indoor temperature liquid line 8.2.1. Using wired remote controller (Fig. 8-1) temperature display 1 Turn on the power at least 12 hours before the test run. D ON/OFF lamp 2 Press the [TEST] button twice.
- Page 12 8. Test run [Output pattern B] Errors detected by unit other than indoor unit (outdoor unit, etc.) Wired remote Wireless remote controller controller Beeper sounds/OPERATION Symptom Remark INDICATOR lamp flashes Check code (Number of times) Indoor/outdoor unit communication error (Transmitting error) (Outdoor unit) Compressor overcurrent interruption U3, U4 Open/short of outdoor unit thermistors...
-
Page 13: Easy Maintenance Function
9. Easy maintenance function Display example (Comp discharge temperature 64 °C) By using the maintenance mode, you can display many types of maintenance data on the remote controller such as the heat exchanger temperature and compressor current consumption for the indoor and outdoor units. This function can be used whether the air conditioner is operating or not. - Page 16 Please be sure to put the contact address/telephone number on this manual before handing it to the customer. HEAD OFFICE: MITSUBISHI DENKI BLDG., 2-2-3, MARUNOUCHI, CHIYODA-KU, TOKYO 100-8310, JAPAN Printed in Thailand BG79U642H01...
Need help?
Do you have a question about the PEA-RP-EA and is the answer not in the manual?
Questions and answers