Table of Contents
Advertisement
Available languages
Available languages
Quick Links
Advertisement
Table of Contents

Related Manuals for Mitsubishi Electric PUHZ-ZRP200YKA


Summary of Contents for Mitsubishi Electric PUHZ-ZRP200YKA
- Page 1 ИНСТРУКЦИЯ ПО ЭКСПЛУАТАЦИИ Mitsubishi Electric PEA-RP200GAQ/PUHZ-ZRP200YKA...
- Page 2 Air-Conditioners INDOOR UNIT PEA-RP200, 250, 400, 500 GAQ FOR USER FÖR ANVÄNDAREN FÜR BENUTZER TIL BRUGER POUR L’UTILISATEUR PARA O UTILIZADOR PARA EL USUARIO °IA TON XPH™TH PER L’UTENTE KULLANICI ‹Ç‹N VOOR DE GEBRUIKER ДЛЯ ПОЛЬЗОВАТЕЛЯ OPERATION MANUAL For safe and correct use, please read this operation manual thoroughly before operating the air-conditioner unit. BEDIENUNGSHANDBUCH Zum sicheren und einwandfreien Gebrauch der Klimaanlage dieses Bedienungshandbuch vor Inbetriebnahme gründlich durchlesen.
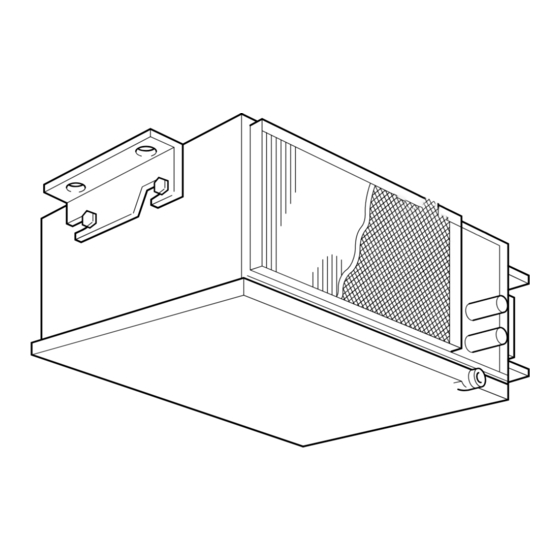
- Page 3 [Fig. 2.0.1] [Fig. 2.0.2] TEMP. ON/OFF A Air outlet A LCD remote controller (option) B Air inlet C Air filter [Fig. 5.0.1] A Air outlet C Air filter B Air inlet D Air filter handle...
-
Page 4: Table Of Contents
• Make sure that there is a main power switch. • Use only accessories authorized by Mitsubishi Electric and ask your • Be sure to adhere to the unit’s voltage and fuse or circuit breaker ratings. dealer or an authorized company to install them. If accessories are in- Never use a piece of wire or a fuse with a higher rating than the one stalled improperly, water leakage, electric shock or fire may result. -
Page 5: During Operation
1.2. During operation In case of failure Warning: Caution: • Never remodel the air conditioner. Consult your dealer for any repair serv- • Do not use any sharp object to push the buttons, as this may damage the ice. Improper repair work can result in water leakage, electric shock, fire, remote controller. -
Page 7: Operation
3. Operation Remote controller (option)-Button TEMP. ON/OFF MENU ON/OFF FILTER BACK MONITOR/SET CHECK TEST Opening the door. PAR-21MAA CLOCK OPERATION CLEAR 0 Filter button (<Enter> button) 1 Set Temperature buttons A Test Run button Down B Check button (Clear button) C Airflow Up/Down button 2 Timer Menu button (Monitor/Set button) 3 Mode button (Return button) -
Page 8: Switching The Unit On/Off
When stop continues for 10 minutes, the compressor and indoor fan are oper- ated for 3 minutes to keep the humidity low. For heating Press the 2 2 2 2 2 [operation mode] button to bring up the “ HEAT” display. Regarding displays during heating operation “DEFROST”... -
Page 9: Using The Timer
s How to Set the Weekly Timer Notes: • It can be set regardless of the operation of the indoor unit. 1. Be sure that you are at a standard control screen, and that the weekly timer indicator 1 is shown in the display. •... - Page 10 s How to Set the Simple Timer Note: Your new entries will be cancelled if you press the Mode (Return) button 2 2 2 2 2 Timer Setting button 4 4 4 4 4 . before pressing the Filter If you have set two or more different operations for exactly the same time, Action (On or Off) only the operation with the highest Operation No.
- Page 11 Examples When something other than the Auto Off Timer is displayed, set it to AUTO If ON and OFF times have both been set at the simple timer, operation and display OFF TIMER using the function selection of remote controller (see Installa- are as indicated below.
-
Page 13: Locking The Remote Controller Buttons (Operation Function Limit Controller)
3.7. Locking the remote controller buttons 3.8.2. Flashing Mode Indicator (Operation function limit controller) ■ If you wish, you can lock the remote controller buttons. You can use the Func- tion Selection of remote controller to select which type of lock to use. (For ˚C information about selecting the lock type, see Installation Manual). -
Page 14: The Smart Way To Use
4. The smart way to use Even minimal steps to care for your air conditioner can help make its use far Prevent intrusion of heat during air-cooling more effective in terms of air-conditioning effect, electricity charges, etc. • To prevent the intrusion of heat during cooling operation, provide a curtain or a Set the right room temperature blind on the window to block out direct sunlight. -
Page 15: Troubleshooting
6. Troubleshooting ● The unit started even though the start/stop button was not pushed. Before you call out a repair man, check the following table to see whether there is a simple solution to your problem. • Is the timer on? Press the start/stop button to stop the unit. -
Page 16: Installation And Transferring Works, And Checking
7. Installation and transferring works, and checking Regarding place for installation Regarding transfer of installation Consult with your dealer for details on installation and transferring the installation. • When removing and reinstalling the air conditioner when you enlarge your home, remodel, or move, consult with your dealer in advance to ascertain the Caution: cost of the professional engineering work required for transferring the installa- Never install the air conditioner where there is a risk of leakage of flammable... - Page 17 Используйте только те дополнительные приспособления, которые • Убедитесь в том, что на линии подачи тока имеется выключатель. санкционированы “Mitsubishi Electric” , и обратитесь к вашему • Обязательно соблюдайте напряжение, указанное для прибора, и поставщику или в специализированное предприятие и закажите их...
- Page 19 1.2. В период эксплуатации Внимание: • Не направляйте поток воздуха на растения или на животных или Внимание: птиц в клетках. • Часто проветривайте помещение; При постоянной работе прибора • Не используйте какие-либо острые предметы для нажатия кнопок, в закрытом помещении в течение длительного периода времени поскольку...
- Page 20 3. Эксплуатация Кнопка пульта дистанционного управления (дополнительно) TEMP. ON/OFF MENU ON/OFF FILTER BACK MONITOR/SET CHECK TEST Открывание двери. PAR-21MAA CLOCK OPERATION CLEAR 0 Кнопка фильтра (Кнопка 1 Кнопки установки температуры A Кнопка пробный прогон Понижение B Кнопка проверки (кнопка сброса значений) Повышение...
- Page 21 Внимание: Никогда не подвергайтесь в течение продолжительного времени прямому воздействию холодного воздуха. Чрезмерное воздействие холодного воздуха вредно для здоровья, его следует избегать. Работа в режиме сушки Режим сушки - это контролируемый микрокомпьютером режим осушения, контролирующий чрезмерное охлаждение воздуха в соответствии с заданной ˚C Вами...
- Page 22 5. Для завершения процедуры установки нажмите кнопку режима (возврат) 3.4. Выбор скорости вентилятора 2. При этом на дисплее снова появится стандартное изображение экрана управления, на котором 1 будет показывать последние настройки дня 1. Для выбора нужной скорости вентилятора нажмите кнопку недели...
- Page 23 кнопку процесса (7 или 8) для изменения Установка матрицы 4. Нажмите или вида процесса таймера, отображаемого на дисплее (на 9). Номер <Установки процесса Sunday Monday ··· Saturday режима * При нажатии кнопки происходит переход к следующему процессу 1 для воскресенья> •...
- Page 25 3. Нажмите кнопку ON/OFF (ВКЛ./ВЫКЛ.) 1 для отображения текущих Пример 1: настроек включения или выключения обычного таймера. Нажмите Включите таймер, установив для времени включения более ранее значение, кнопку один раз для отображения оставшегося времени до включения, чем для времени выключения. а...
- Page 26 s Порядок установки таймера с автоматическим отключением 3.7. Блокировка кнопок пульта Установка таймера дистанционного управления (Пульт дистанционного управления AFTER с ограниченной функцией AUTO OFF эксплуатации) 1. Убедитесь в том, что на дисплее отображен стандартный экран ■ При желании кнопки пульта дистанционного управления могут быть управления, а...
- Page 27 ● Если мигают одновременно лампа ON (ВКЛ.) и код ошибки: Данная Примечание: Может быть ограничена также в индивидуальном порядке. индикация свидетельствует о том, что в работе кондиционера возникли неполадки и он остановлен (продолжение эксплуатации невозможно). 3.8.2. Мигающий индикатор режима Запомните отображаемый номер блока и код ошибки, затем отключите кондиционер...
- Page 28 5. Уход за прибором Обслуживание фильтра должно всегда выполняться специалистом по Внимание: техобслуживанию. • Не сушите фильтр под воздействием прямых солнечных лучей или До проведения обслуживания прибора отключите электропитание у огня и т.д. Это может привести к деформации фильтра. (положение ВЫКЛ.). •...
- Page 29 Если вышеприведенная информация не применима к Вашей ситуации, выключите главный выключатель питания и обратитесь к дилеру, у которого Вы приобрели данный кондиционер воздуха, сообщив ему название модели и описав суть проблемы. Не пытайтесь самостоятельно отремонтировать прибор. В любом из нижеописанных случаев выключите главный выключатель питания и обратитесь к Вашему местному дилеру с просьбой о проведении техобслуживания: •...
- Page 31 8. Технические условия Название модели PEA-RP200GAQ PEA-RP250GAQ PEA-RP400GAQ PEA-RP500GAQ Напряжение В 3N ~ 380, 400, 415 Электропитание Частота Гц Внешнее статическое давление Па Скорость потока воздуха /ч 3900/3120 4800/3840 7200 9600 (Высокий/Низкий) Скорость потока воздуха дБ (А) 51/48 52/49 (Высокий/Низкий) Высота...
- Page 32 This product is designed and intended for use in the residential, commercial and light-industrial environment. • Low Voltage Directive 2006/95/ EC The product at hand is • Electromagnetic Compatibility Directive based on the following 2004/108/ EC EU regulations: Please be sure to put the contact address/telephone number on this manual before handing it to the customer.
- Page 33 СМОТРИТЕ ТАКЖЕ Кондиционеры сплит- Моноблочные Потолочные Мультисплит-системы системы кондиционеры вентиляторы Установка настенных Сервис Бытовые рекуператоры Очистители воздуха кондиционеров кондиционеров Аксессуары для Напольные вентиляторы Фреон Труба медная кондиционеров Кронштейны для кондиционеров...
Need help?
Do you have a question about the PUHZ-ZRP200YKA and is the answer not in the manual?
Questions and answers