Table of Contents
Advertisement
Quick Links
Advertisement
Table of Contents

Related Manuals for RugGear SWIFT PLUS(RG220)


Summary of Contents for RugGear SWIFT PLUS(RG220)
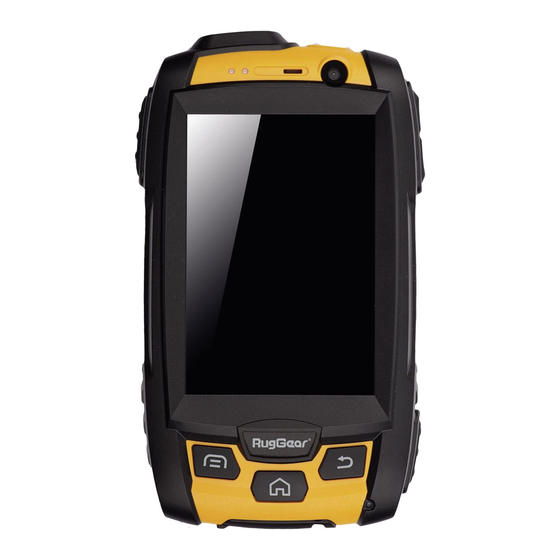
- Page 1 RugGear SWIFT PLUS(RG220) Smartphone User manual...
- Page 2 Please Read Before Proceeding Safety Precautions Please read the safety precautions carefully to ensure the correct use of your mobile phone. Despite the nature of this rugged device, avoid hitting, throwing, dropping, crushing, bending and puncturing your mobile phone. Avoid using your mobile phone in a damp environment, such as the bathroom. Prevent your mobile phone from being intentionally soaked or washed in liquid.
- Page 3 Legal Notice The product described in this manual may include copyrighted software and possible licensors. Customers shall not in any manner reproduce, distribute, modify, decompile, disassemble, decrypt, extract, reverse engineer, lease, assign, or sublicense the said software or hardware, unless such restrictions are prohibited by applicable laws or such actions are approved by respective copyright holders under licenses.
-
Page 4: Table Of Contents
Contents Welcome to the RG220 Smartphone..............1 Getting to Know Your Mobile Phone .................1 Key functions at your fingertips ..................1 Getting Started with Your Mobile Phone ............... 2 Powering On or Off Your Mobile Phone ................ 6 Getting to Know the Home Screen ................. 6 Using the Touchscreen .................... - Page 5 Synchronizing Information................32 Managing Your Accounts ....................32 Customizing Your Account Synchronization..............33 Using Other Applications................33 Using the Calendar......................33 Using the Alarm......................34 Using the File Manager....................35 Calculator ........................35 Managing Your Mobile Phone.................36 Setting the Date and Time....................36 Setting the Display ......................
-
Page 6: Welcome To The Rg220 Smartphone
Welcome to the RG220 Smartphone The RG220 is waterproof IPX7, dustproof IP6X. Yet it also features a capacitive touch control panel through excellent scratch resistant glass, and is powered by Android, offering Google suite applications, including access to thousands of Android applications through Google Play Store. As well as being a rugged mobile phone, with it you’ll be able to enjoy web browsing, messaging, music and more with its high capacity battery and expandable memory up to 32GB. -
Page 7: Getting Started With Your Mobile Phone
Menu key Touch to open a menu with options that relate to the current screen or application. Back key Touch to display the previous screen you were working on. Use to close onscreen keyboard. Getting Started with Your Mobile Phone 1. - Page 8 as shown in Jig-3 4. Insert the back cover: Insert the back cover and rotate four screws clockwise to lock the back cover as shown in Jig-4...
- Page 9 5. Charging Shortcuts to be on and off power display, Press Power button to be ON or OFF. Press the button and keep on the pressing Attention: Please power off the phone before plug in or pull out the SIM card. Please make sure the whole device battery cover, battery cover lock, the screw cove, earphone and USB cover are well sealed so that the device can be dust proof and water proof.
-
Page 10: Powering On Or Off Your Mobile Phone
Important Information About the Battery If the battery has not been used for a long period of time, you may not be able to power on your mobile phone immediately after you begin charging the battery. Allow the battery to charge for a few minutes with the phone powered off before attempting to power on the phone. -
Page 11: Locking And Unlocking The Screen
You can drag an icon to move or delete it. Rotating Your Mobile Phone Display The orientation of most screens will rotate with the phone as you turn it from upright to sideways and back again. Locking and Unlocking the Screen Locking the Screen When your mobile phone is on, press the Power button to lock the screen. -
Page 12: Notification Panel
Connected to HSPA Vibrate mode Mobile network signal strength Battery is very low Searching for a network signal Battery is low No SIM card installed Or No signal Battery is partially drained Connected to a Wi-Fi network Battery is full Roaming Battery is charging Airplane mode... -
Page 13: Folders
1. From the Home screen, touch . Then touch the APPS tab to display the applications. 2. To add an item, drag the application icon to a specific Home screen. Moving a Screen Item 1. Touch and hold an application icon on the Home screen until the icon enlarges. 2. -
Page 14: Using The Airplane Mode
Using the Airplane Mode Some locations may require you to turn off your phone’s wireless connections. Rather than powering off your phone, you can set it to Airplane mode. 1. Press and hold the the Power button. 2. Touch Airplane mode in the options menu. Or using the Settings application, access the WIRELESS &... -
Page 15: Answering And Rejecting A Call
number. Making a Call from Call log 1. Touch Phone ( ) > Call Log tab to display the call log. If you are already working with Contacts or Dialer, touch the Call Log tab. 2. Touch of the contact you want to call. Answering and Rejecting a Call Answering or Rejecting an Incoming Call When you receive a phone call, the incoming call screen opens with the caller ID and any... -
Page 16: Communicating Withyour Contacts
To open the application, do one of the following: Touch and then People ( ) to display the contact list. Touch on the Home screen, then touch People tab. All of your contacts are displayed alphabetically in a scrolling list. Copying Contacts You can copy contacts to and from the SIM card, the device, memory card, or USB storage. -
Page 17: Using The Onscreen Keyboard
Communicating with a Contact 1. In the contacts list, touch the contact that you want to communicate. 2. In the contact’s details screen, you can do one of the following: Touch the phone number to make a call. Touch to send message. Touch to make a video call. -
Page 18: Messaging
Customizing Keyboard Settings 1. Touch > Settings ( ) > Language & input. 2. On Android keyboard option, touch to customize the Android keyboard settings. Messaging The Messaging application allows you to exchange text messages (SMS) and multimedia messages (MMS) with anyone using an SMS or MMS-capable phone. With the Email application you can read and send emails. -
Page 19: Email
6. Touch and select the kind of media file to attach to the message. 7. Once you are done, touch . If you have inserted two SIM cards, touch the desired network to send your message. Opening and Viewing a Multimedia Message 1. - Page 20 6. Enter Name and Account display name. Note: The Account display name is the name shown on the Email screen. 7. Touch Next. After the initial setup, your email application opens to display the contents of your Inbox. Adding Other Email Accounts 1.
-
Page 21: Getting Connected
2. Touch General or an email account. 3. Touch an option and change the necessary settings. Note: Your account’s incoming and outgoing settings depend on the kind of email service for your account: POP3, IMAP, or Exchange. You can enter the necessary details manually, although you will typically need to contact your email service provider to determine the right settings for the account. -
Page 22: Browser
Browser Your mobile phone comes with a browser. You can use Browser to access and browse the Internet. Opening Browser To open the application, do one of the following: Touch on the Home screen. Touch > Browser ( Opening a Web Page 1. -
Page 23: Bluetooth
Home: Touch to return to the home page. Save to bookmarks: Touch to save favorite web pages. Close: Touch to exit the web page. Save for offline reading: Touch to save the current web page to be available even when the\ ... -
Page 24: Entertainment
DEVICES for devices to scan for Bluetooth devices). 3. Touch the device you want to pair with your mobile phone. 4. Enter the pairing password to complete the connection. Note: Once a partnership has been created, connecting to that Bluetooth device again will no longer require entering the password. - Page 25 To share the photo, touch , then touch an application for sharing. To delete the photo, touch > OK. To view other photos and videos in Gallery, touch 3. If you want to view more photos, touch the screen, and then swipe right or left. Shooting a Video 1.
-
Page 26: Enjoying Music
Drag from the inside of the cropping tool to move it. Drag an edge of the cropping tool to resize the image. Drag a corner of the cropping tool to resize the image without changing the length to width ratio. 3. -
Page 27: Google Services
2. The FM Radio automatically scans for available FM channels, saves them as presets, and plays the first FM channel found. Tuning the FM Radio Do any of the following: To select the radio station to listen to, touch To manually tune to a frequency, touch To add the current radio station to the Favorite list, touch To view the Favorite List, touch To turn on the speaker, touch... - Page 28 to Wi-Fi to connect to a Wi-Fi network (instead of to a mobile network) to set up your phone. If you already have a Google account, touch Sign in and enter your username and password. Creating a Google Account If you do not have a Google account, you can create one: 1.
-
Page 29: Using Maps
3. Enter the email subject and compose your message. If you want to add a picture attachment, touch the Menu key, and then touch Attach file to select the picture you want to attach. 4. After composing your email, touch Replying To or Forwarding an Email 1. -
Page 30: Using Play Store
name. 4. Touch the onscreen buttons to view the location on the map, get directions, and more. Getting Directions 1. While viewing a map, touch 2. Enter the starting point in the first text box, and then enter your destination in the second text box. -
Page 31: Synchronizing Information
To check the progress of a download, open the notification panel. The installation duration will depend on the size of the application and your data connection speed. Uninstalling an Application 1. On the Play Store screen, touch the Menu key, and then touch Manage apps. 2. -
Page 32: Customizing Your Account Synchronization
such as the first account you signed into on the mobile phone. If you attempt to remove certain accounts, be aware that all personal information associated with it will be deleted. 1. On the ACCOUNTS settings screen, touch the account type. 2. -
Page 33: Using The Alarm
Setting an Event Reminder 1. On any calendar view, touch an event to view its details or event summary. 2. Touch Add reminder to add a reminder. Or touch the “X” icon to delete it. 3. Touch the reminder time, and then touch the length of time before the event when you want to be reminded. -
Page 34: Calculator
Creating a Folder 1. On the File Manager screen, touch 2. Enter the name of the new folder in the text box. 3. Touch OK. Moving or Copying File(s) 1. On the File Manager screen, long press the file or folder you want to move or copy. Note: To select another file(s), touch the respective check box. -
Page 35: Setting The Display
4. Touch Set date. On the set date screen, touch the desired field, and then scroll up or down to set the date. Touch Done when the configuration is complete. 5. Touch Select time zone, and then select the desired time zone from the list. Scroll the list to view more time zones. -
Page 36: Setting Phone Services
2. Select the Vibrate check box to enable your phone to vibrate for incoming calls. Setting Phone Services Set up the Default Network Your mobile phone supports dual-SIM technology which allows you to switch between two network operators simultaneously. 1. On the Settings screen, touch SIM management. 2. -
Page 37: Managing Applications
2. Select one of the available options. None: The device is not protected. Slide: Slide the lock icon to unlock the phone. Face Unlock: Use the face detection to unlock the phone. Pattern: Trace the correct unlock pattern on the screen to unlock the phone. PIN: Enter a PIN number to unlock the phone. -
Page 38: Specifications
erased. Resetting the phone does not erase any system software updates you’ve downloaded or any files on your microSD card, such as music or photos. 1. On the Settings screen, touch Backup & reset > Factory data reset. 2. When prompted, touch Reset phone, and then touch Erase everything. The mobile phone resets the settings to the original factory settings, and then restarts. -
Page 39: Appendix
Appendix Warnings and Precautions This section contains important information pertaining to the operating instructions of your device. It also contains information about how to use the device safely. Read this information carefully before using your device. Waterproof Casing USB and Headphone Port covers must be securely in place, and the rear cover properly fitted and locked to ensure the device will meet this level of protection. -
Page 40: Accessories
aircraft. Using wireless devices in an aircraft may cause danger to the operation of the aircraft and disrupt the wireless telephone network. It may also be considered illegal. Operating Environment Do not use or charge the device in dusty, damp, and dirty places or places with magnetic fields Otherwise, it may result in a malfunction of the circuit. -
Page 41: Cleaning And Maintenance
water immediately and consult a doctor. If there is a case of battery deformation, color change, or abnormal heating while you charge or store the battery, remove the battery immediately and stop using it. Otherwise, it may lead to battery leakage, overheating, explosion, or fire. If the power cable is damaged (for example, the cord is exposed or broken), or the plug loosens, stop using the cable at once. -
Page 42: Emergency Call
Emergency Call You can use your device for emergency calls in the service area. The connection, however, cannot be guaranteed in all conditions. You should not rely solely on the device for essential communications. CE SAR Compliance This device meets the EU requirements (1999/519/EC) on the limitation of exposure of the general public to electromagnetic fields by way of health protection.
Need help?
Do you have a question about the SWIFT PLUS(RG220) and is the answer not in the manual?
Questions and answers