
Subscribe to Our Youtube Channel
Related Manuals for Snapper Zero Turn Rider


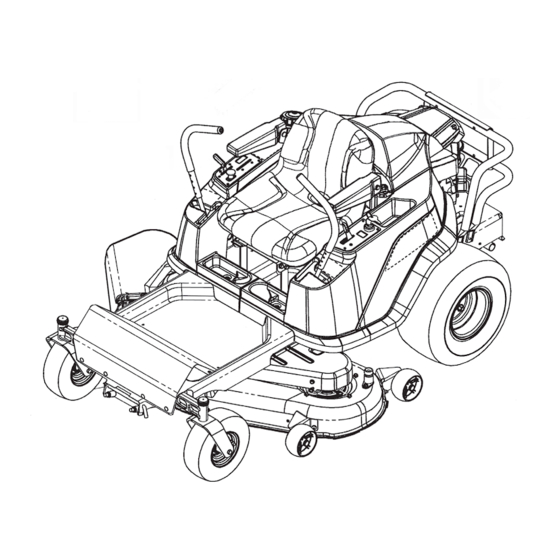
Summary of Contents for Snapper Zero Turn Rider
- Page 1 Operator’s Manual Zero Turn Rider Mfg. No. Description 2691137-00 Zero Turn Rider with 46” Mower See Specifications for power rating information. 1756035 Revision -...
-
Page 2: General Information
Thank you for purchasing this quality-built Snapper riding mower. We’re pleased that you’ve placed your con- fidence in the Snapper brand. When operated and maintained according to the instructions in this manual, your Snapper riding mower will provide many years of dependable service. -
Page 3: Table Of Contents
Table of contents Operator Safety ..........4 adjustments and Service ........ 23 Safety Interlock System Tests .......12 Seat and Ground Speed Lever Adjustments ..23 features and controls ........13 Cutting Height Adjustment ........24 Control Functions ..........13 Front Suspension Adjustment .......24 Operation ............ -
Page 4: Operator Safety
Children are often attracted to the unit and mowing activity. Never assume that children will remain where you last saw them. If there is a risk that children may enter the area where you are mowing, have another responsible adult watch them. www.snapper.com... -
Page 5: Slope Operation
Slope Operation Operation on slopes can be dangerous. Using the unit on a slope that is too steep where you do not have adequate wheel traction (and control) can cause sliding, loss of steering, control, and possible rollover. You should not operate on a slope greater than a 3.5 foot rise over a 20 foot length (10 degrees). - Page 6 Only operate this unit outdoors and away from unventi- lated areas such as inside garages or enclosed trailers. The engine emits poisonous carbon monoxide gas and prolonged exposure in an enclosed area can result in serious injury or death. www.snapper.com...
- Page 7 WaRNING: This powerful cutting machine is capable of amputating hands and feet and can throw objects that can cause injury and damage! Failure to comply with the following SAFETY instructions could result in serious injury or death to the operator or other persons. The owner of the machine must understand these instructions and must allow only persons who understand these instructions to operate machine.
- Page 8 11. Never overfill a fuel tank. Replace fuel cap and tigh- ten securely. OPERaTION 1. Mount and dismount machine from left side. Keep clear of discharge opening at all times. 2. Start engine from operator’s seat, if possible. Make sure blades are OFF and parking brake is set. www.snapper.com...
- Page 9 Towing Maintenance 1. Tow only with a machine that has a hitch designed for (Continued From Previous Column) towing. DO NOT attach towed equipment except at 6. Always provide adequate ventilation when running the hitch point. engine. Exhaust gases contain carbon monoxide, an 2.
- Page 10 www.snapper.com...
-
Page 11: Safety And Instructional Decals
Safety and Instructional Decals If any of these decals are lost or damaged, replace them at once. See your local dealer for replacements. All DANGER, WARNING, CAUTION and instructional These decals are easily applied and will act as a con- messages on your rider and mower should be carefully stant visual reminder to you, and others who may use the read and obeyed. -
Page 12: Safety Interlock System Tests
START/PARK positions in order to start the engine. 7104231 WaRNING Decal, Transmission Release If the unit does not pass a safety test, do not Part No. 7104231 operate it. See an authorized dealer. Decal, Weight Limit Part No. 7101940 www.snapper.com... -
Page 13: Features And Controls
features and controls IMPORTaNT The figures and illustrations in this manual are provided for reference only and may differ from your specific model. Contact your dealer if you have questions. control functions The information below briefly describes the function of individual controls. Starting, stopping, driving, and mowing require the combined use of several controls applied in specific sequences. -
Page 14: Pto Switch
Transmission Release Levers The transmission release levers deactivate the transmissions so that the unit can be pushed by hand (see Pushing the Unit by Hand). Seat adjustment Lever The seat can be adjusted forward and backward (see Seat Adjustments). www.snapper.com... -
Page 15: Operation
Operation General Operating Safety checks before starting Before first time operation: • Check that the crankcase is filled to full mark on dip- stick (a, Figure 1 - located under engine cover). See • Be sure to read all information in the Operator Safety the engine owner’s manual for instructions and oil section before attempting to operate this rider and recommendations. -
Page 16: Starting The Engine
DO NOT disengage the transmissions and coast 5. Disengage the parking brake. down slopes. DO NOT use Transmission Release 6. Engage the PTO by pulling up on the switch. to disengage the transmissions unless machine motion can be controlled and engine is off. www.snapper.com... -
Page 17: Zero Turn Driving Practice
Driving Practice The ground speed levers of the zero turn rider are The ground speed levers of the zero turn rider are responsive. responsive, and learning to gain a smooth and efficient control of the rider’s forward, reverse, and turning move- The BEST method of ments will take some practice. -
Page 18: Advanced Driving
Advanced Driving Executing an End-Of-Row Zero Turn Your zero turn rider’s unique ability to turn in place allows you to turn around at the end of a cutting row rather than having to stop and Y-turn before starting a new row. -
Page 19: Attaching A Trailer
attaching a Trailer The maximum weight of a towed trailer should be less than 200 lbs (91 kg). Secure the trailer with an appropri- ately sized clevis pin (a, Figure 9) and clip (b). Excessive towed loads can cause loss of traction and loss of control on slopes. -
Page 20: Maintenance
Replace fuel filter ** Check blades more often in regions with sandy soils or high dust conditions. Clean engine air cooling system * Whichever comes first ** Clean more often in dusty conditions or when airborne debris is present. www.snapper.com... -
Page 21: Checking Tire Pressures
check Tire Pressures Tire pressure should be checked periodically, and main- tained at the levels shown in the chart (see Figure 10). Note that these pressures may differ slightly from the “Max Inflation” stamped on the side-wall of the tires. The pressures shown provide proper traction, improve cut quality, and extend tire life. -
Page 22: Washing The Mower Deck
Never store the unit (with fuel) in an enclosed, poorly ventilated structure. fuel vapors can travel to an ignition source (such as a furnace, water heater, etc.) and cause an explosion. fuel vapor is also toxic to humans and animals. figure 12. Mower Deck Washout Port www.snapper.com... -
Page 23: Adjustments And Service
Ground Speed Lever adjustment Seat and Ground Speed Lever adjustments Remove the ground speed lever mounting hardware The seat and ground speed levers should be adjusted and bracket (see Figure 14). Move the levers to the so that operator’s elbows are supported by the arm rests desired height using the adjustment holes. -
Page 24: Cutting Height Adjustment
The slot in the cutting height indicator (b) indicates the WaRNING cutting height of the mower deck. DO NOT adjust the rider for a faster overall speed forward or reverse than it was designed. figure 16. cutting Height adjustment figure 15. speed balancing adjustment www.snapper.com... -
Page 25: Mower Removal And Installation
Mower Removal and Installation Installation 1. Disengage the PTO, engage the parking brake, lock NOTE: Perform mower installation and removal on a hard the ground speed levers into their START/PARK posi- flat surface such as a concrete floor. tions, turn off the ignition, remove the key, and wait Removal for all moving parts to stop. -
Page 26: Check Mower Blade Stoppping Time
Remove the battery from the rider and place on a level, non-concrete surface. Charge the battery at 6-10 amps for 1 hour. Do not charge at a rate higher than 10 amps. www.snapper.com... -
Page 27: Troubleshooting
Troubleshooting Troubleshooting the Rider problem look for REMEDY Ground speed levers not in Lock ground speed levers in START/ PARK positions. START/PARK positions. PTO (electric clutch) switch Place in OFF position. in ON position. Out of fuel. If engine is hot, allow it to cool, then refill the fuel tank. Parking brake disengaged. -
Page 28: Troubleshooting The Mower
Excessive belt wear or breakage. Using incorrect belt. See authorized service dealer. Idler pulley spring broken or See authorized service dealer. Mower drive belt slips or not properly attached. fails to drive. Mower drive belt broken. See authorized service dealer. www.snapper.com... -
Page 29: Specifications
Specifications Engine: 21.5 hp * kawasaki Transmissions: Make Kawasaki Make Hydro Gear Model FR651V Model EZT (LH & RH) Gross HP * 21.5 @ 3600 rpm Hydraulic fluid 20W-50 Motor Oil Displacement 44.3 cu. in. (726 cc) Forward: 0-6 MPH (0-9.66 km/h) Speeds Electrical System Battery 12 Volt, 230 CCA @ Specified rpm... -
Page 30: Warranty
Transportation charges on product submitted for repair or replacement under this warranty must be borne by purchaser. This warranty is effective for and is subject to the time periods and conditions stated below. For warranty service, find the nearest Authorized Service Dealer in our dealer locator map at Snapper.com. The purchaser must contact the Authorized Service Dealer, and then make the product available to the Authorized Service Dealer for inspection and testing. - Page 32 www.snapper.com...
Need help?
Do you have a question about the Zero Turn Rider and is the answer not in the manual?
Questions and answers