Lionel GG1 Owner's Manual
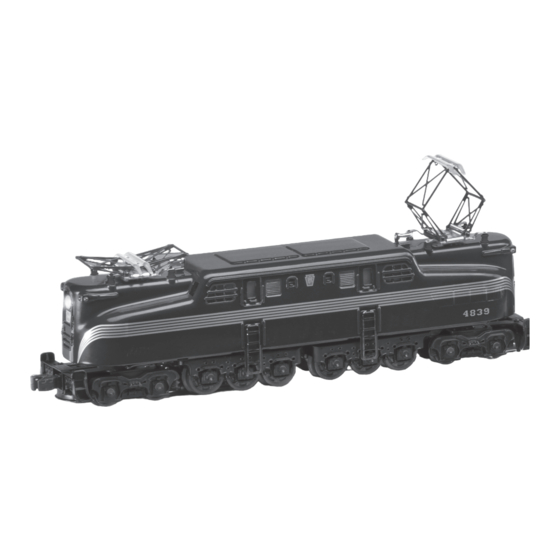
Electric locomotive
Hide thumbs
Also See for GG1:
- Owner's manual (12 pages) ,
- Owner's manual (28 pages) ,
- Owner's manual (20 pages)
Table of Contents
Advertisement
Quick Links
Advertisement
Table of Contents

Related Manuals for Lionel GG1


Summary of Contents for Lionel GG1
- Page 1 71-8354-250 3/05 Lionel Lionel GG1 Electric Locomotive GG1 Electric Locomotive Owner’s Manual Owner’s Manual featuring SYSTEM Caution! Do not attempt to raise or lower the pantographs by hand. Be sure that the pantographs have enough clearance on your layout.
- Page 2 Inside the body, this locomotive is equipped with some of the most advanced sounds and controls in model railroading. The Lionel GG1 locomotive is ready for duty on your layout. Caution! Do not attempt to raise or lower the pantographs by hand.
-
Page 3: Table Of Contents
Table of contents Quick Start Conventional transformer operations TrainMaster Command Control operations Conventional transformer operations Conventional operations Operating your locomotive in the conventional environment Locking your locomotive into a single direction Operating your pantographs in the conventional environment Operating your smoke unit in the conventional environment Uncoupling your locomotive in the conventional environment RailSounds 5.0 sound system operations RailSounds 5.0 sound system operations... -
Page 4: Quick Start
Quick Start Conventional transformer operations Caution! Do not attempt to raise or lower the pantographs by hand. Be sure to remove the paper bands from around the pantographs before you operate Note! the locomotive. 1. Place your locomotive on Lionel or Lionel-compatible O-72 or larger track. -
Page 5: Conventional Transformer Operations
Conventional transformer operations Conventional operations our locomotive is capable of operating in the conventional environment with nothing more than a standard Lionel alternating-current (AC) transformer. In the conventional environment, your locomotive cycles through a repeating pattern of operations: forward, neutral, reverse, neutral, and so on. To advance to the next operation, press the DIRECTION button on your transformer. -
Page 6: Operating Your Locomotive In The Conventional Environment
Conventional transformer operations Operating your locomotive in the conventional environment Caution! Do not attempt to raise or lower the pantographs by hand. Be sure to remove the paper bands from around the pantographs before you operate Note! the locomotive. 1. Place your locomotive on Lionel or Lionel-compatible O-72 or larger track. -
Page 7: Locking Your Locomotive Into A Single Direction
Conventional transformer operations Locking your locomotive into a single direction hen the Command reverse unit switch is in the RUN position, your locomotive sequences through a repeating pattern of operations: forward, neutral, reverse, neutral, and so on. To “lock” your locomotive into a single direction (for example, to operate in forward only), you can deactivate the Command reverse unit’s sequencing function. -
Page 8: Operating Your Pantographs In The Conventional Environment
Note! the locomotive. our GG1 locomotive is equipped with two operating pantographs. Do not raise or lower the pantographs by hand, or you will damage the locomotive. Be sure that the pantographs clear all bridges, signals, and other objects on your layout. Refer to Figure 2 to determine the proper clearance. -
Page 9: Operating Your Smoke Unit In The Conventional Environment
Conventional transformer operations Operating your pantographs in the conventional environment (continued) Locking down the pantographs in the conventional environment If you have bridges, signals, or other trackside structures with low clearance, you will need to lock down the pantographs. Follow these steps to lock both pantographs in the lowered position. -
Page 10: Uncoupling Your Locomotive In The Conventional Environment
Conventional transformer operations Uncoupling your locomotive in the conventional environment our locomotive features two ElectroCouplers that are released by remote control at any point around your layout in the TrainMaster Command Control environment. In the conventional environment, the ElectroCouplers will not open manually or by using a Remote-Control Track section. -
Page 11: Railsounds 5.0 Sound System Operations
RailSounds 5.0 sound system operations RailSounds sound system operations our locomotive is equipped with the Lionel RailSounds 5.0 sound system, the most realistic model railroad sound system in the world. The RailSounds sound system brings the sounds of the railroad to your layout through high quality sound recordings of real locomotives. When you operate your locomotive in the conventional environment, you get the realistic sounds of the electric motor, which automatically rev up as the speed of the locomotive increases. -
Page 12: Installing The Battery
RailSounds 5.0 sound system operations Installing the battery lthough the RailSounds sound system is powered through the track, we recommend that you install a nine-volt alkaline battery to prevent the sound system from shutting down during track power interruptions (for example, at a switch or a dirty section of track). Follow these steps and refer to Figure 4 as you install the battery. -
Page 13: Using The Railsounds 5.0 Sound System In The Conventional Environment
RailSounds 5.0 sound system operations Using the RailSounds 5.0 sound system in the conventional environment hen you first power up your locomotive, you will hear the sounds of the operating pantographs and the locomotive at rest. As the locomotive moves, the RPM sounds automatically increase with the locomotive’s speed. -
Page 14: Activating The Crewtalk Dialog And Towercom Announcements In The Conventional Environment
RailSounds 5.0 sound system operations Activating the CrewTalk dialog and TowerCom announcements in the conventional environment n the conventional environment, CrewTalk dialog and TowerCom announcements are triggered by short horn blasts and vary with the state of the locomotive. • If the locomotive has been stopped for less than 15 seconds, a short horn blast triggers a “please standby”... -
Page 15: Installing A Lionel Sound Activation Button For Conventional Operation
RailSounds 5.0 sound system operations Installing a Lionel Sound Activation Button for conventional operation f your transformer lacks HORN and BELL buttons, you will need to install Lionel no. 610-5906-001 Sound Activation Buttons (available separately) to activate the locomotive’s horn and bell sounds. Connect the buttons as shown below. -
Page 16: Using The Railsounds 5.0 Sound System In The Trainmaster Command Control Environment
RailSounds 5.0 sound system operations Using the RailSounds 5.0 sound system in the TrainMaster Command Control environment o access all of the features of the RailSounds 5.0 sound system, you must operate your locomotive in the TrainMaster Command Control environment. The CAB-1 Remote Controller is required to activate features such as TowerCom announcements, CrewTalk communication, and coupler release sounds. -
Page 17: Activating The Crewtalk Dialog And Towercom Announcements In The Command Control Environment
RailSounds 5.0 sound system operations Activating the CrewTalk dialog and TowerCom announcements in the Command Control environment ith the RailSounds 5.0 sound system, CrewTalk dialog and TowerCom announcements feature a variety of brief radio conversations between the engineer and dispatcher. All dialog is intelligible, and each comment is followed by at least one automatic response. -
Page 18: Railsounds 5.0 Sound System Dialog On A Round Trip
RailSounds 5.0 sound system operations RailSounds 5.0 sound system dialog on a round trip Refer to Figure 5 for a sample dialog script for the locomotive’s round trip. TOWER-INITIATED DIALOG AUX1, 7 - “Stand by.” 5 - “Slow to caution speed.” 7 - “You are clear.”... -
Page 19: Odyssey System Operations
Odyssey System operations The Odyssey System he Odyssey System is “cruise control” for your locomotive. Once the speed is set (see below), your locomotive will maintain a constant speed, no matter what loads the locomotive pulls or what grades you have on your layout. This digitally-controlled system also allows for extremely slow movement that will amaze any “scale”... -
Page 20: Odyssey System Command Control Operation
Odyssey System operations Odyssey System Command Control operation hen the Odyssey System is activated, changes in the speed of the locomotive will correspond to each signal from the Command Base. For example, when you address the locomotive and slowly turn the throttle knob, the first flash of the light on the Command Base corresponds to the first speed step, which is the slowest speed of the locomotive. -
Page 21: Trainmaster Command Control Operations
TrainMaster Command Control operations TrainMaster Command Control operations rainMaster Command Control is the advanced model railroad control system from Lionel. To operate your locomotive in the Command Control environment, you need a Command Base (available separately, 6-12911) and a CAB-1 Remote Controller (available separately, 6-12868). Your commands are sent by the CAB-1 Remote Controller to the Command Base, which then translates the command into digital code. -
Page 22: Cab-1 Remote Controller Commands
TrainMaster Command Control operations CAB-1 Remote Controller commands he CAB-1 Remote Controller commands are detailed below. The corresponding RailSounds sound system effects are in bold italic type. Releases the front coupler. Coupler release sound. Releases the rear coupler. Coupler release sound. Activates the numeric keypad. -
Page 23: Cab-1 Remote Controller Numeric Keypad Commands
TrainMaster Command Control operations CAB-1 Remote Controller numeric keypad commands hen you press the AUX1 button on your CAB-1 Remote Controller, you turn the numeric keypad into ten command buttons. These commands are specific to your locomotive, and an overlay is included to help you learn these functions. After you press the AUX1 button, you will be able to press any numbered button until you address a different Command Control equipped product. -
Page 24: Cab-1 Numeric Keypad Table
CAB-1 numeric keypad table he 3, 5, and 6 keys on your CAB-1 can perform several different functions when controlling your GG1. These functions include: • Starting up and shutting down the engine sounds, with or without activating the pantograph. -
Page 25: Operating The Pantographs In The Command Control Environment
Manual Control of Pantographs The pantographs on your GG1 may be controlled manually using the 6 button on your CAB-1 Remote Controller. Using this function you may cycle your GG1's pantographs through all four combinations of UP and DOWN positions. -
Page 26: Operating The Smoke Unit In The Command Control Environment
TrainMaster Command Control operations Operating the pantographs in the Command Control environment (continued) Locking the pantographs in your desired position Follow these steps to lock your pantographs into your desired position. 1. Place the locomotive on the track. Power up the track, but keep your locomotive at rest (not moving). -
Page 27: Tuning Your Locomotive's Performance
TrainMaster Command Control operations Tuning your locomotive’s performance rainMaster Command Control allows you to fine-tune the performance of your locomotive. Use your CAB-1 Remote Controller to make these adjustments. These settings will be lost if you assign a new ID#. Note! RPM LEVEL Your locomotive’s RPM level varies with the CAB-1 Remote Controller throttle in automatic... -
Page 28: Tuning Your Locomotive's Performance
TrainMaster Command Control operations Tuning your locomotive’s performance (continued) SOUND LEVEL Press AUX1, 1 or 4 on your CAB-1 Remote Controller to raise and lower the volume of the background locomotive sounds, such as RPMs and air release or let-offs. The horn, bell and dialog will be unaffected. -
Page 29: Assigning Your Locomotive A New Id
TrainMaster Command Control operations Assigning your locomotive a new ID# s your roster of TrainMaster Command Control-equipped locomotives grows, you will want to give each unit a unique ID#. The locomotive will respond to commands associated with its ID# while all other units will disregard these commands. To restore your locomotive’s functions, see page 31. -
Page 30: Building A Lash-Up
TrainMaster Command Control operations Building a lash-up rainMaster Command Control allows you to couple your Command Control-equipped locomotives together, forming a multiple unit lash-up. Just like with the real railroads, lash-ups allow you to pull longer trains and climb steeper grades. You will find that the lighting operates prototypically—the lead unit’s headlight and interior lights are illuminated when the train is in forward, and the rear unit’s headlight and interior lights are on when the train is in reverse. -
Page 31: Reprogramming Your Locomotive To Restore Features
TrainMaster Command Control operations Reprogramming your locomotive to restore features f your locomotive is unresponsive to your commands in the TrainMaster Command Control environment, we recommend that you follow this procedure to reset your locomotive. 1. Slide the Command reverse unit switch to the PROG position. 2. -
Page 32: Maintaining And Servicing Your Locomotive
Maintaining and servicing your locomotive Adding fluid to your locomotive’s smoke generator our locomotive is equipped with a smoke generator that produces a safe, clean, white smoke during operation. In order to function, the smoke generator requires the periodic addition of Lionel smoke fluid. A small bottle of smoke fluid is included with your locomotive. To add smoke fluid, lift away the roof-top hatch. -
Page 33: Lubricating Your Locomotive
Maintaining and servicing your locomotive Lubricating your locomotive elp your Lionel locomotive lead a long and productive life on your railroad by maintaining it properly. To keep your locomotive lubricated, we recommend that you purchase a Lionel Lubrication and Maintenance Kit (6-62927), available from your authorized Lionel dealer. When you find that the lubrication points illustrated in Figure 7 on page 34 appear dry, lubricate your locomotive after you have removed any accumulated dirt and dust. -
Page 34: Lubricating Your Locomotive
Maintaining and servicing your locomotive Lubricating your locomotive (continued) FRONT Lubricate the bearings with Lionel oil sparingly Lubricate the gears with Lionel grease sparingly Lubricate the gears with Lionel grease sparingly Lubricate the bearings with Lionel oil sparingly REAR Figure 7. Underside details and lubrication points... -
Page 35: Servicing Your Locomotive's Leds And Lamps
Maintaining and servicing your locomotive Servicing your locomotive’s LEDs and lamps our locomotive is illuminated by several LEDs and lamps. While the LEDs are expected to last for the life of the locomotive, you may find that the lamps may require replacement. We recommend that you have the lamps serviced at an authorized Lionel Service Center. -
Page 36: Limited Warranty/Lionel Service 3
Limited Warranty/Lionel Service his Lionel product, including all mechanical and electrical components, moving parts, motors and structural components, except for light bulbs, is warranted to the original consumer-purchaser, for one year against original defects in materials or workmanship when purchased through an authorized Lionel merchant.
Need help?
Do you have a question about the GG1 and is the answer not in the manual?
Questions and answers