Table of Contents
Advertisement
Quick Links
INSTRUCTION MANUAL
DVD Player + Video Cassette Recorder
Lecteur DVD + Magnétoscope à cassette
Only cassettes marked
As an E
S
NERGY
TAR
SANYO has determined that
this product or product model
meets the E
NERGY
guidelines for energy efficiency.
Please read this manual carefully before connecting your DVD+VCR and operating it for the first time.
Keep the manual in a safe place for future reference.
can be used with this video cassette recorder.
®
Partner,
S
®
TAR
DVC-2000
English
Français
I
i n d ex
Advertisement
Table of Contents

Related Manuals for Sanyo DVC-2000


Summary of Contents for Sanyo DVC-2000
- Page 1 Only cassettes marked can be used with this video cassette recorder. As an E ® Partner, NERGY SANYO has determined that this product or product model meets the E ® NERGY guidelines for energy efficiency. Please read this manual carefully before connecting your DVD+VCR and operating it for the first time.
-
Page 2: Safety Precautions
Safety Precautions CAUTION: The apparatus should not be exposed to water WARNING (dripping or splashing) and no objects filled with liquids, such as vases, should be placed on the apparatus. RISK OF ELECTRIC SHOCK DO NOT OPEN FCC WARNING: This equipment may generate or use radio frequency energy. -
Page 3: Important Safety Instructions
IMPORTANT SAFETY INSTRUCTIONS CAUTION: PLEASE READ AND OBSERVE ALL WARNINGS AND INSTRUCTIONS IN THIS OWNER’S MANUAL AND THOSE MARKED ON THE UNIT. RETAIN THIS BOOKLET FOR FUTURE REFERENCE. This set has been designed and manufactured to assure personal safety. Improper use can result in electric shock or fire hazard. The safeguards incorporated in this unit will protect you if you observe the following procedures for installation, use, and servicing. -
Page 4: Important Safety Instructions
IMPORTANT SAFETY INSTRUCTIONS (Continued) 18. Accessories 23. Disc Tray Do not place this product on an unsta- Keep your fingers well clear of the disc tray as it is closing. ble cart, stand, tripod, bracket, or table. It can cause personal injury. The product may fall, causing serious 24. -
Page 5: Table Of Contents
Table of Contents Introduction Operation with DVD and Audio CD ..28-31 Playing DVD and Audio CD ....28 Safety Precautions . -
Page 6: Before Use
Before Use Playable Discs Disc-related terms Title (DVD only) The main film content or accompanying feature content or music album. (8 cm/12 cm disc) Each title is assigned a title reference number enabling Audio CD you to locate it easily. (8 cm/12 cm disc) Chapter (DVD only) In addition, this unit can play a CD-R or CD-RW that... -
Page 7: Precautions
Before Use (Continued) Precautions Cleaning discs Fingerprints and dust on the disc can cause poor pic- Handling the unit ture quality and sound distortion. Before playing, clean the disc with a clean cloth. Wipe the disc from the cen- When shipping the unit ter out. -
Page 8: Front Panel
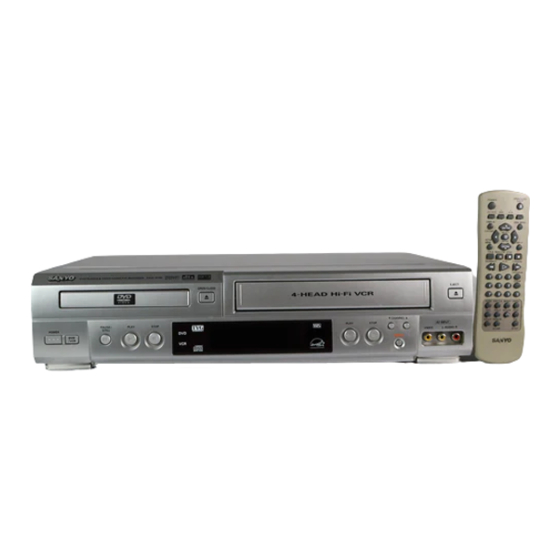
Front Panel Disc Tray (DVD deck) EJECT(Z Z ) Insert a disc here. Ejects the tape in the VCR deck. CHANNEL (v v /V V ) To scan up or down through memorized channels. Cassette Compartment (VCR deck) Insert a video cassette here. Remote Sensor Point the DVD+VCR remote control here. -
Page 9: Display Window
Display Window DVD DVD inserted. CD Audio CD inserted. y B Indicates A-B repeat mode. ALL Indicates repeat all mode. ANGLE active. MP3 MP3 disc inserted. PROG. Programmed playback active. TITLE Indicates current title number. CHP/TRK Indicates current chapter or track number. VCR DVD+VCR functions are available and channels are selected at DVD+VCR. -
Page 10: Remote Control
Remote Control DVD/VCR select button OPEN/CLOSE, EJECT (Z Z ) Select the output source (DVD or VCR) - Opens and closes the disc tray. to view on the TV screen. - Ejects the tape in the VCR deck. POWER OUTPUT SELECT Switches DVD+VCR ON and OFF. -
Page 11: Rear Panel
Rear Panel DVD/VHS OUT (VIDEO/AUDIO (Left/Right)) ANTENNA INPUT Connect to a TV with video and audio inputs. Connect the VHF/UHF/CATV antenna to this terminal. DIGITAL AUDIO OUT (DVD OUT) Connect to digital (coaxial) audio VHS IN LINE 1 (VIDEO IN/AUDIO IN (Left/Right)) equipment. -
Page 12: Connections
Connections Without Cable Box Tips If your cable wire is connected to your TV without a converter Depending on your TV and other equipment you wish to or descrambler box, unscrew the wire from your TV and attach connect, there are various ways you could connect the it to the ANT.IN jack on the DVD+VCR. -
Page 13: Basic Tv Connections
Connections (Continued) Basic TV Connections Optional, Preferred TV Connections Make one of the following connections, depending on Notes the capabilities of your existing equipment. You can ONLY watch and listen to DVD playback through the connections shown below. RF coaxial connection For using S-VIDEO OUT or COMPONENT VIDEO OUT Connect the RF.OUT jack on the DVD+VCR to the jack, set the “TV Output Select”... - Page 14 Connections (Continued) Optional, Preferred TV Connections Rear of DVD+VCR Note You can ONLY listen to DVD playback using COAXIAL (C) and AUDIO OUT (A2) connections. The tuner and VCR will still be heard through the RF.OUT (R) or DVD/VHS AUDIO OUT (A1) jack. (See previous page.) Connecting to an amplifier equipped with two channel analog stereo or Dolby Surround Connect the Left and Right AUDIO OUT (or DVD/VHS...
-
Page 15: Before Operation - Vcr Part
Before Operation - VCR Part On-Screen Display (OSD) Setting the On-Screen Display Some of these functions will be displayed every time the The SETUP, clock setting, and timer recordings are VCR is operated. accessed conveniently with On-Screen Menu Displays that lead you through each step. The following pages ❶... -
Page 16: Setting The Vcr Setup Menu
Before Operation - VCR Part (Continued) Setting the VCR Setup Menu Channel Selection This DVD+VCR is equipped with a frequency Press MENU and the MAIN menu will appear. synthesized tuner capable of receiving up to 181 channels. These include VHF channels 2-13, UHF Press v v /V V to select the VCR SETUP menu, then channels 14-69 and CATV channels 1-125. -
Page 17: Setting The Clock
Before Operation - VCR Part (Continued) Setting the Clock Manual Clock Set Example: July 5, 2002 ; 2:15 AM The DVD+VCR gives you two ways to set the time and date: the Auto Clock Feature or manually. The Auto Press MENU and the MAIN menu will appear. Clock Feature enables the DVD+VCR to set up the clock when the DVD+VCR is turned off. -
Page 18: Before Operation - Dvd Part
Before Operation - DVD Part General Explanation Temporary Feedback Field Icons Repeat Title (DVD) This manual gives the basic instructions for operating TITLE the DVD+VCR. Some DVDs require specific operation Repeat Chapter (DVD) CHAPT or allow only limited operation during playback. When Repeat Track (CD) TRACK this occurs, the symbol... -
Page 19: Initial Settings
Before Operation - DVD Part (Continued) Initial Settings Menu Language Select a language for the setup menu. This is the menu You can set your own Personal Preferences on the you see when you press SETUP. DVD+VCR. English Disc Audio General Operation Disc Subtitle Spanish... -
Page 20: Sound
Before Operation - DVD Part (Continued) Sound Others The DRC and Vocal settings can be changed. Digital Audio Output Use v/V to select the desired option and press Each DVD disc has a variety of audio output options. SELECT/ENTER. The setting of the selected option Set the DVD+VCR’s Digital Audio Output according to is changed between On and Off. -
Page 21: Parental Control
Before Operation - DVD Part (Continued) Parental Control Password If you change the rating level to 7 or lower, you must Rating enter a 4-digit password to prevent playback of discs Movies on DVDs may contain scenes not suitable for with higher ratings. -
Page 22: Operation With Tape
Operation with tape Normal Playback Search This function lets you quickly and visually search for a Preparation: desired tape section in either direction: forward and Turn on the TV. reverse. Tune the TV to the DVD+VCR output channel (CH 3 or 4) or 1 Press BACKWARD (.) or FORWARD (>) set the TV’s source selector to VIDEO. -
Page 23: Normal Recording
Operation with tape (Continued) Normal Recording Timer Recording Preparation: This DVD+VCR can be programmed to record up to 8 Turn on the power of both the DVD+VCR and TV. programs within a period of 1 year. For unattended Tune the TV to the DVD+VCR output channel (CH 3 or 4) or recording, the timer needs to know the channels to be set the TV’s source selector to VIDEO. -
Page 24: Timer Recording
Operation with tape (Continued) Checking (Erasing) the Timer Program Use V V to choose the SPEED option. 1 1 0 0 Use b b /B B to choose the desired recording Programming can be checked whenever the DVD+VCR speed (AUTO, SP or EP). is turned on. -
Page 25: Instant Timer Recording
Operation with tape (Continued) Instant Timer Recording Dubbing and Editing (One-Touch Record) If you wish to edit or dub your camcorder (or another Instant Timer Recording allows you to make a recording VCR) recordings to this DVD+VCR, the rear (or Front) easily of a preset length without using the program panel mounted Audio and Video (A/V) input jacks timer. -
Page 26: Vhs Hi-Fi Stereo System/Mts Broadcast
Operation with tape (Continued) VHS Hi-Fi Stereo System/ MTS (Multi-Channel TV Sound) This DVD+VCR will decode MTS stereo and bilingual MTS Broadcast (SAP) off-the-air broadcast sound signals. It also This DVD+VCR is equipped with the VHS Hi-Fi audio decodes stereo TV sound from local cable companies, sound system for recording and playback. -
Page 27: Tape Counter Memory Feature
Operation with tape (Continued) Tape Counter Memory Feature Additional Information Real-Time Counter In manual recording, Timer recording, Instant Timer Recording, playback, or fast forward modes, the DVD+VCR Shows length of tape run in hours, minutes, and sec- automatically starts rewinding the tape at the end of the onds. -
Page 28: Operation With Dvd And Audio Cd
Operation with DVD and Audio CD Playing DVD and Audio CD General Features Playback Setup Note Unless stated otherwise, all operations described use Turn on the TV and select the video input source con- the remote control. Some features may also be nected to the DVD+VCR. -
Page 29: Still Picture And Frame-By-Frame Playback
Operation with DVD and Audio CD (Continued) General Features (continued) 3 To exit Repeat mode, press REPEAT a third time. The Repeat Off icon appears on the TV screen. Still Picture and Frame-by-frame playback Audio CDs - Repeat Track/All/Off 1 To repeat the track currently playing, press REPEAT. DVD Video Discs The Repeat Track icon appears on the TV screen. -
Page 30: Time Search
Operation with DVD and Audio CD (Continued) General Features (Continued) Marker Search You can start playback from a memorized point. Up to Time Search 0:16:57 - : - - : - - five points can be memorized. To enter a mark, follow these steps. The Time Search function allows you to start playing at any chosen time on the disc. -
Page 31: Special Dvd Features
Operation with DVD and Audio CD (Continued) Special DVD Features Programmed Playback with Audio CD Checking the contents of DVD Video Program allows you to store your favorite tracks for a discs: Menus particular disc in the DVD+VCR memory. DVDs may contain menus that allow you to access spe- Program can contain 20 tracks. -
Page 32: Operation With Mp3 Discs
Operation with MP3 Discs Notes on MP3 Discs Playing MP3 Discs About MP3 The DVD+VCR can play MP3 format recordings on CD- ROM, CD-R, or CD-RW discs. An MP3 file is audio data compressed by using Before playing MP3 recordings, read the notes on MP3 MPEG1, the audio layer-3 file-coding scheme. -
Page 33: Programmed Playback With Mp3 Discs
Operation with MP3 Discs (Continued) Programmed Playback with Repeat Playback with MP3 Discs MP3 Discs To playback a track repeatedly Press REPEAT once during playback. Program allows you to store your favorite tracks for a The current track will be played back repeatedly. particular disc in the DVD+VCR memory. -
Page 34: Troubleshooting
Troubleshooting Check the following guide for the possible cause of a problem before contacting service. Symptom Cause Correction No power. The power cord is disconnected. Plug the power cord into the wall outlet securely. The power is on, but No disc is inserted. Insert a disc or tape. - Page 35 Troubleshooting (Continued) Symptom Cause Correction Some channels are Those channels were deleted with the Use ADD/DEL CH. to restore channels. skipped over when ADD/DEL CH. option. See “Channel Selection” on page 16. using CH/TRK (v/V) Picture and sound of Antenna or cables are loose. Tighten connections or replace cable.
-
Page 36: Language Code List
Language Code List Enter the appropriate code number for the initial settings “Disc Audio”, “Disc Subtitle” and/or “Disc Menu” (See page 19). Code Language Code Language Code Language Code Language 6566 Abkhazian 7074 Fiji 7678 Lingala 8373 Singhalese 6565 Afar 7073 Finnish 7684... -
Page 37: Specifications
Specifications General Power requirements AC 120V , 60 Hz Power consumption Dimensions (approx.) 430 X 97.5 X 360 mm (16.9 x 3.9 x 14.2 inches) (w x h x d) Mass (approx.) 5.3 kg (11.7 lbs) Operating temperature 5˚C to 40˚C (41˚F to 104˚F) Operating humidity 5 % to 90 % Signal system...
Need help?
Do you have a question about the DVC-2000 and is the answer not in the manual?
Questions and answers