Table of Contents
Advertisement
Advertisement
Table of Contents

Related Manuals for PDi PDI-P10LCD


Summary of Contents for PDi PDI-P10LCD
- Page 1 PERSONA Installation Hospital-Grade LCD Operating Television Receiver Instructions MODEL PDI-P10LCD Communication Systems, Inc 40 Greenwood Lane Springboro, Ohio 45066 PH: 937-743-6010 FX: 937-743-5664 ® Better Solutions Are Within Reach http://www.pdiarm.com DOCUMENT NUMBER PD196-058R3...
-
Page 2: Graphical Symbols
PDI-P10LCD USER MANUAL Document Number PD196-058R3 Graphical Symbols This lightning flash with arrowhead symbol, within an equilateral is intended to alert the user of the presence of uninsulated “dangerous voltage” within the product’s enclosure that may be of sufficient magnitude to constitute a risk of electric shock to persons. -
Page 3: Copyright, Disclaimer, And Trademarks
TRADEMARKS All brand names and product names used in this manual are trademarks, registered trademarks, or trade names of their respective holder. PDI and Better Solutions Are Within Reach are registered trademarks of PDI Communication Systems, Inc., Springboro, Ohio. Regulatory Information This equipment has been tested and found to comply with the limits for a Class B digital device, pursuant to part 15 of the FCC Rules. -
Page 4: Installation Precautions
PDI-P10LCD USER MANUAL Document Number PD196-058R3 Installation Precautions 1. Any changes or modifications in construction of this television, which are not expressly approved by the party responsible for compliance, could void the user’s authority to operate the equipment. 2. Use only a power source from a CSA Certified / UL Approved Class 2 Power Supply suitable for use in a Health Care Facility. -
Page 5: Table Of Contents
Language ………………………………………………………………………………..14 Picture ……………………………………………………………………………………15 Rental Operation ………………………………………………………………………..16 Self Rent …………………………………………………………………………………17 FAQ – Frequently Asked Questions ………………………………………………….18 APPENDIX A – Installation on other PDI-508C Arms ……………………………...19 Model PDI-P10LCD Limited Warranty ………………………………………………..21 PDI Communication Systems, Inc. 40 Greenwood Lane Springboro, Ohio 45066... -
Page 6: About The Persona 10
PDI-P10LCD USER MANUAL Document Number PD196-058R3 About the PERSONA 10 This television is specifically designed for entertainment purposes and for use in a hospital, a nursing home, a medical-care center, or a similar health-care center in which installation is limited to a non-hazardous area in accordance with the National Electrical Code, ANSI/NFPA 70. -
Page 7: Installing Tv On Suspension Arm
These instructions detail installing the PDI-P10LCD TV onto the PDI-508C-7 suspension arm. This arm is configured specifically for this television. The PDI- P10LCD TV may be installed on other PDI-508C arms. Please refer to Appendix A of this document for detailed instructions for this case. - Page 8 PDI-P10LCD USER MANUAL Document Number PD196-058R3 INSTALLING THE PDI-P10LCD TO THE PDI-508C-7 SUSPENSION ARM 1. Remove and save the ¾” Socket Head Cap Screw from the plastic “H” clip. Remove the plastic “H” clip and discard. 2. Remove the two nose cover retainer bolts. Raise the metal nose cover and slide the television completely into the arm’s clevis (slot).
-
Page 9: Control Panel
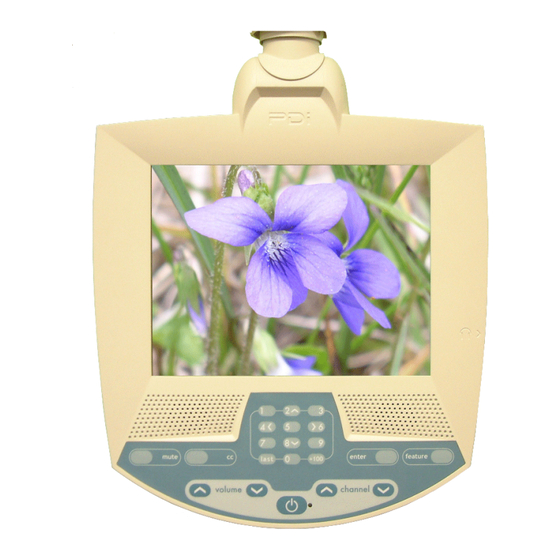
PDI-P10LCD USER MANUAL Document Number PD196-058R3 Control Panel DIRECT ENTRY KEYPAD POWER The easy to clean membrane control panel located on the lower front of the TV contains 9 large easy to read buttons and a numbered “direct entry” keypad for both channel and cursor control. -
Page 10: Earphone Operation
Remove the earphone to enable the internal TV speaker. The TV only offers mono sound. Use of a stereo earphone will result in sound from only one earphone speaker. Contact PDI for either earphone or mono style headsets. PD108-112 Headset... -
Page 11: Service Levels (Tiers)
PDI-P10LCD USER MANUAL Document Number PD196-058R3 Service Levels (Tiers) The PERSONA 10 contains four separate service levels (tiers) allowing the hospital to offer either basic or enhanced viewing. The current service level can be quickly determined by accessing the SETUP MODE menu using the handheld programming remote To use this television control. -
Page 12: Channel Setup
PDI-P10LCD USER MANUAL Document Number PD196-058R3 Channel Setup 1. AUTOPROGRAMMING Press the “SETUP” button on the remote control. A “SETUP SETUP MODE MODE” screen will appear. Service Level : Free Paid : Self Rent : Unlocked 2. Using the “CH▲” or “CH▼” buttons on the remote and select “Channel Setup”. -
Page 13: Clear Service Level
PDI-P10LCD USER MANUAL Document Number PD196-058R3 Clear Service Level 1. Press the “SETUP” button on the remote control. A “SETUP Clear Service Level MODE” screen will appear. Free: Programmed Basic: Programmed 2. Using the “CH▲” or “CH▼” buttons on the remote and select Premium: Blank “Channel Setup”. -
Page 14: Volume Limiter
PDI-P10LCD USER MANUAL Document Number PD196-058R3 Volume Limiter 1. Press the “SETUP” button on the remote control. A “SETUP Features MODE” screen will appear. Power-on Channel and Speaker Volume Limiter : 70 2. Using the “CH▲” or “CH▼” buttons on the remote and select Caption Text Modes : Disabled “Features”. -
Page 15: Picture
PDI-P10LCD USER MANUAL Document Number PD196-058R3 Picture 1. Press the “SETUP” button on the remote control. A “SETUP PICTURE MODE” screen will appear. Brightness : Contrast : 2. Using the “CH▲” or “CH▼” buttons on the remote and select Color : Tint : “Picture”. -
Page 16: Rental Operation
PDI-P10LCD USER MANUAL Document Number PD196-058R3 Rental Operation The “SETUP MODE” menu allows quick selection of • Service Level SETUP MODE • Payment Status • Self Rental Service Level : Free Paid : SERVICE LEVEL Self Rent : Unlocked The service level is manually set by the attendant using the remote. -
Page 17: Self Rent
PDI-P10LCD USER MANUAL Document Number PD196-058R3 3. Press “VOL▼” or “VOL▲” to toggle between “Yes” or “No”. Alternately, the television can be directly set to Paid using the hotkey located on the left row of the remote. Simply press to set to Paid without entering the “SETUP MODE”... -
Page 18: Faq - Frequently Asked Questions
PDI-P10LCD USER MANUAL Document Number PD196-058R3 FAQ – Frequently Asked Questions Q. We do not offer rental television in our hospital. How do I set up the television for only one service level with all TV channels available? A. Program the “Free” service level for all available channels. -
Page 19: Appendix A - Installation On Other Pdi-508C Arms
The suspension arm must be adjusted to the proper weight of the television in order to operate correctly. PDI arm model “PDI-508C-7” is factory adjusted for the proper weight. If this television is installed on a previously existing suspension arm, adjustment of the internal springs may be required. - Page 20 PDI-P10LCD USER MANUAL Document Number PD196-058R3 Appendix A - Continued Elbow Cover FRONT SPRING REAR FRONT SPRINGS SPRINGS REAR BRAKE TENSION BRAKE SPRING SCREWS TENSION SCREWS DO NOT ADJUST ADJUST Brake Tension Screw Detail Arm Adjustment Illustration PDI Communication Systems, Inc.
-
Page 21: Model Pdi-P10Lcd Limited Warranty
(10) days after defect is first observed. Repair of said product requires it to be shipped to the PDI factory in Springboro, Ohio. All shipments shall be F.O.B. Springboro, Ohio, and all shipping and freight charges to PDI’s factory shall be paid by the customer.
Need help?
Do you have a question about the PDI-P10LCD and is the answer not in the manual?
Questions and answers