Table of Contents
Advertisement
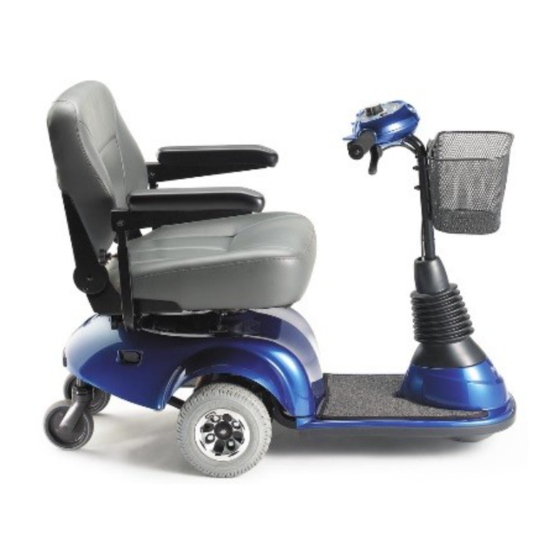
Owner's Operator and Maintenance Manual
HMV
Highly
™
Maneuverable Vehicle
™
™
Zoom
300 and Zoom
400
DEALER: This manual MUST be given to
the user of the scooter.
USER: BEFORE using this scooter, read this
manual and save for future reference.
For more information regarding
Invacare products, parts, and services,
please visit www.invacare.com
Advertisement
Table of Contents
Troubleshooting

Related Manuals for Invacare 300


Summary of Contents for Invacare 300
- Page 1 300 and Zoom DEALER: This manual MUST be given to the user of the scooter. USER: BEFORE using this scooter, read this manual and save for future reference. For more information regarding Invacare products, parts, and services, please visit www.invacare.com...
- Page 2 APPLICABLE). IF YOU ARE UNABLE TO UNDERSTAND THE WARNINGS, CAUTIONS AND INSTRUCTIONS, CONTACT INVACARE TECHNICAL SUPPORT BEFORE ATTEMPTING TO SERVICE OR OPERATE THIS EQUIPMENT - OTHERWISE, INJURY OR DAMAGE MAY RESULT. NOTE: Updated versions of this manual are available on www.invacare.com. ™ ™ Zoom 300 and Zoom...
-
Page 3: Table Of Contents
TABLE OF CONTENTS REGISTER YOUR PRODUCT... 6 SPECIAL NOTES ... 9 TYPICAL PRODUCT PARAMETERS ... 10 LABEL LOCATIONS ... 11 On Zoom 300 ...11 On Zoom 400 ...12 SECTION 1—GENERAL GUIDELINES ... 13 Repair or Service Information ...13 Operation Information ...13 Tire Pressure ...15... - Page 4 Removing/Installing the Rear Shroud ...44 Removing ...44 Installing ...44 SECTION 11—WHEELS AND CASTERS ... 45 Removing/Installing the Drive Wheels ...45 Removing ...45 Installing...45 Removing/Installing the Front Wheel ...47 Removing ...47 Installing ...47 Part No. 1118395 ™ Zoom ™ 300 and Zoom...
- Page 5 TABLE OF CONTENTS Removing/Installing the Caster Assemblies ...48 Removing ...48 Installing...48 SECTION 12—BATTERIES ... 49 Recommended Battery Type ...50 Removing/Installing the Batteries on Zoom 300...50 Removing ...51 Installing...51 Removing/Installing the Batteries on Zoom 400...53 Removing ...53 Installing...53 Connecting/Disconnecting the Battery Cables on the Zoom 400 ...55 Connecting ...55...
-
Page 6: Register Your Product
3. Receive updates with product information, maintenance tips, and industry news. 4. Invacare can contact you or your provider, if servicing is needed on your product. 5. It will enable Invacare to improve product designs based on your input and needs. -
Page 7: Product Registration Form
11. User's Year of birth: ______________________________________________________ If at any time you wish not to receive future mailings from us, please contact us at Invacare Corporation, CRM Department, 39400 Taylor Parkway, Elyria, OH 44035, or fax to 877-619-7996 and we will remove you from our mailing list. -
Page 9: Special Notes
It is Invacare’s position that users of powered scooters should be transferred into appropriate seating in vehicles for transportation and use be made of the restraints made available by the auto industry. -
Page 10: Typical Product Parameters
ENTIRE BASE SECTION: SEAT (WITH ARMS): BATTERIES (QUANTITY - 2): TOTAL WEIGHT OF PRODUCT: (Including Batteries) *NOTE: Zoom 300 parameters are based on an 18-inch wide seat. *NOTE: Zoom 400 parameters are based on an 20-inch wide seat. ™ ™ Zoom... -
Page 11: Label Locations
LABEL LOCATIONS ON ZOOM 300 NOTE: Warning Label 1118359 is located under the rear shroud. WARNING Pinch Point. 1079203 NOTE: Warning Label 1079203 is also located on the other swingarm. Part No. 1118395 DO NOT operate the scooter unless the tiller is in the locked position. -
Page 12: On Zoom 400
Rear Frame Assembly ™ ™ Zoom 300 and Zoom DO NOT operate the scooter unless the tiller is in the locked position. DO NOT lean against or pull forward on the tiller while mounting or dismounting the scooter. Otherwise, injury may occur. -
Page 13: Section 1-General Guidelines
DO NOT operate on roads, streets or highways. DO NOT attempt to move up or down an incline with water, ice or oil film. For Zoom 300 only, avoid operating the scooter in dark or poorly lit areas. ™ ™... - Page 14 Ensure that the seat is properly locked before use. Otherwise that user may fall from the scooter resulting in bodily harm. Attempting unsafe transfers may cause the user to fall, resulting in serious injury. ™ ™ Zoom 300 and Zoom Part No. 1118395...
-
Page 15: Tire Pressure
The recommended tire pressure is listed on the side wall of the tire. ELECTRICAL Check to ensure that all electrical connections are secure at all times. ™ ™ Part No. 1118395 Zoom 300 and Zoom... -
Page 16: Grounding Instructions
BATTERIES The warranty and performance specifications contained in this manual are based on the use of deep cycle gel cell batteries. Invacare strongly recommends their use as the power source for this unit. Carefully read battery/battery charger information prior to installing, servicing or operating your powered scooter. -
Page 17: Weight Limitation
SECTION 1—GENERAL GUIDELINES WEIGHT LIMITATION The weight limitation for the Zoom 300 is 300 lbs. The weight limitation for the Zoom 400 is 400 lbs. If so equipped, the front basket is rated for a maximum loading capacity of 10 lbs. -
Page 18: Section 2-Emi Information
AM/FM radios, TV sets, CD players, cassette players, and small appliances, such as elec- tric shavers and hair dryers, so far as we know, are not likely to cause EMI problems to your powered wheelchair. ™ ™ Zoom 300 and Zoom WARNING Part No. 1118395... - Page 19 EMI (as of May 1994) (the higher the level, the greater the protection); 2) This device has been tested to a radiated immunity level of 20 V/m. Modification of any kind to the electronics of this wheelchair as manufactured by Invacare may adversely affect the RFI immunity levels. Part No. 1118395 WARNING ™...
-
Page 20: Section 3-Safety/Handling Of Powered Scooters
Individual users often develop skills to deal with daily living activities that may differ from those described in this manual. Invacare recognizes and encourages each individual to try what works best for him/her in overcoming obstacles that they may encounter;... -
Page 21: Stairways
Extreme caution is advised when it is necessary to move an UNOCCUPIED powered scooter up or down the stairs. Invacare recommends disassembling the scooter and transporting the components (five [5] components on Zoom 300 and six [6] components on Zoom 400) independently UP or DOWN the stairs. ONLY use secure, non-detachable parts on each component for hand-hold supports. -
Page 22: Section 4-Safety Inspection
❑ Inspect front wheel/fork assembly for proper tension by spinning the wheel. The front wheel should come to a gradual stop. ❑ Check the front fork for damage or corrosion. ™ ™ Zoom 300 and Zoom WARNING CAUTION Part No. 1118395... -
Page 23: Inspect/Adjust Weekly
❑ Inspect caster assembly for proper tension by spinning the caster. The caster should come to a gradual stop. INSPECT/ADJUST EVERY SIX (6) MONTHS ❑ Lubricate the top of the seat using a Teflon Part No. 1118395 ® lubricant. Zoom ™ ™ 300 and Zoom... -
Page 24: Inspect/Adjust Periodically
❑ Clean upholstery and armrests. ❑ Inspect the seat upholstery for rips and tears. ❑ Ensure adjustable height arms operate and lock securely. ❑ Ensure armrest pad sits flush against arm tube. ™ ™ Zoom 300 and Zoom Part No. 1118395... -
Page 25: Section 5-Maintenance And Troubleshooting
When storing scooter for prolonged periods of time, remove batteries. Refer to Removing/Installing the Batteries on Zoom 300 on page 50 OR Removing/Installing the Batteries on Zoom 400 on page 53. After reinstallation, always recharge batteries before use. Refer to Charging the Batteries on page 58. -
Page 26: Troubleshooting
Replace charger. Contact Dealer or a quali- fied technician. Check all connections. Secure connections. Refer to Removing/Installing the Batteries on Zoom 300 on page 50 OR Removing/ Installing the Batteries on Zoom 400 on page 53. Switch another wall outlet. -
Page 27: Section 6-Operation Of The Powered Scooter
WARD motion, the powered scooter will ROLL BACK approximately one (1) foot before brake engages. If the throttle control lever is released while in REVERSE motion the powered scooter will ROLL BACK approximately three (3) feet before brake engages. Part No. 1118395 WARNING ™ ™ Zoom 300 and Zoom... - Page 28 DETAIL “A” - ZOOM 300 Battery Charge Indicator LED Status Indicator LED Horn Speed Control Knob FIGURE 6.1 - CONTROL PANEL 3. CHARGING INDICATOR - Located on the TOP face of the control panel as shown in FIGURE 6.1. Solid RED indicates the charger is on (plugged into wall receptacle).
- Page 29 8. THROTTLE CONTROL LEVER - Located below control panel (FIGURE 6.2). Horn NOTE: Location of Throttle Control Lever and Horn on Zoom 300 shown. Location of Throttle Control Lever and Horn is the same on Zoom 400. FIGURE 6.2 - CONTROL PANEL - HORN AND THROTTLE CONTROL LEVER Part No.
-
Page 30: Operating The Scooter
1. Before operation of the powered scooter, review Control Panel on page 27. 2. Install and charge batteries. Refer to Removing/Installing the Batteries on Zoom 300 on page 50, Removing/Installing the Batteries on Zoom 400 on page 53 and Charging the Batteries on page 58. -
Page 31: Brake Release Lever
When the brake release lever is DISENGAGED (lever pulled OUT) and the key is removed, the powered scooter can be pushed. The powered scooter CANNOT be driven with the brake in the DISENGAGED (lever pulled OUT) position. Part No. 1118395 WARNING ™ ™ Zoom 300 and Zoom... -
Page 32: Resetting The Circuit Breaker
Controller Tray Transaxle NOTE: Brake Release Lever on Zoom 300 shown. Brake Release Lever on Zoom 400 operates the same way. FIGURE 6.3 - BRAKE RELEASE LEVER RESETTING THE CIRCUIT BREAKER NEVER defeat or bypass the circuit breaker. ONLY replace with a circuit breaker of the same rating. -
Page 33: Replacing The Fuse
NOTE: Replace existing blown fuse with a new fuse of the same rating. 3. Pull fuse OUT and install new fuse. 4. Reverse STEPS 1 and 2 to reassemble the powered scooter. Fuse Fuse Holder FIGURE 6.5 - REPLACING THE FUSE ™ ™ Part No. 1118395 Zoom 300 and Zoom... -
Page 34: Section 7-Seat
1. Pulling UP on the seat lever, lower the seat assembly onto the seat post. NOTE: If necessary, slightly twist seat assembly back and forth to lock in place. 2. Release seat lever and lift UP on seat assembly to ensure the seat is secure. ™ ™ Zoom 300 and Zoom Part No. 1118395... -
Page 35: Removing/Installing The Seat Post
3. If necessary, install the seat. Refer to Removing/Installing the Seat on page 34. Seat Post Washer Mounting Screw Frame Post Mounting Screw NOTE: Seat post on Zoom 300 shown. Seat post on Zoom 400 installs the same way. FIGURE 7.2 - REMOVING/INSTALLING THE SEAT POST Part No. 1118395 WARNING Seat Post... -
Page 36: Adjusting Seat Height
2. Remove the adjustable width arms. Refer to Removing/Installing/Adjusting Arms on page 40. 3. Remove the six (6) mounting screws located under the seat that secure the back assembly to the seat base. ™ ™ Zoom 300 and Zoom WARNING Part No. 1118395... -
Page 37: 90° Seat Swivel Adjustment
2. Pull the seat lever UP to rotate the seat. Part No. 1118395 MOUNTING POSITIONS Back Assembly WARNING CAUTION Mounting Screws Back Assembly Seat Base Mounting Screws Back Assembly Seat Base Mounting Screws Back Assembly Seat Base ™ ™ Zoom 300 and Zoom... -
Page 38: Removing/Installing Seat Positioning Strap
3. Reposition the two (2) new seat positioning strap halves underneath arm frame. 4. Reinstall the two (2) mounting screws and washers that secure the seat positioning straps to the arm frame. Securely tighten. ™ ™ Zoom 300 and Zoom VIEW FROM BACK Seat WARNING Part No. 1118395... - Page 39 SECTION 7—SEAT Arm Frame Seat Positioning Strap Seat Positioning Strap Washer Mounting Screw Mounting Screw Washer FIGURE 7.5 - REMOVING/INSTALLING SEAT POSITIONING STRAP ™ ™ Part No. 1118395 Zoom 300 and Zoom...
-
Page 40: Section 8-Arms
Use caution when traveling through doorways as the width may have increased. 1. Loosen the adjustment knob located beneath the seat frame on the arm support bracket. Refer to FIGURE 8.1. ™ ™ Zoom 300 and Zoom Part No. 1118395... -
Page 41: Adjusting Arm Angle
ADJUSTING ARM HEIGHT NOTE: For this procedure, refer to FIGURE 8.3. 1. Remove the lock knob that secures the arm to the arm mounting tube. 2. Adjust the arm to desired height. ™ ™ Part No. 1118395 Zoom 300 and Zoom... -
Page 42: Replacing Armrest Pads
3. Install new armrest pad and securely tighten with existing mounting screws. 4. If necessary, repeat STEPS 1-3 to replace the other armrest pad. Arm Pad Mounting Screws FIGURE 8.4 - REPLACING ARMREST PADS ™ ™ Zoom 300 and Zoom Part No. 1118395... -
Page 43: Section 9-Tiller Adjustment
NOTE: The tiller is locked in position when an audible "click" is heard. UP to UNLOCK DOWN to LOCK NOTE: Tiller on Zoom 300 shown. Tiller on Zoom 400 adjusts the same way. FIGURE 9.1 - ADJUSTING THE TILLER ANGLE Part No. 1118395 WARNING... -
Page 44: Section 10-Rear Shroud
1. Align tabs on the rear shroud with the slots (not shown in figure) in the front shroud. 2. Place rear shroud on the frame and press down slightly. 3. Install the seat. Refer to Removing/Installing the Seat on page 34. DETAIL “B” - ZOOM 400 DETAIL “A” - ZOOM 300 Rear Shroud Rear Shroud Tabs... -
Page 45: Section 11-Wheels And Casters
4. Repeat STEPS 1-3 to install the other drive wheel. 5. Install the rear shroud. Refer to Removing/Installing the Rear Shroud on page 44. 6. Install the seat. Refer to Removing/Installing the Seat on page 34. ™ ™ Part No. 1118395 Zoom 300 and Zoom... - Page 46 Swingarm Keystock Washer Hex Nut FIGURE 11.1 - REMOVING/INSTALLING THE DRIVE WHEELS ™ ™ Zoom 300 and Zoom DETAIL “A” - ZOOM 300 WARNING: PINCH POINT Washer Drive Wheel DETAIL “B” - ZOOM 400 Drive Shaft Drive Wheel Scooter Frame Scooter Frame Part No.
-
Page 47: Removing/Installing The Front Wheel
INSTALLING Front wheel MUST be mounted in the correct fork mounting holes (upper mount- ing holes for the Zoom 400 and lower mounting holes for Zoom 300) - otherwise injury may result. 1. Perform one (1) of the following - A. -
Page 48: Removing/Installing The Caster Assemblies
1. Insert the new caster wheel into the caster housing and turn the hex nut CLOCKWISE to securely tighten the caster wheel in place. Caster Housing Swingarm Assembly Hex Nut Caster FIGURE 11.3 - REMOVING/INSTALLING THE CASTER ASSEMBLIES ™ ™ Zoom 300 and Zoom Part No. 1118395... -
Page 49: Section 12-Batteries
When connecting the battery cables to the batteries, the battery cables MUST be connected to the battery terminals/posts as shown in FIGURE 12.2 for Zoom 300 and FIGURE 12.5 for Zoom 400 - otherwise damage to the battery may result. -
Page 50: Recommended Battery Type
RECOMMENDED BATTERY TYPE WARNING The warranty and performance specifications contained in this manual are based on the use of deep cycle gel cell batteries. Invacare strongly recommends their use as the power source for this unit. CAUTION Failure to use the correct battery size and/or voltage may cause damage to the powered scooter and give unsatisfactory performance. -
Page 51: Removing
B. POSITIVE (+) RED battery cable to POSITIVE (+) battery terminal/post on the RIGHT battery. C. WHITE BATTERY CABLE (JUMPER) to the POSITIVE (+) battery terminal/post on the LEFT battery and the NEGATIVE (-) battery terminal/post on the RIGHT battery. Part No. 1118395 Zoom ™ ™ 300 and Zoom... - Page 52 DETAIL “B” - BATTERY WIRING HARNESS 50Amp Fuse POSITIVE (+) RED Battery Cable POSITIVE (+) RED Battery Terminal NEGATIVE (-) BLACK Battery Terminal FIGURE 12.2 - REMOVING/INSTALLING THE BATTERIES ON ZOOM 300 ™ ™ Zoom 300 and Zoom Battery Tray RED and BLACK Battery Connector...
-
Page 53: Removing/Installing The Batteries On Zoom 400
NOTE: New batteries MUST be fully charged BEFORE using, otherwise the life of the batteries will be reduced. 10. If necessary, charge the batteries. Refer to Charging the Batteries on page 58. Part No. 1118395 Zoom ™ ™ 300 and Zoom... - Page 54 Battery Strap NOTE: Seat and Rear Shroud not shown for clarity. FIGURE 12.3 - REMOVING/INSTALLING THE BATTERIES ON ZOOM 400 ™ ™ Zoom 300 and Zoom DETAIL “B” - BUILT-IN LIFTING STRAPS Built-in Lifting Battery Lifting Straps Straps POSITIVE (+) RED...
-
Page 55: Connecting/Disconnecting The Battery Cables On The Zoom 400
Both caps install in the same manner FIGURE 12.4 - INSTALLING BATTERY TERMINAL CAPS Part No. 1118395 WARNING DO NOT USE Battery Terminal POSITIVE (+) Battery Terminal NEGATIVE (-) Battery Terminal Battery Cable ™ ™ Zoom 300 and Zoom... -
Page 56: Disconnecting
2. Remove the rear shroud. Refer to Removing/Installing the Rear Shroud on page 44. 3. Remove the batteries. Refer to Removing/Installing the Batteries on Zoom 400 on page 53. ™ ™ Zoom 300 and Zoom WARNING WARNING Part No. 1118395... - Page 57 DETAIL “A” - TERMINAL CAPS TIE NEGATIVE (-) Terminal Cap Battery Handle NEGATIVE (-) Battery Terminal Locknut BLACK Battery Cable POSITIVE (+) Battery Terminal with Bracket U1 Battery THE ZOOM 400 WRAPS Battery Terminal Caps Tie Wraps ™ ™ Zoom 300 and Zoom...
-
Page 58: Charging The Batteries
1. Plug AC power cord into on-board battery charger port located to the rear shroud. 2. Plug AC power cord into 110-volt wall outlet. 3. Refer to Battery Charger Operation - Charger Indicator Light on Tiller on page 59. ™ ™ Zoom 300 and Zoom WARNING CAUTION WARNING Part No. 1118395... -
Page 59: Battery Charger Operation - Charger Indicator Light On Tiller
AC Power Cord Rear Shroud NOTE: Charger port on Zoom 300 shown. Charger port on Zoom 400 is similar. FIGURE 12.6 - CHARGING THE BATTERIES BATTERY CHARGER OPERATION - CHARGER INDICATOR LIGHT ON TILLER NOTE: If the scooter is turned on while charging, the battery charge indicator will show the batteries at FULL charge. -
Page 60: Section 13-Transporting
2. Remove the seat. Refer to Removing/Installing the Seat on page 34. 3. Remove the rear shroud. Refer to Removing/Installing the Rear Shroud on page 44. 4. Remove the batteries. Refer to Removing/Installing the Batteries on Zoom 300 on page 50. -
Page 61: Zoom 400
Refer to Removing/Installing the Batteries on Zoom 300 on page 50 FIGURE 13.1 - TRANSPORTING THE SCOOTER - ZOOM 300 ZOOM 400 NOTE: For this procedure, refer to FIGURE 13.2. DISASSEMBLING 1. If installed on scooter, remove the front basket. Refer to Removing/Installing the Front Basket on page 64. -
Page 62: Assembling
5. Install the batteries. Refer to Removing/Installing the Batteries on Zoom 400 on page 53. 6. Install the rear shroud. Refer to Removing/Installing the Rear Shroud on page 44. 7. Install the seat. Refer to Removing/Installing the Seat on page 34. ™ ™ Zoom 300 and Zoom WARNING Part No. 1118395... - Page 63 Refer to Adjusting the Tiller Angle on page 43 Front Frame Assembly Mounting Bracket Controller BLACK Battery LEFT Connectors Battery UP to Unlock DOWN to Lock Frame Mounting Lock Lever Bracket Rear Frame Assembly ™ ™ Zoom 300 and Zoom...
-
Page 64: Section 14-Scooter Accessories
2. To install: A. Align the slots of the basket with the mounting clips on the tiller. B. Push DOWN on the basket to secure it in place. DETAIL “A” - ZOOM 300 Tiller DETAIL “B” - ZOOM 400 Tiller FIGURE 14.1 - REMOVING/INSTALLING THE FRONT BASKET... -
Page 65: Installing/Removing The Crutch/Cane Holder
2. Remove the mounting knob that secures the crutch/cane holder in place. 3. Remove the crutch/cane holder from the accessory tube. Mounting Knob Crutch Cane Holder Seat Hook Accessory Tube Base FIGURE 14.2 - INSTALLING/REMOVING THE CRUTCH/CANE HOLDER ™ ™ Part No. 1118395 Zoom 300 and Zoom... -
Page 66: Installing/Removing The Safety Flag
When turning the scooter or swiveling the scooter seat, it is important to take note of this increased length - otherwise, injury and/or damage to the surrounding property may result. ™ ™ Zoom 300 and Zoom WARNING Mounting Knob Safety Flag Bracket FIGURE 14.3 - INSTALLING/... -
Page 67: Installing/Removing The Walker Holder
3. Secure walker with hook and loop straps. Part No. 1118395 Mounting Knob FIGURE 14.4 - INSTALLING/ REMOVING THE WALKER HOLDER Hook and Loop Strap FIGURE 14.5 - USING THE WALKER HOLDER Zoom Seat Accessory Tube Walker Holder Hook ™ ™ 300 and Zoom... -
Page 68: Installing/Removing The Rear Mounted Basket
3. Remove the basket bracket from the accessory tube. 4. Tighten the mounting knob. Rear Basket Slots Basket Bracket FIGURE 14.6 - INSTALLING/REMOVING THE REAR MOUNTED BASKET ™ ™ Zoom 300 and Zoom WARNING Mounting Knob Accessory Tube Mounting Clips Seat Part No. 1118395... - Page 69 NOTES ™ ™ Part No. 1118395 Zoom 300 and Zoom...
- Page 70 NOTES ™ ™ Zoom 300 and Zoom Part No. 1118395...
-
Page 71: Limited Warranty
In the event you do not receive satisfactory warranty service, please write directly to Invacare at the address on the bottom of the back cover. Provide dealer's name address, date of purchase, indicate nature of the defect and, if the product is serialized, indicate the serial number. - Page 72 Elyria, Ohio USA Mississaugua Ontario 44036-2125 L4Z 4G4 Canada 800-333-6900 800-668-5324 Invacare is a registered trademark of Invacare Corporation. Teflon is a registered trademark of E.I. DuPont Nemours and Company. Yes, you can., HMV and Zoom are trademarks of Invacare Corporation.
Need help?
Do you have a question about the 300 and is the answer not in the manual?
Questions and answers