Advertisement
Table of Contents
- 1 Installation Manual
- 2 Table of Contents
- 3 Safety Considerations
- 4 Before Installation
- 5 Preparations before Installation
- 6 Selecting Installation Site
- 7 Indoor Unit Installation
- 8 Refrigerant Piping Work
- 9 Drain Piping Work
- 10 Electric Wiring Work
- 11 Wiring Example and How to Set the Remote Controller
- 12 Field Setting
- 13 Test Operation
- Download this manual
See also:
Operating Manual
SYSTEM Inverter Air Conditioners
MODELS
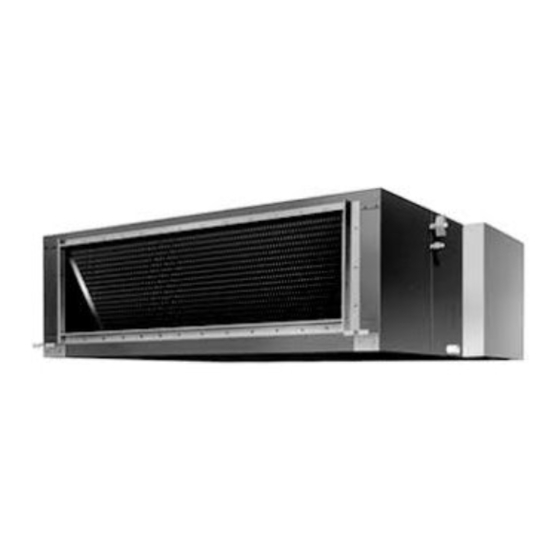
Ceiling-mounted Duct type
FXMQ72MVJU
FXMQ96MVJU
READ THESE INSTRUCTIONS CAREFULLY BEFORE INSTALLATION.
KEEP THIS MANUAL IN A HANDY PLACE FOR FUTURE REFERENCE.
LIRE SOIGNEUSEMENT CES INSTRUCTIONS AVANT L'INSTALLATION.
CONSERVER CE MANUEL A PORTEE DE MAIN POUR REFERENCE ULTERIEURE.
LEA CUIDADOSAMENTE ESTAS INSTRUCCIONES ANTES DE INSTALAR.
GUARDE ESTE MANUAL EN UN LUGAR A MANO PARA LEER EN CASO DE TENER
ALGUNA DUDA.
INSTALLATION MANUAL
English
Français
Español
Advertisement
Table of Contents

Related Manuals for Daikin FXMQ72MVJU


Summary of Contents for Daikin FXMQ72MVJU
-
Page 1: Installation Manual
INSTALLATION MANUAL SYSTEM Inverter Air Conditioners MODELS Ceiling-mounted Duct type FXMQ72MVJU FXMQ96MVJU English Français READ THESE INSTRUCTIONS CAREFULLY BEFORE INSTALLATION. KEEP THIS MANUAL IN A HANDY PLACE FOR FUTURE REFERENCE. Español LIRE SOIGNEUSEMENT CES INSTRUCTIONS AVANT L’INSTALLATION. CONSERVER CE MANUEL A PORTEE DE MAIN POUR REFERENCE ULTERIEURE. -
Page 2: Table Of Contents
VRV SYSTEM Inverter Air Conditioners Installation manual CONTENTS • If refrigerant gas leaks during installation, ventilate the area immediately. Refrigerant gas may produce toxic gas 1. SAFETY CONSIDERATIONS ..........1 if it comes in contact with fire. Exposure to this gas 2. - Page 3 (a)Where a mineral oil mist or oil spray or vapor is pro- than those specified by Daikin are used, fire or explosion duced, for example, in a kitchen. may occur.
-
Page 4: Before Installation
BEFORE INSTALLATION ACCESSORIES • When moving the unit while removing it from the carton Check the following accessories are included with your box, be sure to lift it by holding on to the four lifting lugs unit. without exerting any pressure on other parts, especially, Attached Insulation (Other) -
Page 5: Selecting Installation Site
b. Items to be checked at time of delivery (2) Use suspension bolts for installation. Check whether Also review the “SAFETY CONSIDERATIONS” the ceiling is strong enough to support the weight of the unit or not. If there is a risk, reinforce the ceiling Items to be checked Check before installing the unit. -
Page 6: Indoor Unit Installation
〈Before refrigerant piping work, check which type of refrig- INDOOR UNIT INSTALLATION erant is used. Proper operation is not possible if the types Installing optional accessories before installing the indoor of refrigerant are not the same.〉 unit is easier. As for the parts to be used for installation work, be sure to use CAUTION the provided accessories and specified parts designated by our •... -
Page 7: Drain Piping Work
〈〈Rig the drain pipe as shown below and take measures Gas piping diameter connected diameter against condensation. Improperly rigged piping could lead φ3/4 FXMQ72MVJU to leaks and eventually wet furniture and belongings.〉〉 Use attached piping. 〈〈Insulate the drain hose inside the building.〉〉 φ3/8 φ7/8 FXMQ96MVJU Use attached piping. -
Page 8: Electric Wiring Work
• In order to prevent foreign matter from building up inside the piping, you should avoid curves as much Voltage Model Volts as possible. range FXMQ72MVJU 380×2 NOTE 208- Max. 253 Min. 187 • If converging multiple drain pipes, install according to the pro- FXMQ96MVJU 10.7... -
Page 9: Wiring Example And How To Set The Remote Controller
WIRING EXAMPLE AND HOW TO SET • When clamping the wires, be sure no pressure is applied to the wire connections by using the included clamping material THE REMOTE CONTROLLER to make appropriate clamps. Also, when wiring, make sure the lid on the electrical components box fits snugly by arrang- HOW TO CONNECT WIRINGS ing the wires neatly and attaching the electrical components (Remove the electrical components box lid and wire as shown in... - Page 10 9-2 WIRING EXAMPLE 3. When including BS unit • Fit the power supply wiring of each unit with a switch and fuse Power supply Outdoor unit Power supply as shown in the drawing. 208-230V 208-230V Control box IN/D OUT/D 60Hz 60Hz L1 L2 COMPLETE SYSTEM EXAMPLE (3 SYSTEMS)
-
Page 11: Field Setting
10. FIELD SETTING Wiring Method (See ‘‘ELECTRIC WIRING WORK’’) (3) Remove the electrical components box lid Make sure the terminal box lids are closed on the indoor and outdoor units. (4) Add remote control 2 (slave) to the terminal block for Field setting must be made from the remote controller in remote controller (P ) in the electrical components... - Page 12 1645 Wallace Drive, Suite 110 Carrollton, TX 75006 info@daikinac.com www.daikinac.com 3P086156-13Y EM09A017 (0909) HT...
Need help?
Do you have a question about the FXMQ72MVJU and is the answer not in the manual?
Questions and answers