
Related Manuals for Yamaha YZ85Y


Summary of Contents for Yamaha YZ85Y
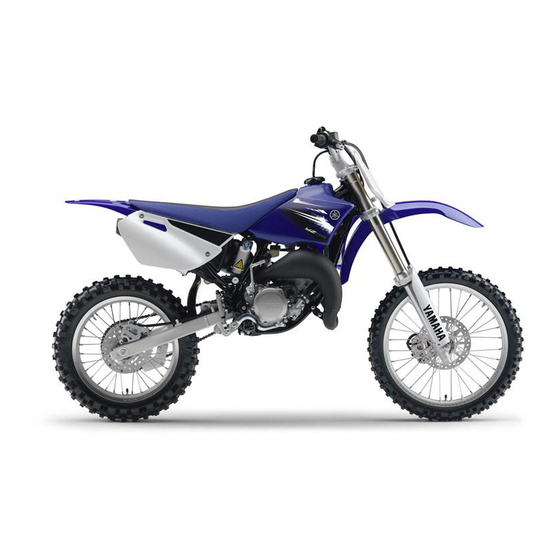
- Page 1 Read this manual carefully before operating this vehicle. OWNER’S MANUAL YZ85Y LIT-11626-22-52 5PA-28199-17...
- Page 2 EAU10042 Read this manual carefully before operating this vehicle. This manual should stay with this vehicle if it is sold.
- Page 3 INTRODUCTION EAU42043 Congratulations on your purchase of the Yamaha YZ85Y. This model is the result of Yamaha’s vast experience in the pro- duction of fine sporting, touring, and pacesetting racing machines. It represents the high degree of craftsmanship and reli- ability that have made Yamaha a leader in these fields.
- Page 4 STERS AND OFF-HIGHWAY MOTORCYCLES” and the “TIPS AND PRACTICE GUIDE FOR THE OFF HIGHWAY MOTORCYCLIST” booklets supplied with this motorcycle when new or available from your Yamaha dealer. Children differ in skills, physical abilities, and judgment. Some children may not be able to operate a motorcycle safely. Parents should su- pervise their child’s use of the motorcycle at all times.
-
Page 5: Important Manual Information
IMPORTANT MANUAL INFORMATION EAU10132 Particularly important information is distinguished in this manual by the following notations: This is the safety alert symbol. It is used to alert you to potential personal injury hazards. Obey all safety messages that follow this symbol to avoid possible injury or death. - Page 6 IMPORTANT MANUAL INFORMATION EAU10193 YZ85Y OWNER’S MANUAL ©2008 by Yamaha Motor Corporation, U.S.A. 1st edition, June 2008 All rights reserved. Any reprinting or unauthorized use without the written permission of Yamaha Motor Corporation, U.S.A. is expressly prohibited. Printed in Japan.
-
Page 7: Table Of Contents
TABLE OF CONTENTS LOCATION OF IMPORTANT FOR YOUR SAFETY – Checking the front brake lever LABELS ..........1-1 PRE-OPERATION CHECKS ..... 5-1 free play ........7-18 Pre-operation check list ....5-2 Checking the shift pedal ....7-18 SAFETY INFORMATION ....2-1 Checking the front and rear brake OPERATION AND IMPORTANT pads .......... - Page 8 TABLE OF CONTENTS MOTORCYCLE CARE AND STORAGE ..........8-1 Matte color caution ......8-1 Care ..........8-1 Storage ...........8-3 SPECIFICATIONS ......9-1 CONSUMER INFORMATION...10-1 Identification numbers ....10-1 YAMAHA MOTOR CORPORATION, U.S.A. YZ/WR MOTORCYCLE LIMITED WARRANTY ....10-2...
-
Page 9: Location Of Important Labels
Read and understand all of the labels on your vehicle. They contain important information for safe and proper operation of your vehicle. Never remove any labels from your vehicle. If a label becomes difficult to read or comes off, a replacement label is available from your Yamaha dealer. - Page 10 LOCATION OF IMPORTANT LABELS Use premium unleaded WARNING gasoline/oil premix only. BEFORE YOU OPERATE THIS VEHICLE, READ 3XJ-2415E-A1. THE OWNER’S MANUAL AND ALL LABELS. NEVER CARRY A PASSENGER. You increase your risk of losing control if you carry a passenger. NEVER OPERATE THIS VEHICLE ON PUBLIC ROADS.
-
Page 11: Safety Information
SAFETY INFORMATION EAU41462 Safe Riding yourself conspicuous appears to Perform the pre-operation checks each be very effective in reducing the time you use the vehicle to make sure it chance of this type of accident. Be a Responsible Owner is in safe operating condition. Failure to Therefore: As the vehicle’s owner, you are respon- inspect or maintain the vehicle properly... - Page 12 SAFETY INFORMATION Many accidents have been caused Protective apparel Avoid Carbon Monoxide Poisoning by error of the motorcycle opera- The majority of fatalities from motor- All engine exhaust contains carbon tor. A typical error made by the op- cycle accidents are the result of head monoxide, a deadly gas.
- Page 13 Yamaha accessories, which are avail- or others. Installing aftermarket prod- or front fork area, they must be able only from a Yamaha dealer, have ucts or having other modifications per- as lightweight as possible and been designed, tested, and approved formed to your vehicle that change any should be kept to a minimum.
- Page 14 SAFETY INFORMATION electric failure could result, which could cause a dangerous loss of lights or engine power. Aftermarket Tires and Rims The tires and rims that came with your motorcycle were designed to match the performance capabilities and to provide the best combination of handling, brak- ing, and comfort.
-
Page 15: Description
DESCRIPTION EAU10410 Left view 1. Radiator cap (page 7-10) 2. Fuel cock (page 4-5) 3. Shock absorber assembly spring preload adjusting nut (page 4-9) 4. Air filter element (page 7-12) 5. Seat (page 4-7) 6. Shift pedal (page 4-1) 7. Throttle stop screw (page 7-14) 8. -
Page 16: Right View
DESCRIPTION EAU10420 Right view 1. Shock absorber assembly compression damping force adjusting screw 9. Brake pedal (page 4-2) (page 4-9) 10.Transmission oil drain bolt (page 7-9) 2. Kickstarter (page 4-6) 11.Shock absorber assembly rebound damping force adjusting screw 3. Front fork rebound damping force adjusting screw (page 4-7) (page 4-9) 4. -
Page 17: Controls And Instruments
DESCRIPTION EAU10430 Controls and instruments 1. Clutch lever (page 4-1) 2. Engine stop button (page 4-1) 3. Brake lever (page 4-2) 4. Throttle grip (page 7-14) 5. Fuel tank cap (page 4-3) -
Page 18: Instrument And Control Functions
INSTRUMENT AND CONTROL FUNCTIONS EAU40660 EAU12850 EAU12870 Handlebar switch Clutch lever Shift pedal 1. Engine stop button “ENGINE STOP” 1. Clutch lever 1. Shift pedal The clutch lever is located at the left The shift pedal is located on the left EAU12670 “ENGINE STOP”... -
Page 19: Brake Lever
INSTRUMENT AND CONTROL FUNCTIONS EAU41261 2. While holding the lever pushed EAU12941 Brake lever Brake pedal away from the handlebar grip, turn The brake lever is located at the right the adjusting bolt in direction (a) to handlebar grip. To apply the front increase the distance, and in direc- brake, pull the lever toward the handle- tion (b) to decrease it. -
Page 20: Fuel Tank Cap
INSTRUMENT AND CONTROL FUNCTIONS EAU13182 EAU41833 Fuel tank cap Fuel This motorcycle has been designed to use a premixed fuel of gasoline and 2- stroke engine oil. Always mix the gaso- line and oil in a clean container before filling the fuel tank. ECA15601 NOTICE Always use fresh gasoline, and fill... - Page 21 INSTRUMENT AND CONTROL FUNCTIONS Your Yamaha engine has been de- Filling the fuel tank other sources of ignition such as signed to use premium unleaded gaso- the pilot lights of water heaters and line with a pump octane number clothes dryers.
-
Page 22: Fuel Tank Breather Hose
INSTRUMENT AND CONTROL FUNCTIONS wash with soap and water. If gaso- EAU41360 EAU41280 Fuel tank breather hose Fuel cock line spills on your clothing, change The fuel cock supplies fuel from the your clothes. tank to the carburetor while filtering it al- The fuel cock has two positions: 1. -
Page 23: Starter (Choke) Knob
INSTRUMENT AND CONTROL FUNCTIONS EAU13640 EAU13650 Starter (choke) knob Kickstarter 1. Arrow mark positioned over “ON” 1. Starter (choke) knob 1. Kickstarter lever With the lever in this position, fuel flows Starting a cold engine requires a richer To start the engine, fold out the kick- to the carburetor. -
Page 24: Seat
INSTRUMENT AND CONTROL FUNCTIONS EAU46280 EAU42051 Seat Adjusting the front fork EWA10180 WARNING To remove the seat Remove the bolts, and then pull the Always adjust both fork legs equal- seat off. ly, otherwise poor handling and loss of stability may result. This front fork is equipped with rebound damping force adjusting screws and compression damping force adjusting... - Page 25 INSTRUMENT AND CONTROL FUNCTIONS To increase the rebound damping force Compression damping force Compression damping setting: and thereby harden the rebound damp- Minimum (soft): ing, turn the adjusting screw on each 20 click(s) in direction (b)* Standard: fork leg in direction (a). To decrease the 10 click(s) in direction (b)* rebound damping force and thereby Maximum (hard):...
-
Page 26: Front Fork Bleeding
INSTRUMENT AND CONTROL FUNCTIONS EAU14791 EAU42062 Front fork bleeding Adjusting the shock absorber When bleeding the front fork, there assembly should be no weight on the front end of This shock absorber assembly is the vehicle. equipped with a spring preload adjust- ing nut, a rebound damping force ad- 2. - Page 27 (b). damping, turn the adjusting screw in di- A special wrench can be ob- rection (b). tained at a Yamaha dealer to make this adjustment. 1. Distance A The spring preload setting is determined by measuring dis-...
- Page 28 Take the shock visable to check the actual total number sion damping, turn the adjusting screw absorber assembly to a Yamaha of clicks or turns of each damping force in direction (a). To decrease the com- dealer for any service.
-
Page 29: Removable Sidestand
INSTRUMENT AND CONTROL FUNCTIONS EAU41381 Removable sidestand 1. Sidestand This motorcycle is equipped with a re- movable sidestand. Make sure that the sidestand is proper- ly secured when the motorcycle is be- ing supported or is being transported. EWA14601 WARNING Never apply force on the motor- cycle while it is on the side- stand. -
Page 30: For Your Safety - Pre-Operation Checks
Failure to inspect or maintain the vehicle properly increases the possibility of an accident or equipment damage. Do not operate the vehicle if you find any problem. If a problem cannot be corrected by the procedures provided in this manual, have the vehicle inspected by a Yamaha dealer. Before using this vehicle, check the following points:... -
Page 31: Pre-Operation Check List
• Check lever free play. • Adjust if necessary. • Make sure that operation is smooth. • Check cable free play. Throttle grip 7-14, 7-23 • If necessary, have Yamaha dealer adjust cable free play and lubricate cable and grip housing. - Page 32 FOR YOUR SAFETY – PRE-OPERATION CHECKS ITEM CHECKS PAGE • Check chain slack. • Adjust if necessary. Drive chain 7-21, 7-22 • Check chain condition. • Lubricate if necessary. • Check for damage. • Check tire condition and tread depth. Wheels and tires •...
-
Page 33: Operation And Important Riding Points
(choke) is not required 2. Shift the transmission into the neu- understand, ask your Yamaha dealer. when the engine is warm. Instead, start tral position. the engine with the throttle slightly EWA10271 3. -
Page 34: Shifting
OPERATION AND IMPORTANT RIDING POINTS EAU16671 ECA10260 4. Once the motorcycle has reached Shifting NOTICE a speed high enough to change gears, close the throttle, and at the Even with the transmission in same time, quickly pull the clutch the neutral position, do not lever in. -
Page 35: Engine Break-In
Yamaha dealer perform 5. After again allowing the engine to parts, oil leakage and any other prob- service. -
Page 36: Parking
Yamaha dealer check the vehi- ans or children are not likely to cle. touch them and be burned. Do not park on a slope or on soft... -
Page 37: Periodic Maintenance And Adjustment
Failure to properly maintain the ve- hicle or performing maintenance ac- tivities incorrectly may increase your risk of injury or death during service or while using the vehicle. If you are not familiar with vehicle ser- vice, have a Yamaha dealer perform service. -
Page 38: Periodic Maintenance And Lubrication Chart
Yamaha dealer. From the seventh race, repeat the maintenance intervals starting from “Every race”. Items marked with an asterisk should be performed by a Yamaha dealer as they require special tools, data and technical skills. - Page 39 PERIODIC MAINTENANCE AND ADJUSTMENT After Every Every Every ITEM ROUTINE break-in race third race fifth race required • Check cylinder for score marks or wear. √ √ • Clean. 5 * Cylinder √ • Replace. • Check clutch housing, friction plates, clutch plates √...
- Page 40 • Clean and regap. Spark plug √ • Replace. • Check chain slack, alignment and condition. √ √ • Adjust and thoroughly lubricate chain with Yamaha Drive chain chain and cable lube or equivalent. √ • Replace. √ √ • Check coolant level and for leakage.
- Page 41 PERIODIC MAINTENANCE AND ADJUSTMENT After Every Every Every ITEM ROUTINE break-in race third race fifth race required • Adjust lever position and pedal height. • Lubricate pivot points. • Check brake disk surface. √ √ • Check fluid level and for leakage. •...
- Page 42 PERIODIC MAINTENANCE AND ADJUSTMENT After Every Every Every ITEM ROUTINE break-in race third race fifth race required • Check for wear or damage. Drive chain roller and √ 24 * support guide • Replace if necessary. √ √ • Check operation and tighten if necessary. 25 * Rear suspension √...
- Page 43 PERIODIC MAINTENANCE AND ADJUSTMENT • Every two years replace the internal components of the brake master cylinders and calipers, and change the brake fluid. • Replace the brake hoses every four years and if cracked or damaged.
-
Page 44: Checking The Spark Plug
Do not attempt to diagnose such problems yourself. In- 1. Spark plug gap stead, have a Yamaha dealer check 1. Spark plug cap the vehicle. Spark plug gap: 2. Remove the spark plug as shown, 0.5–0.6 mm (0.020–0.024 in) -
Page 45: Transmission Oil
If any spark plug threads. leakage is found, have a Yamaha deal- 3. Install the spark plug with the er check and repair the motorcycle. In spark plug wrench, and then tight- addition, the transmission oil must be en it to the specified torque. -
Page 46: Coolant
PERIODIC MAINTENANCE AND ADJUSTMENT ECA10452 7. Start the engine, and then let it idle EAU20070 Coolant NOTICE for several minutes while checking The coolant level should be checked the transmission for oil leakage. If In order to prevent clutch slip- before each ride. - Page 47 PERIODIC MAINTENANCE AND ADJUSTMENT EAUM1313 To change the coolant The coolant level must be checked 1. Place the vehicle on a level sur- on a cold engine since the level face and let the engine cool if nec- varies with engine temperature. essary.
-
Page 48: Cleaning The Air Filter Element
9. Start the engine, and then check the vehicle for coolant leakage. If coolant is leaking, have a Yamaha 1. Air filter case cover dealer check the cooling system. 1. Wing bolt 2. - Page 49 PERIODIC MAINTENANCE AND ADJUSTMENT The sponge material should be wet but not dripping. Recommended oil: Yamaha foam air filter oil or other quality foam air filter oil 7. Pull the sponge material over the air filter element frame. 1. Sponge material 1.
-
Page 50: Adjusting The Carburetor
Therefore, most car- justed when necessary. buretor adjustments should be left to a 1. Start the engine and thoroughly Yamaha dealer, who has the neces- warm it up. sary professional knowledge and expe- 2. Turn the throttle stop screw until rience. - Page 51 PERIODIC MAINTENANCE AND ADJUSTMENT 2. To increase the throttle cable free EAU41821 Standard tire air pressure: Tires play, turn the adjusting nut in direc- Front: To maximize the performance, durabil- tion (a). To decrease the throttle 100 kPa (1.00 kgf/cm², 15 psi) ity, and safe operation of your motor- Rear: cable free play, turn the adjusting...
- Page 52 If unavoid- stem indicates that the tire has model by Yamaha Motor Co., Ltd. able, however, patch the tube slipped from its original posi- very carefully and replace it as Front tire: tion on the rim.
-
Page 53: Play
5. Loosen the locknut further down age before each ride. If any dam- the clutch cable. age is found, have a Yamaha dealer replace the wheel. Do not attempt even the smallest repair to 1. Clutch lever free play the wheel. -
Page 54: Checking The Front Brake Lever Free Play
The operation of the shift pedal should dent. be checked before each ride. If opera- tion is not smooth, have a Yamaha dealer check the vehicle. 1. Brake lever free play There should be no free play at the brake lever end. -
Page 55: Checking The Front And Rear Brake Pads
EAU22580 Checking the front and rear Checking the brake fluid level touches the brake disc, have a Yamaha brake pads dealer replace the brake pads as a set. Front brake The front and rear brake pads must be... -
Page 56: Changing The Brake Fluid
Changing the brake fluid is above the minimum level mark and ter the brake fluid reservoir when Have a Yamaha dealer change the replenish if necessary. A low brake fluid refilling. Water will significantly brake fluid at the intervals specified in... -
Page 57: Drive Chain Slack
PERIODIC MAINTENANCE AND ADJUSTMENT EAU22760 to chain slippage or breakage. Drive chain slack To prevent this from occurring, The drive chain slack should be keep the drive chain slack with- checked before each ride and adjusted in the specified limits. [ECA10571] if necessary. -
Page 58: Cleaning And Lubricating The Drive Chain
1. Remove all dirt and mud from the drive chain with a brush or cloth. For a thorough cleaning, have a Yamaha dealer remove the drive chain and soak it in solvent. 2. Spray Yamaha Chain and Cable Lube or a high-quality spray-type... -
Page 59: Checking And Lubricating The Cables
Clutch lever ble to prevent unsafe conditions. [EWA10711] Recommended lubricant: Yamaha Chain and Cable Lube or 4- stroke engine oil The operation of the brake and clutch levers should be checked before each ride, and the lever pivots should be lu- bricated if necessary. -
Page 60: Checking And Lubricating The Brake Pedal
PERIODIC MAINTENANCE AND ADJUSTMENT EAU23182 EAUM1650 Recommended lubricants: Checking and lubricating the Lubricating the swingarm piv- Brake lever: brake pedal Silicone grease Clutch lever: Lithium-soap-based grease The operation of the brake pedal The swingarm pivots must be lubricat- should be checked before each ride, ed at the intervals specified in the peri- and the pedal pivot should be lubricat- odic maintenance and lubrication chart. -
Page 61: Lubricating The Rear Suspension
WARNING! To avoid injury, have a Yamaha dealer check or re- specified in the periodic maintenance securely support the vehicle so pair it. -
Page 62: Checking The Steering
If any free not available, by placing a jack un- play can be felt, have a Yamaha der the frame in front of the rear wheel. dealer check or repair the steering. -
Page 63: Front Wheel
PERIODIC MAINTENANCE AND ADJUSTMENT a jack either under each side of the EAU24360 Front wheel frame in front of the rear wheel or under each side of the swingarm. EAU41341 To remove the front wheel EWA10821 WARNING To avoid injury, securely support the vehicle so there is no danger of it falling over. -
Page 64: Rear Wheel
PERIODIC MAINTENANCE AND ADJUSTMENT EAU25080 6. While supporting the brake caliper Rear wheel and slightly lifting the wheel, pull the wheel axle out. EAU41312 To remove the rear wheel EWA10821 WARNING To avoid injury, securely support the vehicle so there is no danger of it falling over. -
Page 65: Troubleshooting
However, should your motorcycle require any repair, take it to a Yamaha dealer, whose skilled technicians have the necessary tools, experience, and know-how to service the motorcycle properly. - Page 66 PERIODIC MAINTENANCE AND ADJUSTMENT heaters or furnaces. Gasoline or gasoline vapors can ignite or ex- plode, causing severe injury or property damage. 7-30...
-
Page 67: Troubleshooting Charts
Wipe off with a dry cloth and correct the the kickstarter. spark plug gap, or replace the spark plug. Remove the spark plug and check the electrodes. The engine does not start. Have a Yamaha dealer check the vehicle. Have a Yamaha dealer check the vehicle. 7-31... - Page 68 Start the engine. If the engine overheats again, have a The coolant level Yamaha dealer check and repair the cooling system. is OK. If coolant is not available, tap water can be temporarily used instead, provided that it is changed to the recommended coolant as soon as possible.
-
Page 69: Motorcycle Care And Storage
Rust and corrosion can develop matte colored finished parts. Be Cleaning even if high-quality components are sure to consult a Yamaha dealer for ECA10771 advice on what products to use be- used. A rusty exhaust pipe may go un- NOTICE fore cleaning the vehicle. - Page 70 MOTORCYCLE CARE AND STORAGE contact with strong or abrasive scratched, use a quality plastic After cleaning cleaning products, solvent or polishing compound after 1. Dry the motorcycle with a chamois thinner, fuel (gasoline), rust re- washing. or an absorbing cloth. movers or inhibitors, brake flu- 2.
-
Page 71: Storage
1. Follow all the instructions in the Consult a Yamaha dealer for advice on spark plug cap. WARNING! To “Care” section of this chapter. what products to use. - Page 72 MOTORCYCLE CARE AND STORAGE ground the spark plug elec- trodes while turning the en- gine over. [EWA10951] 5. Lubricate all control cables and the pivoting points of all levers and brake pedal. 6. Check and, if necessary, correct the tire air pressure, and then lift the motorcycle so that both of its wheels are off the ground.
-
Page 73: Specifications
SPECIFICATIONS Dimensions: Transmission oil: Secondary reduction system: Chain drive Overall length: Type: Secondary reduction ratio: 1821 mm (71.7 in) YAMALUBE 4 (10W-40) or SAE 10W-40 47/14 (3.357) Overall width: Oil change quantity: Transmission type: 758 mm (29.8 in) 0.50 L (0.53 US qt, 0.44 Imp.qt) Constant mesh 6-speed Overall height: Cooling system:... - Page 74 SPECIFICATIONS Manufacturer/model: Rear brake: DUNLOP/D739FA Type: Rear tire: Single disc brake Type: Operation: With tube Right foot operation Size: Recommended fluid: 90/100-14 49M DOT 4 Manufacturer/model: Front suspension: DUNLOP/D756 Type: Tire air pressure (measured on cold Telescopic fork tires): Spring/shock absorber type: Coil spring/oil damper Front: Wheel travel:...
-
Page 75: Consumer Information
Record the vehicle identification num- ber and model label information in the spaces provided below for assistance when ordering spare parts from a Yamaha dealer or for reference in case the vehicle is stolen. VEHICLE IDENTIFICATION NUMBER: 1. Vehicle identification number 1. -
Page 76: Yamaha Motor Corporation, U.s.a. Yz/Wr Motorcycle Limited Warranty
CONSUMER INFORMATION EAU42120 YAMAHA MOTOR CORPORATION, U.S.A. YZ/WR MOTORCYCLE LIMITED WARRANTY 10-2... - Page 77 CONSUMER INFORMATION 10-3...
- Page 78 INDEX Fuel tank breather hose......4-5 Steering, checking.........7-26 Fuel tank cap .......... 4-3 Storage............8-3 Air filter element, cleaning..... 7-12 Supporting the motorcycle ....7-26 Swingarm pivots, lubricating ....7-24 Handlebar switch ........4-1 Brake and clutch levers, checking and lubricating ........... 7-23 Throttle cable free play, adjusting ..
- Page 80 YAMAHA MOTOR CO., LTD. PRINTED ON RECYCLED PAPER PRINTED IN JAPAN 2008.07-0.7×1 CR...
Need help?
Do you have a question about the YZ85Y and is the answer not in the manual?
Questions and answers