
Subscribe to Our Youtube Channel
Related Manuals for Beam 200W Moving Head Light


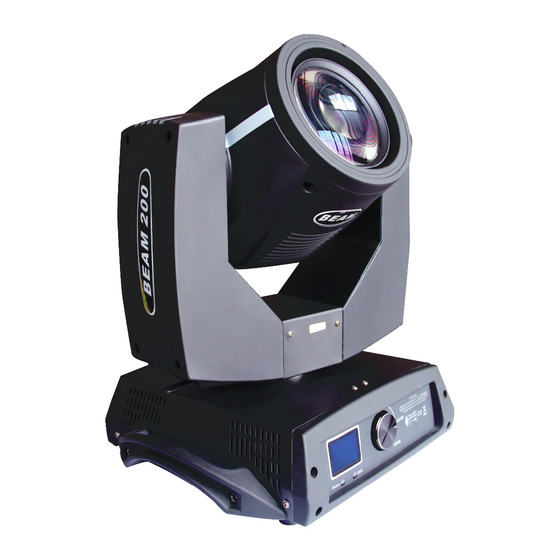
Summary of Contents for Beam 200W Moving Head Light
- Page 1 Beam Beam 200W 200W Moving Moving Head Head Light Light Beam Beam 200W 200W Moving Moving Head Head Light Light USER MANUAL USER USER USER MANUAL MANUAL MANUAL...
- Page 3 200W Beam Light Manual 200W 200W 200W Beam Beam Beam Light Light Light Manual Manual Manual 1.Safety Information……………………………………………3 2.Installation and Startup……………………………………5 3.Menu settings …………………………………………………9 4.Technical Information………………………………………10 5.Channel function………………………………………………11 1 1 1 1 、Unpacking Unpacking Unpacking Inspection Inspection Unpacking Inspection Inspection First of all, thank you for choosing a product from the factory, please read this manual completely and carefully and keep it for reference.
- Page 4 the right to update the relevant parts of the specification at any time without prior notice. Pictures of this manual and the actual product differences, original structure, is subject to the physical. When you receive the product, carefully take place, inspect the product for damage caused by transport, and check the following distribution spare parts: 1、Signal line———1 piece...
- Page 5 . ◆ Minimum illumination distance : Beam need to locate the the lens projected light projection object to maintain at least a distance of 12 m ( 39'4 ) . ◆ minimum distance with flammable material...
- Page 6 Factory bulb equipped with special lighting . - Please read the bulb manufacturers to provide the "operating instructions " (with YODN 200W R5 bulb lighting installation instructions ) . ◆ for any damage or thermal deformation , replace the lamp...
- Page 7 Installation Installation Startup Startup Installation Installation and and Startup Startup Figure 1: X -axis its lock and release mechanisms, every 90 ° locking and releasing...
- Page 8 Figure 2: Y -axis its lock and release mechanisms, every 45 ° locking and releasing...
- Page 9 Figure 3 : The lamps can be installed in the rubber feet , the floor trusses , ceiling or wall . Warning: Lighting is positioned on the floor unless otherwise must be fitted with a safety rope Figure 4 : connect and disconnect the power cord...
- Page 10 Figure 5: Connecting to power Figure 6 : Connecting to the control signal line ( DMX ) Note: Please use meets specifications shielded 2-pole twisted pair signal lines, characteristic impedance of 120 ohms , do not use the microphone Cable or other specified uses signal line. Terminal connection must use...
- Page 11 XLR 3-pin male and female connector Canon. Important Note: 2-pole line can not be with each other or in contact with the metal shell of the connector. Shield to pin 1 must sleeve wrapped. Menu settings Menu Menu Menu settings settings settings Using the menu:...
- Page 12 Prism: rotating eight prism, the pros and cons of bi-directional rotation moving effect , atomization function Atomizing effect: 0-100 % adjustable atomization beam angle Aperture: seven beam adjustment Focus: linear focus Dimmer / Shutter: 0-100 % linear dimmer light and two-piece strobe...
- Page 13 (0.5-14 seconds) The level scan: 540 degrees, Resolution 8Bit/16Bit , automatic correction The scan vertical: 250 degrees, Resolution 8Bit/16Bit, auto-correction beam angle : parallel beam angle : 0 - 3.8 ° Protection: IP20 control mode : International standard DMX512...
- Page 14 CH5: X/Y scan speed 0-255 high - slow CH6: Dimmer 0-255 OFF - ON CH7: Strobe 1--50 51--240 Strobe slowly -- highly 241--255 CH8: Fog Filter 0-255 None - Fog CH9: Color White 8-15 Color 1 16-23 Color 2 24-31 Color 3 32-39 Color 4...
- Page 15 28-34 Gobo 4 35-41 Gobo 5 42-48 Gobo 6 49-55 Gobo 7 56-62 Gobo 8 63-69 Gobo 9 70-76 Gobo 10 77-83 Gobo 11 84-90 Gobo 12 91-97 Gobo 13 98-104 Gobo 14 105-111 Gobo 15 112-118 Gobo 16 119-127 Gobo 17 128-191 Rainbow effect positive rotation highly -- slowly...
Need help?
Do you have a question about the 200W Moving Head Light and is the answer not in the manual?
Questions and answers