Advertisement
Table of Contents
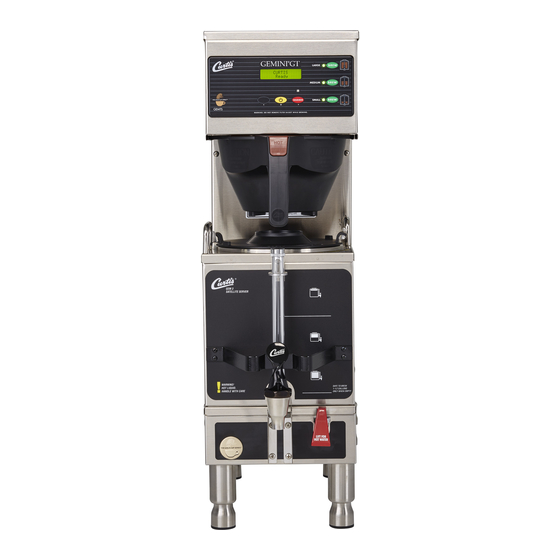
Models
GEM TS
GEM SS
CAUTION: Please use
this setup procedure
before attempting to use
this brewer. Failure to follow the
instructions can result in injury or the
voiding of the warranty.
IMPORTANT: Equipment
to be installed to comply
with applicable federal,
state, or local plumbing/electrical
codes having jurisdiction.
CAUTION: DO NOT
connect this brewer to hot
water. The inlet valve is
not rated for hot water.
WARNING HOT LIQUID,
Scalding may occur.
Avoid splashing.
C
ISO 9001:2008
Wilbur Curtis Company
Montebello, CA 90640
Tel: (323) 837-2300
www.wilburcurtis.com
Service Manual – GEMTS/SS
Important Safeguards/Conventions
This appliance is designed for commercial use. Any servicing other than cleaning and preventive maintenance
should be performed by an authorized Wilbur Curtis service technician.
• DO NOT immerse the unit in water or any other liquid
• To reduce the risk of fire or electric shock, DO NOT open service panels. No user serviceable parts
inside.
• Keep hands and other items away from hot surfaces of unit during operation.
• Never clean with scouring powders, bleach or harsh chemicals.
Conventions
WARNINGS – To help avoid personal injury
Important Notes/Cautions – from the factory
Sanitation Requirements
Your Curtis Gemini is Factory Pre-Set and Ready to Go... Right from the Box.
Following are the Factory Settings for your interLock Coffee Brewing Systems:
• Brew Temperature = 200°F
• Brew Volume = Large set to vessel requirements.
System Requirements:
• Water Source 20 – 90 PSI (Minimum Flow Rate of 1 GPM)
• Electrical: See attached schematic for standard model or visit www.wilburcurtis.com for your model.
SETUP STEPS
The unit should be located on a solid counter top and leveled (left to right and front to back),. Connect a water line from the water filter to
the brewer.
NOTE: A water filtration system must be installed to maintain a trouble-free operation. (In areas with extremely hard water, we suggest that
a sedimentary and taste & odor filter be installed.) This will prolong the life of your brewing system and enhance coffee quality.
NSF International requires the following water connection:
1. A quick disconnect or additional coiled tubing (at least 2x the depth of the unit) so that the machine can be moved for clean-
ing underneath the unit.
2. This equipment is to be installed with adequate back flow protection to comply with applicable federal, state and local codes.
3. Water pipe connections and fixtures directly connected to a potable water supply shall be sized, installed and maintained in
accordance with federal, state, and local codes.
1. A 3/8"Flare x 3/8" Male pipe elbow is supplied with the brewer for water line connection. Use tubing sized sufficiently to provide a
minimum of 1.0 GPM.
2. Connect the unit to an appropriate electrical power circuit.
3. Turn on the toggle (STANDBY/ON) switch behind the unit. The heating tank will start to fill. When the water level in the tank rises to the
correct volume, the heating elements will energize automatically. With ADS Systems there is no danger of element burnout caused by
an empty tank.
4. The heating tank will require 20 to 30 minutes to reach operating temperature (200°F), indicated when READY TO BREW is displayed
on the LCD screen.
5. Prior to brewing, dispense 12 ounces of hot water through the hot water faucet.
6. Brew a cycle of at least 12 ounces, to purge the water lines of any air that may be trapped after filling.
BREWING INSTRUCTIONS
1. Brewer should be ON (Confirm at rear toggle switch, then press the ON/OFF button). Ready-to-Brew should be on the display. If the
brewer is connected to an InterLock grinder, the grinder should be on. When Interlock connection is made, grind coffee at this time.
2. Place an empty Satellite under the brewcone and press the warmer switch to pre-heat the Satellite.
3. Place a clean filter
into the brewcone.
WARNING: TO AVOID SCALDING, Do not remove brewcone while brew light is flashing.
W
C
C
ilbur
urtis
• Water Bypass = On LARGE & MEDIUM brew only
• Energy Save Mode = Off
4. Fill brewcone with
5. Transfer filled brew
ground coffee.
cone to brewer.
, i
.
ompany
nC
6. Press Brew button. Brewing
will begin immediately.
1
Advertisement
Table of Contents

Subscribe to Our Youtube Channel
Related Manuals for Curtis GEM TS


Summary of Contents for Curtis GEM TS
- Page 1 ilbur urtis ompany Service Manual – GEMTS/SS Important Safeguards/Conventions This appliance is designed for commercial use. Any servicing other than cleaning and preventive maintenance should be performed by an authorized Wilbur Curtis service technician. Models • DO NOT immerse the unit in water or any other liquid GEM TS • To reduce the risk of fire or electric shock, DO NOT open service panels. No user serviceable parts GEM SS inside. • Keep hands and other items away from hot surfaces of unit during operation. • Never clean with scouring powders, bleach or harsh chemicals. Conventions WARNINGS – To help avoid personal injury Important Notes/Cautions – from the factory Sanitation Requirements Your Curtis Gemini is Factory Pre-Set and Ready to Go… Right from the Box. Following are the Factory Settings for your interLock Coffee Brewing Systems: • Brew Temperature = 200°F • Water Bypass = On LARGE & MEDIUM brew only...
-
Page 2: Program Menus
Your Curtis ADS System is Factory Pre-Set for Optimum Performance. After connection to water and power; the rear toggle switch must be on. You will hear a beep sound, indicating power is available to the controller. CURTIS <GEMINI TWIN> CURTIS The control displays . Press ON/OFF button and the screen will display . After three seconds, is displayed. WILBUR CURTIS FILLING Water will fill the tank (approximately 2-3 minutes depending on water flow rate). When the proper level is reached CURTIS will appear on the HEATING screen. It takes approximately 20 minutes to reach setpoint temperature of 200°F. Control will display CURTIS when temperature reaches the setpoint (200°F). Unit is now ready to brew. READY TO BREW PROGRAM MENUS Curtis Curtis Ready Entering Programming Mode Enter Code - - - - Program Menus <-- Select --> Global Recipes Brew Button Prog Model Select Non-Brew Prog... - Page 3 Program Menus GEMTS/SS Brewer From Program Menus press > display will show the next feature Global Recipes. Program Menus GLOBAL RECIPES Global Recipes (Factory set to Gourmet STD) Global Recipes Press to select. If selected, press < or > to chose a recipe based on the type of coffee being brewed. Selections are Gourmet STD, Light Roast, Dark Roast, High Yield, Filter Pack, or Decaf. Press to select the desired recipe. NON-BREW PROGRAMMING Temperature (Factory set to 200ºF) Press to Select. Press < or > to move to desired temperature and then to set. Temperature is programmable from Temperature 170ºF to 206ºF in 2-degree increments. Energy Save Mode (Factory set to OFF) Energy Save Mode Press to Select, < or > ON, OFF or ON 140ºF , to set. When in ON, unit will automatically shut off 4 hours from last brew. When feature is OFF, unit does not utilize the energy saving mode. In the ON 140ºF position, temperature lowers to 140ºF, if unit has not brewed in 4 hours. This feature will save energy by maintaining a lower temperature in the tank in periods of non-operation. Brew Count Odom Brew Count Odom Press to display total brew cycles. Press EX or Reset.
- Page 4 Program Menus GEMTS/SS Brewer P-Maintenance (Factory set to OFF) P-Maintenance Press to Select, Set gallons brewed to indicate P-Maintenance. Press < or > to adjust from Off to 9500 gallons. This feature advances in 100 gallon increments. Press to exit. Beeper On/Off (Factory set to ON) Beeper On/Off Press to display ON or OFF. Pressing either < or > toggles between on and off. to set. When ON, this feature allows you to hear a short beep each time a button is pressed. Drip-out Mode (Factory set to 2 minutes) Drip-out Mode Press to Select. Press < or > to move to desired time. Settings are OFF, 1, 2, 3, 4 and 5 minutes. Press to Select time. Warmers Default (Factory setting - MED) Warmers Default Press to Select. Press < or > to adjust from OFF, HIGH, MED or LOW. Power setting for HIGH is 100W watts MED is 82 watts. LOW is 66 watts. Displ. Brew Time (Factory set to ON) Displ.
-
Page 5: Error Message
Warmers The warmer, under the brewcone will turn on automatically whenever a coffee brew cycle is started. The warmers may be switched on and off using the WARMER buttons on the control panel. LEFT & RIGHT SATELLITE WARMERS Error Message An error message will appear on the screen in the event of a malfunction under the following conditions: 1. Water Level Overflow. 2. Break in Temperature ERROR MESSAGE DESCRIPTION CAUSE Control Circuit (900) 000-0000 EXT (0000) Fill run error/Overflow The fill solenoid has either run for 3. Excess Temperature in 1-(800)-000-0000 Water Level ERR. more than 10 minutes on the initial Heating Tank Water Level Error... - Page 6 PARTS Nº Part Nº Description WC-3357 BREWCONE W/HANDLE DIAGRAMS 1A WC-3354 BREWCONE, GOURMET LRG CAP WC-5421 COVER, TOP GEM TS WC- 844-101* KIT, VALVE BY-PASS NON-ADJUST WC-37121 * KIT, DUMP VALVE LEFT WC- 441 SOLENOID, LOCK BREWCONE LEFT WC-39395 LABEL, UCM OVERLAY DUAL TWIN 6A WC-39440 LABEL, CONTL PANEL 3 BATCH WC-39439 LABEL, CONTL PANEL 2 BATCH WC-39438 LABEL, CONTL PANEL 1 BATCH WC-37176* KIT, UCM CONTROL MODULE WC-8559 RELAY, SOLIDSTATE 40A W/HT SNK WC-1809 * FAUCET, HOT WATER WC-5423 DECK ASSY NO HEATING ELMTS WC- 847 * VALVE, INLET WC-2977-101 FITTING, SPRAYHEAD ULTEM WC-37122 * KIT, DUMP VALVE RIGHT...
- Page 7 ELECTRICAL SCHEMATIC – GEM TS...
- Page 8 ELECTRICAL SCHEMATIC – GEM SS...
-
Page 9: Parts Diagrams
PARTS DIAGRAMS GEM-3, SATELLITE COFFEE SERVER GEM-5, SATELLITE WARMER GEM-8, SATELLITE WARMER SHORT Nº Part Nº Description WC-5622 LID, SATELLITE PLASTIC GEM3 WC-3307 LID, SATELLITE STAINLESS (OLDER UNITS) WC-2102 GAUGE GLASS ASSEMBLY 8” WC-2005* WASHER, SHIELD CAP 1/8” WC-2010C SHIELD, 8 INCH GAUGE GLASS WC-2025* GAUGE GLASS, 8 INCH WC-2006*... - Page 10 Product Warranty Information The Wilbur Curtis Company certifies that its products are free from defects in material and workmanship under normal use. The following limited warranties and conditions apply: 3 Years, Parts and Labor, from Original Date of Purchase on digital control boards.
Need help?
Do you have a question about the GEM TS and is the answer not in the manual?
Questions and answers