Table of Contents
Advertisement
Quick Links
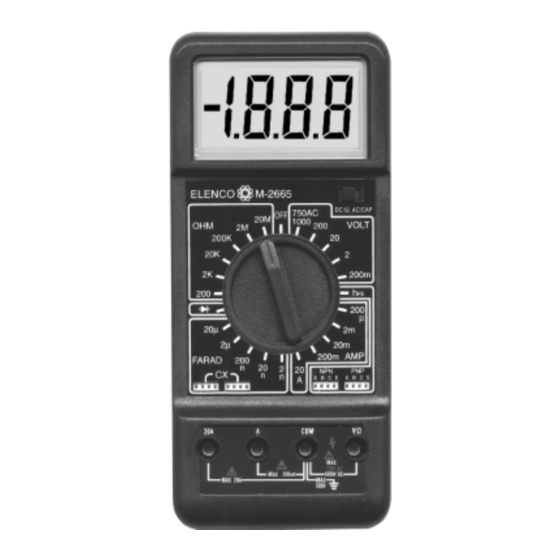
DIGITAL MULTIMETER KIT
MODEL M-2665K
WIDE RANGE DIGITAL MULTIMETER WITH
CAPACITANCE AND TRANSISTOR TESTING FEATURES
Elenco™ Electronics, Inc.
150 W. Carpenter Avenue
Wheeling, IL 60090
(847) 541-3800
http://www.elenco.com
e-mail: elenco@elenco.com
Assembly and Instruction Manual
Elenco™ Electronics, Inc.
Copyright © 1991 Elenco™ Electronics, Inc.
Revised 2002
REV-P
753005
Advertisement
Table of Contents

Subscribe to Our Youtube Channel
Related Manuals for Elenco Electronics M-2665K


Summary of Contents for Elenco Electronics M-2665K
- Page 1 DIGITAL MULTIMETER KIT MODEL M-2665K WIDE RANGE DIGITAL MULTIMETER WITH CAPACITANCE AND TRANSISTOR TESTING FEATURES Elenco™ Electronics, Inc. 150 W. Carpenter Avenue Wheeling, IL 60090 (847) 541-3800 http://www.elenco.com e-mail: elenco@elenco.com Assembly and Instruction Manual Elenco™ Electronics, Inc. Copyright © 1991 Elenco™ Electronics, Inc.
- Page 2 THEORY OF OPERATION A. divided down by 2. C. Zero, read, interphase. A block diagram of the M-2665K is shown in Figure 1. signal if 100VDC, it is reduced to 100mV DC by B. converted to DC. D. Autozero, read, cycle phase.
-
Page 3: Schematic Diagram
SCHEMATIC DIAGRAM A/D CONVERTER A simplified circuit diagram of the analog portion of converter can be divided into three consecutive time the A/D converter is shown in Figure 2. Each of the periods: autozero (AZ), integrate (INTEG) and read. switches shown represent analog gates which are Both autozero and integrate are fixed time periods. -
Page 4: Voltage Measurement
VOLTAGE MEASUREMENT 4. OPERATION MAINTENANCE Figure 3 shows a simplified diagram of the voltage indicator will function. If the AC function is selected, 4-1 Battery and Fuse Replacement measurement function. the divider output is AC coupled to a full wave CAUTION Remove the two phillips head screws. -
Page 5: Resistance Measurements
(D) Diode Test (F) Capacitance Measurement RESISTANCE MEASUREMENTS Figure 5 shows a simplified diagram of the resistance measurement function. 1. Set the selector switch to the “Ohm” position. 1. Set the range selector knob to the “FARAD” position. 2. Connect the red test lead to “V/Ω” input jack and the black one to the “COM”... - Page 6 3-3 Method of Measurement (A) DC/AC Voltage Measurement (C) Resistance Measurement BACKPLANE 1. Set the selector switch to “DC” or “AC”. 1. Set the selector switch to the “Ohm” position. LCD PHASE DRIVER 2. Connect the red test lead to “V/Ω” input jack and 2.
- Page 7 Transistor h ASSEMBLY Range Test Condition The meter kit has been divided into a number of IMPORTANT CONSTRUCTION NOTES 10mA 2.8V sections to make the assembly easy and avoid 1. Wash your hands with soap and water before you 10mA 2.8V major problems with the meter operation.
- Page 8 Range Resolution Accuracy Maximum Input The most important factor in assembling your M-2665K Digital Multimeter Kit is good soldering techniques. 200mV 100µV +1.2% of rdg + 2dgt Using the proper soldering iron is of prime importance. A small pencil type soldering iron of 25 - 40 watts is +1.2% of rdg + 2dgt...
-
Page 9: Specifications
1. FEATURES IDENTIFYING CAPACITOR VALUES Capacitors will be identified by their capacitance value in pF (picofarads), nF (nanofarads), or µF (microfarads). Most • Wide measuring ranges: 34 ranges for AC/DC Voltage and Current, Resistance, Capacitance, TR h capacitors will have their actual value printed on them. Some capacitors may have their value printed in the following Diode Test. -
Page 10: Using The Digital Multimeter
RESISTOR READING EXERCISE REINSTALLATION OF THE RANGE SELECTOR KNOB If you removed the range selector knob for troubleshooting, Before starting assembly of your digital multimeter incorrectly or read the value from the wrong end. Bottom View of Selector Knob then follow the instructions below to reinstall it. &... -
Page 11: Parts Identification
Amps Section Section SECTION A 1. 200mA scale not working: 1. Check for shorts on socket pins. Meter Display Circuit A. Check fuse. 2. Measure across B terminal to COM terminal for 251kΩ. PARTS LIST - SECTION A B. Measure across (A) terminal and (COM) terminal for 1Ω... -
Page 12: Troubleshooting Guide
ASSEMBLE THE FOLLOWING COMPONENTS TO THE PC BOARD TROUBLESHOOTING GUIDE In all of the following steps the components must be installed on the top legend side of the PC board. The If the meter is not working, perform the U1 (7106R) perform the tests that pertain to the Function that is board is turned to solder the component leads on the selector switch side. - Page 13 Testing Procedure SECTION C - AC voltage Testing Procedure SECTION F ASSEMBLE THE LCD and current circuit Set the meter in one of the farad scales. Make sure Assemble the LCD into the housing with the parts Testing Procedure that SW1 is in the AC/Cap position. Measure a cap Measure an AC voltage with a known accurate shown in Figure E.
- Page 14 SECTION B DC Voltage & Current Circuit Top Plates PARTS LIST - SECTION B RESISTORS Qty. Symbol Description Color Code Part # 1Ω .5% 1/2W brown-black-gold-green / OR brn-blk-blk-sil-grn 111051 Top Case 9Ω .5% 1/4W white-black-black-silver-green 119050 100Ω .5% 1/4W brown-black-black-black-green 131050 900Ω...
-
Page 15: Final Assembly
FINAL ASSEMBLY ASSEMBLE THE FOLLOWING COMPONENTS TO THE PC BOARD In all of the following steps the components must be installed on the top legend side of the PC board. The Solder the spring to the PC board as shown in top of the springs and then place a ball bearing board is turned to solder the component leads on the selector switch side. - Page 16 Push the four input sockets into the PC board holes from the selector switch side until they stop (see Mount the two 9-pin component sockets to the PC board with the notch at the base of the socket in the Figure G).
- Page 17 ASSEMBLE THE FOLLOWING COMPONENTS TO THE PC BOARD SECTION C In all of the following steps the components must be installed on the top legend side of the PC board. The AC Voltage & Current Circuit board is turned to solder the component leads on the selector switch side. PARTS LIST - SECTION C D11 - 1N4148 Diode RESISTORS...
- Page 18 SECTION D SECTION E Resistance Circuit Capacitance and Transistor Testing Circuit PARTS LIST - SECTION D PARTS LIST - SECTION E Symbol Description Part # RESISTORS 1kΩ Thermister 190415 Qty. Symbol Description Color Code Part # 98.8Ω 1% 1/4W white-gray-gray-gold-brown 129830 ASSEMBLE THE FOLLOWING COMPONENT TO THE PC BOARD 150Ω...
Need help?
Do you have a question about the M-2665K and is the answer not in the manual?
Questions and answers