Table of Contents
Advertisement
Quick Links
Advertisement
Table of Contents

Related Manuals for SoundMax SM-MSD11


Summary of Contents for SoundMax SM-MSD11
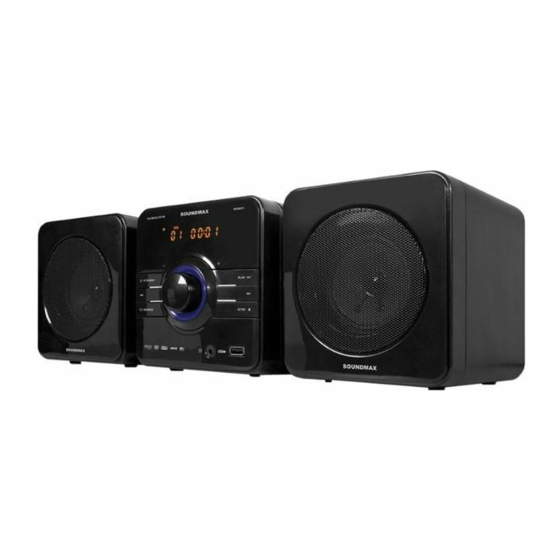
- Page 1 SM-MSD11 DVD MICRO SYSTEM Instruction manual...
-
Page 2: Table Of Contents
Contents Contents Before you start Control elements Connection System setup Button functions Other operations General information Specification... -
Page 3: Before You Start
Before you start Utilization of the product If you want to dispose this product, do not mix it with general household waste. There is a separate collection system for used electronic products in accordance with legislation that requires proper treatment, recovery and recycling. Please contact your local authorities for the correct method of disposal. - Page 4 Use supply sources of rated voltage; otherwise the unit may not function or may be damaged. Place the unit on a horizontal surface. Keep the unit ventilated. Don’t block the heat hole. Overheat may cause malfunction. Do not place any objects on the cover, this may make it function improperly (incorrect playback). Please place the unit in a dry and well-aired area.
- Page 5 Supported formats Disc types Symbol Contents Audio + Video Audio Video-CD (VCD) Audio + Video SVCD Audio + Video HDCD Audio JPEG Digital Photo CDDA Audio Kodak Picture CD Digital Photo MPEG4 Audio + Video...
-
Page 6: Control Elements
Control elements Front panel Rear panel 1. Display 1. Speaker output 2. STANDBY button 2. FM antenna 3. PREVIOUS button 3. SCART connector 4. SOURCE button 4. Composite video output 5. PLAY/PAUSE button 5. R/L stereo audio output 6. NEXT button 6. - Page 7 Remote control (RC) 1. STANDBY button 2. OSD button 3. Number buttons 4. SEARCH+/- (REWIND/F.FORWARD) buttons 5. STOP button 6. PLAY/PAUSE button 7. TITLE/COPY button 8. Cursor (UP/DOWN/LEFT/RIGHT) buttons 9. AUDIO/MEMORY button 10. ANGLE button 11. PBC button 12. PROG button 13.
- Page 8 Battery installation 1. Remove the battery compartment cover on the back of the RC. 2. Insert the batteries into the battery compartment making sure that the correct polarity is observed. 3. Install the cover back. Use two AAA/1.5V batteries for the RC. The RC should be pointed at the IR sensor within 8 meters and within 30 degrees at the left or the right side.
-
Page 9: Connection
Connection Before you start connection of external devices, ensure that power of the unit is switched off. Following outputs are available in this unit: Composite video Use the yellow plug of an AV cable to connect the composite video output of this unit to the video input of a TV/monitor. SCART Use a 21-pin SCART cable to connect the SCART output of this unit to the TV/monitor SCART input. -
Page 10: System Setup
System setup 1. Press SETUP button to enter the setup menu. In setup mode, press SETUP button again to quit the setup page. 2. Use LEFT/RIGHT cursor buttons to choose a setup page: General setup page, Audio setup page, Dolby Digital setup, Video setup page, Preference page. - Page 11 Audio setup ANALOG AUDIO: Downmix LT/RT: The audio out is Left and Right channels format even if the original sound is 5.1CH format. Stereo: The audio out format is stereo even if the original sound is 5.1CH format. DIGITAL AUDIO: Digital output SPDIF/OFF: no digital signal out (optical or coaxial output off), only analog audio output.
- Page 12 Preference setup (available while disc is on full stop) TV TYPE This unit is suitable for all kinds of TV systems. You can select one of the PAL, NTSC or Multi. Auto: the TV system is auto switched according to the disc system. NTSC: this system is used in USA, Taiwan, Japan etc.
-
Page 13: Button Functions
Button functions STANDBY Press STANDBY button to switch on the unit. When on, press this button to switch off the unit. Warning: The power is not fully cut off at standby state. If the unit will not be used for a long time, turn off the power by disconnecting the power cord from the current supply. - Page 14 VOL+/- Press VOL+ to adjust volume up, press VOL- to adjust volume down. You can also rotate VOLUME regulator to adjust the sound volume level. V-MODE Press V-MODE button to switch the video output mode. PROG If the disc has 2 or more tracks, chapters or titles, set up the playing order to your preference. Press PROG button to enter program menu.
- Page 15 SUBTITLE/AUTO When playing a DVD disc with multi-subtitle function, press this button to select the subtitle language. In Radio receiving mode use this button to automatically adjust and save all stations with strong signal. AUDIO/MEMORY When playing DVD with more than one audio language, press AUDIO/MEMORY button to select you desired audio language.
- Page 16 STOP When playing DVD/VCD/SVCD/CD disc, press STOP button once, the unit will memorize the previous ending point. Press PLAY/PAUSE button to continue playback. Press STOP button twice; now playback can only be resumed from the beginning of the disc. In Radio mode, while auto scanning, press STOP button to stop the process. RESET When the disc tray cover is open, press RESET button to reset all setting to default values (except PARENTAL and PASSWORD SETUP settings).
-
Page 17: Other Operations
Other operations Ripping This unit has Ripping function making it handy and quick to copy audio files (e.g. music) from CDs. RIPPING is converting from CDDA format to the compressed MP3 format onto a USB drive. In the course of copying, ID3 tags are generated automatically in Russian and English, depending on the source. - Page 18 Note: Some DivX discs cannot be played due to their parameters and recording conditions. Video files more than 2 Gb having AVI extension can be played partially. MP3/MPEG4 playback After you inserted a disc containing MP3 or MPEG4 files, following menu will be displayed on the screen: 1.
- Page 19 Copying data Play data disc or USB containing MP3/JPG/DivX files. Press TITLE/COPY button on RC, the COPY menu will appear with option of ALL SELECT/ALL UNSEL/COPY/EXIT. Move the cursor to the target file or folder, press ENTER button to tick it, or select ALL SELECT item to select all the data.
-
Page 20: General Information
General information Handling compact discs Do not insert anything other than a CD into the disc tray. Do not use cracked, chipped, warped, or otherwise damaged discs as they may cause damage to the player. Handle the disc only by the edges (as shown in the picture). To keep discs clean do not touch its surface. Store discs in their cases when not in use. - Page 21 Troubleshooting guide Below is a table describing simple measures that can help you eliminate most problems likely to emerge when this unit is in use. If below measures do not help, turn to a service center or to the nearest dealer. Symptom Cause Solution...
-
Page 22: Specification
Specification Number of speakers Power output 2 x 5 W The number of storable stations FM range 64 – 108 MHz Supported storage DVD-R/-RW, DVD+R/+RW, CD-R/-RW, USB Formats of playback DVD-video, DVD-audio, Super VCD, VCD, HDCD, CDDA, MP3, Kodak Picture CD, JPEG, MPEG4 (DivX/XviD) Built-in sound decoders Dolby Digital... - Page 26 Video-CD (VCD) SVCD DVCD JPEG CDDA Kodak Picture CD MPEG4...
- Page 27 STANDBY 2. FM- PREVIOUS SCART SOURCE PLAY/PAUSE NEXT STOP VOLUME 9. USB-...
- Page 28 STANDBY SEARCH+/- (REWIND/F.FORWARD) STOP PLAY/PAUSE TITLE/COPY AUDIO/MEMORY ANGLE PROG REPEAT MUTE SETUP SLOW /SLOW VOL-/VOL+ GOTO CH-/CH+ (PREVIOUS/NEXT) SOURCE SELECT SUBTITLE/AUTO ENTER MENU/RIPPING/MO/ST V-MODE L/R/ST STEP ZOOM RESET...
- Page 29 AAA/1.5V...
- Page 30 SCART SCART SCART SCART RCA ( DTS.
- Page 31 STANDBY STANDBY, GOTO GOTO, SETUP SETUP; PLAY/PAUSE PLAY/PAUSE, MUTE MUTE, (playback control – PBC. VOL+/- VOL+ VOL- VOLUME...
- Page 32 ANGLE ANGLE SEARCH +/- (REWIND/F.FORWARD) 2 – 4 – 8 – 16 – 32 - V-MODE V-MODE PROG PROG ENTER ENTER PROG ENTER. OSD, SOURCE SELECT SOURCE SELECT CH-/CH+ (PREVIOUS/NEXT) DVD- PREVIOUS NEXT SVCD-, VCD-, CD- PREVIOUS NEXT...
- Page 33 TITLE/COPY DVD- TITLE/COPY USB- TITLE/COPY MENU/RIPPING/MO/ST DVD- USB- Ripping. SUBTITLE/AUTO DVD- SUBTITLE/AUTO, AUDIO/MEMORY DVD- AUDIO/MEMORY AUDIO/MEMORY, ENTER ENTER USB- STEP DVD-, SVCD-, VCD- STEP; PLAY/PAUSE.
- Page 34 ZOOM DVD, SVCD, VCD ZOOM : 2x => 3x => 4x => 1/2 => 1/3 => 1/4 => REPEAT REPEAT ( ). STOP DVD/SVCD/VCD/CD- STOP, PLAY/PAUSE STOP; RESET RESET, L/R/ST VCD- SLOW SLOW : 1/2 => 1/4 => 1/8 => 1/16 => SLOW : 1/2 =>...
- Page 35 SETUP, SETUP. Dolby Digital, ENTER. PanScan: LetterBox: 16:9: SUBTITLE STANDBY,...
- Page 36 SPDIF SPDIF/ SPDIF/RAW: SPDIF/PCM: LPCM SPDIF/PCM SPDIF. HDCD Dolby Digital...
- Page 37 Off: RGB: RGB ( SCART PAL, NTSC PAL: NTSC: PBC ( 136900. 136900...
- Page 38 Ripping RIPPING, (CD) RIPPING CDDA ( USB- ID3- CD text, « » ». RIPPING RIPPING MENU/RIPPING/MO/ST ENTER. « » (bit rate). « » ENTER (« ») (« »). « » ENTER. USB- USB-...
- Page 39 MP3/JPEG/MPEG4 MP3 - MP3- JPEG (Joint Photographic Expert Group) - 15-20 MPEG4 - DivX MP3/MPEG4 PLAY/PAUSE ENTER PROG JPEG STOP, SLIDE SHOW PLAY/PAUSE ENTER MENU PLAY/PAUSE ENTER,...
- Page 40 STOP NEXT PREVIOUS PLAY/PAUSE ENTER ZOOM F.FORWARD REWIND Cursor buttons USB- USB- USB- USB- USB- MP3/JPG/DivX. TITLE/COPY ALL SELECT )/ALL UNSEL ( )/COPY ( ENTER, ALL SELECT,...
- Page 41 AAA 1.5V...
- Page 43 64 – 108 DVD-R/-RW, DVD+R/+RW, CD-R/-RW, USB DVD-video, DVD-audio, Super VCD, VCD, HDCD, CDDA, MP3, Kodak Picture CD, JPEG, MPEG4 (DivX/XviD) Dolby Digital SCART USB- USB- ID3- ) 190 x 140 x 141 125 x 130 x 141 1,57 ~ 100 – 240 , 50/60...
Need help?
Do you have a question about the SM-MSD11 and is the answer not in the manual?
Questions and answers