
Subscribe to Our Youtube Channel
Related Manuals for Interton STAGE 93 SPBTE


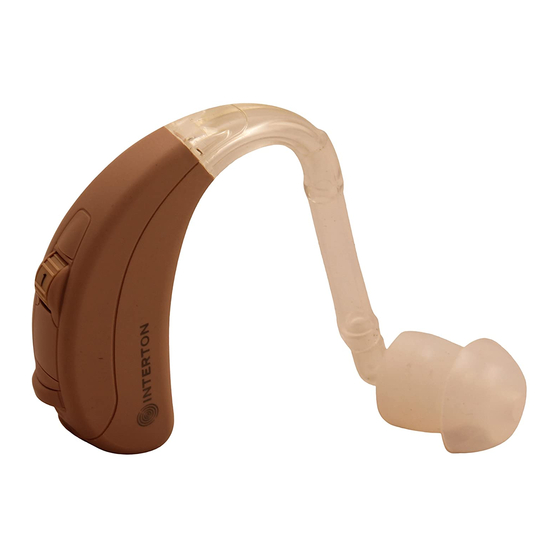
Summary of Contents for Interton STAGE 93 SPBTE
- Page 1 USER GUIDE Digital trimmer-controlled Behind-the-Ear hearing instrument STAGE 93 SPBTE...
-
Page 2: Table Of Contents
You will Telephone use Eight steps towards better hearing enjoy more benefits from your Interton hearing system by wearing the system regularly in order to get comfortable with using it. Telecoil-Program... - Page 3 Turning on and off microphone earhook Turn your hearing instrument on by closing the battery door. Turn your hearing instrument off by pushing in on the small knob located on the battery door. This will cause the battery door to open. plastic The hearing instrument will always be in program 1 when it is tube...
-
Page 4: Volume Control
Volume control If program 2 was enabled, pressing the program button, will Volume is adjusted by means of a conveniently located rotary con- enable program 3 etc. An audible signal will be heard after press- trol marked from »1« (minimum level) to »4« (maximum level). ing the program button. -
Page 5: Proper Placement In The Ear
Proper Placement in the Ear Program Intended for Type of program number listening situations Inserting the instrument 1) Hold the ear mould between your thumb and index finger Basic Program Most situations and position its sound outlet in your ear canal Background noise Comfort Program 2) Slide the ear mould all the way into your ear with a gentle,... -
Page 6: Removal
6) When the ear mould and hearing instrument are correctly Recognising left and right instrument positioned, and you have not already turned it on, switch on If you have two hearing instruments, they may be set differently for your right and left your instrument by closing the battery door ears. -
Page 7: Direct Audio Input (Dai) Capability
To properly identify your left instrument from your right • The sound source connects to your hearing instru- Indication you should see an indication just above the Push button ment with a cable and an audio boot. (see page 6), that designates which ear the instrument is • To use direct audio input (DAI), set the hear i ng instru- for. -
Page 8: Telephone Use
Telephone use In order to activate the telecoil, the telecoil program available in program 3 must be Using the telephone, while wearing your hearing instrument, may selected. require some practice. Many hearing instruments will whistle, Cellular Phone and Hearing Instrument Compatibility when the phone is held up against them. -
Page 9: Using Assistive Listening (Tele-Loop) Systems
Using Assistive Listening (Tele-Loop) Systems Changing batteries Many gathering places are equipped with assistive listening (tele-loop) systems, for Insert the new battery with the + side facing up as shown on the side of the battery example, in schools, theaters and houses of worship. To take advantage of a tele-loop compartment. -
Page 10: Warnings
Warnings Maintenance and cleaning Earwax (cerumen) can accumulate in and on the earmould during use. Therefore, clean • Keep batteries away from children and mentally challenged persons. your earmould regularly. Failure to do so can lead to an accumulation of earwax, impair- •... -
Page 11: Cleaning The Earmould
Cleaning the earmould General warnings • First, remove the tubing and earmould from the hearing instru- • Do not leave your hearing instrument in the sun, near an open fire or in a hot, parked car. ment. Keep left and right instrument separated. • Do not wear your instrument while showering, swimming, in heavy rain or in a moist • Remove earwax with the cleaning brush and a soft cloth. If atmosphere such as steam bath or sauna. -
Page 12: Solving Small Problems
Solving small problems Your Interton instrument is a reliable one. In case of minor problems or malfunctions, you may be able to solve them yourself. SYMPTOM CAUSE POSSIBLE REMEDY Feedback, • Is your earmould inserted correctly? • Put it in again ’whistling’... - Page 13 SYMPTOM CAUSE POSSIBLE REMEDY Sound is distorted, • Is the battery dead? • Replace it with a new one spluttering or weak • Is the battery dirty? • Clean it or use a new one • Is the plastic tube or the earmold clogged or broken? •...
-
Page 14: Eight Steps Towards Better Hearing
Eight steps towards better hearing 2. Listen outside - quiet & traffic You need to get used to your new hearing instrument. Sounds seem new and different. Go outside, to a quiet place, e.g., the park or woods. Listen to the environmental sounds. That is because you grew accustomed to your diminished hearing. - Page 15 5. Get used to conversation in a group 7. Use your telephone Following conversations in a group is often difficult because of the background noise. Listen Often, you can hear the telephone clearly with your hearing instrument in the microphone to the different voices.
-
Page 16: Hearing Instrument Identification
Repairs Your hearing care professional place a check mark in the below table to identify the If your Interton hearing instrument malfunctions, it must be repaired by a qualified model you have received. technician. Do not attempt to open the case of the hearing instrument since this would invalidate the warranty. -
Page 17: Warning To Hearing Care Practitioner
Warning to the hearing care practitioner Notes Special care should be exercised in selecting and fitting a hearing instrument(s) whose maximum sound pressure level exceeds 132 dB SPL with an IEC 60711: 1981 occluded ear simulator, because there may be a risk of impairing the remain ing hearing of the hearing instrument user. - Page 18 Notes...
- Page 19 Any issues relating to the EU Medical Device Directive 93/42/EEC should be directed to Interton A/S. HANDED OUT BY: Worldwide headquarters | Interton A/S | Lautrupbjerg 7 | DK-2750 Ballerup Denmark | Tel.: +45 45 75 1111 | Fax: +45 45 75 1119 | www.interton.com...
Need help?
Do you have a question about the STAGE 93 SPBTE and is the answer not in the manual?
Questions and answers
Respected management my mom's interton has certainly lost or dropped which is not audible to her. How to set the trimmer or any other boot required to fix the problem local mechanics are demanding too much as there is no maintainence center in Faisalabad Pakistan.
The context does not provide specific instructions for adjusting the trimmer on the Interton STAGE 93 SPBTE hearing aid. However, for fixing audio issues:
- If there is feedback (whistling):
- Check if the earmould is inserted correctly and reinsert it.
- Reduce the volume if it is very loud.
- Check if the plastic tube or earmould is clogged or broken; visit your hearing care practitioner if needed.
- Move your hand or objects away from the instrument.
- Visit your physician if your ear is full of wax.
- If there is no sound:
- Ensure the instrument is switched on.
- Insert a battery if missing.
- Replace the battery if it is not good.
- Check for clogged or broken tubing or earmould; visit your hearing care practitioner if necessary.
- Visit your physician if your ear is full of wax.
This answer is automatically generated