Table of Contents
Advertisement
Quick Links
Advertisement
Table of Contents

Subscribe to Our Youtube Channel
Related Manuals for Panasonic ToughBook CF-P2 Series


Summary of Contents for Panasonic ToughBook CF-P2 Series
- Page 1 ® OPERATING INSTRUCTIONS Handheld Computer CF-P2 Series Model No. Please read this instructions manual carefully before using this product and save this manual for future use. Refer to the provided Safety Precautions regarding precautions for this com- puter.
- Page 2 * For the Model No., insert the 12 digit number (for example, CF-P2T1FDF7E) located on the back of the computer. Introduction Thank you for purchasing the Panasonic Handheld Computer. Read the operating instruc- tions thoroughly for proper operation of your new computer. Illustrations and Terminology in this Manual NOTE provides a useful fact or helpful information.
-
Page 3: Table Of Contents
Remaining Battery ............. 29 Setting for Auto Powering Off ..........29 Replacing the Battery Pack ..........30 SD Memory Card/SDIO Card/MultiMedia Card ..31 Panasonic Backup ..........32 Pocket Internet Explorer ........35 Connecting to Your Computer ....... 36 Wireless Functions ..........39 Changing the Wireless Power Status ........ -
Page 4: What's In The Box
What’s in the Box? Make sure the parts shown in the figure have been supplied. If any of these items is missing or is not working properly, contact Panasonic Technical Support. Make sure the provided stylus has been stored to the computer ( page 17). -
Page 5: Names And Functions Of Parts
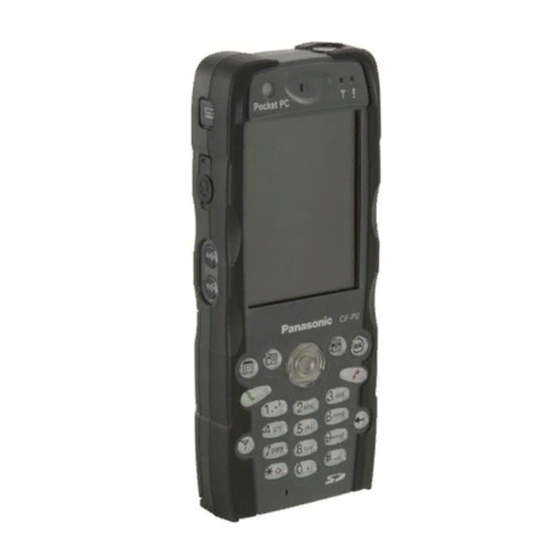
Names and Functions of Parts The illustrations shown may differ from the actual physical appearances. Wireless Power LED Notification LED Indicator Indicator page 7) When wireless power is on, LED indicator is blinking green. Power Switch Receiver page 17) Stylus Light Sensor Brightness of backlight changes according to... - Page 6 Names and Functions of Parts Record Button GSM/GPRS Antenna Connector Used for a car mounter (optional) Can be recorded while pressing this connected to CF-P2. button. GSM/GPRS Antenna (built-in) Headset Jack Bluetooth Antenna page 8) (built-in) Volume Up Wireless LAN Antenna Button (built-in) Volume Down...
- Page 7 Names and Functions of Parts page 5) Notification LED Indicator Notification Status None Given* Not connected to the Fast Travel Charger Not lit Blinking Green or unable to recharge outside the allowable temperature range. Connected to the Fast Travel Charger Green Blinking Green (No charging)
- Page 8 Names and Functions of Parts Headset and 3.5 DIA plug adaptor Only the CF-VHSP11W (sold separately) can connect to the headset jack. CF-VHSP11W includes A and B. When using a 3.5 DIA plug, B is required. This adaptor can be connected to stereo headphones. Audio output from the internal speaker is disabled when the headset or the 3.5 DIA plug adaptor is connected.
-
Page 9: First-Time Operation
Latch Install the battery pack. (1) Hold the battery pack so that the name “Panasonic” is fac- ing upwards and the tab (C) is placed as shown at right, and put the battery pack into the computer so that the bat-... -
Page 10: Operation
First-time Operation (2) Set the cover in place and slide it in the direction indi- cated by the arrow to close. CAUTION After changing the SIM card and inserting the battery pack (except for first-time op- eration), reset the CF-P2. Connect your computer to a power outlet. -
Page 11: Operation
First-time Operation Turn your computer on Reset Switch (1) Using the provided stylus ( page 17), push the center of the reset switch straight in for 1 second while holding down on the power switch ( page 12). CAUTION When the battery pack is not fully charged, if the Fast Travel Charger is connected, CF-P2 may not turn on. -
Page 12: Starting Up/Shutting Down
Starting Up/Shutting Down Starting Up (from the second time) Power Switch Lightly press the power switch once. Programs and files that were previously displayed appear on your screen. Power Switch Lightly press the power switch (within 0.5 seconds) to turn on/off CF-P2. To turn the LCD backlight on/off: Turn on CF-P2, and press the power switch until the LCD backlight goes on/off and release the switch. - Page 13 Starting Up/Shutting Down The Navigation Bar and Command Bar The navigation bar is located at the top of the screen. It displays the active program and current time, and allows you to switch to programs and close screens. Use the command bar at the bottom of the screen to perform tasks in programs. The command bar includes menu names, buttons, and the input panel button.
- Page 14 Starting Up/Shutting Down Following are some of the status icons you may see. Status Icon & Meaning Turn all sounds on and off GPRS available Backup battery is very low GPRS Connection in progress Roaming Main battery is charging Main battery is full Radio off Playing sound disable Main battery is low...
- Page 15 Tap to open an item. Your day at a glance. Displayed when synchronizing with a host ® ® computer using Microsoft ActiveSync Tap to create a new item. Tap to view connection status. is displayed when Panasonic Bluetooth has started.
- Page 16 Starting Up/Shutting Down Pop-up Menus With pop-up menus, you can quickly choose an action for an item. For example, you can use the pop-up menu in the contact list to quickly delete a contact, make a copy of a contact, or send an e-mail message to a contact.
-
Page 17: Lcd (Touchscreen)
LCD (Touchscreen) Using the Stylus Use the provided stylus to perform operations on the touchscreen. The stylus is located in the stylus holder at the upper right of the computer, and can be held like a pen or a pencil. The following operations are possible on the touchscreen. - Page 18 LCD (Touchscreen) Handling the Touchscreen Use the provided stylus with CF-P2. Do not use an implement other than the stylus pro- vided with the computer. Do not place any object on the surface or press down forcefully with sharp-pointed objects (e.g., nails), or hard objects that may become damaged (e.g., pencils and ball point pens).
-
Page 19: Backlight Settings
Backlight Settings Adjust the LCD Brightness Screen brightness can be adjusted in accordance with the usage conditions. - [Settings] - [System] tab - [Backlight]. Tap the [Brightness] tab and adjust the bright- ness with the slider. Tap [ok]. CAUTION If there are check marks at [Advanced] tab (see below), this function may not work. - Page 20 Backlight Settings LCD Backlight ON/OFF Turn on CF-P2, and press the power switch until the LCD backlight goes on/off and release the switch. (Depending on the setting under the [Advanced] tab, the LCD backlight may not be turned on.) Setting of the LCD Backlight The LCD backlight can be set to turn off automatically (e.g., for conserve power) by setting the timeout function.
-
Page 21: Entering Information
Entering Information You can use the following options to enter information: Use the numeric keypad to input typed text by using T9 ( below) or the number shown on the key top. Use the input panel to input typed text, either by using the soft keyboard or other input method. - Page 22 Entering Information Entering Letters in T9 Mode Important T9 concepts: • Type to the end of the word if it does not appear after you enter the first few letters. • Don’t be concerned about what appears on screen while entering a word. •...
- Page 23 Entering Information Entering Letters in ABC Mode To enter a letter, press the corresponding number key repeatedly until you cycle around to the desired letter. For example, to enter an s, press four times. pqrs ntering Predicted Words* Sometimes T9 places in the selection list predicted words. Predicted words are words T9 thinks you may want to enter, based on text you’ve recently entered.
-
Page 24: Using The Input Panel
Entering Information Entering Numbers There are two ways to enter numbers. If CF-P2 is in ABC or T9 mode, you can enter a number by pressing the corresponding number key until a number is displayed. The num- ber is entered, but CF-P2’s text entry mode doesn’t change. You can also enter numbers by setting CF-P2 to 123 mode (by pressing until displayed). -
Page 25: Using The Keyboard
Entering Information Using the Keyboard Press a key to input the number shown on the key top. Cursor Control ok Button OFF Hook (Talk) ON Hook (End) Button Button Backspace Key Wireless Power pqrs wxyz Button Numeric Keypad page 53. OFF Hook (Talk) Button: page 53. -
Page 26: Changing The Assignment Of Program Buttons
Changing the Assignment of Program Buttons Programs are assigned to the buttons shown below at the time of purchase. If either of the buttons is pressed after the computer has started up, the program assigned for that button is started up. These buttons are called program buttons. pqrs wxyz (A) - Quick Menu (B) - Contacts (C) - Context Menu (D) - OK/Close... -
Page 27: Quick Menu
Changing the Assignment of Program Buttons Quick Menu Quick Menu tool allows you to launch the enrolled application quickly by pressing the pro- gram button, and check the battery status and date. When you press the program button that is assigned to the Quick Menu, the window indicated below is displayed. - Page 28 Changing the Assignment of Program Buttons Changing the Assignment of Quick Menu Press the program button that is assigned to the Quick Menu and tap [As- sign]. [Program Assignment] will be displayed. NOTE If the [Restore Default] is tapped, the assignments will return to the default settings.
-
Page 29: Battery Power
Battery Power CAUTION Ensure that the backup battery is fully charged before replacing the battery pack and replace the battery pack within 30 minutes; otherwise the data in RAM will be lost. Do not touch the terminals of the battery pack. The battery pack may no longer function properly if the terminals are dirty or damaged. -
Page 30: Replacing The Battery Pack
Battery Power Replacing the Battery Pack When the charge provided by your battery pack is supplied for only a short period of time, even after full charging according to the instructions, it may be time to replace your battery pack. The battery pack is a consumable item and therefore requires replacement (CF-VZSU33U). Removing the battery pack CAUTION Ensure that the Fast Travel Charger is removed when replacing the battery pack. -
Page 31: Sd Memory Card/Sdio Card/Multimedia Card
SD Memory Card/SDIO Card/MultiMedia Card About SD Memory Card/MultiMedia Card An SD Memory Card/MultiMedia Card can be used for the following purposes. The exchange of data with various devices equipped with an SD card/MultiMedia Card slot, audio storage, and so on. NOTE Software (e.g., drivers) required to exchange data with these devices. -
Page 32: Panasonic Backup
When backing up to an SD Memory Card, be sure to insert the SD Memory Card first, and wait for a moment, then start [Panasonic Backup]. (See below) NOTE Backup processing cannot be executed manually during Auto Backup or Auto Restore. - Page 33 Panasonic Backup Auto Backup - [Programs] - [Panasonic Backup]. Tap [Tools] on the command bar and select [Auto Backup Settings]. A warning message will be displayed. Tap [ok]. Tap [File] tab. (1) Tap to choose the storage area for Auto Backup.
- Page 34 Auto Restore Full reset CF-P2 ( page 61 step (1) - (4)). [Panasonic Backup] screen will be displayed. Select a file for restore, and tap [OK]. If a password has been set, a message will be displayed. Enter the password and press [OK]. Restore will start.
-
Page 35: Pocket Internet Explorer
Pocket Internet Explorer You can connect to Internet service provider (ISP), and use the connection to send and re- ceive e-mail messages and view Web or WAP pages. Getting Connected The settings will vary for different network environments. Ask your system administrator or the person in charge of the network and make settings using the followings. -
Page 36: Connecting To Your Computer
Connecting to Your Computer Use Microsoft ActiveSync to synchronize a host computer and CF-P2 information, to transfer ® ® files between a host computer and CF-P2, or to backup and restore data. CAUTION To ensure that synchronization functions properly, install Microsoft ActiveSync ®... - Page 37 Connecting to Your Computer At [Get Connected], read the on-screen instructions and connect the CF- P2 with a host computer. (Refer to page 38 to connect the CF-P2 with a host computer.) • Change the setting for the host computer or CF-P2, depending on the connection to the host computer.
- Page 38 Connecting to Your Computer ® Backup/Restore data using ActiveSync Backup (1) At [Microsoft ActiveSync] on the host computer, select [Tools] - [Backup/Restore] - [Backup] tab. (2) Select [Full backup] or [Incremental backup] and then select [Back Up Now]. (3) At [Backup Complete], select [OK]. Restore (1) After Backup procedure, at [Microsoft ActiveSync] on the host computer, select [Tools] - [Backup/Restore] - [Restore] tab, and select [Restore Now].
-
Page 39: Wireless Functions
Wireless Functions The following wireless functions are in CF-P2. • GSM/GPRS (Phone) ( page 40) • Wireless LAN ( page 43) • Bluetooth ( page 49) Changing the Wireless Power Status Display the screen on the right, and confirm the switching and status of the GSM/GPRS (Phone), Wireless LAN and Bluetooth power supply. -
Page 40: Setting Up The Remote Network For Gprs
Wireless Functions Setting Up the Remote Network for GPRS The settings may vary with the local service provider. This information has to be requested from the local provider. (The following sample screenshots illustrate the setup procedure.) Turn your computer on ( page 11). - Page 41 Wireless Functions (6) Enter the user name and password, and enter domain if provided by ISP or network administrator. (Check with your network manager or the operator for the SIM you are using to confirm the information to be requested). (7) Tap [Finish].
- Page 42 Wireless Functions Connect /Disconnect to GPRS network Connecting Make sure that one of the five icons ( , , , is displayed on the navigation bar. to display the Connectivity bubble (A). Make sure that the name of the setting in step page 40) is displayed and tap [Connect GPRS].
-
Page 43: Connecting To Wireless Lan
Wireless Functions Connecting to Wireless LAN NOTE Wireless LAN communications are done via an antenna. Do not shield this antenna with the hand, etc. This will negatively effect the performance of your wireless LAN communications. After finishing the first-time operation, make a connection setting for Wireless LAN us- ing the following procedure. - Page 44 Wireless Functions (2) If the connectivity bubble pops up as shown at right, enter the WEP key, then tap [Connect]. (3) Tap to display the connectivity bubble. (4) Tap [Settings] - [Network Cards]* You can also tap - [Settings] - [Connections] tab - [Network Cards].
- Page 45 Wireless Functions (5) At [Networks to access], select [All Available] or [Only access points]. (6) Tap on the access point you want to connect to from the list. [Configure Wireless Network] screen will appear. (7) Tap [Network Key] tab and select [Authentication]. If WEP is enabled: Select [WEP] at [Data Encryption].
- Page 46 Wireless LAN connection is properly estab- lished. You can also check on [Network Adapters] tab to check if the IP address obtained from DHCP is correct. (11) Tap [Panasonic Pegasus WLAN CF Module] to see the IP address information.
- Page 47 Wireless Functions Peer to peer mode The Peer-to-peer mode is also known as the “Ad-Hoc” mode. There are two ways to con- nect CF-P2 with other devices in the peer-to-peer mode. The first way is to create an Ad- Hoc network on CF-P2, then allow other devices to connect to CF-P2 by joining the net- work.
- Page 48 Wireless Functions (3) Type in the network name in [Network name] (CF-P2test, for example). Then add a checkmark for [This is a de- vice-to-device (ad-hoc) connection]. Ad-hoc channel is assigned automatically. (4) Tap [ok] to return to the previous screen. (5) Tap and hold the network name and tap [connect].
-
Page 49: Connecting To Bluetooth Devices
Wireless Functions Connecting to Bluetooth Devices Bluetooth is a technology which enables wireless communication. With Bluetooth, you can access internet or exchange data with other Bluetooth devices (e.g., computer, mobile phone, access point) without connecting cables. Bluetooth Specification • Bluetooth Specification V1.2 Compliant •... - Page 50 (1) Make sure that Bluetooth is powered on. (2) Tap - [Programs] - [Panasonic Bluetooth] - [My Device] - [My Services]. Be sure to remove the check mark from [Network Type ActiveSync], and add a check mark for [Serial Port Type ActiveSync], then tap [OK].
- Page 51 Establishing the Bluetooth Connection by Opening the COM Port Use this setting when using Bluetooth intermittently (i.e. Printer application). (1) Make sure that Bluetooth is powered on. (2) Tap, in order, - [Programs] - [Panasonic Bluetooth]. (3) Tap (Refresh Button) on the command bar to search for devices within range.
- Page 52 (3) Tap [Add Short Cut] to set a short cut. (4) Tap on the command bar and then, tap [Auto Con- nection]. (5) Tap the target device. After starting up Panasonic Bluetooth next time, the Bluetooth connection with the target device will be au- tomatically established.
-
Page 53: Dialer And Telephony
Dialer and Telephony You can send and receive phone calls or messages using CF-P2. This section explains Messaging, phone settings, and how to make and receive phone calls. For details, tap - [Help] - [Phone]. : If pressed when the [Phone] screen is not displayed, the [Phone] screen Off Hook (Talk) Button will be displayed. - Page 54 Dialer and Telephony Setting of the phone - [Settings] - [Personal] tab - [Phone]. [Phone] tab: Select the type and tone of ring or vibration you want to receive for an incoming call. Choose to hear touch tones or beeps when you press the keyboard.
-
Page 55: Using Speed Dial
Dialer and Telephony Making calls You can make phone calls using any of the following four methods. • Using the keyboard • Using Speed Dial • From Call History • From Contacts For details, tap - [Help] - [Phone]. The phone function starts when you press a number key if the [Today] screen is displayed. Using the keyboard Press to display [Phone] screen... - Page 56 Dialer and Telephony From Contacts - [Contacts] ( page 53). You can also display Contacts by pressing Tap and hold on the person you want to call, and tap the field from work, home or mobile phone number you want to call. (depending on which fields have been filled in.) Tap on the person you want to call;...
- Page 57 Dialer and Telephony To add Speed Dial From Contacts (1) Tap - [Contacts], and tap and hold the contact who you want to add. (2) Tap [Add to Speed Dial...]. Change the settings if required, and tap [ok]. From Phone (1) On the [Phone] screen, tap [Speed Dial] - [New].
-
Page 58: Customizing The Computer
Customizing the Computer If you want information on the various individual settings of the computer, tap - [Set- tings] and then tap the item (icon) you want to check. (For details, tap - [Help] - [Settings].) Personal Buttons Program buttons and the cursor control settings. Input Input panel (soft keyboard or letter recognizer, etc.) settings. - Page 59 Customizing the Computer System About Display of release version and copyrights, and device ID setting. Audio Mute car audio when playing sound* . Select the check box to use Head- set/Headphone* , using built-in microphone. On [Record] tab, select [Use ALC] radio button when you use Automatic Level Control (ALC), or select [Manual] radio button and move the slider to select the record gain level.
- Page 60 Customizing the Computer Remove Programs Remove programs in storage memory. Screen Screen orientation. Touchscreen alignment ( page 18), ClearType and text size settings. Connections Connections Internet connection and Intranet connection settings ( page 35). Network Cards Set up a wireless network. RF Settings Select a radio button for GPRS authentication with [Authentication] tab.
-
Page 61: Dealing With Problems
18 step 2 ). (4) At [complete], tap the screen to begin using CF-P2. If the [Panasonic Backup] screen is displayed, follow the on-screen instructions. (5) Set the time and date. - [Settings] - [System] tab - [Clock & Alarms] to set the time and date, and tap... -
Page 62: Troubleshooting
- [Settings] - [System] tab. If you continue to experience problems, the backup battery maintaining the clock may need to be replaced. Contact Panasonic Technical Support. This computer will not correctly recognize the date and time starting from the year 2085 A.D. - Page 63 Dealing with Problems Display The LCD backlight may have automatically turned off It is hard to view the LCD. due to the power-saving function. Turn on the LCD back- light by holding down the power switch until the back- light goes on. Adjust the backlight brightness.
- Page 64 Dealing with Problems Connecting Peripherals Peripheral is not recog- Remove cards or other peripherals, and push the reset nized even after driver is switch. installed. Network Cannot connect to the net- Check the server information and network settings. work. Sounds Quality of recorded sound - [Settings] - [Personal] tab - [Input] - [Options] tab is poor.
-
Page 65: Diagnostic Tool
Dealing with Problems Diagnostic Tool You can use the Diagnostic Tool to check the CF-P2’s usage status, and use this informa- tion when calling your technical support office for advice. Start the Diagnostic Tool. - [Programs] - [Diagnostic Tool] - [Self Test] tab. - Page 66 Dealing with Problems Tap [Information] tab. The device information is displayed. Tap [State] tab. Information indicating the CF-P2’s usage status is displayed. NOTE Status information is given before the Diagnos- tic Tool starts. If the status has been changed since the Diagnostic Tool was turned on, the change will not be displayed.
-
Page 67: For Effective Use
For Effective Use Maintenance Do not use water when cleaning the panel. Ingredients included in water may leave residue and reduce readability of the screen. <When cleaning dust/dirt> Avoid rubbing off dust/dirt with cloth since it may leave scratch on the screen. Sweep dust/dirt with fine brush, then wipe it with “dry”... -
Page 68: Specifications
Specifications Main Specifications Model No. CF-P2T1FDF7E PXA270, 312 MHz ® Intel Instruction Cache Memory: 32 KB Data Cache Memory: 32 KB 64 MB / 128 MB (Flash) Memory (RAM/ROM) 150 KB Video Memory LCD Type 2.83 QVGA type (Transflective color TFT with backlight) Displayed Colors 65536 colors (240 x 320 dots) Keyboard... - Page 69 Specifications Main Specifications 58 mm x 20 mm x 145 mm {2.4" x 0.9 " x 5.8 "} Physical Dimension (W x H x D) Approx. 199 g {Approx. 0.4 lb.} Weight GSM/GPRS Type Compliant with ETSI GSM phase 2/2+ standard EGSM900 Class 4 (2 W) / DCS1800 Class 1 (1 W) Class Internal SIM card (3 V only)
- Page 70 Specifications Wireless LAN IEEE802.11b compliant, Frequency 2.4 GHz band Standards Compliance Communication Protocol Direct Sequence Spread Spectrum (DS-SS), Half Duplex 2.412-2.462 GHz (1-11ch) Frequency Range 1, 2, 5.5, 11 Mbps Transmission Rate Media Access Protocol CSMA/CA Access Mode Infrastructure mode, Ad-Hoc Security 128/64 Bit WEP and WPA support 802.1x Authentification...
- Page 71 Specifications ® ® Microsoft ActiveSync 3.7 System Requirements ® ® ® ® ® ® ® Microsoft Windows XP, Microsoft Windows 2000, Microsoft Windows Millennium Edition, Microsoft ® ® ® Windows NT Workstation 4.0 with SP6 or later, or Microsoft Windows ®...
- Page 72 Macromedia, Inc. ® Bluetooth is a trademark owned by Bluetooth SIG, Inc., U.S.A. and licensed to Matsushita Electric Indus- trial Co., Ltd. Panasonic is a registered trademark of Matsushita Electric Industrial Co., Ltd. ® PCE0157C_PPC...
Need help?
Do you have a question about the ToughBook CF-P2 Series and is the answer not in the manual?
Questions and answers