Advertisement
Quick Links
Download this manual
See also:
Manual
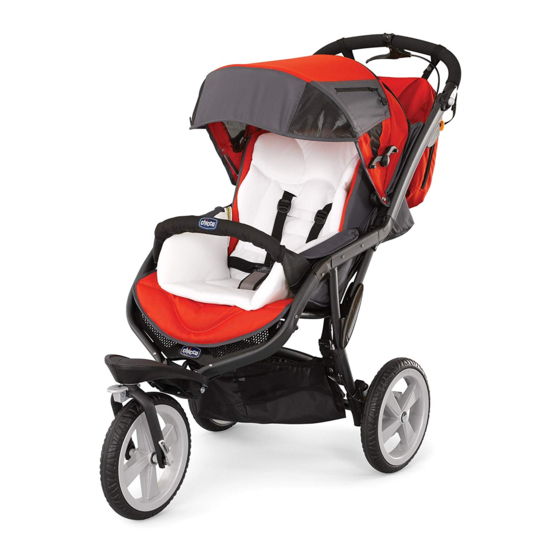
S3
All-Terrain Stroller
Owner's Manual
Manual del propietario • Manuel d'utilisation
IS0033a9(vSeat)ESF
©2009 CHICCO USA, INC. 08/09
Advertisement

Related Manuals for Chicco S3


Summary of Contents for Chicco S3
- Page 1 All-Terrain Stroller Owner's Manual Manual del propietario • Manuel d'utilisation IS0033a9(vSeat)ESF ©2009 CHICCO USA, INC. 08/09...
- Page 2 40lbs (15 kg.). To closing the stroller, ensure that carry infants 0-6 months you your child is at a safe distance: MUST use a Chicco KeyFit or ensure that during these KeyFit 30 infant car seat properly operations, the movable parts...
- Page 3 • The stroller must not be used infant car seat to the stroller while running or skating. other than the Chicco KeyFit • Before use, remove and dispose or KeyFit 30. Injury or death of all plastic bags and packaging...
- Page 4 ADVERTENCIA El incumplimiento de todas las advertencias e instrucciones puede ocasionar lesiones graves o la muerte. Para preservar la seguridad de su hijo, lea las etiquetas y el manual de propietario antes de utilizar el producto. La seguridad de su hijo es muy importante para nosotros, por lo tanto le recomendamos que tome las siguientes precauciones cuando utilice este producto: •...
- Page 5 • No debe utilizar la silla de paseo DEBE utilizar un asiento de automóvil mientras corra o patine. para niños Chicco KeyFit o KeyFit 30 y • Antes del uso, retire y deseche todas ajustarlo de forma correcta a la silla de las bolsas de plástico y los materiales...
-
Page 6: Mise En Garde
: s'assurer les bébés de 0 à 6 mois, il FAUT que durant ces opérations, les pièces utiliser un KeyFit de Chicco ou un mobiles de la poussette n'entrent pas siège de voiture d'enfant KeyFit 30 en contact avec l'enfant. - Page 7 KeyFit ou KeyFit 30 les garder hors de portée des enfants. de Chicco. Si l'on essaie d'utiliser cette • S'assurer que la personne utilisant la poussette avec les sièges de voiture poussette sait comment l'utiliser de de bébé...
- Page 8 Components Componentes Composants A. - Stroller frame A. - Estructura de la silla de paseo A. - Cadre de poussette B. - C. B. - C. - Front and Back wheels B. - C. - Ruedas delantera y traseras B. - C. - Roues avant et arrière D.
- Page 9 Components Componentes Composants E. - Canopy E. - Capota E. - Baldaquin F. - Pillow insert F. - Cubierta de la almohada F. - Garniture de coussin G. -Shopping basket G. - Cesto portaobjetos G. - Panier de magasinage...
- Page 10 Components Componentes Composants H. - Mono-shoulder rucksack H. - Mochila para un solo hombro H. - Sac à dos d'une épaule...
- Page 11 How to assemble stroller Cómo armar la silla de paseo Comment assembler la poussette ADVERTENCIA MISE EN GARDE WARNING Al abrir la silla de paseo, En ouvrant la poussette, When opening the stroller, asegúrese de que su hijo, u s'assurer que votre enfant ou ensure that your child, or other otros niños, se encuentren a que tout autre enfant est à...
- Page 12 How to assemble stroller Cómo armar la silla de paseo Comment assembler la poussette 2. Tilt the stroller forward as shown and the stroller will start to open. 2. Incline la silla de pase hacia delante, tal como se muestra, y la silla comenzará a abrirse.
- Page 13 How to open/close footrest Cómo abrir/cerrar el apoyapiés Comment ouvrir/fermer le repose-pied ADVERTENCIA MISE EN GARDE WARNING Trabe el apoyapiés en la Verrouiller le repose-pied dans Lock the footrest in the use posición de uso la position d'utilisation position immediately after inmediatamente después de immédiatement après avoir opening the stroller.
- Page 14 How to open/close footrest Cómo abrir/cerrar el apoyapiés Comment ouvrir/fermer le repose-pied 4. Open the locking device located underneath the footrest. Line up the lock with the holes on the footrest. Release the locking joint to allow it to slide through the holes on the footrest.
- Page 15 How to open/close footrest Cómo abrir/cerrar el apoyapiés Comment ouvrir/fermer le repose-pied ADVERTENCIA MISE EN GARDE WARNING Verifique que el apoyapiés esté Vérifier pour s'assurer que le Check to make sure that the trabado. repose-pied est dans la position footrest is in the locked verrouillée.
- Page 16 How to fit/remove the front wheel Cómo colocar/quitar la rueda delantera Comment installer/retirer la roue avant WARNING ADVERTENCIA MISE EN GARDE Before use, ensure that the Antes de utilizar la silla de Avant d'utiliser, s'assurer que wheels are safely locked into paseo, asegúrese de que las les roues sont bien verrouillées position.
- Page 17 How to fit/remove the front wheel Cómo colocar/quitar la rueda delantera Comment installer/retirer la roue avant 6. Insert the quick release handle into the front fork located underneath the footrest. Check to make sure that the fork is inserted on to the quick release bar on both sides correctly.
- Page 18 How to fit/remove the front wheel Cómo colocar/quitar la rueda delantera Comment installer/retirer la roue avant 7. After fitting the wheel, tighten the quick release handle. With the handle point out. Hold the quick release nut in place while turning the handle clockwise to tighten. Once tight fold the handle to lay flush with the fork.
- Page 19 How to fit/remove the front wheel Cómo colocar/quitar la rueda delantera Comment installer/retirer la roue avant ADVERTENCIA MISE EN GARDE WARNING Asegúrese de que la rueda esté Vérifier pour s'assurer que la Check that the wheel is safely colocada de forma segura en fourche est insérée locked into position.
- Page 20 How to fit/remove the rear wheels Cómo colocar/quitar las ruedas traseras Comment installer/retirer les roues arrière 8A. To identify the rear wheels look for the internal braking crowns as shown. 8A. Para identificar las ruedas traseras, busque las coronas de freno internas, como se muestra.
- Page 21 How to fit/remove the rear wheels Cómo colocar/quitar las ruedas traseras Comment installer/retirer les roues arrière 8B. Attach the rear wheels, insert the joint of the wheel into the hole located at the back of the stroller frame as shown. You should hear a click when it is locked into position.
- Page 22 How to fit/remove the rear wheels Cómo colocar/quitar las ruedas traseras Comment installer/retirer les roues arrière ADVERTENCIA MISE EN GARDE WARNING Asegúrese de que las ruedas Vérifier que les roues sont bien Check that the wheels are estén colocadas correctamente. installées.
- Page 23 How to adjust the backrest Cómo ajustar el respaldo Comment ajuster le dossier WARNING ADVERTENCIA MISE EN GARDE The child's weight can make El peso del niño puede dificultar Le poids de l'enfant peut rendre this operation difficult. esta operación. cette opération difficile.
- Page 24 How to use the safety harness Cómo utilizar el cinturón de seguridad Comment utiliser le harnais de sécurité MISE EN GARDE WARNING ADVERTENCIA Pour garantir la sécurité de To guarantee the safety of Recuerde siempre utilizar el l'enfant, toujours utiliser le your child, always use the cinturón de seguridad, para harnais de sécurité.
- Page 25 How to use the safety harness Cómo utilizar el cinturón de seguridad Comment utiliser le harnais de sécurité 11. After seating your child in the stroller, insert the two clips into the buckle. Adjust the shoulder straps as required, pass them through the hole at the proper height.
- Page 26 How to use safety harness Cómo utilizar el cinturón de seguridad Comment utiliser le harnais de sécurité 12. Unfasten the lap belt by pressing the side buttons with one hand, at the same time. Pull up on the buckle as it is released. Repeat for other side.
- Page 27 Chicco para que le envíen otra. 13. To remove the bumper bar, press the two small buttons located in the inner side of the armrest and pull the bumper bar towards you.
- Page 28 Height adjustable handle Manija de altura ajustable Poignée à hauteur ajustable To make the stroller more ergonomic and compact, it is possible to adjust the height of the handle. 14. To raise or lower the handle of the stroller, operate the external buttons, and adjust the handle to the position that you find most comfortable.
- Page 29 Safety brake Freno de seguridad Frein de sécurité WARNING ADVERTENCIA MISE EN GARDE Always apply the brakes Recuerde siempre accionar los Toujours appliquer les freins whenever the stroller is frenos cuando la silla de paseo lorsque la poussette est arrêtée. stationary.
- Page 30 Slowing down brake Freno de reducción de velocidad Frein de ralentissement MISE EN GARDE WARNING ADVERTENCIA Le frein de ralentissement est The intended use of the El freno de reducción de pour réduire la vitesse de la slowing down brake is to slow velocidad está...
- Page 31 Slowing down brake Freno de reducción de velocidad Frein de ralentissement 16B. It is recommended to adjust the brakes regularly by turning nut (A), which adjusts both brake shoes. If the two brakes are not aligned, it is possible to adjust them independently by turning nuts (B).
- Page 32 Front swivel wheel Rueda delantera giratoria Roue pivotante avant 17. To put the front wheel in swivel mode, push the front lever in a downward direction with your foot, as shown. To put the front wheel in a fixed position, lift the lever with the foot (the wheel will lock in the straight position).
- Page 33 Front swivel wheel Rueda delantera giratoria Roue pivotante avant It is recommended to use the fixed wheel when using the stroller on uneven surfaces. Use the swivel wheel to increase the manoeuvrability of the stroller in tight spaces. Se recomienda utilizar la rueda fija cuando use la silla en superficies irregulares.
- Page 34 Adjustable rear suspension Suspensión trasera ajustable Suspension arrière ajustable 18. To adjust the suspension, operate the lever shown. Turn the lever inward and the suspen- sion becomes softer (ideal for use with young children or on rough terrain). Turn the lever outward the suspension becomes harder (ideal for older children or smooth pavings).
- Page 35 How to attach KeyFit infant seat Cómo colocar un asiento para niños KeyFit Comment installer le siège de bébé KeyFit To attach the KeyFit infant seat to the stroller, make sure seat back is fully reclined. 19A. Place car seat in stroller as shown. Para colocar el asiento para niños KeyFit en la silla de paseo, asegúrese de que el respaldo de la silla esté...
- Page 36 How to attach KeyFit infant seat Cómo colocar un asiento para niños KeyFit Comment installer le siège de bébé KeyFit 19B. KeyFit infant seat will rest on stroller bumper bar. Check to make sure the curvature on back of the KeyFit infant seat is resting securely on the stroller bumper bar.
- Page 37 How to attach KeyFit infant seat Cómo colocar un asiento para niños KeyFit Comment installer le siège de bébé KeyFit 20. Secure the KeyFit infant seat by fastening the KeyFit car seat attachment strap over the seat. Pull the strap so infant set is tightly fastened.
- Page 38 Canopy Capota Baldaquin WARNING ADVERTENCIA MISE EN GARDE The canopy must be fixed La capota debe fijarse a ambos Le baldaquin doit être installé on both sides of the stroller. lados de la silla de paseo. des deux côtés de la poussette. Check that the canopy is safely Asegúrese de que la capota se Vérifier que le baldaquin est...
- Page 39 Canopy Capota Baldaquin 22. To open the canopy, push the small front arch in a forward direction, and lock it by pushing down on both arches on either side of canopy as shown. 22. Para abrir la capota, empuje el arco pequeño frontal hacia delante y bloquéelo al empujar hacia abajo las dos palancas arqueadas que se encuentran a ambos lados...
- Page 40 Summer Canopy (on certain models) Capota de verano (en algunos modelos) Baldaquin d'été (sur certains modèles) ADVERTENCIA MISE EN GARDE WARNING No sobrecargue el bolsillo, ya Ne pas surcharger la poche Do not overload the pocket, que está diseñado para guardar puisqu'elle n'est conçue que since it has been designed to objetos pequeños únicamente.
- Page 41 Pillow/Insert Almohada/cubierta Coussin/garniture 24. The stroller can be fitted with a pillow/insert. It can be used on either side. On one side, it has a soft and warm fleece cover that is ideal for the winter. On the other side it has a special netting cover that allows maximum aeration in the summer.
- Page 42 Pillow/Insert Almohada/cubierta Coussin/garniture 25A. Check that the shoulder straps are adjusted to the correct shoulder height of your child. The Shoulder straps should be at or above your child's shoulders. 25A. Asegúrese de que los cinturones para hombros estén ajustados a la altura correcta de los hombros de su hijo.
- Page 43 Pillow/Insert Almohada/cubierta Coussin/garniture 26A. Slide the crotch strap into the opening at the bottom on the pillow/insert. 26A. Deslice la correa de la entrepierna en las aberturas que se encuentran en la parte inferior de la almohada/cubierta. 26A. Glisser la courroie d'entrejambe dans l'ouverture au bas du coussin/garniture.
- Page 44 Apron (on certain models) Delantal (en algunos modelos) Tablier (sur certains modèles) 27A. Undo the snap buttons on the cover located at the front of the seat. Then fit the apron as shown in the diagram, attaching the snap buttons located on the cover to the studs on the apron.
- Page 45 Foot muff (on certain models) Cubre pies (en algunos modelos) Manchon de pieds (sur certains modèles) 28. The foot muff has holes which allow you to slide through and use the safety harness even when you use the foot muff. To maximize comfort, you may fit the pillows/inserts inside the foot muff.
- Page 46 Foot muff (on certain models) Cubre pies (en algunos modelos) Manchon de pieds (sur certains modèles) 29. The foot muff can be used as a foot muff turned inside out or it can be used as a normal apron, by opening the zips and removing the lower part made of fleece.
- Page 47 Rain cover (on certain models) Funda para lluvia (en algunos modelos) Housse de pluie (sur certains modèles) WARNING ADVERTENCIA MISE EN GARDE Do not use rain cover if the No utilice la funda para lluvia si Ne pas utiliser la housse de stroller is not fitted with the la silla de paseo no viene pluie si la poussette n'a pas...
- Page 48 Shopping basket (on certain models) Cesto portaobjetos (en algunos modelos) Panier de magasinage (sur certains modèles) WARNING ADVERTENCIA MISE EN GARDE Do not load the shopping No cargue el cesto Ne pas charger le panier de basket with objects weighing portaobjetos con objetos que magasinage d'objets pesant over 6.61 lbs.
- Page 49 Mono-shoulder rucksack (on certain models) Mochila para un solo hombro (en algunos modelos) Sac à dos d'une épaule (sur certains modèles) WARNING ADVERTENCIA MISE EN GARDE Handle weight must not El peso de la manija no debe Le poids de la poignée ne peut exceed 1 lb.
- Page 50 How to close the stroller Cómo cerrar la silla de paseo Comment fermer la poussette WARNING ADVERTENCIA MISE EN GARDE When folding the stroller, Al plegar la silla de paseo, En refermant la poussette, make sure that your child and asegúrese de que su hijo y otros s'assurer que votre enfant ou other children are at a safe...
- Page 51 How to close the stroller Cómo cerrar la silla de paseo Comment fermer la poussette 33. Hold the stroller as shown. Pull both orange triggers towards you. Push the brake lever with your foot and, at the same time, tilt the handle in a backwards direction. The stroller will begin to fold.
- Page 52 How to close the stroller Cómo cerrar la silla de paseo Comment fermer la poussette 34. Fold the stroller completely, until the side locking system locks the stroller in the closed position. To make the stroller more compact, raise the handle to the highest position.
-
Page 53: Cleaning And Maintenance
Cleaning and Maintenance This product requires regular maintenance. The cleaning and maintenance of the stroller must only be carried out by an adult. CLEANING To remove the cover of the stroller and the rigid backrest support, please refer to the section "how to fit/remove the cover". -
Page 54: Limpieza Y Mantenimiento
Limpieza y mantenimiento Las operaciones de limpieza y mantenimiento deben ser efectuadas exclusivamente por un adulto. LIMPIEZA La silla de paseo se puede desenfundar (consultar la sección "Cómo colocar/quitar la funda"). Para limpiar las partes de tela consultar las etiquetas de lavado. A continuación se muestran los símbolos de lavado con los correspondientes significados: Lavar a mano en agua fría No usar lejía... -
Page 55: Nettoyage Et Entretien
Nettoyage et Entretien Ce produit exige un entretien régulier. Les opérations de nettoyage et d’entretien doivent être réalisées uniquement par un adulte. NETTOYAGE Pour retirer la housse de la poussette et le support rigide du dossier, se reporter à la section «... - Page 56 For more information Más información Pour obtenir de plus amples renseignements If you have any questions or comments about this product, or are missing any of the parts, please contact us in one of the following ways: By phone (toll free): (877)-424-4226 By e-mail: info@chiccousa.com By mail: 1826 William Penn Way Lancaster, PA 17601...
- Page 57 For more information Más información Pour obtenir de plus amples renseignements IMPORTANT NOTE: The pictures and instructions contained in the booklet refer to the complete stroller model. Some of the components and functions described here may vary according to the model purchased. NOTA IMPORTANTE: Las imágenes e instrucciones contenidas en este manual se refieren a una versión completa de la silla de paseo.
- Page 58 www.chiccousa.com...
Need help?
Do you have a question about the S3 and is the answer not in the manual?
Questions and answers