
Related Manuals for PARKZONE VisionAire AS3X


Summary of Contents for PARKZONE VisionAire AS3X
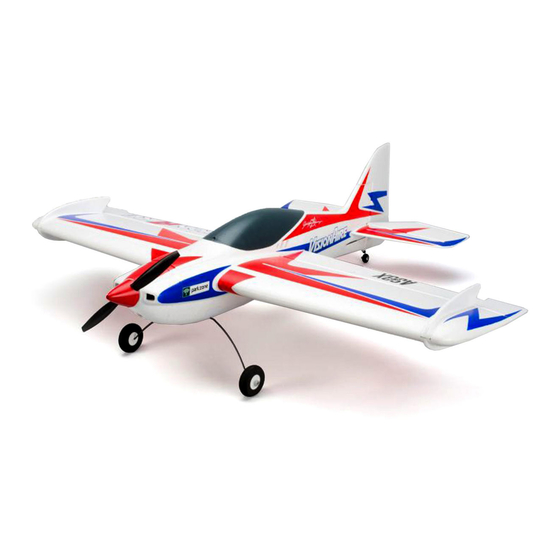
- Page 1 VisionAire ™ Instruction Manual / Bedienungsanleitung Manuel d’utilisation / Manuale di Istruzioni...
- Page 2 NOTICE All instructions, warranties and other collateral documents are subject to change at the sole discretion of Horizon Hobby, Inc. For up-to-date product literature, visit www.horizonhobby.com and click on the support tab for this product. Meaning of Special Language: The following terms are used throughout the product literature to indicate various levels of potential harm when operating this product: NOTICE: Procedures, which if not properly followed, create a possibility of physical property damage AND little or no possibility of injury.
-
Page 3: Table Of Contents
– Introduction – ® ™ Welcome to the exciting world of 3D fl ight! Even if this isn’t your fi rst 3D airplane, the ParkZone VisionAire aircraft is going to be a fast favorite. Its awesome ® power-to-weight performance coupled with the incredible balance of stability and agility its AS3X (Artifi... -
Page 4: Charging The Flight Battery
• Audible beeper indicates power and charge status you to safely charge your battery pack • 12V accessory outlet input cord when used with the included ParkZone Li-Po balancing charger. • Maximum charge rate 1C (2.2 amps) -
Page 5: Transmitter And Receiver Binding
Transmitter and Receiver Binding Binding is the process of programming the receiver to recognize the GUID (Globally Unique Identifi er) code of a single specifi c transmitter. You need to ‘bind’ your ™ ® ® chosen Spektrum DSM2 /DSMX technology equipped aircraft transmitter to the receiver for proper operation (Please visit www.bindnfl y.com for a complete list of compatible transmitters). -
Page 6: As3X System
AS3X System Horizon Hobby has always made RC sport, scale and unique aircraft with heralded a new era of performance, and with the AR635 that performance is the kind of performance experts appreciate. First used in Blade ® ultra micro introduced for larger airplanes. -
Page 7: Installing Horizontal Tail
Installing Horizontal Tail 1. Slide the horizontal tail tube (A) into the hole in the rear of the fuselage. 2. Install the 2 piece (left and right) horizontal tail as shown. Ensure the control horn faces down. 3. Apply 8 pieces of tape (B) to the fuselage mounts (one on the top and bottom of each half of the horizontal tail). -
Page 8: Installing Sfg Technology
® Installing SFG Technology Wing Fences 1. Carefully apply the included tape (A) to the wing fence base. 2. Align and install the left and right (marked L and R) top and bottom wing fences (B) into the respective wing slots (C). The bottom fences have integrated plastic skids, as shown. -
Page 9: Transmitter Setup
Transmitter Setup IMPORTANT: The AR635 receiver’s default setting is for 3D mode using the For the best fl ight experience, we recommend fl ying your aircraft with the DX6i transmitter and above. If you choose to fl y using another transmitter, you Dual Rate switched to high rate. -
Page 10: Control Direction Test
Control Direction Test Move the controls on the transmitter to make sure the aircraft control Transmitter surfaces move correctly and in the proper direction. After performing Aircraft Reaction the Control Test, correctly set the failsafe. Make sure the transmitter command controls are at neutral and the throttle and throttle trim are in the low position, then rebind the model to your transmitter. -
Page 11: As3X Control Direction Test
AS3X Control Direction Test Perform the Control Direction Test to ensure the aircraft responds cor- Aircraft movement AS3X Reaction rectly to your transmitter. Once you are sure the aircraft responds cor- rectly, move the aircraft as shown to ensure the AS3X system moves the control surfaces in their proper direction. -
Page 12: Flying Tips And Repairs
Perform a range check with your radio system. We recommend fl ying your battery. It is not recommended to fl y the battery to LVC. ParkZone VisionAire aircraft outside in no greater than moderate winds. Always avoid fl ying near houses, trees, wires and buildings. You should also be careful Make sure to land into the wind. -
Page 13: Guidelines For Flying 3D
Guidelines for Flying 3D Getting Started This aircraft and its AS3X system were designed together to help an intermedi- ate pilot apply standard fl ying skills to the demands of 3D fl ying. The calmer the wind conditions, the easier it is to execute maneuvers. Enable the 3D setting in the AS3X system using the assigned channel 5/AUX switch on your transmitter. -
Page 14: Ama National Model Aircraft Safety Code
AMA National Model Aircraft Safety Code Effective January 1, 2011 B. RADIO CONTROL A. GENERAL 1. All pilots shall avoid fl ying directly over unprotected people, vessels, A model aircraft is a non-human-carrying aircraft capable of sustained fl ight vehicles or structures and shall avoid endangerment of life and property in the atmosphere. -
Page 15: Troubleshooting Guide As3X
Troubleshooting Guide AS3X Problem Possible Cause Solution Oscillation Flying over recommended Reduce air speed airspeed Damaged propeller or spinner Replace propeller or spinner Imbalanced propeller Balance the propeller. For more information, view John Redman’s propeller balancing video at www. horizonhobby.com Flight condition variations Adjust gain to current fl... -
Page 16: Limited Warranty
Problem Possible Cause Solution Aircraft will not con- Transmitter too near aircraft during connecting pro- Move powered transmitter a few feet from aircraft, disconnect and reconnect nect (after binding) cess fl ight battery to aircraft to transmitter Aircraft or transmitter is too close to large metal ob- Move aircraft and transmitter to another location and attempt connecting again ject, wireless source or another transmitter Bind plug left installed in bind port... -
Page 17: Contact Information
copy of your original sales receipt must be included for warranty consider- pleted and payment will be required without notification or estimate ation. Be sure your name, address, and RMA number are clearly written on the of the expense unless the expense exceeds 50% of the retail purchase outside of the shipping carton. -
Page 18: Parts Contact Information
Set del carrello di atterraggio: Vision- PKZ6503 Landing gear set: VisionAire Fahrwerk-Set: VisionAire VisionAire Aire Parkzone VisionAire Tragfl ächen- und PKZ6521 Wing & H. Tail Tube: VisionAire Clé d’aile et de stabilisateur : VisionAire Ala & tubo coda orizz: VisionAire Leitwerksverbinder: VisionAire Parkzone VisionAire Akkuklappe:... -
Page 19: Optional Parts
Optional Parts • Optionale Bauteile • Pièces optionnelles • Pezzi opzionali Part # | Nummer Description Beschreibung Description Descrizione Numéro | Codice 2500mAh 3S 11.1V 30C LiPo, E-fl ite 2500mAh 3S 11.1V 30C LiPo; Batterie Li-Po E-fl ite 11.1V 3S 2500mA 2500mA Li-Po E-fl... - Page 20 © 2012 Horizon Hobby, Inc. ParkZone, VisionAire, AS3X, E-flite, Blade, Celectra, EC3, DSM, DSM2, DSMX, Bind-N-Fly, ModelMatch and SFG Technology are trademarks or registered trademarks of Horizon Hobby, Inc. The Spektrum trademark is used with permission of Bachmann Industries, Inc.
Need help?
Do you have a question about the VisionAire AS3X and is the answer not in the manual?
Questions and answers