TabletKiosk Sahara Slate PC i500 User Manual
12.1” tablet pc
Hide thumbs
Also See for Sahara Slate PC i500:
- Quick start manual (12 pages) ,
- Quick start manual (12 pages) ,
- User manual (157 pages)

Related Manuals for TabletKiosk Sahara Slate PC i500


Summary of Contents for TabletKiosk Sahara Slate PC i500
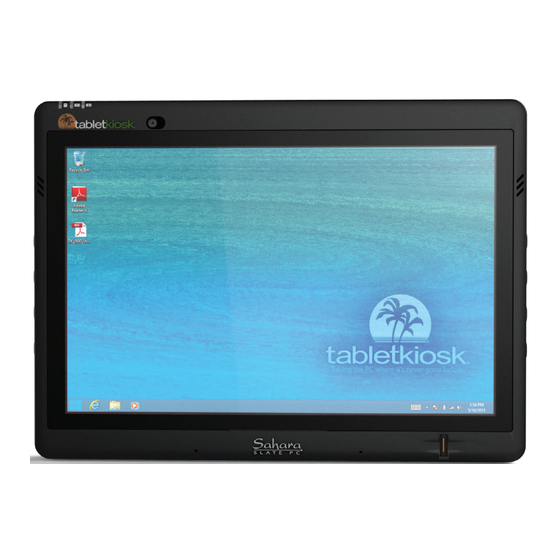
- Page 1 User’s Guide Sahara Slate PC® i500 12.1” Tablet PC Tablet PCs designed for business. Built to last.
- Page 3 Inside are trademarks of Intel Corporation in the U.S. and other countries. The Bluetooth word mark and logos are owned by the Bluetooth SIG, Inc. and any use of such marks by TabletKiosk is under license. Linux is a registered trademark of Linus Torvalds.
-
Page 4: Disclaimer
All rights are reserved. No part of this manual may be reproduced by any mechanical, electronic, or other means in any form without prior written permission of TabletKiosk. If you have any questions regarding the Sahara Slate PC, or the information contained within this manual, please contact TabletKiosk at info@tabletkiosk.com. - Page 5 When the AC adapter is plugged into an electrical outlet, place the power cord so it will not be stepped on or walked on. Do not place objects over or on the power cord. Use the Sahara Slate PC in a clean, dry, temperature controlled environment.
-
Page 6: Safety Notices For The Power Cord
Safety Notices for the Power Cord This equipment has a 2 or 3-wire power cord. Replace the power cord if it becomes damaged. Contact your dealer for an exact replacement. In the U.S.A. and Canada, the power cord must be a UL-listed detachable power cord (in Canada, CSA-certified). - Page 7 ™ Use only shielded I/O cables to connect I/O devices to this equipment. You are cautioned that any changes or modifications not expressly approved by TabletKiosk could void your authority to use the equipment. b. Regulatory information / Disclaimers This device must be installed and used in strict accordance with the instructions included in the user documentation provided with the product.
- Page 8 c. For portable devices without a co-location condition (eg. notebook pc) FCC RF Radiation Exposure Statement: 1. This Transmitter must not be co-located or operating in conjunction with any other antenna or transmitter. 2. This equipment complies with FCC RF radiation exposure limits set forth for an uncontrolled environment.
-
Page 9: Canadian Emi Compliance Statement
Caution: When using IEEE 802.11a wireless LAN, this product is restricted to indoor use, due to its operation in the 5.15–5.25 GHz frequency range. The FCC requires this product to be used indoors for the frequency range of 5.15–5.25 GHz to reduce the potential form harmful interference to co-channel mobile satellite systems. -
Page 10: Power Savings Reminder
Power Savings Reminder Please remember to shut off your computer if you are not going to use it for an extended period of time in order to save on electricity. Instructions importantes de sécurité Pour votre propre sécurité et celle de votre appareil, veuillez suivre l’ensemble des instructions d’utilisation et d’entretien de votre Sahara Slate PC. -
Page 11: Consignes De Sécurité Pour Le Cordon D'alimentation
Ne jamais ouvrir et ne jamais démonter le Sahara Slate PC. Pour des raisons de sécurité, et pour éviter tout dégât irréversible, cet appareil doit être réparé uniquement par un personnel qualifié. Contacter un centre de services agréé si l’un des problèmes suivants surgit : 1. - Page 12 Aux Etats-Unis et au Canada, le cordon d’alimentation doit être un cordon détachable homologué UL (certifié CSA au Canada). Cordon à 2 fils SPT-2 18AWG Cordon à 3 fils SVT or0SJT, 18 AWG, à 3 conducteurs Le cordon d’alimentation doit posséder un raccord moulé à l’autre extrémité.
- Page 13 ™ Utiliser uniquement des câbles d’entrée/ sortie pour rac- corder les appareils d’entrée/ sortie de ce matériel. Vous devez savoir que tout changement ou toute modification n’ayant pas été approuvés préalablement par TabletKiosk peut annuler votre autorisation d’utiliser le matériel. b. Informations réglementaires / Dégagement de responsabilité...
- Page 14 un raccord non autorisés. Le fabricant et ses revendeurs ou distributeurs agréés ne pourront être tenus pour responsables des dommages ou des violations des règlements gouverne- mentaux découlant du non-respect de ces directives. c. Pour les appareils portables sans condition de coemplacement (par ex.
-
Page 15: État De Conformité Emi Pour Les Utilisateurs Canadiens
Remarque - consignes de sécurité TNV : Afin de réduire les risques d’incendie, utiliser uniquement un cordon certifié CSA ou homologué UL de taille No. 26 AWG ou supérieure. Eviter d’utiliser un téléphone (sauf un téléphone sans fil) pendant des orages électriques. Les éclairs peuvent provoquer une décharge électrique. -
Page 16: Déclaration De Marquage Ce De L'union Européenne
doit accepter toutes les interférences, y compris celles suscep- tibles d’en compromettre le fonctionnement. Déclaration de marquage CE de l’union européenne Ce matériel a été testé et déclaré en conformité avec les exi- gences EMC, objet de la directive de l’union européenne pour le marquage CE. - Page 17 This Page Left Blank Intentionally Preface...
-
Page 19: Table Of Contents
Table of Contents Preface Copyright Disclaimer Important Safety Instructions Caution (Lithium-Ion Batteries) Safety Notices for the Power Cord Notice of FCC Compliance Canadian EMI Compliance Statement European Union CE Marking Declaration Caution: To Prevent Hearing Damage Power Savings Reminder viii Instructions importantes de sécurité... - Page 20 Touring the Sahara Slate PC Front View Back View Left View Right View Top View Bottom View Battery Usage and Care Using the Batteries for the First Time Calibrating the batteries Charging the Batteries Under Typical Conditions Problems Charging the Battery Battery Status Low Battery Warnings About Battery Usage...
- Page 21 Adding a Program Short-Cut to the menu Entering Text with the Tablet PC Input Panel Writing Pad Tools Menu Character-by-Character Mode Help with Editing Handwritten Text On-Screen Keyboard Tools Menu Input Panel Options Opening Handwriting Ink to text conversion Insertion Text Completion Advanced Improving Handwriting Recognition...
- Page 22 Enabling Multiple Monitor Support Enhancing the Display Custom Resolutions (Advanced Mode only) 3D Performance Media Power Hot Keys System and Display Information Control Panel Preferences Getting More Help Realtek HD Audio Manager Adjusting Audio Playback Volume Level Set Default Playback Device Speaker Configuration Sound Effects Default Audio Format...
- Page 23 Before you Begin ANY Upgrade Procedure Upgrading Memory (RAM) Upgrading the Data Storage Drive (HDD or SSD) Using the TabletKiosk Modular Expansion System To attach an expansion module: Using the Sahara Slate PC with the VESA Mounting Plate or Docking Cradle...
- Page 24 FAN Calibration Battery Calibration Enable/Disable CCD Enable/Disable G sensor Wake on LAN from S4/S5 mode 3rd & 4th Programmable button Intel® Rapid Start Technology Trusted Computing Boot Menu Launch CSM Boot Option #1 Boot Option #2 Security Administrator Password User Password Secure Boot menu Save &...
- Page 25 Cameras 2.0 MegaPixel Front Facing Camera 5.0 MegaPixel Rear Facing Camera with 1W LED Flash TPM Security Fingerprint Reader External I/O Ports Weight Measurements Case Color LED Indicators Function Buttons (Left) Function Buttons (Right) Control Switches (Top) AC Adapter Operating Environment Storage Environment Table of Contents xxiii...
-
Page 27: Getting Started
What’s in the Box Your Sahara Slate PC i500 should come securely packaged in its shipping container along with the items listed below. Contact your dealer immediately if you find that anything is missing or damaged. -
Page 28: Setting Up Your Sahara Slate Pc
8. Stylus Pen (may not be included with certain touch only configurations) Setting Up Your Sahara Slate PC Please read the following steps to begin using your new Tablet PC as quickly and easily as possible. 1. Insert the Battery Pack(s) 2. -
Page 29: To Remove The Battery Packs
Slide the battery-locking tab (the tab closest to the top of the tablet) up to the “locked” ( ) position. Once the locking tab clicks into position, the battery should be securely seated. Slide the locking tab on the battery to the locked position to keep the battery secured in the bay. -
Page 30: Step 2: Connect The Tablet Pc To An External Power Source
The batteries on the Sahara Slate PC i500 are hot swappable. This means you can change out discharged batteries for spare, charged batteries without first having to power off the system. Note, however, that the Sahara Slate PC does not have a short- term internal battery. -
Page 31: Step 4: Powering On The Sahara Slate Pc
to the Internet and/or a corporate LAN using a wired connection as opposed to wirelessly, connect the external peripheral or cable now. See the chapter entitled Touring Your Sahara Slate PC, to identify which ports to use. Step 4: Powering on the Sahara Slate PC Locate the three switches on the top of the Tablet PC. -
Page 32: Touch Screen
Navigating with a touch screen is dif- ferent from navigating with a mouse, while using a stylus pen in Active Digitizer mode on the Sahara Slate PC i500 is actually quite similar to navigating with a mouse. -
Page 33: Active Digitizer (Pen)
Active Digitizer (pen) Using the Sahara Slate PC in Active Digitizer mode is similar to navigating with a mouse. If your Sahara Slate PC i500 came with a dual mode screen, it will also have come with a special stylus pen that you will use to interact with the digitizer panel. -
Page 34: Energy Star 5.2 Compliance Information
TIP: When trying to select or activate something on the screen with the stylus pen, pay attention to the position of the pointer icon instead of the tip of the pen. Tapping lightly on the screen with the tip of the stylus will perform a standard left mouse button click. - Page 35 and environmental benefits, please visit www.energystar.gov/ powermanagement. To learn more about how your organization can benefit by reducing the energy consumption of their IT equipment, please visit the Low Carbon IT Campaign website. Chapter 01: Getting Started...
-
Page 37: Touring The Sahara Slate Pc
Chapter 02 Touring the Sahara Slate PC The Sahara Slate PC i500 includes a number of physical charac- teristics designed to enhance user productivity. Take a moment to familiarize yourself with the controls and Input/ Output (I/O) ports on the faces and sides of the computer. Understanding the layout of the system will help you use your Sahara Slate PC more effectively while in the field or on the go. -
Page 38: Front View
Front View 1. Data Drive Activity and Battery Status LEDs Blinks when internal HDD / SSD reads or writes data Charging status of battery 1: green = 100% charged, orange = charging, blinking = battery low (<10%) Charging status of battery 2: green = 100% charged, orange = charging, blinking = battery low (<10%) 2. -
Page 39: Back View
Back View & 1. TabletKiosk Expansion Module Port Remove cover to install modular expansion modules 2. System and CPU Ventilation Ports Do not block to prevent overheating 3. 5.0 MegaPixel Camera and LED Flash 4. RAM Modules 5. Docking Connector Port... -
Page 40: Left View
Left View % ^ & * 1. Carrying Strap Bracket Attachment Port Used with optional shoulder strap or system handle 2. DisplayPort++ Digital Video Out High resolution (up to 2560x1600) digital out with optional embedded audio. Used for mirroring or extended desktops. Adapters available to convert to HDMI, DVI-D, or VGA 3. -
Page 41: Right View
Right View 1. Battery Bay Two (2) with Lithium Ion Battery Pack 2. Function Buttons R1: Top Button turns on/off touch screen, in BIOS/DOS mode R2: User Programmable, in BIOS/DOS mode R3: User Programmable, in BIOS/DOS mode R4: User Programmable, in BIOS/DOS mode 3. -
Page 42: Top View
Top View # $ % 1. TabletKiosk Modular Expansion Port Remove cover to install modular expansion modules 2. System Ventilation Fan exhaust port for expelling hot air from the interior of the Tablet PC. Do not block to help prevent over heating. -
Page 43: Bottom View
Bottom View 1. Docking Cradle Stabilizing Groove Used to help secure the Sahara Slate PC in its docking cradle. 2. System Ventilation Intake Port Fan intake port for drawing cool air into the interior of the Tablet PC. Do not block to help prevent over heating. Chapter 02: Touring the Sahara Slate PC... -
Page 45: Battery Usage And Care
Chapter 03 Battery Usage and Care Sahara Slate PC i500 Tablet PCs features two (2) Lithium-Ion batteries that are user replaceable, rechargeable and also hot swappable. This means that you can remove a discharged bat- tery and replace it with a fully charged battery without putting the computer into hibernation mode, or fully powering it off, to prevent data loss. -
Page 46: Using The Batteries For The First Time
Before using the Tablet PC on battery power for the first time, the batteries should be fully charged. On the front of the Sahara Slate PC are two battery status indica- tors just above the TabletKiosk logo. These indicators will track the charging status of the two Lithium-Ion battery packs... -
Page 47: The Battery
1. To enter the BIOS, power on or restart your Sahara Slate PC and press the L2 (Screen Rotation) button as soon as you see the TabletKiosk logo. 2. Once in the BIOS, use the L3 button to navigate over to the Advanced menu screen. -
Page 48: Charging The Batteries Under Typical Conditions
NOTE: This procedure will take a while as the system will discharge the batteries and then charge them again. Make sure you have some time before performing this routine. This routine might be better run at the end of the day. If you are still having problems, contact your dealer and arrange for replacements. -
Page 49: Battery Status
used in your computer or being exposed to an overly hot environment, the battery may not charge when you connect the computer to an electrical outlet. If this occurs, disconnect the computer from the electrical outlet and allow it and the battery to cool to room temperature. Then reconnect the computer to an electrical outlet to continue charging the battery. -
Page 50: Real Time Clock Battery
IMPORTANT: To avoid damage, only use TabletKiosk replacement batteries. To prevent loss of data, do not remove both battery packs at the same time while the system is powered on unless attached to an external power source. Also, be sure to check the status of each battery before removing it. - Page 51 For optimal longevity of the battery packs, it is important to periodically charge them in order to keep their electrons mov- ing. Even charging the batteries for ten to fifteen minutes every 60 - 90 days should be sufficient to keep the batteries in good condition.
-
Page 53: Using Your Sahara Slate Pc With Microsoft® Windows® 7
Chapter 04 Using Your Sahara Slate PC with Microsoft® Windows® 7 Tablet PCs are nothing new to Microsoft. Since Windows® XP Tablet PC Edition, Windows has supported pen based comput- ing. A few years later, Windows Vista™ added support for touch while considerably improving pen interaction. - Page 54 When using the stylus pen, hold it as if you were writing with a standard pen. When using a Sahara Slate PC model that includes a digitizer, simply moving the tip of the stylus a few millimeters above the screen will automatically activate the panel. Without touching the screen, move the stylus around and watch how the pointer (shaped like a diamond instead of a traditional mouse arrow) follows the pen just as if you were moving a mouse.
-
Page 55: Selecting Multiple Items
Selecting Multiple Items Windows® 7 is well aware of how you manipulate items on your computer with a mouse and how selecting multiple items, for such actions as moving or copying, might be a bit more chal- lenging when using a stylus pen or your fingers. That is why Windows®... -
Page 56: Enabling, Disabling And Adjusting Touch Screen Features
In order to calibrate the capacitive touch screen: 1. Tap on “START g Control Panels g Hardware and Sound g Tablet PC Settings” 2. From the “Display” tab, tap on the “Calibrate...” button. 3. If your Sahara Slate PC only has a capacitive touch screen, you should see the Calibration screen. -
Page 57: Enabling And Disabling Touch Input
The first time you calibrate your screen you will have to tap on 16 target points. Afterward you will only have 4 target points. Enabling and Disabling Touch Input To disable touch input in Windows, uncheck “Use your finger as an input device”. -
Page 58: Using The Touch Pointer
If you find you are often double-tapping when you don’t mean to, adjust the Speed slider toward “Fast” and the Spatial slider toward “Small”. Double-tap on the picture of the door to test your new settings. Adjust the sliders until you can comfortably open and close the door. -
Page 59: Panning Gesture Settings
The “Advanced Options...” button opens a panel that allows the positioning (relative to the pointer arrow), appearance and velocity behavior of the Touch Pointer to be adjusted. Panning Gesture Settings Windows allows you to move— or pan—around in a document or window simply by placing two fingers on the screen and then sliding them around. -
Page 60: Resistive Touch Screen Calibration
the object ceases to exert its affect. Windows inertia functions the same way and can be controlled or even disabled altogether. Unchecking the box “Enable inertia after a pan gesture” will disable inertia altogether and only allow panning within a docu- ment or window to occur while your finger is in contact with the screen and in motion. -
Page 61: Calibrating The Resistive Touch Screen
Calibrating the Resistive Touch Screen If the pointer isn’t properly following the touch of your stylus or finger, you might need to calibrate the touch screen. 1. Open the PenMount control panel and, in the “Device” tab, tap on the “PenMount 6000 USB” icon and then tap “Config- ure”. -
Page 62: Draw Test
Touch each of the red squares that appear on- screen to calibrate the touch screen. Remember to hold your finger or stylus down on the square until it tells you to release. 4. When the calibration is complete, you can test the screen accuracy by either tapping around the screen, or using the “Draw”... -
Page 63: Edge Compensation
Tapping on the “Draw” button will open the Drawing Test. Tap on the “Menu” button during the test to display a grid overlay, display the point coordinates of where the screen is touched, or to clear the screen so you can start over. Edge Compensation The edge compensation sliders are used to adjust... -
Page 64: Configuring And Calibrating The Digitizer
Configuring and Calibrating the Digitizer The Electromagnetic Active Digitizer by Wacom® is the highest resolution input panel available on the Sahara Slate PC. In order to switch to it, all you need to do is bring the tip of the stylus pen to within about 10 mm of the screen’s surface and it will automatically activate. - Page 65 DUAL MODE SCREEN NOTE: If you have a dual mode system that also has a touch screen, a dialog box will ap- pear that asks you whether you want to calibrate for pen or touch. Select “Pen Input” and the digitizer calibration screen will appear.
-
Page 66: Pen Actions
current calibration settings, or tap “Try again” and repeat the calibration. Pen Actions In the “Pen and Touch” control panel on the “Pen Options” tab is a table that lists the pen actions and their equivalent mouse actions, similar to the table at the beginning of this chapter. -
Page 67: Press And Hold
If you find you are often double-tapping when you don’t mean to, adjust the Speed slider toward “Fast” and the Spatial slider toward “Small”. Double-tap on the picture of the door to test your new settings. You can continue to adjust the sliders until you feel comfortable opening and closing the door. -
Page 68: Pen Configuration
Pen Configuration Using the optional Pen Tablet Properties control panel available www.tabletkiosk.com or www.wacom.com, you can adjust: ™ How hard you must press the eraser and pen tip to adjust the width of the lines they draw and erase (this is known... -
Page 69: Adding A Command To The Menu
The “Add” dropdown menu lets you select keystroke commands or program shortcuts to add to the Pen Pop-up Menu. In order to invoke it, remember to set the pen button to “Pop-up Menu”. Adding a command to the menu 1. Tap on the “Add” drop down menu and select “Keystrokes...”... -
Page 70: Adding A Program Short-Cut To The Menu
4. Repeat as many combina- tions as you like and then go to the “Pop-up Items” field and drag them into the order you would like them to display in the menu. Adding a Program Short-Cut to the menu 1. Tap on the “Add” drop down menu and select “Open/Run...”... -
Page 71: Entering Text With The Tablet Pc Input Panel
Entering Text with the Tablet PC Input Panel Complementing Microsoft’s Digital Inking handwriting recogni- tion technology is a special application called the Tablet PC Input Panel that accepts, and then converts handwriting into text, as well as provides a compact and convenient on-screen keyboard. Typically the Input Panel sits docked just off the left side of your screen. -
Page 72: Writing Pad
If your Sahara Slate PC i500 doesn’t have an Active Digitizer, or the Input Panel isn’t docked on the side of the screen and you want to be able to display it: 1. -
Page 73: Tools Menu
After you have entered some text, the “Insert” button will appear on the bottom of the panel that will allow you to place the text into your document. Tools Menu To switch between word- by-word and character- by-character modes, tap on the “Tools”... -
Page 74: On-Screen Keyboard
Input Panel just to the left of the “Close” button. Tapping on this bar opens a panel with buttons that, when clicked on, illustrate how to accomplish a particular editing action. The “Help” button in the title bar houses a panel containing additional buttons that demonstrate how to perform the different editing gestures in the Writing Pad. -
Page 75: Tools Menu
Tools Menu The Tools menu on the keyboard allows you to switch between the standard and expanded keyboard modes, dock or float the keyboard, and open the Input Panels’ “Options” menu. Addition- ally, you can get more information about using the Input Panels by tapping on the “Help topics”... -
Page 76: Ink To Text Conversion
Ink to text conversion This tab has options for adjusting when the Input Panel will automatically convert your handwriting to text as you are writing. The “Distance from Ink” slider determines how far away your stylus must move from the text you are writing before converting the text, while the “Length of pause”... -
Page 77: Text Completion
Text Completion This tab allows you to turn off and on AutoComplete and Predic- tive text options. These options work much the same way as they do on smartphones. Advanced This tab lets you change the Password security level, altering the way the Tablet PC Input Panel and the on-screen keyboard displays text and key presses when... -
Page 78: Automatic Learning
NOTE: You can also access the Handwriting Personalization application from the START Menu under “All Programs g Accessories g Tablet PC”. There are two different training utilities: Target specific recognition errors does spot training on letters and numbers that usually account for the most common transla- tion errors. -
Page 79: Handedness
matic Learning”. This enables Windows to learn your handwriting on the fly as you write. This feature is enabled by default, so if you are the primary user of your Tablet PC you don’t have to do anything to enable it. If your Sahara Slate PC is going to be used by many different people, you may want to... -
Page 80: Using Gestures To Improve Productivity
Using Gestures to Improve Productivity When using Windows® 7 on a standard laptop or desktop PC, many people take advantage of added efficiency provided by keyboard short-cuts. Tablet PC users have another way to improve efficiency while working by using Windows® 7 built-in screen gestures to open applications, close applications, move data between applications, and navigate within applications. -
Page 81: Editing Flicks
Editing Flicks In addition to the above flicks, there are four default edit flicks: Flick Direction Action Performed Up Right Copy Down Right Paste Down Left Undo Up Left Delete The four default navigational flicks are The four editing flicks can be enabled enabled in Windows®... -
Page 82: Customizing Pen Flicks
3. At the top of the tab there is a check box that should be selected called “Use flicks to perform common actions quickly and easily”. Below it are two option boxes, select “Navigational flicks and editing flicks” to enable both types of flicks. -
Page 83: Touch Gestures
down menu or by creating your own custom action. To create a custom action: 1. Choose “(add)” from the specific direction’s drop down menu. 2. At the bottom of the panel are two fields that should now be active. Tap in the top field labeled “Name:”. -
Page 84: Enabling And Disabling Multi-Touch Gestures
Standard Windows multi-touch gestures only support capacitive touch screens. Enabling and Disabling Multi-Touch Gestures Many of the most useful gestures built into Windows® 7 require two finger touch. To disable these behaviors, simply uncheck the box “Enable multi- touch gestures and inking”. Panning with (or without) Inertia Panning is similar to scrolling up/down or left/right on a page... -
Page 85: Two Finger Tap
and then rotate one finger around the other in either a clockwise or counter clockwise direction. Two Finger Tap Tap two fingers on the screen around where your intended target is the midpoint in order to zoom into that area to perform actions on small objects such as tapping on a text link in a web page. -
Page 86: Connecting To The Internet
To accept the changes you have made, simply close the control panel. If at any point you wish to return the buttons to their default states, tap on the link in the lower right corner of the interface "Reset all buttons to default". Connecting to the Internet Your Sahara Slate PC allows you to connect to the Internet in different ways. - Page 87 5. Tap on the “Local Area Connection” link and then tap on the “Properties” button from the “Local Area Connection Proper- ties” window that appears. If Windows asks you for permission to continue, tap on the “Continue” button. 6. On the Networking Tab, you’ll see a list box called “This connection uses the following items:”...
-
Page 88: Using Both Dhcp And A Static Ip Address
If DHCP is used on your network, tap “Obtain an IP address automatically” and “Obtain DNS server address automatically”. Otherwise, enter the correct IP and DNS server addresses by selecting the two options that begin with “Use the following…” If you are unsure of which option to use, contact your network adminis- trator or your Internet... -
Page 89: Using A Wireless Lan
2. Tap on the “Alternate Con- figuration” tab and select the “User configured” option. Enter the correct values in the appropriate fields. If you are unsure of which values or options to use, contact your network administrator or the technical support line of your ISP. -
Page 90: Bluetooth® Wireless Connectivity
4. If the wireless network you are attempting to connect to is security- enabled, you will see a dialog box requesting a network security key. Enter the proper key and then tap “OK”. Most failures to connect to a wireless network occur because the network security key has been improperly entered. - Page 91 3. Make sure your Bluetooth device is powered on and is in Discoverable mode. If you do not know how to do this, refer to your Bluetooth device's manual for more information. 4. Windows will search out all Bluetooth devices within range that are set to be discoverable.
-
Page 92: Configuring Bluetooth Settings
6. Windows should complete the pairing process and inform you that your device is now paired and that Windows is installing any required drivers. Your device should be available for use as soon as the drivers are installed. Tap on "Close" to exit the process. To connect additional devices, simply repeat the "Add a Device"... -
Page 93: Intel® Graphics And Media Control Panel
tablet to be discoverable, assigns COM ports for Bluetooth devices that require them, sets up shares for transferring files to and from Blue- tooth connected devices, enables the use of DRM audio devices, sets up audio switching for video conferencing with Bluetooth connected headsets, and more. -
Page 94: Setting Up Your Display(S) Using Wizard Mode
The first time you launch the control panel, you will be presented with a screen asking you to choose the mode you wish to use. Typically, Basic Mode or Wizard Mode are sufficient to accomplish most tasks. If you do not wish to see this screen again, tap on the “Do not show this dialog again.”... - Page 95 2. Choose which display should be the primary display (where the Windows taskbar and desktop icons will reside and where programs will initially open). If you do not have an external monitor attached to the system, you will only be able to select “Built-in Display”.
-
Page 96: Setting Up Your Display(S) Manually
If you do not see a resolution or refresh setting you would like to use, it is probably because your display device is not communicating that option to the Tablet PC and therefore may not be a compatible option via the DisplayPort or display converter you are using. -
Page 97: Enabling Multiple Monitor Support
General Settings allows you to change your display’s properties. Use the Display drop down to choose the display that you wish to change settings. Also, you must be in Advanced Mode to see the Custom Resolutions option under the Display Section. NOTE: If you are connected to a display that requires a Dual-Link DVI connection and does not feature an internal scaler, you should not choose to create a custom resolution that is unsupported by your... -
Page 98: Enhancing The Display
After you have chosen your operating mode, select which moni- tor will be the Primary display and which will be the Secondary display. The Primary display will control the resolution of the Windows desktop, house the Windows Taskbar and be the only monitor active when operating in “Single Display”... -
Page 99: 3D Performance
to display may cause damage to the Tablet PC’s graphics accel- erator and is therefore not supported. IMPORTANT: If the settings on this panel are not familiar to you, we recommend not creating a custom setting to prevent damaging the graphics chipset or your display. -
Page 100: System And Display Information
System and Display Information Options and Support g System Information will give you an overview of many important settings related to your system’s CPU, memory, graphics accelerator, Windows and DirectX ver- sions, built-in display and attached display. Control Panel Preferences Options and Support g Preferences allows you to control how and where the Intel®... -
Page 101: Adjusting Audio Playback
Adjusting Audio Playback The Speakers tab is where you can control the way your Sahara Slate PC plays back audio. Here you can adjust the system volume level, set the default playback device (internal speaker or headphones/external speakers), specify the type of speakers attached to the system, set environmental presets for sound effects, and specify the audio playback format. -
Page 102: Speaker Configuration
Speaker Configuration This sub-tab allows you to choose what type of speaker configu- ration is attached to your system. If you do not have any at- tached audio devices, your configuration will default to “Stereo” for the built-in speakers and be grayed out. Press the play button next to the drop down menu to hear a speaker test play. -
Page 103: Default Audio Format
bathroom, Auditorium, Concert Hall, etc.). Select an Environment from the drop down menu to hear how it affects playback. To constrain certain sounds from playing back too loudly or too softly compared to the average volume level of the currently playing audio content, put a check in the box entitled Loudness Equalization. -
Page 104: Adjusting Audio Recording
Adjusting Audio Recording The Microphone Tab contains controls to adjust the quality of audio recorded by the system via either the built-in digital micro- phone array, or an externally connected sound source. Recording Volume Level The Recording Volume section at the top of the Microphone tab has controls for stereo balance (left and right), input volume levels of the selected recording device, muting and microphone boost. -
Page 105: Default Format
To launch Camera, double tap on its icon on the desktop, or if you do not have a desktop shortcut for Camera, choose it from the Start Menu in the "All Programs > TabletKiosk" submenu. Chapter 04: Using Your Sahara Slate PC with Microsoft® Windows® 7... -
Page 106: Main Interface Controls (Right)
When the application starts, you'll be presented with the main application interface. Main Interface Controls (right) Tap this icon to swap the active camera between the front and rear facing camera. Enable/Disable the LED flash for the rear camera. Flash On Flash Off Switch between still photo and video recording modes. -
Page 107: Overlay Controls (Left)
Information icons only. Information icons and composition grid. Composition grid only. Take a photograph. Start Recording video. The red light will illuminate and an on-screen "REC" overlay will appear in the lower left corner while recording video. Tap the button again to stop recording. -
Page 108: Settings Panel
Self Timer selector. Displays timer selection. Tap to cycle through the options. (Photo mode only) Two (2) second delay Ten (10) second delay Video format (resolution) selector. Displays current video format. Tap to cycle through the options. 720p (1280x720) <-- supported on rear facing camera only. 480p (640x480) 240p (320x240) Settings Panel... -
Page 109: Windows Mobility Center
Tapping on a field in the panel will cycle through the avail options or open a dialog box to choose where to save a photo or video file. The change takes effect immediately after exiting the panel. Tap on the close icon in the upper right hand corner of the panel to close it. -
Page 111: Securing Your Sahara Slate Pc
Chapter 05 Securing Your Sahara Slate PC Your Sahara Slate PC is equipped with a security enabled BIOS, a Trust Platform Module (TPM) that is TCG v1.2 compliant, and a biometric fingerprint reader that can help you better secure your system and your data from intruders. -
Page 112: Initializing Tpm
USB mouse or keyboard. 1. Power on or restart your Sahara Slate PC. 2. As soon as the TabletKiosk logo appears on the screen press the Screen Rotation (L2) button on the left side of the system. -
Page 113: Taking Ownership Of The Tpm
Aptio Setup Utility - Copyright (c) 2012 American Megatrends, Inc. TPM is OFF Main Advanced Boot Security Save & Exit ◄ TPM Configuration Enables or Disables BIOS Security Device Support [Disabled] support for security device. O.S. will not show Security Device. -
Page 114: Memory Stick
5. A window will appear asking you to create a TPM password. Tap on Automatically to have Windows create a secure password for you. 6. A new window will appear prompting you to save your TPM ownership password, which is displayed for you along with an option to Save the... - Page 115 Once you have saved your password, tap on the “Initial- ize” button. You will see a message telling you that the TPM is initializing, and after a moment you should see a window When you see this window it means your TPM is initialized stating the and ready to begin helping to protect your data.
-
Page 116: Creating A Windows Password
To learn more about TPM command blocking and using group policies to configure command blocking, tap on the links at the bottom of the TPM Management Console entitled How do I block TPM commands and How do I configure group policy related to TPM command blocking, or ask your System Administrator. - Page 117 3. The Create Your Password window should open and the cur- sor will be in a field labeled “New Password”. Enter your new password. Keep in mind that passwords are case sensitive. TIP: Try and create a password that mixes letters, numbers and at least one special character (! _ $, etc.) to make it more difficult for someone attempting to access your system to guess it.
-
Page 118: Getting Started With Bioexcess
After creating your password, if you try and log into Windows but the on-screen keyboard doesn’t appear, tap on the keyboard button located in the lower left This button toggles corner of the login screen. the visibility of the on-screen keyboard Getting Started with BioExcess Now that you have initialized the TPM and created a Windows password, you can begin using your own security management... -
Page 119: Enrollment Tutorial
screen that gives you an overview of the initialization process. When you are ready to begin, tap the “Next” button. Enrollment Tutorial Before you begin actually enrolling your fingerprints, you are given the opportunity to practice swiping your finger across the scanner in order to get a feel for how quickly and how... -
Page 120: Fingerprint Enrollment
Fingerprint Enrollment Now you need to pick at least one finger to register with BioEx- cess. For added safety, you should register at least two fingers. Preferably one from each hand. Tap on the box above finger you wish to register first and then tap on the “Next”... -
Page 121: Secure Drive Setup And Initialization Completion
Secure Drive Setup and Initialization Completion You will see a screen that says your Secure Drive is being config- ured. After a few moments, you will be presented with the Initialization Successful screen that says you have successfully initial- ized the BioExcess program. -
Page 122: Fingerprint Management
System Tray and the tap on “Control Center...” from the pop-up menu that appears. An authentication window will appear. Swipe a registered finger across the fingerprint reader on the front of the Sahara Slate PC to proceed. NOTE: If you prefer, you can type in your Windows logon password instead by choosing “Enter password”... -
Page 123: Data Protection
Data Protection Here you can encrypt or de- crypt individual files as well as access your invisible Secure Drive. Once accessed, your Secure Drive will appear in the Windows Explorer and application save/open dialogue boxes just like any other attached drive. Until accessed via this panel, it remains invisible and unaccessible. -
Page 124: Protecting Your Files Using Bitlocker Drive Encryption
Protecting Your Files Using BitLocker Drive Encryption BitLocker is a feature available only in Microsoft Windows 7 Ulti- mate edition (and Enterprise edition) that protects the files and folders on your data storage drive. You can also use BitLocker To Go to help protect all files stored on removable data drives such as external hard drives and USB flash drives. -
Page 125: Turning Off Bitlocker And Decrypting Your Drive
2. From the BitLocker Drive Encryption control panel, tap on the Turn on BitLocker link next to the drive you want to encrypt to start the BitLocker Setup Wizard. 3. Follow the instructions in the wizard, making sure to create your BitLocker recovery key. -
Page 127: Upgrading Your Sahara Slate Pc
(and solid state drives) seemingly always just around the corner. This chapter covers the procedures for upgrading, and/or replac- ing, your computer’s memory (RAM) and storage capacity (hard disk drive or solid state drive), as well as using the TabletKiosk Modular Expansion System. Before you Begin ANY Upgrade Procedure Before attempting to add or remove any internal components within the Sahara Slate PC—with the exception of an expansion... -
Page 128: Upgrading Memory (Ram)
6. You should only attempt upgrades and/or component replacements on a solid, clean, flat surface. CAUTION: Damage resulting from the servicing of your computer that is not authorized by TabletKiosk is not covered by your computer’s standard or optional extended warranty. Upgrading Memory (RAM) You can increase your system’s memory by installing additional... - Page 129 Refer to the following instructions and illustrations for informa- tion on how to upgrade your computer’s memory modules. Be sure to follow the procedures in the previous section, Before you Begin ANY Upgrade Procedure. 1. Turn off your Tablet PC, turn it over and place it face down on a solid, flat surface.
- Page 130 4. If you are adding only one module and there is an empty slot avail- able, proceed to step 6. Otherwise, using your fingers or a small screw- driver, pull the two metal restraining clips on both sides of the RAM module outward and away from the module.
-
Page 131: Upgrading The Data Storage Drive (Hdd Or Ssd)
seated module should click right into place when pressed down. Many memory errors or boot up failures after a RAM upgrade are due to an improperly seated module. Align the module at an angle with the Once inserted, press down on the module SODIMM slot and insert it. - Page 132 Your Sahara Slate PC comes with a data storage drive that is easy to replace. Before installing a new HDD or SSD, be sure to back up all of the files on your existing drive. You will also need a bootable Windows installation disk or a full disk backup of your existing drive in order to restore your system.
- Page 133 4. Take hold of the plastic drive release strip and gently pull the drive out of its compartment as shown in the illustration. You might have to gently move the drive slightly side-to-side at first to work it out of the SATA and power ports.
-
Page 134: Using The Tabletkiosk Modular Expansion System
P.O.S. module features a Magtek Magnetic Stripe Reader for credit card and ID card data capture. Based upon Universal Serial Bus (USB) technology, TabletKiosk expansion system modules are hot swappable. This means you can add or remove modules without having to shut down or restart the system. -
Page 135: Using The Sahara Slate Pc With The Vesa Mounting Plate Or Docking Cradle
Using the Sahara Slate PC with the VESA Mounting Plate or Docking Cradle In order to enable convenient desktop functionality or kiosk style wall/cabinet mounting, TabletKiosk created the VESA Chapter 06: Upgrading Your Sahara Slate PC... -
Page 136: Inserting The Sahara Slate Pc Into The Dock/Mounting Plate
Mounting Plate and Docking Cradle. Both work with all models of the Sahara Slate PC i500 series and previous generation i400 series of Tablet PCs. The difference between the two is that the Docking Cradle includes the 3-Position Kickstand and an AC adapter and power cord. -
Page 137: Removing The Sahara Slate Pc From The Dock/Mounting Plate
Removing the Sahara Slate PC from the Dock/Mounting Plate To remove the Sahara Slate PC, loosen the thumbscrews or release the Quick-Release Latch by moving the slider switch until the latch disengages. Pull the top of the tablet straight forward until it is clear of the docking plug and then lift the system out of the L-channel bracket. -
Page 139: Troubleshooting
Troubleshooting This chapter describes how to solve some of the common prob- lems you may encounter while using your Sahara Slate PC i500 as well as how to recover your system. If after reading this section, you are still unable to solve a problem, please check our online resources at www.tabletkiosk.com... -
Page 140: Battery Problems/Solutions
The battery pack is Replace the battery pack. Use only bat- nearing the end of teries recommended for use with the its life. Sahara Slate PC i500. Battery life icon in Battery Packs require Calibrate the battery pack as specified System Tray ( calibration. -
Page 141: Internet Problems/Solutions
Internet Problems/Solutions Problem Possible Cause Solution Unable to connect to Account for Internet Contact your ISP for assistance. the Internet. Service Provider (ISP) is not properly configured. No valid network Check the network status icon in the connection detected. System Tray ( ) to make sure you are connected to a valid network. -
Page 142: Networking Problems/Solutions
Replace the battery packs. Use only bat- connected to an may be defective. teries recommended for use with the external power Sahara Slate PC i500. source but does not turn on even though the battery packs are connected. The Power/Standby... -
Page 143: Input And Screen Display Problems/Solutions
Touch screen This can happen over time. Check the calibrated (Resistive controller drivers are TabletKiosk website to make sure you touch screen). corrupted. have the newest available drivers, then uninstall the current drivers and install the new drivers. -
Page 144: Upgrade Problems/Solutions
AHCI. See Appendix A: BIOS Setup. ognize the drive. Firewire device is not Sahara Slate PC i535/ Second generation Sahara Slate PC i500 recognized when i575 do not have Tablet PCs have no support for Firewire. plugged into VESA... -
Page 145: Usb Problems/Solutions
Before you call your dealer, please have the following information available: 1. Which configuration of the Sahara Slate PC i500 do you have? 2. What is the serial number? 3. What peripheral devices are you using? 4. -
Page 146: Recovering Your System
Recovering Your System While Windows® 7 is a very stable and robust operating system, there may be times where you’ll encounter errors that may prevent you from booting into Windows normally. Your Sahara Slate PC has a hidden partition on the data storage drive that contains the files you’ll need to restore your system. -
Page 147: Launching System Restore At System Start Up
3. Select “Reinstall Win- dows”. You will be given the opportunity to back up your files before you proceed. If you have an external hard drive, USB drive or DVD burner, we strongly recommend backing up if you can not afford to lose your data. - Page 148 NOTE: The easiest way to enter the Advanced Boot Menu is by repeatedly pressing the [F8] key as soon as you see the TabletKiosk logo screen and not stopping until the Advanced Boot Options menu screen appears. 1. When the Advanced Boot Options menu appears, select “Repair...
-
Page 149: What To Do After A Successful System Reinstall
Click on the last option “Reinstall Windows” to restore your system. 5. You will then be given one last chance to cancel by clicking the “No” button when asked if are you sure you want to reinstall Windows. If you are sure, click the “Yes” button and the restore procedure will begin. -
Page 151: Bios Set-Up
Entering the BIOS To enter the BIOS, press the Screen Rotation button on the left side of the Tablet PC or press the [Delete] key on an attached keyboard as soon as the TabletKiosk logo appears on screen. Appendix A: BIOS Set-up... -
Page 152: Bios Key Mapping Legend
BIOS Key Mapping Legend Specific function keys on the Sahara Slate PC i500 have alternate functionality when in DOS mode that can be used to navigate the BIOS without a keyboard or mouse attached to the system. Additionally, you can use your fingers or the stylus pen to navi- gate the BIOS. -
Page 153: Main Menu
Main Menu Aptio Setup Utility - Copyright (c) 2012 American Megatrends, Inc. Main Advanced Boot Security Save & Exit BIOS Information Set the Date. Use Tab to BIOS Version T12IT RC.01 switch between Data elements. EC Version 0.00.30 Build Date and Time 04/22/2011 17:35:24 SYSTEM Information... -
Page 154: Advanced Menu
Advanced Menu Aptio Setup Utility - Copyright (c) 2012 American Megatrends, Inc. Main Advanced Boot Security Save & Exit Advanced Setting Select the keyboard NumLock state Bootup NumLock State [Off] SATA Mode Selection [AHCI] ► Enter Mebx ► Enable vPro ►... -
Page 155: Battery Calibration
Battery Calibration Starts battery calibration test to check battery capacity and charge/discharge levels for more accurate battery status. Enable/Disable CCD Enable or disable the cameras. One, none or both cameras can be enabled or disabled. Enable/Disable G sensor Enable or disable the auto rotation of the LCD display. When enabled, the screen rotation button (L2) will lock or unlock the automatic screen rotation. -
Page 156: Boot Menu
Boot Menu Aptio Setup Utility - Copyright (c) 2012 American Megatrends, Inc. Main Advanced Boot Security Save & Exit Boot Configuration This option controls if CSM will be launched. Launch CSM [Always] Boot Option Priorities Boot Option #1 [P1: WDC WD5000BPVT-...] Boot Option #2 [IBA GE Slot 00C8 v1404] →←: Select Screen... -
Page 157: Security
Security Aptio Setup Utility - Copyright (c) 2012 American Megatrends, Inc. Main Advanced Boot Security Save & Exit Password Description Set Administrator Password If ONLY the Administrator’s password is set, then this only limits access to Setup and is only asked for when entering Setup If ONLY the User’s password is set, then this is a power on password and must be entered to boot or enter Setup. -
Page 158: Save & Exit
Save & Exit Aptio Setup Utility - Copyright (c) 2012 American Megatrends, Inc. Main Advanced Boot Security Save & Exit Save Changes and Reset Reset the system after saving Discard Changes and Reset the changes. Restore Defaults Save as User Defaults Restore User Defaults Boot Override P1: WDC WD5000BPVT-ooHX2T3... -
Page 159: Boot Override
Boot Override Selecting a device listed under this section will override the Boot #1 option and restart the system and boot one time from the selected device. This is useful for booting from a USB key or optical disc for troubleshooting purposes. Appendix A: BIOS Set-up... -
Page 161: Specifications
Appendix B Specifications Processors Intel® Core™ i7-3517UE (1.7GHz/2.8GHz max, 17W max TDP) ™ Two (2) cores, four (4) threads ™ 32KB instruction and 32KB data L1 cache per core ™ 256KB shared instruction/data L2 cache per core ™ 4MB Intel® Smart Cache (instruction/data L3) ™... -
Page 162: Intel® Celeron® 1047Ue (1.4Ghz, 17W Max Tdp)
™ Advanced Encryption Standard New Instructions (AES-NI) ™ Intel® Advanced Vector Extension (Intel® AVX) ™ Intel® Fast Memory Access / Intel® Flex Memory Access ™ Intel® VT-x with Extended Page Tables (EPT) ™ Intel® Identity Protection Technology Intel® Celeron® 1047UE (1.4GHz, 17W max TDP) ™... -
Page 163: Power Management
™ Intel® Flexible Display Interface ™ Intel® Rapid Storage Technology ™ Intel® Smart Connect Technology ™ Intel® Rapid Start Technology ™ Intel® I/O Virtualization Technology (Intel® VT-d) ™ DMI up to 20 Gb/s each direction, full duplex ™ PCI Express 3.0 interface @ up to 8.0 GT/s transfer speeds ™... -
Page 164: Memory
™ Support for APM-based legacy power management ™ Two (2) Power management channels ™ Compatible and enhanced mode Memory ™ Two (2) 204-pin DDR3 SODIMM sockets, user accessible ™ Support for 1GB/2GB/4GB/8GB SODIMMs for each slot ™ Maximum RAM configuration of 16GB DDR3 ™... -
Page 165: Data Storage Drives
™ Charge Voltage: 12.6V ™ Maximum Charge Current: 1A ™ Operating Temperature: 0–45° C ™ Storage Temperature: -20–40° C ™ Over Charge Protection, Over Discharge Protection, Over Current and Output Short Protection, Over Thermal Protection Data Storage Drives ™ 2.5”, up to 9.5 mm, SATA III 600 MB/s ™... -
Page 166: Projective Capacitive Touch Screen
™ Coordinate Accuracy: ±0.4mm ™ Detectable Pen Tilt: up to 50.1° from vertical ™ Detectable Height: 4–14mm above sensor film ™ Position Report Rate: 133pps ™ Pressure Resolution: 256 levels @ full scale ™ Wacom® Stylus with side switch and eraser (no batteries required) Projective Capacitive Touch Screen ™... -
Page 167: Audio
Audio ™ High Definition Audio Codec (ALC272-VA4-GR) ™ Microsoft® WLP 3.10+ compliant ™ Two (2) stereo DACs support 16/20/24-bit PCM for dual independent playback (multiple streaming) ™ Two (2) stereo ADCs support 16/20/24-bit PCM for dual independent recording ™ Both DACs (output) and ADCs (input) support independent 32-bit 44.1/48/96/192kHz sample rates ™... -
Page 168: Gigabit Ethernet (Lan)
Gigabit Ethernet (LAN) ™ Intel® 82579 GbE PHY controller with built-in RJ45 port ™ 10/100/1000 Base-T IEEE 802.3 specification conformance ™ Supports up to 9KB Jumbo Frames (full duplex) ™ IEEE 802.3u auto-negotiation conformance ™ MDC/MDIO management interface ™ MACSec hardware ready (802.1AE), Intel® vPro, Intel® Viiv and Intel®... -
Page 169: Bluetooth Wireless
Bluetooth Wireless ™ Integrated into Intel® Centrino® Advanced-N 6235 ™ RF Power ON/OFF switch ™ Dual Mode Bluetooth 2.1, 2.1+EDR, 3.0, 3.0+HS, 4.0 (BLE) ™ Encryption and authentication ensure safe, secure com- munications Cameras 2.0 MegaPixel Front Facing Camera ™ Still image capture up to 1600x1200 ™... -
Page 170: Tpm Security
™ USB 2.0 Video Class Compliant, Microsoft WHQL certified ™ Color Filter Array: RGB Bayer Pattern ™ Imaging Sensor : ¼” CMOS, OV5640 ™ Pixel size: 1.4um x 1.4um ™ F-stop: 2.8 ±5% ™ Field of View (diagonal): 70° ™ Focus Range: 100mm ~ ∞ ™... -
Page 171: External I/O Ports
™ Modem Control Circuitry ™ DC-In ™ Docking Connector (Optional Sahara Slate PC i500 Docking Cradle adds 4x USB 2.0 ports, 1x 15-pin D-Sub connector (VGA), 1x RJ45 jack for 10/100 Mbps Ethernet LAN, 1x DC-In with power pass-thru) ™ TabletKiosk® Feature Expansion Module Port... -
Page 172: Weight
Weight ™ 1.34 kg (2.95 lbs.) with one standard battery installed ™ 1.49 kg (3.3 lbs.) with two standard batteries installed Measurements ™ 300 mm x 220 mm x 24 mm (11.81 in x 8.66 in x .95 in) Case Color ™... -
Page 173: Control Switches (Top)
Control Switches (Top) ™ System Power Switch ™ Wireless Networking Transmitter On/Off ™ Bluetooth® Transmitter On/Off AC Adapter ™ Input voltage (nominal): 100 ~ 240 Vac ™ Input voltage (maximum): 90 ~ 265 Vac ™ Input Frequency: 47 ~ 63Hz ™... - Page 175 Tablet PCs designed for business. Built to last. 310.782.1201 tel 310.782.1205 fax www.tabletkiosk.com UG.i500.rev.02.12.14...
Need help?
Do you have a question about the Sahara Slate PC i500 and is the answer not in the manual?
Questions and answers