Table of Contents
Advertisement
Advertisement
Table of Contents

Subscribe to Our Youtube Channel
Related Manuals for Teac HDR2700T


Summary of Contents for Teac HDR2700T
- Page 3 Keep your purchase receipt to enable you to proceed quickly in the event of a Warranty Service. If you require Warranty Service, please contact the TEAC Customer Support Hotline at 1300 553 315 for assistance. Please ensure that you have the model number, serial number and purchase receipt ready when you call.
- Page 4 Authorised Service Centre for repair. In this event, proof of purchase is required to support a warranty claim. After the repair, the product will be available for collection by or return to the purchaser at a fee upon request. TEAC in- home service can be made available at a fee upon request.
- Page 5 User’s Manual Thank you for purchasing HDR2700T High Definition Digital video recorder. This manual will help you to install, use and maintain the receiver. Please read this manual carefully before operating your unit and keep it for future reference. Warning & Note In this manual, pay special attention to the following marks that indicate hazardous situations.
-
Page 6: Safety Instruction
User’s Manual Safety Instruction Read following items carefully before operating this unit. Installation v Place the unit on a firm and level surface. v The mains socket should be near the equipment. Do not run an extension lead to the unit. v Install the unit in a place with: good ventilation (leave no less than 10cm around this unit) no heat source (burning candle, radiator, heater, fireplace, amplifier, etc) - Page 7 User’s Manual environmental protection. Others v The all-pole power switch of this receiver is on rear panel. Switch it to “ I”, related equipment will connect with power supply. Switch it to “o”, related equipment will disconnect with power supply completely. v Only use accessories specified by the manufacturer, as other unsupported accessories may cause damage to the unit.
-
Page 8: Table Of Contents
User’s Manual Contents 1. Before Using the unit.......................3 1.1 Main Feature........................3 1.2 Accessories........................3 1.3 Front Panel ........................4 1.4 Remote Control Unit (RCU) .....................5 1.5 Rear Panel ........................8 2. Setup............................9 2.1 Connecting up your unit ....................9 2.2 Inserting batteries in RCU ....................11 2.3 Power on .........................12 2.4 Power on and check picture...................12 2.5 Active Standby &... - Page 9 User’s Manual 9.1 Common Set ........................30 9.2 Modify Password ......................31 9.3 PG (parental) Lock......................31 9.4 Resume Default......................31 10. Software Upgrade ........................32 11. Information..........................32 11.1 Channel Information .....................32 11.2 System Information.......................32 12. Appendix ..........................33 12.1 Trouble Shooting ......................33 12.2 Specification........................34 12.3 Acronym ........................35...
-
Page 10: Before Using The Unit
User’s Manual 1. Before Using the unit 1.1 Main Features PVR functions and twin tuner function Ø Time shift supported Ø Upgradeable up to 1TB HDD Ø Recording time: up to 100 hours (depend on HDD) Ø Variable forward play speed: 2, 4, 8, 16, 32 1/2, 1/4, 1/8 Ø... -
Page 11: Front Panel
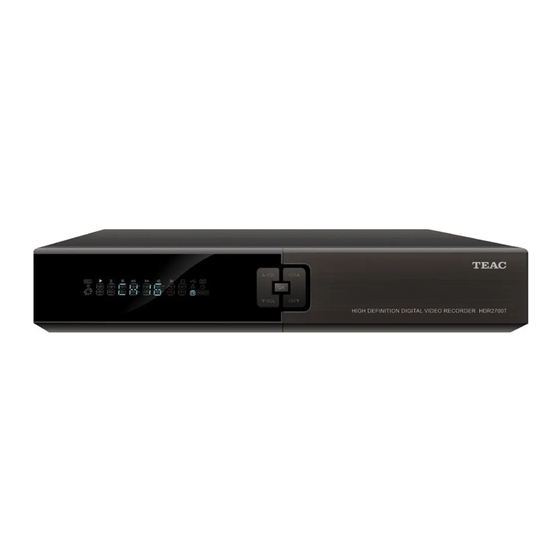
User’s Manual RCA cable (1) RF male to RF female loop cable 1.3 Front Panel Name Function 1. DISPLAY Display status Decrease or increase the volume , change values for menu options or 2/6. VOL-/+ move cursor left/right 3/7. CH / Switch to next or previous channel, or move cursor down/up 4. -
Page 12: Remote Control Unit (Rcu)
User’s Manual 1.4 Remote Control Unit (RCU) Learning keys 1. TV POWER, , TV/AV, SET These keys (except SET key) can be program med to learn the corresponding TV function. After that, you can control basic TV functions using the unit’s RCU. Refer to page 7 Learning Key for more details. - Page 13 User’s Manual 22. SWAP: Swap focus between main screen and PIP window 34. PIP: Display PIP window. The keys of PVR 19. LIST: Display recorded file list (see 5.5 Pla y- back File). 21. PVR: Display shortcut key window (see 5.8 Shortcut Key of PVR).
- Page 14 User’s Manual Learning Key The HDR2700T RCU has some learning keys at the upper left side. The keys (except SET key) can be used to memorise Infrared key codes from a TV RCU. After memorising, the HDR2700T RCU learning keys can be used to operate the TV.
-
Page 15: Rear Panel
User’s Manual 1.5 Rear Panel Name Function 1. LOOP OUT1 Terrestrial broadcasting signal output socket through the first tuner. Terrestrial broadcasting signal output socket through the second 2. LOOP OUT2 tuner. Component video output socket, output YPbPr video signal to 3. -
Page 16: Setup
2.1 Connecting up your unit There are several ways to connect up your unit as following. If you have any problem with your setup or need help, contact the TEAC Customer Support Hotline 1300 553 315. 2.1.1 Connecting the antenna v Connect the antenna cable to ANT IN 1 connector on the rear panel. - Page 17 User’s Manual 2. To use YPbPr (component video) and audio connectors 1. Plug one end of the component video cable into the Y (green), Pb (blue) and Pr (red) sock- ets on the unit, and plug the other ends into the matching sockets on your TV. 2.
-
Page 18: Inserting Batteries In Rcu
User’s Manual 4. To use S/P DIF connection If you want to enjoy Dolby digital audio, your TV or audio system must be able to decode Dolby digital audio. Plug one end of the optical S/P DIF cable into the S/P DIF socket on the unit, and plug the other end into the matching socket on your audio system. -
Page 19: Power On
User’s Manual Note: Batteries, including those which contain no heavy metals, may not be disposed of with household waste. Please dispose of used batteries in an environmentally sound manner. Find out about the legal regulations which apply in your area. 2.3 Power on 1. -
Page 20: Basic Operation
User’s Manual In Passive Standby Mode: The unit will cut all power and reduce consumption to minimum. Antenna LOOP OUT connector will not output antenna signal. The current time will not be showed on the front panel VFD display. 3. Basic Operation This part describes operations such as channel switch, volume control and other basic features when playing programs. -
Page 21: Channel List
User’s Manual 1. Detailed information of current program 2. Channel number and name 3. Current and next program information 4. Favor icon 5. Current time 6. Standard/high definition mode icon 7. Decoding standard 8. Current audio mode 3.4 Channel List Channel list is available for you to browse channels easily and quickly. -
Page 22: Picture In Picture (Pip)
User’s Manual Note: Subject to availability from the broadcaster. 3.8 Picture in Picture (PIP) Watch two channels simultaneously on one screen. The audio in main screen will be used. 1. Activate PIP Function Select Main Menu > Setting > General Settings and press OK key to enter. 1. -
Page 23: View Epg Information
User’s Manual 4.1 View EPG Information EPG information is displayed as follows: 1. Channel list 2. Preview window 3. Current time 4. Date table 5. Program list In channel list: Green key: Toggles between a list of available TV channels, radio channels or both. keys: Select channel OK key:... -
Page 24: View Detailed Program Information
User’s Manual 4.3 View Detailed Program Information 1. Press arrow keys to select a future program. 2. Press OK key to pop up a drop-down list. 3. Select “Detail” and press OK key to di splay content introduce window. 4. Press EXIT key to exit. Note: You can select a program and press INFO key to view detailed program information. -
Page 25: Set Recording Parameter
User’s Manual You can also select Main Menu ? PVR ? Storage Device and press OK key to enter. Select a device and press OK key to confirm. Note: If you set “USB device” as storage device, time shift is unavailable. 5.2 Set Recording Parameter Note: If you do not set recording parameters, system will record program according to default settings. - Page 26 User’s Manual 1. Start Recording When watching a program, press RECORD key to start recording and a symbol is displayed in top left corner of screen. Once a recording is started, the recording file is displayed on the recorded list even though it is not finished yet.
-
Page 27: Schedule Recording
User’s Manual 5.4 Schedule Recording You can set future programs to be r ecorded at a specific time, and the unit will start recording automatically. In addition, you can modify schedules and delete unwanted schedules. Note: The unit has 2 standby modes called “Passive”... -
Page 28: Playback File
User’s Manual 3. Delete Schedule 1. Press keys to select a schedule. 2. Press OK key to display a drop-down list. 3. Select “Delete” and press OK key to mark the schedule with “ ”. If you want to cancel this set- ting, press OK key again to display the drop-down list and select “Cancel del”. -
Page 29: Add Bookmark
User’s Manual 3. Playback Process Bar If you press INFO key, playback process bar is displayed. It displays cur rent file inform ation, playback process and operation help information. 1. File name 2. Watching point time (hh:mm:ss)/ 3. Playback process 4. -
Page 30: Edit Recorded File
User’s Manual 4. Press Green key, then a small triangle appears on the progress bar. 5. Move to the end of the scene. 6. Press Yellow key, the cut section is marked in bright green. 7. Press OK key and then you get asked for confirmation. If you select “OK”, the marked part is cut. - Page 31 User’s Manual In addition, you can manage groups by creating, deleting and renaming in group edit window. v Create group Press Green key to pop up an on-screen key- board. Refer to 5.6.3 Rename Recorded File for detailed operations. v Delete group 1.
-
Page 32: Time Shift
User’s Manual Note: Password is required to view locked file, refer to 9.2 Modify Password. 5. Copy File You can copy files between connected storage devices. 1. Select a file. 2. Press OK key to pop up a drop-down list. 3. - Page 33 User’s Manual warning box for confirmation. 3. Select “OK” and press OK key to confirm or select “Cancel” and press OK key to cancel the operation. You can also select Main Menu ? Setting ? Storage Device and press OK key to enter. The icon in the bottom left corner of window displays used and free space of the selected device.
-
Page 34: Multimedia
User’s Manual 6. Multimedia You can view photos and listen to music in MP3 format from a USB device (su ch as memory stick). Notes: • Make sure that your USB device contains MP3 and JPEG files before inserting it into the unit. -
Page 35: Search Type
User’s Manual 1. Add Frequency Press OK key to pop up a drop -down list. Select “Add” and press OK key to pop up add Mux window, in which you can add a frequency by perfor ming the following steps: 1. -
Page 36: Channel Edit
User’s Manual 2. Auto Search For beginners, auto search is the best choice. Select Main Menu ? Channel ? Auto Search and press OK key to enter. The system will search channels according to d efault parameters. Updated TV and Radio channels will be sorted automatically. Note: Do not interrupt the searching to avoid data loss. -
Page 37: Delete Channel
User’s Manual 8.4 Delete Channel Note: A deleted channel cannot be accessed unless you search for it again. 1. Press keys to select a channel. 2. Press key to pop up a drop-down list. 3. Highlight “Delete” and press OK key to mark this channel with “... -
Page 38: Modify Password
User’s Manual When setting the time offset from Greenwich Mean Time, make sure that the time offset does not include da ylight saving time. Menu Transparence: You can change the menu brightness by adjus ting the transparency level of the On-Screen Display (OSD). Press key to pop up a drop-down list. -
Page 39: Software Upgrade
User’s Manual 10. Software Upgrade Warning: Do not turn off the unit or unplug the USB device during software upgrade. The unit has stable and convenient software to use. However, once in a while new software may be released to improve the unit’... -
Page 40: Appendix
2. If you set USB device as your storage device, “time shift” is not available. Select internal hard disk as storage device as per 5.1 Set Storage Device. Note: If you cannot solve the problems after referring to this trouble shooting, please contact the TEAC Customer Care Centre, see back page for details. -
Page 41: Specification
User’s Manual 12.2 Specification Tuner Input Frequency 47 ~ 858MHz Loop out Frequency 47 ~ 858MHz Input Level -25 ~ +20dBmV Bandwidth 6M, 7M, 8M Input Impedance 75ohm Channel Decoding Standard DVB-T EN300 744 FEC Code Rate 1/2, 2/3, 3/4, 5/6, 7/8 Demodulation (QPSK,16 and 64 QAM) Video Decoding... -
Page 42: Acronym
User’s Manual Supported HDD Size Up to 1TB Size for SD recording 0.8 GB / hour Size for HD recording 2 GB / hour Recording format (External USB storage device) Music file type Picture file type JPEG 12.3 Acronym Digital Video Broadc asting Electronic Program Guide Free to Air Hard Disk Drive... - Page 43 TEAC CUSTOMER SUPPORT HOTLINE (TCS) 1300 553 315 Between Monday to Friday – AEST 8.30AM to 6PM...
Need help?
Do you have a question about the HDR2700T and is the answer not in the manual?
Questions and answers