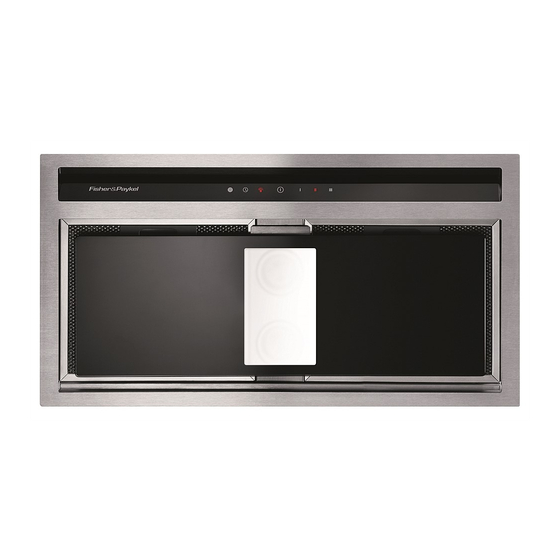
Fisher & Paykel HP60IDCHX2 Installation Instructions And User Manual
Power pack rangehood
Hide thumbs
Also See for HP60IDCHX2:
- Installation instructions & user manual (28 pages) ,
- Installation instructions manual (9 pages) ,
- Installation manual/user manual (24 pages)
Subscribe to Our Youtube Channel
Summary of Contents for Fisher & Paykel HP60IDCHX2
- Page 1 Installation instructions Power Pack rangehood User guide HP60IDCHX2, HP90IDCHX2, HP60ICSX2 & HP90ICSX2 models NZ AU...
-
Page 3: Table Of Contents
Contents Safety and warnings Installation instructions Using your rangehood Accessories and ratings Manufacturer’s Warranty Customer Care Important! SAVE THESE INSTRUCTIONS The models shown in this User Guide may not be available in all markets and are subject to change at any time. For current details about model and specification availability in your country, please visit our local website listed on the back cover or contact your local Fisher &... -
Page 4: Safety And Warnings
Safety and warnings WARNING! Electrical Shock Hazard All electrical work must be done in accordance with local and/or national electrical codes as applicable. For safety, this product must be earthed. If you are unfamiliar with methods of installing electrical wiring, employ the services of a qualified electrician. - Page 5 Safety and warnings If the supply cord of this equipment is damaged it must only be replaced by the manufacturer, its ■ ■ service agent or similarly qualified person in order to avoid a hazard. Always switch the power off prior to installation, servicing or cleaning the rangehood. ■...
-
Page 6: Installation Instructions
Installation instructions Contents of packaging Typical equipment required Screwdriver 1 × Rangehood body ■ ■ ■ ■ Tape measure 1 × 150 mm ducting adaptor ■ ■ ■ ■ Spirit level 1 × 120 mm ducting adaptor ■ ■ ■ ■ Duct tape (if ducting) 1 ×... - Page 7 Installation instructions Warning! Failure to install the screws or fixing device in accordance with these instructions may result in electrical hazards. Height of rangehood Please read the entire instructions BEFORE installing the rangehood. Not less than 650 mm Ascertain the desired installation height of the Gas Burner ■...
-
Page 8: Ducting Options
Installation instructions Ducting options The method of ducting should be carefully considered before installing the rangehood. The guide below recommends the ducting components to use for all common ducting configurations – through the top of the home (for the roof and soffit) and through the rear of the home. - Page 9 Installation instructions Fit the ducting adaptor to the rangehood using the short screws supplied. Provide an opening on the underside of the cupboard to suit models: 500 mm × 265 mm (HP60ID) and 800 mm × 265 mm (HP90ID) ■ ■ 455 mm ×...
- Page 10 Installation instructions depth Lift the rangehood and fit through the opening of the cupboard till the spring loaded brackets / clips hold the product in place. Secure ranghood while tightening the brackets / clips. 4 × on HP60 / 90ID models or 2 × on HP60 / 90IC models. Refit the filter and peripheral glass panel. Warning! Failure to install the screws or fixing device in accordance with these instructions may result in electrical hazards.
-
Page 11: Using Your Rangehood
Using your rangehood Controls Fig.5 Touch Control HP60 / 90ID models with Touch Panel Filter clean warning display / button. Activated regularly to alert of the need to clean filters. It can be deactivated with a single press Enable and disable extractor fan timer. Lighting on and off. -
Page 12: Light Bulb Replacement
Using your rangehood Filter maintenance To maintain efficiency, the filters should be removed regularly (approximately monthly), and washed using hot soapy water or the dishwasher. Note: some discolouration of the frame may occur if washed in the dishwasher. Rangehoods fitted with charcoal filters are designed to remove grease and odours from cooking vapours prior to the cleansed air re-entering the kitchen (when the rangehood is in recirculation mode). -
Page 13: Accessories And Ratings
Accessories and ratings Parts and accessories list Filter Charcoal HP60/90 792458 LED Bulb HP60/90IDCHX2 792393 Halogen Bulb HP60/90ICSX2 792461... -
Page 14: Manufacturer's Warranty
Manufacturer's Warranty You automatically receive a 2 year Manufacturer’s Warranty with the purchase of this Product covering parts and labour for servicing within the country of purchase. Fisher & Paykel undertakes to: Repair or, at its option, replace without cost to the owner either for material or labour any part of the Product, the serial number of which appears on the Product, which is found to be defective within TWO YEARS of the date of purchase. -
Page 15: Customer Care
Customer Care Before you call for service or assistance… Check the things you can do yourself. Refer to your User Guide and check: Your appliance is correctly installed You are familiar with its normal operation If after checking these points you still need assistance, please refer to your nearest Fisher & Paykel Authorised Repairer, or contact us through our local website listed on the back cover. - Page 16 www.fisherpaykel.co.nz www.fisherpaykel.com.au Copyright © Fisher & Paykel 2013. All rights reserved. The product specifications in this booklet apply to the specific products and models described at the date of issue. Under our policy of continuous product improvement, these specifications may change at any time. You should therefore check with your Dealer to ensure this booklet correctly describes the product currently available.


Need help?
Do you have a question about the HP60IDCHX2 and is the answer not in the manual?
Questions and answers