Table of Contents
Advertisement
Quick Links
Installation Instructions
Contents of Packaging
150mm ducting adapter wi
flap
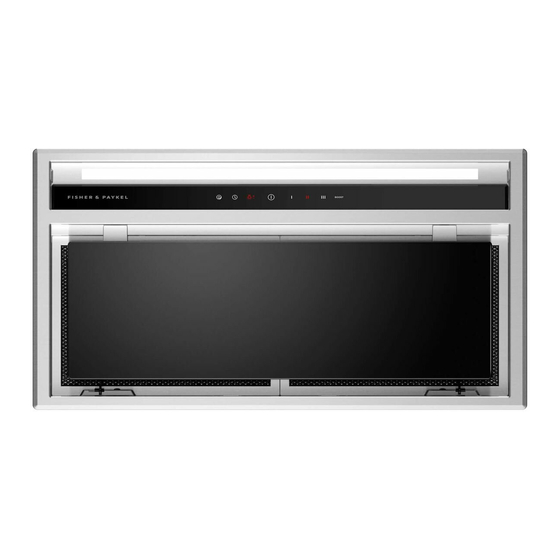
Cooker hood (1)
Installation Instructions User
Guide Manual (1)
13mm screw (2)
125mm ducting adapter (1)
https://producthelp.fisherpaykel.com/eu/Cook/Cooker_Hoods/Built-in_Integrated/HP90IHCB3/User_Guide_HP90IHCB3/03_in...
Updated: Sun, 02 Jan 2022 12:41:57 GMT
Powered by
1
Advertisement
Table of Contents

Subscribe to Our Youtube Channel
Related Manuals for Fisher & Paykel HP60


Summary of Contents for Fisher & Paykel HP60
- Page 1 Installation Instructions Contents of Packaging 150mm ducting adapter wi flap Cooker hood (1) Installation Instructions User Guide Manual (1) 13mm screw (2) 125mm ducting adapter (1) https://producthelp.fisherpaykel.com/eu/Cook/Cooker_Hoods/Built-in_Integrated/HP90IHCB3/User_Guide_HP90IHCB3/03_in… Updated: Sun, 02 Jan 2022 12:41:57 GMT Powered by...
-
Page 2: Product And Cabinetry Cutout Dimensions
Product and Cabinetry Cutout Dimensions Product Dimensions (mm) HP60 HP90 A. Overall height of product (395) (360) (with ducting adapter) B. Overall width of product C. Overall depth of product D. Thickness of flange https://producthelp.fisherpaykel.com/eu/Cook/Cooker_Hoods/Built-in_Integrated/HP90IHCB3/User_Guide_HP90IHCB3/03_in… Updated: Sun, 02 Jan 2022 12:41:57 GMT... - Page 3 Product Dimensions (mm) HP60 HP90 E. Width of chassis F. Depth of chassis G. Height of side of chassis H. Width of top surface of chassis I. Length of angled surface of chassis J. Distance from centre of ducting outlet to back of chassis K.
- Page 4 • Actual product dimensions may vary by ± 2mm. • Please read the entire instructions before installing the cooker hood. Height of Cooker Hood https://producthelp.fisherpaykel.com/eu/Cook/Cooker_Hoods/Built-in_Integrated/HP90IHCB3/User_Guide_HP90IHCB3/03_in… Updated: Sun, 02 Jan 2022 12:41:57 GMT Powered by...
-
Page 5: Venting Options
Minimum Clearances P. Height top of hob to base of product *Electric hob (for induction hob see note below) min. 600 – max. 750 Gas hob min. 650 – max. 750 Cooker hood installation height above the hob is the user’s preference. This cooker hood must be installed between the minimum and maximum height limits indicated in the table above. -
Page 6: Ducted Externally
Ducted Externally For an externally ducted installation it is recommended that 150mm diameter, rigid or semi-rigid ducting is used. This will require a 160mm (min) round hole in the ceiling or wall. Care should be taken to position the hole correctly. For optimal efficiency, use rigid or semi-rigid ducting for reduced noise and increased airflow. - Page 7 3. Provide an opening on the underside of the cupboard (see product and cabinetry cutout dimensions). 4. Remove the filters and face plate of the cooker hood. https://producthelp.fisherpaykel.com/eu/Cook/Cooker_Hoods/Built-in_Integrated/HP90IHCB3/User_Guide_HP90IHCB3/03_in… Updated: Sun, 02 Jan 2022 12:41:57 GMT Powered by...
- Page 8 5. Lift the cooker hood and fit through the opening of the cupboard till the spring loaded brackets/clips hold the product in place. 6. Secure cooker hood while tightening the 4 brackets/clips. https://producthelp.fisherpaykel.com/eu/Cook/Cooker_Hoods/Built-in_Integrated/HP90IHCB3/User_Guide_HP90IHCB3/03_in… Updated: Sun, 02 Jan 2022 12:41:57 GMT Powered by...
- Page 9 7. Connect duct and plug cooker hood in. https://producthelp.fisherpaykel.com/eu/Cook/Cooker_Hoods/Built-in_Integrated/HP90IHCB3/User_Guide_HP90IHCB3/03_in… Updated: Sun, 02 Jan 2022 12:41:57 GMT Powered by...
Need help?
Do you have a question about the HP60 and is the answer not in the manual?
Questions and answers