Troy-Bilt Bronco Operator's Manual
Rear tine tiller
Hide thumbs
Also See for Bronco:
- Operator's manual (88 pages) ,
- Operation manual (48 pages) ,
- Operator's manual (32 pages)
Table of Contents
Advertisement
Available languages
Available languages
Safe Operation Practices • Set-Up • Operation • Maintenance • Service • Troubleshooting • Warranty
O
'
M
peratOr
s
anual
Rear Tine Tiller — Bronco
WARNING
READ AND FOLLOW ALL SAFETY RULES AND INSTRUCTIONS IN THIS MANUAL
BEFORE ATTEMPTING TO OPERATE THIS MACHINE.
FAILURE TO COMPLY WITH THESE INSTRUCTIONS MAY RESULT IN PERSONAL INJURY.
TROY-BILT LLC, P.O. BOX 361131 CLEVELAND, OHIO 44136-0019
Printed In USA
Form No. 769-03616
(January 4, 2008)
Advertisement
Chapters
Table of Contents

Subscribe to Our Youtube Channel
Related Manuals for Troy-Bilt Bronco


Summary of Contents for Troy-Bilt Bronco
- Page 1 READ AND FOLLOW ALL SAFETY RULES AND INSTRUCTIONS IN THIS MANUAL BEFORE ATTEMPTING TO OPERATE THIS MACHINE. FAILURE TO COMPLY WITH THESE INSTRUCTIONS MAY RESULT IN PERSONAL INJURY. TROY-BILT LLC, P.O. BOX 361131 CLEVELAND, OHIO 44136-0019 Printed In USA Form No. 769-03616...
-
Page 2: Table Of Contents
Choose from the options below: ◊ Visit us on the web at www.troybilt.com ◊ Call a Customer Support Representative at (800) 828-5500 or (330) 558-7220 ◊ Write us at Troy-Bilt LLC • P.O. Box 361131 • Cleveland, OH • 44136-0019... -
Page 3: Important Safe Operation Practices
Important Safe Operation Practices WARNING! This symbol points out important safety instructions which, if not followed, could endanger the personal safety and/or property of yourself and others. Read and follow all instructions in this manual before attempting to operate this machine. Failure to comply with these instructions may result in personal injury. - Page 4 When practical, remove gas-powered equipment After striking a foreign object, stop the engine, disconnect from the truck or trailer and refuel it on the ground. the spark plug wire and ground against the engine. If this is not possible, then refuel such equipment on Thoroughly inspect the machine for any damage.
- Page 5 Average Useful Life If the fuel tank has to be drained, do this outdoors. Observe proper disposal laws and regulations for gas, oil, According to the Consumer Products Safety Commission etc. to protect the environment. (CPSC) and the U.S. Environmental Protection Agency (EPA), Notice Regarding Emissions this product has an Average Useful Life of seven (7) years, or 130 hours of operation.
-
Page 6: Assembly & Set-Up
Assembly & Set-Up Contents of Carton • One Tiller • One 20 oz. Bottle SAE 10W30 Oil • One Handlebar Assembly • One Operator’s Manual • One Engine Operator’s Manual Handle WARNING! To prevent personal injury or property damage, do not start the engine until all assembly NOTE: All references to the right or left side of the tiller are from steps are complete and you have read and the operators positon. - Page 7 Using two 5⁄16”-18 x 1-3⁄4” screws and 5⁄16”-18 hex nuts, loosely Move Tiller Off Crate attach the handlebar support using the upper holes. To roll the tiller off the shipping platform, put the wheels in Tighten the two screws securely. See Fig. 3-2. freewheel, as follows: Place a sturdy block under the transmission to raise one wheel about 1”...
- Page 8 Forward Clutch Cable Carefully unwrap the forward clutch cable (Black) from its shipping position. Pull the cable up through the bottom hole of the cable bracket and push the cable connector up through the hole until the groove in the connector snaps into place.
-
Page 9: Controls & Features
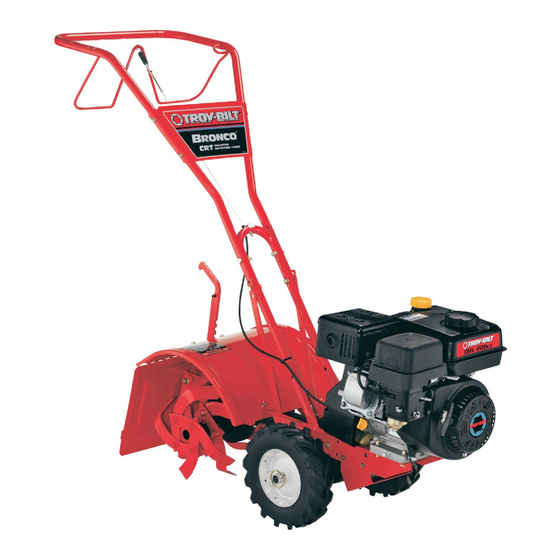
Controls and Features Forward Clutch Bail Depth Regulator Oil Fill Handlebar Height Adjustment Gasoline Fill Tines Wheel Drive Pin Recoil Starter Figure 4-1 Engine Controls Handlebar Height Adjustment For detailed information on all engine controls refer to the The handlebar height is adjustable to three different settings. In seperate Engine Operator’s Manual. -
Page 10: Operation
Operation Starting the Engine Starting the Engine WARNING! To help prevent serious personal injury Pre-Start Checklist or damage to the equipment, put both wheels in the With the spark plug wire disconnected from the spark plug, WHEEL DRIVE position. Never have the wheels in perform the following checks and services before each use. - Page 11 To Engage Drive & Tines Turning the Tiller NOTE: The tiller pictured on the following pages is used to Practice turning the tiller in a level, open area. Be very demonstrate the operation of the tiller and may not look exactly careful to keep your feet and legs away from the tines.
- Page 12 Clearing the Tines • When cultivating (breaking up surface soil around plants to destroy weeds, see Fig. 5-4), adjust the tines to dig only The tines have a self-clearing action which eliminates most 1” to 2” deep. Using shallow tilling depths helps prevent tangling of debris in the tines.
- Page 13 Suggested Tilling Patterns • If the garden size will not permit lengthwise and then crosswise tilling, overlap the first passes by one-half a tiller • When preparing a seedbed, go over the same path twice in width, followed by successive passes at one-quarter width. the first row, then overlap one-half the tiller width on the See Fig.
- Page 14 Terrace Gardening Loading & Unloading the Tiller To create a terrace, start at the top of the slope and work WARNING! Loading and unloading the tiller into a down. Go back and forth across the first row as shown in vehicle is potentially hazardous and doing so is not Fig.
-
Page 15: Maintenance & Adjustment
Maintenance & Adjustments Maintenance Schedule Check Change Before Every Every Every After first after first Engine each use 5 Hours 10 Hours 30 Hours 2 hours 2 hours Manual Check Motor Oil Level Clean Engine Check Nuts and Bolts Change Motor Oil Lubricate Tiller Service Engine Air Cleaner System Check Tines for Wear... - Page 16 Lubrication Off-Season Storage After every 10 operating hours, oil or grease the lubrication When the tiller won’t be used for an extended period, prepare it points shown in Fig. 6-1 and described below. for storage as follows: Clean the tiller and engine. Do routine tiller lubrication and check for loose parts and hardware.
-
Page 17: Service
Service Belt Replacement Removing/Installing a Tine Assembly: A tine assembly consists of eight tines mounted on a tine If the drive belt needs to be replaced, see your local authorized holder. dealer or refer to the Replacement Parts Section for ordering information. -
Page 18: Troubleshooting
Troubleshooting Problem Cause Remedy Engine does not start Spark plug wire disconnected. Reconnect wire. Engine Throttle Control Lever incorrectly set. Put lever in START position. Fuel tank empty. Add fuel. Stale gasoline. Drain fuel and add fresh fuel. Dirty air filter. Clean or replace filter (see Engine Manual). -
Page 19: Replacement Parts
Replacement Parts Component Part Number and Description 754-04090 Forward Drive Belt, 4L X 25.375 746-04413 Forward Drive Cable 742-04227 Bolo Tine, 10” (LT) 742-04226 Bolo Tine, 10” (RT) 634-04453 Wheels, 11 x 4-4 Phone (800) 828-5500 to order replacement parts or a complete Parts Manual (have your full model number and serial number ready). Parts Manual downloads are also available free of charge at www.troybilt.com. - Page 20 MANUFACTURER’S LIMITED WARRANTY FOR The limited warranty set forth below is given by Troy-Bilt LLC with b. Log splitter pumps, valves, and cylinders have a separate one- respect to new merchandise purchased and used in the United States year warranty.
- Page 21 LEA Y RESPETE TODAS LAS NORMAS DE SEGURIDAD E INSTRUCCIONES INCLUIDAS EN ESTE MANUAL ANTES DE PONER EN FUNCIONAMIENTO ESTA MÁQUINA. SI NO RESPETA ESTAS INSTRUCCIONES PUEDE PROVOCAR LESIONES PERSONALES. TROY-BILT LLC, P.O. BOX 361131 CLEVELAND, OHIO 44136-0019 Impreso en Estados Unidos de América Formulario No. 769-03616...
- Page 22 Elija entre las opciones que se presentan a continuación: ◊ Visite nuestro sitio web en www.troybilt.com ◊ Llame a un representante de Asistencia al Cliente al (800) 828-5500 ó (330) 558-7220 ◊ Escríbanos a Troy-Bilt LLC • P.O. Box 361131 • Cleveland, OH • 44136-0019...
-
Page 23: Medidas Importantes De Seguridad
Medidas importantes de seguridad ¡ADVERTENCIA! La presencia de este símbolo indica que se trata de instrucciones importantes de seguridad que se deben respetar para evitar poner en peligro su seguridad personal y/o material y la de otras personas. Lea y siga todas las instrucciones de este manual antes de poner en funcionamiento esta máquina. - Page 24 Cuando sea factible, retire el equipo a gasolina del Después de golpear con algún objeto extraño, detenga el camión o remolque y llénelo en el suelo. Si esto motor, desconecte el cable de la bujía y conecte el motor a no es posible, llene el equipo en un remolque con masa.
- Page 25 Vida útil media Si debe vaciar el tanque de combustible, hágalo al aire libre. Respete las normas referentes a la disposición correcta de Según la Comisión de Seguridad de Productos para el residuos y las reglamentaciones sobre gasolina, aceite, etc. Consumidor de los Estados Unidos (CPSC) y la Agencia de para proteger el medio ambiente.
-
Page 26: Montaje Y Configuración
Montaje y Configuración Contenido de la caja • Una cultivadora • Un botella de 20 onzas de aceite • Un montaje de las barras de control SAE 10W30 • Un Manual del operador • Un Manual del operador del motor Manija ¡ADVERTENCIA! Para evitar lesiones personales o daños materiales, no arranque el motor hasta... - Page 27 Usando dos tornillos de 5⁄16”-18 x 1-3⁄4” y tuercas hexagonales de Saque la cultivadora de la caja de embalaje. 5⁄16”-18, fije sin apretar el soporte de la barra de control Para deslizar la cultivadora fuera de la plataforma de embarque, en los orificios superiores.
- Page 28 Cable de embrague de marcha directa Desempaquete cuidadosamente el cable del embrague delantero (negro) de su posición del envío. Tire el cable hacia arriba a través del agujero inferior del soporte de cable y empuje el conectador del cable hacia arriba a través del agujero hasta que el surco en el conectador se encaja a presión hacia lugar.
-
Page 29: Controles Y Características
Controles y Características Gancho de embrague de marcha directa Regulador de profundidad Llenado de aceite Ajuste de la altura de la barra de control Llenado de combustible Dientes Pasador de transmisión en las ruedas Arrancador de retroceso Figura 4-1 Controles del motor Ajuste de la altura de la barra de control Para obtener información detallada sobre todos los controles del La altura de la barra de control tiene tres ajustes diferentes. -
Page 30: Funcionamiento
Funcionamiento Encendido del motor Encendido del motor ¡ADVERTENCIA! Para ayudar a evitar lesiones Lista de verificación previa al arranque personales graves o daños al equipo, coloque ambas Con el cable de la bujía desconectado de la bujía, realice los ruedas en la posición TRANSMISIÓN EN LAS RUEDAS. siguientes controles y servicios antes de usar la máquina. - Page 31 Procedimiento para engranar la transmisión y los Dar la vuelta con la cultivadora dientes Practique dar la vuelta con la cultivadora en un área abierta y nivelada. Asegúrese de mantener los pies y las piernas NOTA: La cultivadora que aparece en las páginas siguientes lejos de los dientes.
- Page 32 Los dientes tienen una acción autolimpiante que elimina la • Al realizar tareas de labranza (rompiendo la superficie de mayor parte de los desechos que se enredan en los mismos. Sin suelo alrededor de las plantas para destruir las malezas, embargo, a veces se pueden enredar pasto seco, tallos fibrosos o vea la Fig.
- Page 33 Modelos de labranza sugeridos • Si las dimensiones del jardín no permiten la labranza en sentido longitudinal y luego en sentido transversal, • Al preparar el lecho de siembra, recorra la misma senda dos traslape las primeras pasadas por la mitad del ancho de veces en la primera hilera, luego traslape la mitad del ancho la cultivadora, continuando con sucesivas pasadas a un de la cultivadora en el resto de las pasadas.
- Page 34 Al realizar la labranza verticalmente, trate de hacer la primera • Use rampas resistentes y haga rodar la cultivadora pasada hacia arriba ya que la cultivadora cava con mayor manualmente (con el motor apagado) para subirla o bajarla profundidad cuando sube que cuando baja. En suelo blando del vehículo.
-
Page 35: Mantenimiento Y Ajustes
Mantenimiento y Ajustes Calendario de mantenimiento Verifique Cambie después después Consulte Cada Cada Cada Antes de de las de las el Manual cada uso 5 horas 10 horas 30 horas primeras 2 primeras 2 del Motor horas horas Verifique el nivel de aceite Limpie el motor Verifique las tuercas y los pernos Cambie el aceite de motor... - Page 36 Lubricación Almacenamiento fuera de temporada Después de cada 10 horas de funcionamiento, aceite o engrase Si la cultivadora no se usará durante un período prolongado, los puntos de lubricación que se muestran en la Fig. 6-1 y que se prepárela para el almacenamiento de la siguiente forma: describen a continuación.
-
Page 37: Servicio
Servicio Cambio de correa Retiro/Instalación de un conjunto de dientes: Un conjunto de dientes comprende ocho dientes Si es necesario cambiar la correa de transmisión, vea al montados en un soporte de dientes. distribuidor local autorizado o consulte la sección de piezas de reemplazo para obtener la información y realizar el pedido. -
Page 38: Solución De Problemas
Solución de Problemas Problema Causa Solución El motor no Se ha desconectado el cable de la bujía. Reconecte el cable. arranca Ajuste incorrecto de la palanca de control del Coloque la palanca en la posición START (arranque). regulador del motor. El tanque de combustible está... - Page 39 Notas...
- Page 40 Las disposiciones de esta garantía cubren el recurso de reparación Accesorios — Troy-Bilt garantiza que los accesorios de este única y exclusiva que surge de la venta. Troy-Bilt no se hará producto están libres de defectos de material y mano de obra responsable de ninguna pérdida o daño incidental o resultante,...
Need help?
Do you have a question about the Bronco and is the answer not in the manual?
Questions and answers