Table of Contents
Advertisement
A Division of Snow Joe, LLC
IMPORTANT!
Safety Instructions
All Operators Must Read These
Instructions Before Use
Any electrical appliance can be dangerous if used incorrectly.
Some of the safety precautions given in this manual apply
generally to many appliances. Other warnings are specific to the
use of this snow thrower. Keep this manual for future reference.
General Safety WARNINGS!
You and any other operator of this snow thrower must read,
understand and follow these instructions in their entirety,
and should reread them at the start of each snow season.
Failure to follow these instructions may result in ELECTRIC
SHOCK, FIRE and/or serious PERSONAL INJURY.
Notice the personal safety alert symbol
this manual to draw your attention to a WARNING
given along with the particular operating instruction.
This means that the operation requires special
ATTENTION, CAUTION, and AWARENESS.
1. Work Area
a. Keep work area clean and well lit. Cluttered,
dark areas invite accidents.
b. Do not operate snow thrower in an explosive
atmosphere, such as in the presence of flammable
liquids, gases, or dust. Electrical appliances create
sparks that may ignite the dust or fumes.
c. Keep children, pets, and bystanders away from
work area. Be aware that the normal noise of the
machine when turned on may make it difficult for
you to hear approaching people.
2. Electrical Safety
a. Electrical plugs must match the outlet. Never modify
the plug in any way. Do not use any adapter plugs with
grounded appliances. Unmodified plugs and matching
outlets will reduce risk of electric shock.
b. Avoid body contact with earthed or grounded
surfaces such as pipes, radiators, ranges, and
refrigerators. There is an increased risk of electric
shock if your body is earthed or grounded.
c. Do not abuse the cord. Keep cord away from heat,
oil, sharp edges or moving parts. Damaged or
entangled cords increase the risk of electric shock.
Never carry the snow thrower by its cord or yank
the cord to disconnect it from the electrical outlet.
d. Replace or properly repair damaged cords. If
© 2010 by Snow Joe, LLC
All rights reserved. Original instructions.
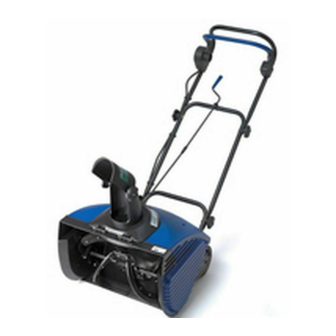
Snow Thrower
Snow Thrower
Model No. 622U1/623U1
used in
m
cord is damaged in any manner while plugged in,
pull the extension cord from the wall receptacle.
e. Contact with water while operating the
snow thrower can result in electric shock and
serious bodily injury. Do not use the snow thrower
in damp or wet locations or expose to rain. Do not
handle the plug or the appliance with wet hands or
while standing in water.
f. Extension Cord – WARNING – Only use a UL rated
extension cord for OUTDOOR, all-weather use
(usually orange color). To prevent the extension
cord from disconnecting during operation, tie it around
the top right side of the middle frame before connecting
it to the snow thrower as shown in Figure 18. See
WARNING box on page 10 for more cord information.
g. Turn off the power switch and disconnect the
power cable before inspecting, servicing, repairing,
or cleaning the snow thrower. Any such operation
should be performed after revolving parts inside the
snow thrower stop completely.
h. Do not move or transport the snow thrower when
the plug is connected to the power socket and
the switch is turned on.
3. Personal Safety
a. Stay alert – Watch what you are doing and use
common sense when operating the snow thrower.
Do not use the machine when tired, ill, or under
the influence of drugs, alcohol, or medication. A
moment of inattention may result in serious
personal injury.
b. Wear proper clothing – Wearing rubber boots offers
additional protection from electric shock. Do not wear
loose clothing or jewelry that may become caught
in the machine. Wear protective headgear to keep
hair away from revolving parts of the machine.
Safety glasses offer better protection than
everyday eyeglasses.
c. Moving parts present risks – Keep your face,
hair, clothing, hands and feet away from moving
parts. All guards and safety attachments must be
installed properly before using the unit. Shut off
and disconnect cord before touching any parts
other than the handles and switch.
d. Surfaces – This snow thrower is intended for use on
paved surfaces. Do not use on gravel, stone, or other
unpaved surfaces unless the snow thrower is adjusted
for such surfaces according to the instructions given
in the operator!s manual.
e. Avoid accidental starting – Make sure the switch is
in the off position before plugging in the unit. Do not
carry the snow thrower with your finger on the switch.
SAVE THESE INSTRUCTIONS
1
Form No. 7622U1/623U1-880E
OPERATOR'S MANUAL
Advertisement
Chapters
Table of Contents

Related Manuals for SNOWJOE 622U1


Summary of Contents for SNOWJOE 622U1
-
Page 1: Snow Thrower
Snow Thrower Form No. 7622U1/623U1-880E Model No. 622U1/623U1 OPERATOR’S MANUAL A Division of Snow Joe, LLC cord is damaged in any manner while plugged in, IMPORTANT! pull the extension cord from the wall receptacle. e. Contact with water while operating the... - Page 2 Hand-held operating position – Operation of the snow thrower in the hand-held position is unsafe. i. Abnormal operation – If you notice the snow thrower Figure 1 Model 622U1/623U1 running in an unstable state or hear abnormal sounds A – Lower frame K –...
-
Page 3: Safety And Instruction Decals
Manuel de rechange disponible sur envoi du numéro de modèle et du numéro de série à : PELIGRO Snow Joe, LLC, 86 Executive Avenue, Edison, NJ 08817, ou visiter le site www.snowjoe.com No emplee las manos para desatascar la tolva. Pare el motor antes de sacar el material atascado. - Page 4 Instead, promptly inform the dealer where you bought the snow thrower or contact Snow Joe customer service for assistance. 2. Hold the middle frame so that the screw holes align with the holes on the lower frame.
- Page 5 Figure 3 Figure 5 A – Middle frame B – Lower frame A – Joint fixing knob B – Washers 3. Connect the upper frame to the middle frame in the same way as described in step 2. Use the joint fixing T-bolts, washers, and knobs to secure the connection on both sides (Figs.
- Page 6 4. Locate the three cable clips in the parts bag. Secure the power cord to the frame of the unit by clipping them onto the frame at evenly spaced intervals (Fig. 9). Figure 7 A – Joint fixing T-bolt B – Washer Figure 9 A –...
-
Page 7: Figure
Figure 10 Figure 12 A – Chute deflector C – Discharge chute A – Chute deflector B – Chute deflector knob B – Chute deflector knob 3. Locate the upper chute crank in the parts bag. Remove the screw and nut from the upper chute crank using a Phillips screwdriver and the wrench provided (Fig. -
Page 8: Figure
4. Slide the upper chute crank into the lower chute crank, aligning 5. Remove the washer and nut from the eye bolt with rubber the screw holes. Tighten the screw into the aligned holes grommet found on the upper chute crank. Position the chute using a screwdriver. -
Page 9: Figure
Operation Note: Before using this machine, make sure that the power source you will use complies with the specifications detailed in this manual. Before inserting the plug into the socket, verify that the snow thrower!s roll shaft and rubber plates are firmly secured with screws, and that the rubber plates are facing the correct direction. -
Page 10: Figs
If the cord is damaged, do not use the snow thrower. Replace or repair the damaged cord immediately. If you need assistance, contact an authorized Snow Joe dealer. Powering On and Off 1. To power on, first press the switch button found alongside the switch housing (Fig. - Page 11 9. Some parts of the snow thrower may freeze under extreme Moving the Machine and Plowing temperature conditions. Do not attempt to operate the the Snow snow thrower with frozen parts. If the parts freeze while the snow thrower is in use, stop the snow thrower, unplug the extension cord, and inspect for frozen parts.
-
Page 12: Figs
2. The chute deflector on the top of the discharge chute controls the height of the snow stream. Loosen both chute deflector knobs to raise or lower the deflector to the desired height of snow you wish to throw. Tighten the knobs to secure the deflector (Fig. -
Page 13: Replacing Rubber Plates
Maintenance WARNING WARNING Make sure to turn off the switch and disconnect the extension cord before performing any maintenance task on your snow thrower. Lifetime Lubrication Lubrication is not necessary and may damage the unit. The snow thrower is lubricated for lifetime use at the factory Figure 25 before shipment. -
Page 14: Replacing The Scraper
1. Detach the worn scraper from the snow thrower by removing the 3 screws that hold it in place (Fig. 31). Figure 27 A – Rubber plate D – Bolt B – Rivet E – Auger Figure 29 C – Small flat washer A –... -
Page 15: Replacing The Belt
Model #: Automatic Reset Serial #: The Snow Joe 622U1 has a built in automatic reset function. In the event of a major obstruction halting the auger, simply unplug your unit, clear auger obstruction, wait 60 seconds and resume use. - Page 16 Belts and augers are not covered under warranty – belts and augers wear out and can be purchased at the Snow Joe Center. Snow Joe, LLC may from time to time change the design of its products. Nothing contained in this warranty shall be construed as obligating Snow Joe, LLC to incorporate such design changes into previously manufactured products, nor shall such changes be construed as an admission that previous designs were defective.
Need help?
Do you have a question about the 622U1 and is the answer not in the manual?
Questions and answers
what is the drive belt size or any number for 622U1. Also how many ribs
What is the part number for the rubber scrapper