Table of Contents
Advertisement
Available languages
Available languages
Quick Links
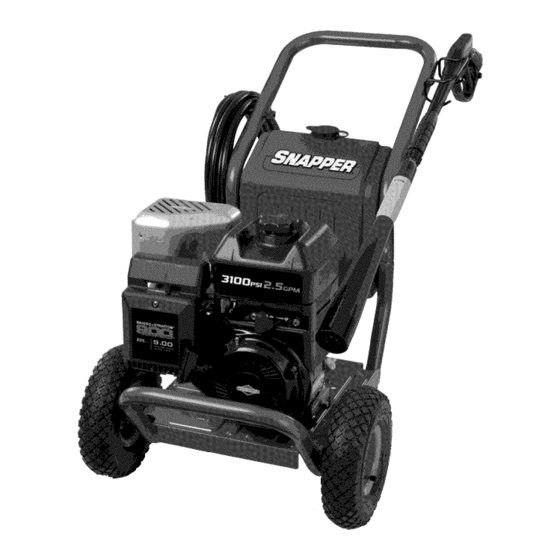
Operator's Manual
3100 PSI MAX
2.5 GPM MAX
PRESSURE WASHER
Model No. 580.752640
PRESSURE WASHER
CUSTOMER HELPLINE
1-800-317-7833
HOURS: Mon. - Fri. 8 a.m. to 5 p.m. (CT)
WARNING
Before using this product, read this
manual and follow all Safety Rules
and Operating Instructions.
This pressure washer is rated in accordance to the Pressure Washer Manufacturer's Association
(PWMA) standard PW101 (Testing and Rating Performance of Pressure Washers).
Esta limpiadora a presión está clasificada conforme a la norma PW101 (comprobación y clasificación de rendimiento de limpiadoras
a presión) de la Asociación de fabricantes de bombas a presión (Pressure Washer Manufacturer's Association, PWMA).
Sears, Roebuck and Co., Hoffman Estates, IL 60179 U.S.A.
Visit our website: www.sears.com
Part No. 208908GS Draft - (01/22/2009)
ADVERTENCIA
Antes de utilizar el producto, lea este
manual y siga todas las Reglas de
Seguridad e Instrucciones de Uso.
• Safety
• Assembly
• Operation
• Maintenance
• Parts
• Español, p. 32
Advertisement
Chapters
Table of Contents

Related Manuals for Snapper 580.752640


Summary of Contents for Snapper 580.752640
-
Page 1: Pressure Washer
Operator’s Manual 3100 PSI MAX 2.5 GPM MAX PRESSURE WASHER Model No. 580.752640 PRESSURE WASHER CUSTOMER HELPLINE 1-800-317-7833 • Safety • Assembly HOURS: Mon. - Fri. 8 a.m. to 5 p.m. (CT) • Operation • Maintenance WARNING ADVERTENCIA Before using this product, read this Antes de utilizar el producto, lea este •... -
Page 2: Table Of Contents
SNAPPER TWO-YEAR LIMITED WARRANTY For the first year from the date of purchase, if this Snapper product fails due to a defect in material or workmanship, return it to any Sears store or Parts & Repair Center in the United States for free repair. -
Page 3: Safety Rules
SAFETY RULES Read this manual carefully and become familiar WARNING: The engine exhaust from this product with your pressure washer. Know its applications, contains chemicals known to the State of California to its limitations, and any hazards involved. cause cancer, birth defects, or other reproductive harm. Important Safety Information WARNING: This product contains lead and lead Safety Symbols and Meanings... - Page 4 WARNING: Starter cord kickback (rapid retraction) can WARNING: Fuel and its vapors are extremely result in bodily injury. Kickback will pull hand and flammable and explosive. arm toward engine faster than you can let go. Fire or explosion can cause severe burns Broken bones, fractures, bruises, or sprains or death.
- Page 5 WARNING: Use of pressure washer can create puddles WARNING: Risk of eye injury. and slippery surfaces. Spray can splash back or propel objects. Kickback from spray gun can cause you to fall. • Always wear indirect vented (chemical splash) safety goggles •...
-
Page 6: Features And Controls
FEATURES AND CONTROLS KNOW YOUR PRESSURE WASHER Read the Operator’s Manual and safety rules before operating your pressure washer. Compare the illustrations with your pressure washer to familiarize yourself with the locations of various controls and adjustments. Save this manual for future reference. A - Spray Gun —... -
Page 7: Assembly
6. If any parts are missing or damaged, call the pressure washer helpline at 1-800-317-7833. ASSEMBLING PRESSURE WASHER Your Snapper pressure washer will need assembly before Insert “L” bolt (J) through hole on left side of handle operation: (viewing from front of unit). Hold bolt in place and attach Fill out and send in registration card. - Page 8 Insert spray gun holder wireform (A) through hole just Add Fuel above cleaning tank on right side of handle (viewing Fuel must meet these requirements: from front of unit). Hold wireform in place and attach a • Clean, fresh, unleaded gasoline. plastic knob (B) from inside of unit.
- Page 9 CAUTION! Connect Hose and Water Supply to Pump Alcohol-blended fuels (called gasohol, ethanol or methanol) can attract moisture, which leads to separation and formation of acids during storage. Acidic gas can damage the NOTICE: DO NOT run the pump without the water supply fuel system of an engine while in storage.
- Page 10 Before connecting garden hose to water inlet, inspect WARNING: Risk of eye injury. inlet screen. Clean screen (A) if it contains debris or have Spray can splash back or propel objects. it replaced if damaged. DO NOT run pressure washer if inlet screen is damaged or missing.
-
Page 11: Operation
OPERATION HOW TO USE YOUR PRESSURE WASHER To Start Your Pressure Washer To start your engine-powered pressure washer for the first If you have any problems operating your pressure washer, time, follow these instructions step-by-step. This information please call the pressure washer helpline at 1-800-317-7833. also applies whenever you start the engine after you have let Pressure Washer Location the pressure washer sit idle for at least a day. - Page 12 Move choke lever (B) to “Choke” position. 11. Return recoil starter slowly. DO NOT let rope “snap back” against starter. 12. When engine starts, slowly move choke lever to “Run” position, as engine warms. If engine falters, move choke lever to “Choke” position, then to “Run” position. 13.
- Page 13 How to Stop Your Pressure Washer Cleaning and Applying Detergent Release spray gun trigger and let engine idle for two CAUTION: Chemicals can cause bodily injury, and/or minutes. property damage. Move throttle to SLOW position, then STOP position. • NEVER use caustic liquid with pressure washer. •...
- Page 14 8A. If using cleaning tank, rotate detergent shut-off valve on Keep spray gun a safe distance from spray surface. cleaning tank to “On” position (A). WARNING: Kickback from spray gun can cause you to fall. • Operate pressure washer from a stable surface. •...
-
Page 15: Specifications
SPECIFICATIONS ENGINE TECHNICAL INFORMATION PRODUCT SPECIFICATIONS This is a single cylinder, overhead valve (OHV), air cooled Pressure Washer Specifications engine. It is a low emissions engine. Max Outlet Pressure ..... . . 3,100 PSI In the State of California, Model 120000 engines are certified Max Flow Rate . -
Page 16: Maintenance
MAINTENANCE OWNER’S RESPONSIBILITIES Pump Oil DO NOT attempt any oil maintenance on this pump. The Follow the hourly or calendar intervals, whichever occurs pump is pre-lubricated and sealed from the factory, requiring first. More frequent service is required when operating in no additional maintenance for the life of the pump. -
Page 17: Maintenance
Check High Pressure Hose Disconnect PrecisionSpray™ Selector from spray gun. 4. Use a small paper clip to free any foreign material High pressure hoses can develop leaks from wear, kinking, or abuse. Inspect hose before each use. Check for cuts, clogging or restricting the high pressure nozzles (A). - Page 18 ENGINE MAINTENANCE Adding Engine Oil Make sure pressure washer is on a level surface. WARNING: Unintentional sparking can result in fire or Check oil level as described in Checking Oil Level. electric shock. If needed, slowly pour oil into oil fill opening to the point of overflowing at oil fill cap.
- Page 19 Service Air Cleaner Inspect Muffler and Spark Arrester Your engine will not run properly and may be damaged if you Inspect the muffler for cracks, corrosion, or other damage. run it with a dirty air cleaner. Service more often if operating Remove the spark arrester, if equipped, and inspect for under dirty or dusty conditions.
- Page 20 AFTER EACH USE 3. Disconnect hose from spray gun and high pressure outlet on pump. Drain water from hose, gun, and spray Water should not remain in the unit for long periods of time. tip extension. Use a rag to wipe off the hose. Sediments or minerals can deposit on pump parts and “freeze”...
-
Page 21: Storage
STORAGE WINTER STORAGE There is no need to drain gasoline from the engine if a fuel stabilizer is added according to instructions. Run the engine for 2 minutes to circulate the stabilizer throughout the fuel NOTICE: You must protect your unit from freezing system. -
Page 22: Troubleshooting
TROUBLESHOOTING Problem Cause Correction 1. PrecisionSpray™ Selector is in a Rotate PrecisionSpray™ Selector to a low pressure position. high pressure position. 2. Water inlet is blocked. Clear inlet. 3. Inadequate water supply. Provide adequate water flow. 4. Inlet hose is kinked or leaking. Straighten inlet hose, patch leak. -
Page 23: Replacement Parts
PARTS SNAPPER 3100 PSI Pressure Washer 580.752640 Main Unit — Exploded View and Parts List Item Part # Description Items Not Illustrated 209324GS BASE, w/Vib Mounts Part # Description AG208900GS HANDLE 208908GS MANUAL, Operator’s 192134GS KIT, Engine Mounting Hardware 191267SGS... - Page 24 ENGINE, Briggs & Stratton, 121012 – Exploded View...
- Page 25 ENGINE, Briggs & Stratton, 121012 – Exploded View...
- Page 26 ENGINE, Briggs & Stratton, 121012 – Exploded View...
- Page 27 ENGINE, Briggs & Stratton, 121012 – Parts List Item Part # Description Item Part # Description 697322 Cylinder Assembly 691300 Valve-Cap 399269 Kit-Bushing/Seal (Magneto Side) 271716 Washer-Sealing 299819s Seal-Oil (Magneto Side) 793122 Panel-Control 699486 Head-Cylinder 693593 Muffler 698210 Gasket-Cylinder Head 699598 Housing-Blower 692600...
-
Page 28: Emission Control Warranty
EMISSION CONTROL SYSTEM WARRANTY California, U.S. EPA, and Sears Emissions Sears Emissions Control Warranty Provisions Control Warranty Statement The following are specific provisions relative to your Emissions Control Warranty Coverage. It is in addition to the Your Warranty Rights And Obligations Sears engine warranty for non-regulated engines found in the Operator’s Manual. - Page 29 The warranty on emissions-related parts is as follows: Look For Relevant Emissions Durability Period and Air Index Information On Your Engine Emissions Label • Any warranted part that is not scheduled for replacement as required maintenance in the owner’s Engines that are certified to meet the California Air Resources manual supplied, is warranted for the warranty period Board (CARB) Emissions Standard must display information stated above.
-
Page 30: Notes
NOTES... -
Page 31: Notes
NOTES... -
Page 32: Español
GARANTÍA LIMITADA DE DOS AÑOS DE SNAPPER Durante el primero año a partir de la fecha de compra, si este producto de Snapper falla debido a defectos de materiales o mano, devuélvalo a cualquier almacén Sears o centro de reparación y repuestos de los Estados Unidos para su reparación gratuita. -
Page 33: Reglas De Seguridad
REGLAS DE SEGURIDAD Lea este manual minuciosamente y conozca a fondo las ADVERTENCIA: El escape del motor de este producto partes y el funcionamiento de su máquina limpiadora a contiene elementos químicos reconocidos en el Estado de presión. Conozca sus aplicaciones, sus limitaciones y los California por producir cáncer, defectos de nacimiento u peligros involucrados. - Page 34 ADVERTENCIA: El retroceso (repliegue rápido) del cable ADVERTENCIA: La gasolina y sus vapores son del arrancador puede producir lesiones. El extremadamente inflamables y retroceso impedirá que el usuario suelte el cable a explosivos. tiempo y tirará de su mano y brazo hacia el motor. El fuego o una explosión pueden causar Como resultado, podrían producirse fracturas, quemaduras severas e inclusive la muerte.
- Page 35 AVISO: El rociado de alta presión puede dañar elementos ADVERTENCIA: El chorro de agua a alta presión que frágiles, incluyendo el vidrio. este equipo produce, puede atravesar la piel y • NO dirija la pistola rociadora hacia un cristal cuando utilice la los tejidos subcutáneos, provocando lesiones de boquilla MAX (punta de alfiler).
-
Page 36: Características Y Controles
CARACTERÍSTICAS Y CONTROLES CONOZCA SU MAQUINA LIMPIADORA A PRESIÓN Lea el Manual del Operario y las reglas de seguridad antes de poner en marcha su limpiadora a presión. Compare las ilustraciones con su limpiadora a presión para familiarizarse con las ubicaciones de los diferentes controles y ajustes. Guarde este manual para referencias futuras. -
Page 37: Montaje
MONTAJE Conecte el Asa y Limpiar el Tanque Su limpiadora a presión requiere de cierto ensamble y estará lista para ser usado únicamente después de haber depositado el 1. Coloque el asa (A) sobre los soportes del mismo (B) que ya combustible y el aceite recomendado. - Page 38 Inserte el gancho de alambre de soporte (A) de la pistola a Agregue Gasolina través del orificio situado justo encima del limpiar el tanque en el derecho de la asa (visto desde la parte delantera de la unidad). El combustible debe reunir los siguientes requisitos: Sujete el gancho de alambre en su posición y coloque un perilla •...
- Page 39 3. Instale la tapa del tanque de combustible y la espera para algún Conecte la Manguera y el Suministro de Agua a combustible rociado para evaporar. la Bomba ¡PRECAUCIÓN! Los combustibles con mezcla de alcohol (gasohol, AVISO: NO haga funcionar la bomba si no tiene el etanol o metanol) pueden atraer la humedad y provocar la suministro conectado y abierto.
- Page 40 Antes de que conecte la manguera de jardín a la entrada de ADVERTENCIA: Riesgo de lesiones oculares. agua, inspeccione el colador de la entrada. Limpie el colador (A) El agua rociada puede salpicar o propulsar si tiene residuos o solicite su remplazo si está dañado. NO haga objetos.
-
Page 41: Operacion
OPERACION COMO USAR SU LIMPIADORA A PRESIÓN Para Poner en Marcha el Limpiadora a Presión Para darle arranque a su limpiadora a presión movido a motor por Si tiene problemas con el funcionamiento de su máquina limpiadora primera vez, siga estas instrucciones paso a paso. Esta información a presión, por favor llame a la línea de ayuda de la máquina acerca de la puesta en marcha inicial también es válida para cuando limpiadora a presión al 1-800-317-7833. - Page 42 Mueva la palanca del ahogador (B) a la posición "Ahogado" 11. Jale la cuerda de arranque lentamente. NO permita que la cuerda ("Choke"). regrese bruscamente en contra del arrancador. 12. Cuando arranque el motor, mueva lentamente la palanca del ahogador a la posición "En marcha" ("Run"). Si el motor falla, mueva la palanca a la posición "Ahogado"...
- Page 43 AVISO: El contacto con el silenciador a alta temperatura NOTA: Siempre mantenga la control de válvula de regulación en el “Rápido” (“Fast”) posicione cuándo operar la limpiadora a presión. puede producir daños en el tubo de inyección de detergente. • Cuando coloque el filtro en la botella del detergente, coloque el Cómo Detener su Limpiadora a Presión tubo de manera que no entre en contacto accidentalmente con el Suelte el gatillo de la pistola rociadora y deje funcionar el...
- Page 44 Aplique el detergente sobre la superficie seca, comenzando en Limpieza del tubo de inyección de detergente la parte inferior del área y dirigiéndose hacia arriba, utilizando Si usó el tubo, debe lavarlo con agua limpia antes de parar el motor. movimientos largos, parejos y superpuestos.
-
Page 45: Especificaciones
ESPECIFICACIONES INFORMACIÓN TÉCNICA SOBRE EL MOTOR ESPECIFICACIONES DEL PRODUCTO El motor es de uno cilindros, de válvulas en cabeza (OHV), Especificaciones de la Máquina Limpiadora a refrigerado por aire y de baja emisión. Presión En el Estado de California, los motores de la serie 120000 han Presión de salida máxima . -
Page 46: Mantenimiento
MANTENIMIENTO PLAN DE MANTENIMIENTO Bomba de Aceite NO realice ninguna operación de mantenimiento con el aceite de la Siga los intervalos de horas o de calendario, los que sucedan bomba. La bomba se suministra prelubricada y sellada en fábrica, y antes. -
Page 47: Mantenimiento De La Boquilla
Revise la Manguera de Alta Presión Desconecte el selector PrecisionSpray™ de la pistola rociadora. Utilice un pequeño clip para papel para eliminar todo material La manguera de alta presión pueden desarrollar fugas debido al extraño que pueda obstruir las boquillas (A). desgaste, dobleces o abuso. -
Page 48: Mantenimiento Del Motor
MANTENIMIENTO DEL MOTOR Adición de Aceite del Motor Coloque el limpiadora a presión sobre una superficie nivelada. ADVERTENCIA: Chispear involuntario puede tener Compruebe el nivel de aceite tal como se indica en la sección como resultado el fuego o el golpe Comprobación del nivel de aceite. - Page 49 Servicio del Depurador de Aire Inspeccione el Silenciador y la Pantalla Apagachispas Su motor no funcionará adecuadamente y puede dañarse si usted lo hace funcionar con un depurador de aire sucio. Suministre servicio Inspeccione que el silenciador no presente fisuras, corrosión u más frecuentemente si la unidad funciona bajo condiciones de otros daños.
-
Page 50: Despues De Cada Uso
DESPUES DE CADA USO Desconecte manga del fusil del rocío y salida alta de presión en la bomba. Desagüe agua de la manga, del fusil, y de la No deberá haber agua en la unidad por largos períodos de tiempo. extensión de boquilla. -
Page 51: Almacenamiento
ALMACENAMIENTO ALMACENAMIENTO PARA INVIERNO Proteja el Sistema de Combustible Aditivo para Combustible: AVISO: Usted deberá proteger su unidad de las El combustible puede estar pasado 30 días después de su temperaturas de congelamiento. almacenamiento. El combustible pasado provoca la formación de •... -
Page 52: Reparacion De Daños Repuestos
REPARACION DE DAÑOS Problema Causa Solución El selector PrecisionSpray™ está en una Gire el selector PrecisionSpray™ hasta una posición de baja presión. posición de alta presión. La entrada de agua está bloqueada. Limpie la entrada. Suministro de agua inadecuado. Proporcione flujo de agua adecuado. La manguera de entrada está... -
Page 53: Notas
NOTAS... -
Page 54: Garantia Del Control De Emisiones
GARANTIA DEL SISTEMA DE CONTROL DE EMISIONES Sears, Roebuck and Co., U.S.A. (Sears), California Air Resources Board (Consejo de Recursos sobre el Aire de California, CARB, por sus siglas en inglés) y United States Environmental Protection Agency (Agencia de Protección Ambiental de EE.UU. , EPA, por sus siglas en inglés). - Page 55 Información sobre emisiones Algunos motores cuentan con la certificación de cumplimiento de la fase 2 de las normas sobre emisiones de la United States Los motores con certificación de cumplimiento de la normativa Environmental Protection Agency (USEPA, Agencia estadounidense sobre emisiones del California Air Resources Board (CARB) deben de protección del medioambiente ).
Need help?
Do you have a question about the 580.752640 and is the answer not in the manual?
Questions and answers