Samsung SPH-m330 User Manual
Portable dual band telephone
Hide thumbs
Also See for SPH-m330:
- User manual (160 pages) ,
- Manual del usuario (160 pages) ,
- User manual (33 pages)

Related Manuals for Samsung SPH-m330


Summary of Contents for Samsung SPH-m330
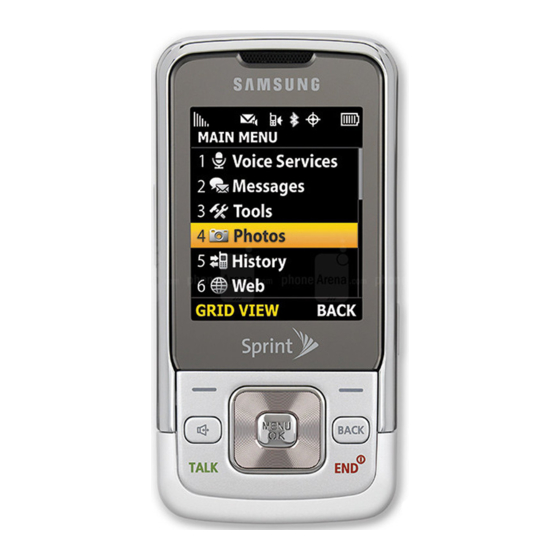
- Page 1 SPH-m330 P O R T A B L E D u a l B a n d T E L E P H O N E User Guide Please read this manual before operating your phone, and keep it for future reference.
-
Page 2: Intellectual Property
Company AKA 3M CORPORATION DELAWARE. The Bluetooth® word mark and logos are owned by the Bluetooth SIG, Inc. and any use of such marks by Samsung Electronics Canada, Inc. is under license. Other trademarks and trade names are those of their respective owners. - Page 3 Except as set forth in the express warranty contained on the warranty page enclosed with the product, the purchaser takes the product "as is", and Samsung makes no express or implied warranty of any kind whatsoever with respect to the product, including but not limited to the merchantability of the product or its fitness for any particular purpose or use;...
-
Page 5: Table Of Contents
Table of Contents Getting Started................1 Front View of Phone ........1 Side Views of Phone . - Page 6 Settings ..........43 Contacts ..................
- Page 7 Camera Options......... . 71 Picture Messaging.
-
Page 8: Getting Started
Getting Started Front View of Phone 1. Earpiece 2. Status Bar Icons 3. Display Screen 14. Camera 4. Navigation Key Lens/Speaker (Back of phone) 5. Softkey (Left) 13. Softkey (Right) 6. Speakerphone 12. BACK/ Clear Key 7. TALK Key 11. END/ 8. -
Page 9: Side Views Of Phone
Side Views of Phone 15. Headset 18. Charger/ Jack Accessories Jack 16. Volume Button 17. Side Camera Button Key Functions 1. Earpiece: Allows you to hear the other caller and the different ring tones and sounds offered by your phone. 2. - Page 10 7. TALK Key: Can be used in several different ways. • Allows you to place or receive a call. • In standby mode, press the key once to access the Recent Calls log. • If you press and hold the key down, you will initiate the Voice Recognition feature.
-
Page 11: Viewing The Display Screen
• Scroll up or down to navigate through the different menu options. • To mute the ringer during an incoming call, press the volume key up or down. 17. Side Camera Button: Used to launch the integrated digital camera. 18. Charger/Accessories Jack: Used to connect any available accessory cables to your phone. - Page 12 The camera is enabled and you are in Camera Mode. Indicates that you have a missed alarm. Indicates that you have a new message waiting. Indicates that your phone is in vibrate only. Indicates that your phone is set to ringer plus vibrate mode. Indicates Ringer Off + Vibrate mode;...
- Page 13 Displays your current battery strength when it is low. Indicates Key Mute mode; the keypad turned off. Indicates Speaker mode; the microphone turned off. Indicates that the Self Timer function is enabled. With the self timer enabled, a set amount of time is required prior to taking a picture. Indicates that the white balance has been set to Sunny.
-
Page 14: Features Of Your Phone
Features of Your Phone Congratulations on the purchase of your Samsung SPH-m330 phone. This phone is lightweight, easy-to-use, reliable, and offers many significant features and service options: • Dual-band capability provides access to other Digital Networks where roaming agreements are established. See "Roaming" on page 23. -
Page 15: Using Your Phone's Battery And Charger
Tip: The Power Save mode helps to conserve battery power when you are in an area without a signal. To turn your phone off: • Press and hold for two seconds until you see the powering down animation on the display screen. Your screen remains blank while your phone is off (unless the battery is charging). - Page 16 Installing or Removing the Battery To install or remove the LiIon battery: 1. Make sure the power is off so that you don’t lose any stored numbers or messages. Press down on the cover and slide it in the direction of the arrow (1) and then carefully lift the battery cover away from the phone (2).
- Page 17 3. To remove the battery, lift the battery up at each end (1) and remove from the phone (2). 4. Replace the cover plate by lining up the tabs (1) and then firmly sliding the cover in the direction of the arrow (2) until it snaps into place. Charging the Battery Your phone’s Li-ion battery is rechargeable and should be charged as soon as possible so you can begin using your phone.
- Page 18 HORIZONTAL, OR FLOOR-MOUNTED POSITION. It takes approximately 4 hours to fully recharge a completely drained standard battery. With the Samsung approved Li-ion battery, you can recharge the battery before it drains completely. An animated battery icon is displayed on the LCD screen. The icon indicates whether the battery is being charged or is fully charged.
-
Page 19: Phone Basics
Phone Basics Displaying Your Phone Number If you forget your phone number, your phone can remind you. To display your phone number: 1. Press for Menu. 2. Select Settings > Phone Info > Phone Number. Note: Menu items may be selected by highlighting them with the navigation key and pressing . - Page 20 You can also place calls from your phone using Voice Dial (page 32), Speed Dialing numbers from your Contacts (page 17), or using your Call History listings (page 64). Answering Calls To answer an incoming call: 1. Make sure your phone is on. (If your phone is off, incoming calls go to voicemail.) 2.
- Page 21 Warning: After initiating a 911 call, you must end the call by pressing This notifies the phone that the 911 call was terminated intentionally by the user. No other calls can be made before terminating the 911 call. In-Call Options During a call, use the left softkey to Mute or UnMute your phone’s microphone.
- Page 22 WARNING: Because of higher volume levels, do not place the device near your ear during speakerphone use. End-of-Call Options After receiving a call from or making a call to a phone number that is not in your Contacts, the phone number and duration of the call are displayed. Press the right softkey for Next and select Call Again to call the number again, Send Message to send a text or picture message directly to that number, or Save to...
- Page 23 2. Use your navigation key to display the desired entry. 3. To dial the number, highlight it and press Dialing and Saving Phone Numbers With Pauses You can dial or save phone numbers with pauses for use with automated systems, such as voicemail or credit card billing numbers.
- Page 24 4. Select Abbreviated Dialing. 5. Press the navigation key up or down to select On and press 6. Input the five or six digit prefix and press to Save. Making an Abbreviated Dial Call To make a call: 1. Enter the last four or five digits of the prefix phone number. 2.
-
Page 25: Entering Text
To use Two-Touch Dialing for Speed Dial locations 10-99: 1. Press the first digit. 2. Press and hold the second digit for approximately two seconds. (The display confirms that the number has been dialed when it shows “Speed Dial #”. See "Speed Dial #’s" on page 50.) Entering Text Selecting a Character Input Mode Your phone provides convenient ways to enter words, letters, punctuation,... -
Page 26: Text Entry
• If the word you want is not displayed after you have entered all the letters, press to then display additional word selections with each consecutive press of • To accept a word and insert a space, press Entering Characters Using Alpha mode To enter characters by tapping the keypad, select the Alpha mode (see “Selecting a Character Input Mode”... -
Page 27: Using Voicemail
• Dual Language: When activated and you are in T9 Mode, displays choices from both the English and French dictionaries. Highlight None or French. • My Words: When activated, adds the word to the personal dictionary. • Used Word Dictionary: When activated, adds the words used to the phone’s dictionary. -
Page 28: Responding To Call Waiting
Responding to Call Waiting When you’re on a call, Call Waiting alerts you of incoming calls by sounding two beeps. Your phone’s screen informs you that another call is coming in and displays the caller’s phone number (if it is available and you are in digital mode). To respond to an incoming call while you’re on a call: •... -
Page 29: Tty Use With Handset
TTY Use With Handset A TTY (also known as a TDD or Text Telephone), is a telecommunications device that allows people who are deaf, hard of hearing, or have speech or language disabilities to communicate by telephone. Your phone is compatible with select TTY devices. Please check with the manufacturer of your TTY device to ensure that it supports digital wireless transmission. -
Page 30: Roaming
Roaming Understanding Roaming Recognizing Icons on the Display Screen Your phone’s display screen always lets you know when you’re off the network. The following chart indicates what you will see depending on where you are using your phone. Roaming Indicator Network Other Digital Networks Note: You will pay a higher per-minute rate for roaming calls. - Page 31 5. To select an option, highlight it and press • Automatic: This setting seeks service. When service is unavailable, the phone searches for an alternate system. • Home only: This setting allows you to access the home network only preventing roaming on other networks. 24 Roaming...
-
Page 32: Menus
Menus Menu Styles Your phone can display the various features and options in one of two different menu styles: Grid Grid displays the first level menu choices with static graphical icons arranged in a grid pattern. As you navigate through the menu, menu options are highlighted. You can use the navigation key to scroll through menus quickly and easily. -
Page 33: Viewing The Menus
Viewing the Menus 4: Messenger 5: Mobile Email Menu Diagram 6: Communities The following list outlines your phone’s 1: Facebook menu structure: 2: MySpace 3: Red Light Lounge 1: My Account 4: Lavalife 2: Call History 1: Outgoing Calls 5: Bebo 2: Incoming Calls 6: Mocospace 3: Missed Calls... - Page 34 1: Use Ringer • Low Volume 2: Auto Download 2: Separate • On Volume • Off 3: Picture Message 4: Alerts Setup 1: Use Ringer • On Volume • Off 2: Separate 6: Tools Volume 1: Alarm 2: Type 1: Alarm #1 1: Voicemail 2: Alarm #2 2: Text Message...
- Page 35 6: Keypad Light 8: Contacts • Slide Open 1: Find • 30 seconds 2: Add New Entry • 15 seconds 3: Speed Dial#’s • 8 seconds 4: Groups • Off 1: Unassigned 7: Language 2: Family • English 3: Friends •...
- Page 36 4: Signal Fade/Call Drop • Off 5: Power On 3: Dual Language 6: Power Off • None 4: Keytones • French 1: Tone Type 4: My Words • Xylophone 5: Used Word Dictionary • DTMF • Yes • Voice • No 2: Tone Volume 6: Display Candidate •...
- Page 37 3: Airplane Mode 1: Restrict • On 1: Outgoing Call • Off 1: Allow all 4: Browser 2: Contacts only 1: Clear Bookmarks 3: Special# only 2: Clear Cache 2: Incoming Call 3: Clear Cookies 1: Allow all 5: Call setup 2: Contacts only 1: Auto Answer 3: Special# only...
- Page 38 6: Key Mute/Key Unmute • Off 7: Messages • On 8: Recent History 5: Launch 9: Tools • Review Pictures Camera Options Menu When you are in Camera Preview Mode, press the Options soft key to access the following options: 1: Self Timer 1: Off 2: 5 Sec...
-
Page 39: Voice Service
Voice Service Activating Voice Service Voice recognition allows you to say commands to perform common functions supported by your phone. There is no voice training required to use the voice recognition feature. You simply say the pre-designated command displayed on your screen in a normal tone of voice to perform the desired function. -
Page 40: Voice Service Settings
3. If you say a name stored in your Contacts, be sure to say their full name exactly as it is entered in your Contacts. (The phone plays the name through the earpiece and displays it on the screen.) • If you said a name listed in your Contacts that has more than one number associated with it, the phone displays the different locations (Home, Work, Mobile, Pager, and Others) and asks you which one... - Page 41 Changing Voice Dial Prompts By default, your phone provides audio prompts such as “Say a name or shortcut”. You can change these prompts to Prompts or Names. To change voice dial prompts: 1. Press for Menu. 2. Select Settings > More..3.
-
Page 42: Web
The Wireless Web Your phone comes equipped with Wireless Web access. You can view specially designed versions of popular sites including sports, weather, news, stock quotes etc., as well as access downloadable ringtones, wallpapers, and games. When you launch the web, the phone will connect to the Internet and the service indicator icon will display. - Page 43 Softkeys When browsing the Web, the bottom line of your phone's display contains one or more softkeys. These keys are shortcut controls for navigating around the Web, and they correspond to the softkey buttons directly below the phone’s display screen. Depending on which Web sites you visit, the labels on the softkeys may change to indicate their function.
- Page 44 Press the Menu softkey and select one of the following options: 1. Home: To return to the Web Home Page. 2. Forward: One web page (if you have not returned back from a previous web page, this option is greyed out). 3.
-
Page 45: Messaging
Messaging Now you can exchange text and multimedia messages right from your phone and stay connected without saying a word. Within the Messaging menu you can also view the number of voicemail messages you have waiting for you. For more information on using your phone’s voicemail feature, see “Voicemail”... - Page 46 4. Enter a recipient in the following ways: • To enter a phone number or email address, use the keypad to enter characters. The right softkey allows you to switch between entering letters, numbers, and symbols. When you are finished, press •...
-
Page 47: Picture Messaging
2. Select Messaging. 3. Select Text & Picture Message. 4. Use the navigator key to highlight the location (Inbox, Outbox, Draft, or Saved) of messages to erase and press 5. Press the navigator key to select the message. 6. Press the right softkey for Options and select Erase. -
Page 48: Voicemail
7. To select additional media to add to your message, highlight More and press and do the following: • If you wish to add an audio message, select Add Sound. Select Record and record your message after the beep. • If you wish to add slides, select Add Slide. - Page 49 Note: Your phone service accepts messages even when it is turned off. However, you are only notified of new messages when your phone is turned on and you are in a Service Area. Retrieving Your Voicemail Messages You can review your messages directly from your phone or from any other touch- tone phone.
-
Page 50: Settings
Settings There are several options associated with messaging. The Settings menu allows you to customize the options to fit your preferences. The message options are divided into the following categories: General • Notification: Allows you to configure whether new messages will appear with a pop-up message and an icon or an icon only. - Page 51 Notification The Notification option allows you to select whether a message in a popup window appears to alert you that new messages are waiting. To turn On the Display Popup option: 1. In the Settings menu, select General. 2. Select Notification. 3.
- Page 52 4. Select the type of message that this alert is for: Voicemail, Text Message or Picture Message. 5. Press the navigation key up or down to move between ringer options. For Separate Volume, press the navigation key up or down to select the desired volume level and press Note: Press the left softkey for Vibrate to turn vibration on or off.
- Page 53 To set the message reminder option: 1. In the Settings menu, select General. 2. Select Message Alert. 3. Select Reminder. 4. Press the navigation key up or down to select the desired duration and press to select. Auto-Erase This option allows you to automatically delete old messages when the Inbox becomes full.
- Page 54 Text Message Priority This option allows you to configure the default Priority attached to your outgoing text messages. There are two priority levels associated with text messaging. They are: • Normal: This option sends the message as normal with regular delivery. •...
- Page 55 To select the priority level for picture messages: 1. In the Settings menu, select Picture Message. 2. Select Priority. 3. Select High, Normal, or Low using the navigation key and press select. Auto Download This option allows you to configure whether to automatically download media attached to picture messages.
-
Page 56: Contacts
Contacts Your phone can store up to 600 numbers. Each contact can store up to a total of seven phone numbers. For instance, you could store both the home and mobile numbers for someone. Each Contact name can contain up to 64 characters. Finding Contacts There are several ways to display your Contacts entries: by name, speed dial number, and voice dial recognition. -
Page 57: Editing A Contact
Editing a Contact You can always edit a Contact to change a phone number, add an additional phone number, or provide a custom ringer or image. To edit a Contact: 1. From standby mode, press the right softkey for Contacts. 2. -
Page 58: Groups
To call a Contact using speed dial, see "Using One-Touch or Two-Touch Speed Dialing" on page 17. Groups If you have assigned contacts into a group, you can send a message to everyone in a group easily by selecting that group. If the group is empty, you can add members to it, rename or delete the group, and set a ringer for the group. -
Page 59: My Name Card
4. Select a group from the list. Press the right softkey for Options and select the desired option: • Rename group: Select this option to rename the group. Use the key to erase the name and type in a new name. When finished, press the left softkey for Done. -
Page 60: Tools
Tools Alarm Your phone comes with a built-in alarm with multiple alarm times. To use the alarm: 1. Press for Menu. 2. Select Tools. 3. Select Alarm. 4. Select Alarm #1, Alarm #2, Alarm #3. 5. Press the navigation key left or right and select On. 6. -
Page 61: Tip Calculator
5. Use the navigation key to select a mathematical function: • Left to Subtract • Right to Add • Up to Multiply • Down to Divide 6. Enter the next number using the keypad. Repeat steps 4 and 5 as necessary. - Page 62 5. Select the type of event to be Appointment, Personal, Business, Birthday, or Vacation. 6. Press the navigation key down and select one of the following: • • No Alarm 30min before • • On Time 1Hr before • 10min before 7.
- Page 63 Event Alerts There are several ways your phone alerts you of scheduled events: • By playing the assigned ringer type. • By illuminating the backlight. To select the ringer: 1. Press for Menu. 2. Select Settings > Sounds > Ringer Type. 3.
-
Page 64: Task List
Erasing All Events in your Scheduler To delete all scheduled events: 1. Press for Menu. 2. Select Tools > Calendar. 3. Select Scheduler. 4. Press the right softkey for Options. 5. Select Delete All. 6. Highlight Yes using the navigation key and press to confirm. -
Page 65: Countdown
To delete one or more tasks: 1. Press for Menu. 2. Select Tools > Calendar. 3. Select Task List. If you wish to delete a specific task, highlight it using the navigation key. 4. Press the right softkey for Options. 5. -
Page 66: Memo Pad
To view a countdown: 1. Press for Menu. 2. Select Tools > Calendar. 3. Select Countdown. 4. Press the navigation key up or down to highlight the desired countdown and press Tip: When viewing an existing countdown, press the navigation key left or right to cycle between the other countdown entries. -
Page 67: World Time
3. Select Memo Pad. 4. Highlight the memo you wish to delete using the navigation key. 5. Press the right softkey for Options. 6. Select Delete or Delete All. 7. Highlight Yes using the navigation key and press to confirm. To send the memo as a text message: 1. -
Page 68: Voice Services
Voice Services Voice Service For more information, see "Voice Service" on page 32. Voice Memo You can use your phone to record brief memos to remind you of important events, phone numbers, or other items. Recording Voice Memos To record a voice memo: 1. - Page 69 Reviewing and Erasing Memos To play the voice memos you have recorded: 1. Press for Menu. 2. Select Tools > Voice Services. 3. Select Voice Memo. 4. Select Review. (The phone displays a list of saved memos, with the first one selected.) 5.
-
Page 70: Updating Your Phone
Updating Your Phone You can automatically download and update the software on your phone. Only the internal software is updated and other information on the phone, such as Contacts, is not deleted. To update your phone: 1. Press for Menu. 2. -
Page 71: Call History
Call History Viewing History You will find the Call History feature very helpful. It is a list of the last 150 phone numbers (or Contacts entries) for calls you missed, made, or accepted. Call History makes redialing a number fast and easy. It is continually updated as new numbers are added to the beginning of the list and the oldest entries are removed from the bottom of the list. -
Page 72: Making A Call From Call History
Making a Call From Call History To place a call from Call History: 1. Press for Menu. 2. Select Call History. 3. Select Recent Calls. 4. Highlight the entry you want to call and press to dial the number. Tip: When in standby mode, you can also press the key to show your recent calls. -
Page 73: Prepending A Phone Number From Call History
Prepending a Phone Number From Call History If you need to make a call from Call History and you happen to be outside your local area code, you can add the appropriate prefix by prepending the number. To prepend a phone number from Call History: 1. -
Page 74: My Stuff
My Stuff With your new web-enabled phone, you have access to a variety of services such as downloadable Games, Ringers, Wallpapers, and Applications. While each type of download involves a different file type, the basic method for accessing and downloading files is the same. Games You can play a variety of entertaining and graphically-rich games on your phone. -
Page 75: Ringers
Ringers Downloading Ringers To download an available ringer to your phone: 1. Press for Menu. 2. Select My Stuff. 3. Select Ringers. 4. Select Get New Ringers. The web will launch and take you to the Ringers download menu. 5. Use your navigation key to highlight and select a ringer you wish to download. -
Page 76: Wallpapers
Wallpapers Downloading Wallpapers To download an available wallpaper to your phone: 1. Press for Menu. 2. Select My Stuff. 3. Select Wallpapers. 4. Select Get New Wallpapers. The web will launch and take you to the Wallpapers download menu. 5. Use the navigation key to highlight and select a wallpaper you wish to download. -
Page 77: Applications
Applications Downloading Applications To download an application to your phone: 1. Press for Menu. 2. Select My Stuff. 3. Select Applications. 4. Select Get New Applications. The web will launch and take you to the Applications download menu. • If you have an Intellisync account, you can select Intellisync and enter your login and password to access new applications. -
Page 78: Camera
Camera Taking Pictures Taking pictures with your phone’s built-in camera is as simple as choosing a subject, pointing the lens, and pressing a button. To take a picture: 1. Press for Menu. 2. Select Camera > Camera. Shortcut: To activate camera mode, you can also press and hold the the side camera button (see illustration on page 2). - Page 79 3. Select from the following options: • (1) Self Timer: Allows you to configure a timer for Off, 5 sec, or 10 sec. • (2) Fun Tools: Allows you to select: Color Tones: Allows you to select between several different color tones including None, Monochrome (black &...
- Page 80 • High (480*640): The high setting allows a high level of image detail. Images taken at the high setting require more memory to save than the other modes. • Med (240*320): The medium setting allows you to take good quality images without using too much memory. •...
-
Page 81: Picture Messaging
Note: While the Self timer is active, all keys are disabled except Picture Messaging Once you’ve taken a picture, it is automatically saved in the camera. You can share the picture instantly with family and friends. With Picture Messaging, a picture can be sent to up to ten people at a time using their email addresses or phone numbers (if their phones are equipped to receive picture messages). -
Page 82: Pictbridge
SPH-m330 cannot be guaranteed. Printing From Your Phone The SPH-m330 comes equipped with a built-in camera that allows you to print images directly to a printer using the PictBridge technology. A USB data cable must be connected between the two devices before any printing can occur. - Page 83 Note: These options may vary and are dependent on the printer’s capabilities. 9. Press the navigation key down to select Border. Press the navigation key left or right to select on or off. 10. Press the right softkey to Preview the image or press the left softkey to Print the image.
-
Page 84: Bluetooth
Bluetooth-enabled handhelds, PCs, and wireless phones. The Bluetooth communication range is usually up to approximately 10 meters (30 feet). Note: There are many Bluetooth devices in the market whose compatibility with the SPH-m330 cannot be guaranteed. Trusted Devices Trusted Devices The Bluetooth pairing process allows you to establish trusted connections between your phone and another Bluetooth device. -
Page 85: Enable
Enable By default, your device’s Bluetooth functionality is turned off. Turning Bluetooth on makes your device “discoverable” by other in-range Bluetooth devices. To turn Bluetooth on or off: 1. Press for Menu. 2. Select Bluetooth. 3. Select On or Off and press Bluetooth Status Indicators The following icons show your Bluetooth connection status at a glance: •... -
Page 86: My Bluetooth Info
• Visible for 3min: To allow other devices three minutes to detect your phone before changing your status to hidden. • Hidden: To prevent other Bluetooth devices from detecting and identifying your phone. My Bluetooth Info Your phone’s Bluetooth name will appear to other in-range Bluetooth devices, depending on your Visibility settings. -
Page 87: Settings
Settings Display Changing the Main Screen Your new phone offers options for what you see on the display screen when in standby mode. To change the wallpaper: 1. Press for Menu. 2. Select Settings > Display > Main Screen. 3. Select Wallpaper. 4. - Page 88 Changing the Greeting Your phone allows you to change the greeting shown on your display screen when it is idle. To change the greeting on your phone: 1. Press for Menu. 2. Select Settings > Display > Main Screen. 3. Select Foregrounds. 4.
- Page 89 Note: Long backlight settings reduce the battery’s talk and standby times. Changing the Size of your Dialing Font You can adjust the size of the digits that appear on screen when dialing a phone number. To change the dialing font size: 1.
-
Page 90: Sounds
Language Your phone can display text in English or French. Language selection changes all menu settings. To change the language on your phone: 1. Press for Menu. 2. Select Settings > Display. 3. Select Language. 4. Press the navigation key up or down to select English or French. 5. - Page 91 Ringer Type Ringer types help you identify incoming calls and messages. You can assign ringer types to individual Contacts entries, types of calls, Scheduler entries, and types of messages. • Ring Tones: Include a variety of standard ringer types. • Melodies: Include a variety of standard musical melodies.
- Page 92 • Signal Fade/Call Drop: An alert tone is sounded when the signal fades and the connection is lost. An alert tone is also sounded when your phone partially loses signal due to network conditions. • Power On/Power Off: An alert tone is sounded when your phone is powered On or Off.
-
Page 93: Messaging
3. Select Keytones. 4. Select Tone Volume. 5. Press the navigation key right or up to increase, and left or down to decrease the volume. 6. Press to save and exit. Tone Length Your phone offers a number of options for changing the tone duration of a key press. -
Page 94: More
More Auto Keyguard The Auto Keyguard feature helps to prevent accidental key presses when the handset is in your pocket or purse. When the Auto Keyguard is on, the buttons are disabled until you unlock the phone. There are two settings available: •... - Page 95 Note: 911 and emergency calls cannot be made when the Airplane Mode is on. Browser Browser options allow you to clear the memory of web sites you visited using your phone’s Browser. Clearing these items will free up space on your phone. You can set the following options: •...
- Page 96 2. Select Settings > More..3. Select Call setup. 4. Select Auto Answer. 5. Press the navigation key up or down to select Yes or No. 6. Press to save and exit. Abbreviated Dialing Abbreviated dialing allows you to program a five- or six-digit prefix for commonly used phone numbers.
- Page 97 5. Press to save and exit. Call End To set the actions required to end a call: 1. Press for Menu. 2. Select Settings > More..3. Select Call setup. 4. Select Call End and select one of the following: •...
- Page 98 Headset Mode Headset Mode directs audio to either the headset exclusively or to both the headset and the phone’s speaker. There are two options: • Turbo Button: The ringer is routed through both the headset and the phone’s speaker. The turbo button can be turned On or Off. •...
- Page 99 When the Location feature is on, your phone’s standby screen will display the icon. When Location is turned off, the icon will display. Restrict and Lock For more information, see "Phone Security" on page 93. Roaming For more information, see "Roaming" on page 23. Security For more information, see "Phone Security"...
-
Page 100: Phone Security
Phone Security Accessing the Security Menu All of your phone’s security settings are available through the Security menu. You must enter your lock code to view the Security menu. To access the Security menu: 1. Press for Menu. 2. Select Settings > More..3. - Page 101 Changing the Lock Code To change your lock code: 1. Press for Menu. 2. Select Settings > More..3. Select Security. 4. Enter your lock code. 5. Select Change Lock. 6. Enter your new lock code and press the left softkey for Next.
-
Page 102: Using Special Numbers
Restricting Voice Calls You can restrict your incoming and outgoing calls to Allow all, Contacts only, or Special# only. To restrict voice calls: 1. Press for Menu. 2. Select Settings > More..3. Select Restrict and Lock. 4. Select Voice. 5. -
Page 103: Erasing Phone Data
3. Select Security. 4. Enter your lock code. 5. Select Special #. 6. Select entry one, two, or three and press 7. Press and hold to clear the existing number. 8. Enter the number using the keypad. 9. Press to save and exit. Note: There are no Speed Dial options associated with special numbers. -
Page 104: Default Settings
• Erase Messages. This option clears all your text messages, picture messages, and voicemail. 7. Using the navigation key, select Yes to confirm and press permanently delete. Default Settings Resetting the phone restores all the factory defaults, including the ringer types and display settings. -
Page 105: Safety
Safety Getting the Most Out of Your Reception Keeping Tabs on Signal Strength The quality of each call you make or receive depends on the signal strength in your area. Your phone informs you of the current signal strength by displaying a number of bars next to the signal strength icon. -
Page 106: Maintaining Safe Use Of And Access To Your Phone
Maintaining Your Phone’s Peak Performance There are several simple guidelines for operating your phone properly and maintaining safe, satisfactory service. • Speak directly into the mouthpiece. • Avoid exposing your phone and accessories to rain or liquid spills. If your phone does get wet, immediately turn the power off and remove the battery. - Page 107 Following Safety Guidelines To operate your phone safely and efficiently, always follow any special regulations in a given area. Turn your phone off in areas where use is forbidden or when it may cause interference or danger. Using Your Phone Near Other Electronic Devices Most modern electronic equipment is shielded from radio frequency (RF) signals.
-
Page 108: Caring For The Battery
The guidelines listed below help you get the most out of your battery’s performance. • Use only Samsung approved batteries and desktop chargers. These chargers are designed to maximize battery life. Using other batteries or chargers voids your warranty and may cause damage. - Page 109 • Do not use the battery charger in direct sunlight or in high humidity areas, such as the bathroom. • Never dispose of the battery by incineration. • Keep the metal contacts on top of the battery clean. • Do not attempt to disassemble or short-circuit the battery. •...
- Page 110 Information to User This equipment has been tested and found to comply with the limits of a Class B digital device, pursuant to Part 15 of the FCC Rules. These limits are designed to provide reasonable protection against harmful interference in a residential installation.
-
Page 111: Owner's Record
The highest reported SAR values of the SPH-m330 are: CDMA mode (Part 22) Head: 1.22 W/kg Body-worn: 0.871 W/kg PCS mode (Part 24) Head: 1.16 W/kg Body-worn: 0.911 W/kg Owner’s Record The model number, regulatory number, and serial number are located on a nameplate inside the battery compartment. -
Page 112: Manufacturer's Warranty
80% of rated capacity or the battery leaks, and this Limited Warranty does not cover any battery if: (i) the battery has been charged by a battery charger not specified or approved by SAMSUNG for charging the battery; (ii) any of the seals on the battery are broken or show evidence of tampering;... - Page 113 JURISDICTIONS DO NOT ALLOW LIMITATIONS ON HOW LONG AN IMPLIED WARRANTY LASTS, SO THE ABOVE LIMITATION MAY NOT APPLY TO YOU. IN ADDITION, SAMSUNG SHALL NOT BE LIABLE FOR ANY DAMAGES OF ANY KIND RESULTING FROM THE PURCHASE, USE, OR MISUSE OF, OR INABILITY TO USE...
- Page 114 Product pricing reflects this allocation of risk and the limitations of liability contained in this Limited Warranty. The agents, employees, distributors, and dealers of SAMSUNG are not authorized to make modifications to this Limited Warranty, or make additional warranties binding on SAMSUNG. Accordingly, additional statements such as dealer advertising or presentation, whether oral or written, do not constitute warranties by SAMSUNG and should not be relied upon.
-
Page 115: Index
Index Alpha Mode Selecting a Character Input Mode Abbreviated Dialing 16 Activating Voice Service 32 Symbols and Numbers Air Time 66 Symbols, Numbers Airplane Mode 87 T9 (English) Mode Alerts 84 Erasing Text Messages 39 Auto Answer 88 Font Backlight 81 Changing the size Backlight Brightness 81 Backlight Contrast 81... - Page 116 Phone Info 86 Setting Up Volume 83 Phone Number 12, 86 Phone Numbers Saving With Pauses PictBridge 75 Applications Picture Message 40 Downloading Items Picture Messages Games Wallpapers Storing Wireless Web Picture Messaging 41 Launching the Web Pictures - Storing 74 Navigating Ringers Resetting Your Phone 97...
Need help?
Do you have a question about the SPH-m330 and is the answer not in the manual?
Questions and answers