Advertisement
Table of Contents
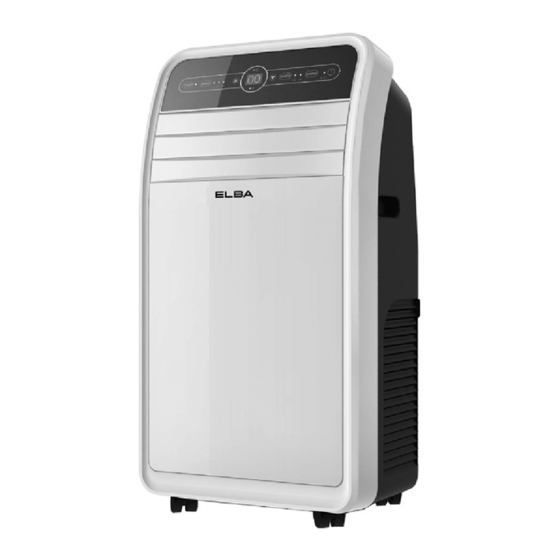
PORTABLE AIR-CONDITIONER
MODEL: EPAC-A4215D(WH)
Owner's Manual
Please read this manual carefully before
operating your set.
Retain it for future reference.
Record model number and serial number
of the set.
See the label attached on the set and
quote this information to your dealer when
you require service.
For The Warranty Terms & Conditions, Please Refer To Warranty Certificate
Advertisement
Table of Contents

Subscribe to Our Youtube Channel
Summary of Contents for Elba EPAC-A4215D
- Page 1 PORTABLE AIR-CONDITIONER MODEL: EPAC-A4215D(WH) Owner’s Manual Please read this manual carefully before operating your set. Retain it for future reference. Record model number and serial number of the set. See the label attached on the set and quote this information to your dealer when you require service.
-
Page 2: Table Of Contents
CONTENT SAFETY PRECAUTIONS..............3 PRODUCT DESCRIPTION…………………………….………..4 INSTALLATION................ 5-6 OPERATION PROCEDURE AND MODULATON......7 OPERATING METHOD..............8 DRAINAGE METHOD………………………….…………….……….9 CLEANING AND MAINTENANCE..........9 INTELLIGENT ERROR DETECTION……………………………10 .............…..10 TROUBLESHOOTING ..............11 MAIN SPECIFICATION... -
Page 3: Safety Precautions
REMOVE ALL PACKING MATERIALS FROM THIS PRODUCT BEFORE USING IT. THIS APPLIANCE MUST BE INSTALLED ON A FLAT SURFACE. PLEASE ENSURE THE ELECTRICITY SUPPLY TO THIS APPLIANCE IS DISCONNECTED BEFORE INSTALLING. Please read this instruction carefully. It is advisable to keep this instruction manual in a safe place for future reference. -
Page 4: Product Description
PRODUCT DESCRIPTION Handle Air inlet (L) Control panel Louver Caster Remote controller Air inlet (R) Air outlet Dehumidification drainage nozzle Air inlet grille Exhaust duct assembly Window sealing plate assembly... -
Page 5: Installation
INSTALLATION • Place it on a flat and even place, and keep it at least 50cm away from its surrounding object. • Fix the exhaust duct assembly in the air outlet behind the panel (anticlockwise). • Insert the exhaust duct assembly into the window sealing plate; adjust opening width of window so that the window can match with the sealing plate properly. -
Page 6: Installation
INCORRECT INSTALLATION • It’s important to keep the exhaust duct smooth. Incorrect installation will affect the efficiency of the appliance. • Prevent the exhaust duct from seriously bending. • Ensure air can flow smoothly in the duct. WARNING: The exhaust duct is designed especially for this model. Don’t replace or lengthen it; otherwise, it will result in operating failure. -
Page 7: Operation Procedure And Modulaton
OPERATION PROCEDURE AND MODULATON ON/OFF key Press the key to turn ON/OFF the appliance. Swing key Press this key after turning on the appliance to swing the wind louver automatically. Speed key Press the key to select High/Low wind speed. Temperature/ time adjusting (Up/Down) key Press the key at cooling mode to increase/reduce the setting temperature;... -
Page 8: Operating Method
OPERATING METHOD Cooling mode • When the appliance enters cooling mode after power ON, the cooling mode indicator lamp lights up. • Press Up/Down key to adjust setting temperature (17ºC to 30ºC). • Press Speed key to choose High/Low wind speed. Wind mode •... -
Page 9: Drainage Method
DRAINAGE METHOD This appliance is equipped with automatic water vaporization system. The condenser is cooled with the circulating of condensing water to improve cooling efficiency and energy saving. If the internal vessel is full of water, the display screen will display “FL”, and the compressor stops operate automatically. -
Page 10: Intelligent Error Detection
SEASONAL CLEANING If the appliance will not be used for a long time: • Pull out the water wedge to drain off the remaining water. • Operate the appliance in wind mode for 2 hours until the inside is dry. •... -
Page 11: Main Specification
MAIN SPECIFICATION Model No : EPAC-A4215D(WH) Cooling Capacity : 12,000 BTU/h Thermostat Range : 17ºC to 35ºC Max Air Flow : 420m Input Power : 3.5kW Rated Voltage : 220-240V Rated Frequency : 50Hz Power Consumption : 1350W Refrigerant : R410a NOTICE This product must not be disposed together with domestic waste.


Need help?
Do you have a question about the EPAC-A4215D and is the answer not in the manual?
Questions and answers