
Related Manuals for Fanimation FP4320 series


Summary of Contents for Fanimation FP4320 series
-
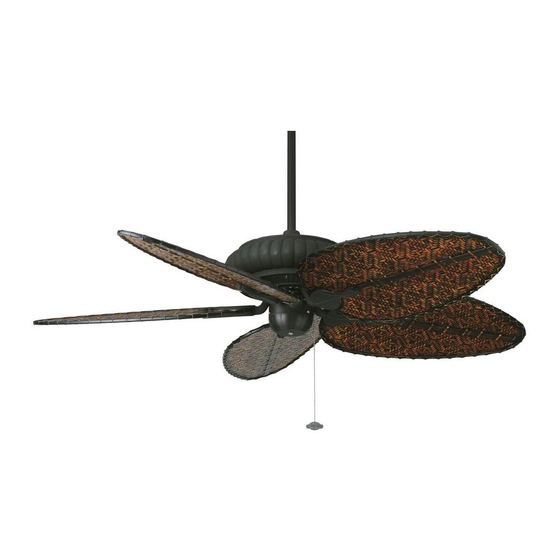
Page 1: Ceiling Fan
The Belleria ® Ceiling Fan Wet Location Model Net Weight 9.9 kg (21.78 lbs) Model No. FP4320**1 OWNER’S MANUAL READ AND SAVE THESE INSTRUCTIONS... -
Page 2: Table Of Contents
Fanimation. 7. Fanimation reserves the right to modify or discontinue any product at any time and may substitute any part under this warranty. 8. Under no circumstances may a fan be returned without prior authorization from Fanimation. The receipt of purchase must ac- company authorized returns and must be sent freight prepaid to Fanimation. -
Page 3: Unpacking Instructions
Fanimation. Substitution of parts or accessories not • Blade Holders (5) – Four wire connectors designated for use with this product by Fanimation could • Blade Holder Covers (5) – Phillips screwdriver, 4˝ result in personal injury or property damage. Contact your retail store for missing or damaged parts. -
Page 4: Electrical And Structural Requirements
8 - 9 feet above the floor for optimal airflow. Consult your a gentle updraft, which forces warm air near the ceiling Fanimation Retailer for optional mounting accessories. down into the occupied space.Remember to adjust your thermostat when using your ceiling fan - additional energy... - Page 5 How to Assemble Your Ceiling Fan (cont’d) 2. The fan comes with blue, black, and white 80” Black, Blue and White Lead wires. Separate and untwist the three wires. Route the wires the wires through the downrod. (Figure 2) Downrod NOTE: You will be using either the 6 ˝...
-
Page 6: How To Hang Your Ceiling Fan
How to Hang Your Ceiling Fan WARNING To avoid possible fire or shock, be sure electricity is turned off at the main fuse box before hanging. MAIN FUSE BOX (Figure 7) Figure 7 NOTE: If you are not sure if the outlet box is grounded, contact a licensed electrician for advise, as it must be Ceiling grounded for safe operation. -
Page 7: How To Wire Your Ceiling Fan - Pull Chain
How to Wire Your Ceiling Fan - Pull Chain If you feel that you do not have enough electrical wiring knowledge or experience, have your fan installed by a licensed electrician. ▲WARNING Black To avoid possible electrical shock, be sure electricity is Fan Wire Listed Black... -
Page 8: Installing The Canopy Housing
Operating Instructions-Pull Chain (Cont’d) 3. Check the operation of the fan by gently pulling on the pull chain switch. (Figure 14) Your fan model is equipped with a 4-position, 3-speed, pull chain switch. The operating sequence is as follows: 1st Pull = HIGH 3rd Pull = LOW 2nd Pull = MEDIUM 4th Pull = OFF... -
Page 9: Maintenance
Mounting the Fan Blades (cont’d) NOTE: You will find the fan blade set packed in its own carton and the blade holders and hardware bag in the Blade Holder Arm fan box. 2. Lay flat side of blade holder arm on a flat surface with the inside of the blade holder arm facing up. -
Page 10: Parts List
Parts List Model #FP4320**1 Ref. # Description Part # Hanger Bracket Assembly AP255BL Wet Downrod/Hanger Ball Assembly ADR1-6 Ceiling Canopy PG155 Canopy Screw Cover Assembly AP260** Motor Coupling Cover Assembly APPAC1405** Fan Motor/Housing Assembly AMA4320 Blade Holder (Set of 5) AP43210 Blade Holder Cover (Set of 5) AP3220... -
Page 11: Exploded-View Drawing
The Belleria FP4320**1 ® Exploded-View Figure 1 NOTE: The illustration shown is not to scale or its actual confi guration may vary... -
Page 12: Trouble Shooting
Trouble Shooting ▲WARNING For your own safety turn off power at fuse box or circuit breaker before trouble shooting your fan. Trouble Probable Cause Suggested Remedy 1. FAN WILL NOT START 1. Fuse or circuit breaker blown. 1. Check main and branch circuit fuses or circuit breakers. - Page 14 10983 Bennett Parkway Zionsville, IN 46077 (888) 567-2055 FAX (866) 482-5215 Outside U.S. call (317) 733-4113 Visit Our Website @ www.fanimation.com Copyright 2010 Fanimation 2010/09...