Table of Contents
Advertisement
Advertisement
Table of Contents

Related Manuals for Pioneer DV-500K-S


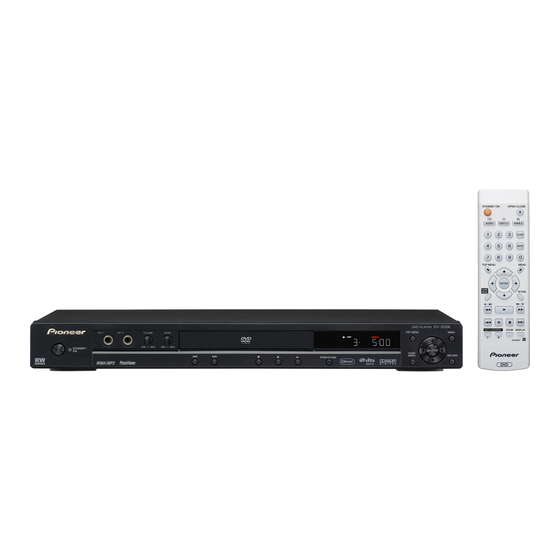
Summary of Contents for Pioneer DV-500K-S
- Page 1 DVD Player DV-500K-S DV-300-S Operating Instructions...
-
Page 2: Operating Environment
Thank you for buying this Pioneer product. Please read through these operating instructions so you will know how to operate your model properly. After you have finished reading the instructions, put them away in a safe place for future reference. - Page 3 When you find it unused for a long period of time (for example, when damaged, ask your nearest PIONEER authorized on vacation). D3-4-2-2-1a_A_En service center or your dealer for a replacement.
-
Page 4: Table Of Contents
Contents 01 Before you start Zooming the screen ....29 Switching camera angles ... . . 29 Features. -
Page 5: Before You Start
Before you start Chapter 1 Before you start Features • MP3 and WMA compatibility See Compressed audio compatibility on page 8. • 24-bit/96 kHz compatible DAC • JPEG compatibility The integrated 24-bit/96 kHz DAC means that See JPEG file compatibility on page 9. this player is compatible with high sampling- rate discs, capable of delivering exceptional ®3... -
Page 6: Hints On Installation
Before you start Putting the batteries in the remote Hints on installation We want you to enjoy using this product for • Open the battery compartment cover years to come, so please use the following and insert the batteries as shown. guidelines when choosing a suitable location: Use two AA/R6P batteries and follow the indications (, ) inside the compartment. -
Page 7: Disc / Content Format Playback Compatibility
Before you start Disc / content format playback About DualDisc playback A DualDisc is a new two -sided disc, one side compatibility of which contains DVD content video, audio, This player is compatible with a wide range of etc. while the other side contains non-DVD disc types (media) and formats. -
Page 8: Compressed Audio Compatibility
Before you start Compressed audio compatibility About DivX video • Compatible formats: MPEG-1 Audio Layer DivX is a digital video format created by DivX, 3 (MP3), Windows Media Audio (WMA) Inc. This player can play DivX videos burned on CD-R/-RW/-ROM discs. Keeping the same •... -
Page 9: Divx Video Compatibility
Before you start DivX video compatibility ® • Official DivX Certified product. ® • Plays all versions of DivX video (including ® ® DivX 6) with standard playback of DivX media files. • File extensions: .avi and .divx (these must be used for the player to recognize DivX video files). -
Page 10: Connections
Connections Chapter 2 Connections Easy connections Important • Before making or changing any connections, switch off the power and disconnect the power cable from the AC outlet. • The setup described here is a basic setup that allows you to play discs using just the cables supplied with the player. -
Page 11: Connecting Using The S-Video Output
Connections Connecting using the S-video Connecting using the output component video output If your TV (or other equipment) has an S-video You can use the component video output (S1) input, you can use the S-video output on instead of the standard video out jack to this player instead of the standard (composite) connect this player to your TV (or other output for a better quality picture. -
Page 12: Connecting To An Av Receiver
Connections • If you connect a TV that is not compatible For a coaxial connection, use a coaxial cable with a progressive scan signal and switch (similar to the supplied video cable) to connect the player to progressive, you will not be the COAXIAL DIGITAL AUDIO OUT jack to a able to see any picture at all. -
Page 13: Controls And Displays
Controls and displays Chapter 3 Controls and displays Front panel TOP MENU MENU MIC1 MIC2 VOLUME ECHO MIN – MAX MIN – MAX STANDBY/ ENTER HOME OPEN/CLOSE MENU RETURN 16 15 DV-500K TOP MENU MENU STANDBY/ ENTER HOME OPEN/CLOSE RETURN MENU DV-300 ... -
Page 14: Remote Control
Controls and displays Remote control 12 PLAY MODE (for DV-300) (page 25) (low) (for DV-500K) (page 20) 13 SURROUND (for DV-300) (page 30) OPEN/CLOSE STANDBY/ON (high) (for DV-500K) (page 20) 14 OPEN/CLOSE (page 17) AUDIO SUBTITLE ANGLE 15 ANGLE (page 29) CLEAR 16 CLEAR (page 27) -
Page 15: Getting Started
Getting started Chapter 4 Getting started Switching on Using the on-screen displays After making sure that everything is connected For ease of use, this player makes extensive properly and that the player is plugged in, use of graphical on-screen displays (OSDs). press ... -
Page 16: Setting Up The Player For Your Tv
Getting started Setting up the player for your Setting the language of this player’s on-screen displays If you have a widescreen (16:9) TV, you should This sets the language of the player’s on- setup the player so that the picture will be screen displays. -
Page 17: Playing Discs
Getting started Playing discs Load a disc. Load a disc with the label side facing up, using The basic playback controls for playing DVD, the disc tray guide to align the disc (if you’re CD, Video CD/Super VCD, DivX video and loading a double-sided DVD disc, load it with MP3/WMA discs are covered here. -
Page 18: Basic Playback Controls
Getting started Basic playback controls Resume and Last Memory The table below shows the basic controls on When you stop playback of a DVD, CD, Video CD/Super VCD or DivX video discs, RESUME is the remote for playing discs. The following chapter covers other playback features in shown in the display indicating that you can more detail. - Page 19 Getting started DVD-Video disc menus Video CD/Super VCD PBC menus Many DVD-Video discs feature menus from Some Video CD/Super VCDs have menus from which you can select what you want to watch. which you can choose what you want to watch. They may also give access to additional These are called PBC (Playback control) features, such as subtitle and audio language...
-
Page 20: Singing Your Favorite Songs Along With Karaoke Discs
Getting started Singing Your Favorite Songs Along with Karaoke Discs MIC1 MIC2 VOLUME ECHO STANDBY/ MIN – MAX MIN – MAX DV-500K only This player has a karaoke feature that lets you DV-500K sing along with your favorite songs, featuring (a) microphone(s) jack conveniently located on the front panel as well as controls for mixing the vocal level and amount of echo effect. - Page 21 Getting started Note • You can adjust the HIGH tone in a range of • After I load a DVD disc, it ejects five steps and the LOW tone in a range of automatically after a few seconds! five steps. Most likely, the disc is the wrong region for •...
-
Page 22: Playing Discs
Playing discs Chapter 5 Playing discs Playing in slow motion Note You can play DVDs at four different slow • Many of the functions covered in this motion speeds, forwards and backwards. chapter apply to DVD discs, Video CDs/ Video CD/Super VCDs and DivX video can be Super VCDs, CDs, DivX video and WMA/ played at four different forward slow motion MP3, JPEG discs, although the exact... -
Page 23: Viewing A Jpeg Slideshow
Playing discs Viewing a JPEG slideshow Browsing DVD or Video CD/ Super VCD disc with the Disc After loading a CD/CD-R/-RW containing JPEG picture files, press (play) to start a slideshow Navigator from the first folder/picture on the disc. The Use the Disc Navigator to browse through the player displays the pictures in each folder in contents of a DVD or Video CD/Super VCD disc... -
Page 24: Browsing Wma, Mp3, Divx Video And Jpeg Files With The Disc Navigator
Playing discs Press HOME MENU and select ‘Disc The screen shows up to six moving thumbnail images displayed one after another. To display Navigator’ from the on-screen menu. the previous/next six thumbnails, press / (you don’t have to wait for all the 00:00/ 00:00 0kbps thumbnails to finish playing to display the... -
Page 25: Looping A Section Of A Disc
Playing discs To resume normal playback, select ‘Off’ from the menu. • You can also play a JPEG slideshow while listening to WMA/MP3 playback. Simply Using repeat play select the audio file you want to listen to There are various repeat play options, followed by the JPEG from which you want depending on the kind of disc loaded. -
Page 26: Using Random Play
Playing discs Press HOME MENU and select ‘Play The repeat options available depend on the kind of disc loaded. For example, for DVD Mode’ from the on-screen menu. discs, you can select Title Repeat or Chapter Select ‘Random’ from the list of func- Repeat (or Repeat Off). -
Page 27: Creating A Program List
Playing discs Creating a program list Repeat step 3 to build up a program list. This feature lets you program the play order of A program list can contain up to 24 titles/ titles/chapters/tracks on a disc. chapters/tracks. • You can insert steps into the middle of a Important program list by just highlighting the position where you want the new step to... -
Page 28: Searching A Disc
Playing discs Searching a disc Switching subtitles You can search DVD discs by title or chapter Some DVD and DivX video discs have subtitles number, or by time; CDs and Video CD/Super in one or more languages; the disc box will VCDs by track number or time;... -
Page 29: Zooming The Screen
Playing discs Displaying disc information Note Various track, chapter and title information, • Some DVD discs only allow you to change such as the elapsed and remaining playing audio language from the disc menu. Press time can be displayed on-screen while a disc is TOP MENU or MENU to access. -
Page 30: Audio Settings And Video Adjust Menus
Audio Settings and Video Adjust menus Chapter 6 Audio Settings and Video Adjust menus Audio Settings menu • Audio DRC is only effective through the digital output when Digital Out is set to The Audio Settings menu offers features for On, and Dolby Digital Out is set to Dolby adjusting the way discs sound. -
Page 31: Video Adjust Menu
Audio Settings and Video Adjust menus Dialog Video Adjust menu • Settings: High, Medium, Low, Off From the Video Adjust screen you can adjust (default) various settings that affect how the picture is presented. The Dialog feature is designed to make the dialog stand out from other background Press HOME MENU and select ‘Video sounds in the soundtrack. -
Page 32: Initial Settings Menu
Initial Settings menu Chapter 7 Initial Settings menu Using the Initial Settings menu The Initial Settings menu provides audio and Note video output settings, parental lock settings, and display settings, among others. • In the table below, the default setting is shown in bold: other settings are shown in If an option is grayed out it means that it italics. -
Page 33: Video Output Settings
Initial Settings menu Video Output settings Setting Option What it means TV Screen 4:3 (Letter Box) Set if you have a conventional 4:3 TV. Widescreen movies are (This setting effective for shown with black bars top and bottom. analog video output. See 4:3 (Pan &... -
Page 34: Display Settings
Initial Settings menu Setting Option What it means Subtitle Display Subtitles are displayed according to your selected subtitle language (see page 33). Subtitles are always off by default when you play a DVD disc (note that some discs override this setting). Display settings Setting Option... -
Page 35: Parental Lock
Initial Settings menu Parental Lock Changing your password To change your password, confirm your • Default level: Off; Default password: none; existing password then enter a new one. Default Country/Area code: us (2119) To give you some control over what your Select ‘Password Change’. -
Page 36: About Divx Vod Content
Initial Settings menu Setting/changing the Country/Area Displaying your DivX VOD code registration code You can find the Country/Area code list on Press HOME MENU and select ‘Initial page 41. Settings’. Select ‘Country Code’. Select ‘Options’, then ‘DivX VOD’. Use number buttons to enter your password, then press ENTER. -
Page 37: Additional Information
The DVD player’s lens should not become dirty conventional, fully circular discs. Do not use in normal use, but if for some reason it should shaped discs. Pioneer disclaims all liability malfunction due to dust or dirt, consult your arising in connection with the use of shaped nearest Pioneer-authorized service center. -
Page 38: Screen Sizes And Disc Formats
Additional information Condensation Standard TV users Condensation may form inside the player if it is If you have a standard TV, the TV Screen brought into a warm room from outside, or if setting (page 33) of this player should be set to the temperature of the room rises quickly. -
Page 39: Setting The Tv System
Additional information Setting the TV system Using the front panel buttons, hold down the (stop) button and press (Except Taiwanese model) STANDBY/ON to switch the player back The default setting of this player is AUTO, and unless you notice that the picture is distorted All the player’s settings are now reset. -
Page 40: Troubleshooting
CD-ROM discs. proper operation. If this does not correct the JPEG A standard file format used for still problem, please consult your nearest Pioneer images. JPEG files are identified by the service center. file extension “.jpg”. -
Page 41: Language Code List
Additional information Language code list Language (Language code letter), Language code Japanese (ja), 1001 Bhutani (dz), 0426 Kirghiz (ky), 1125 Sinhalese (si), 1909 English (en), 0514 Esperanto (eo), 0515 Latin (la), 1201 Slovak (sk), 1911 French (fr), 0618 Estonian (et), 0520 Lingala (ln), 1214 Slovenian (sl), 1912 German (de), 0405... -
Page 42: Specifications
Additional information Specifications General Digital audio characteristics Power requirements Frequency response ... 4 Hz to 44 kHz ....AC 110 V to 240 V, 50 Hz/60 Hz S/N ratio . - Page 43 253 Alexandra Road, #04-01, Singapore 159936 TEL: 65-6472-7555 PIONEER ELECTRONICS AUSTRALIA PTY. LTD. 178-184 Boundary Road, Braeside, Victoria 3195, Australia, TEL: (03) 9586-6300 PIONEER ELECTRONICS DE MEXICO S.A. DE C.V. Blvd.Manuel Avila Camacho 138 10 piso Col.Lomas de Chapultepec, Mexico,D.F. 11000 TEL: 55-9178-4270 K002_B_En <07C00001>...
Need help?
Do you have a question about the DV-500K-S and is the answer not in the manual?
Questions and answers