Table of Contents
Advertisement
Installation/Operation/Maintenance
Applies to: Model UESA
High-Effi ciency, Separated-Combustion,
Low-Static Unit Heater
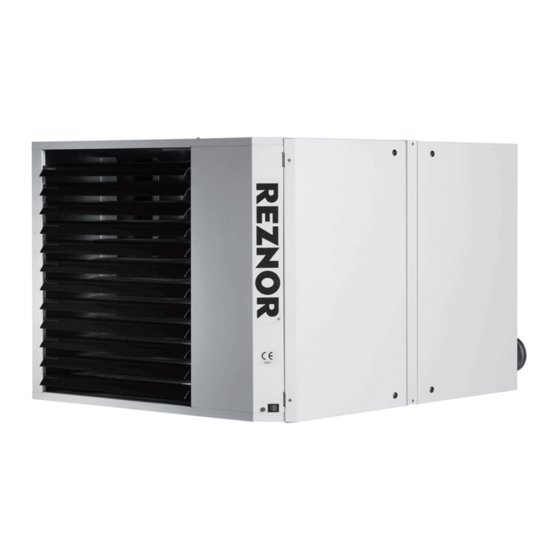
UESA
These appliances meet the following EC Directives:
DIR 2009/142/EC:GAD
DIR CE 89/336/EEG:EMC
DIR 73/23/EEG:LVD
DIR 89/392/EEG:MD
WARNING
Please read this document carefully before commencing installation, commissioning and/or servicing.
Leave it with the user or attached to the appliance or gas service meter after installation.
Improper installation, adjustment, alteration, service or maintenance can cause property damage, injury or death.
All work must be carried out by appropriately qualifi ed persons.
The manufacturer does not take any responsibility in the event of non-observance of the regulations concerning
the connection of the apparatus causing a harmful operation possibly resulting in damage to the apparatus and/or
environment in which the unit is installed.
Reznor U.K. Limited - Park Farm Road - Folkestone - Kent - England
tel : 01303-259141
fax : 01303-850002
1104UESAGBEN, page 1/31
Advertisement
Table of Contents

Related Manuals for Reznor UESA


Summary of Contents for Reznor UESA
- Page 1 Reznor U.K. Limited - Park Farm Road - Folkestone - Kent - England tel : 01303-259141...
-
Page 2: Table Of Contents
TABLE OF CONTENTS General..............................3 1.1 Warning 1.2 General information 1.3 Warranty 1.4 Installation codes Unit heater location..........................4 Uncrating & preparation........................4 Clearances & dimensions........................5 Hanging the heater..........................7 Mechanical.............................8 6.1 Gas piping & pressures 6.1.1 Gas supply 6.1.2 Gas connections 6.1.3 Burner gas pressure and adjustment 6.1.4 Gas conversion 6.2 Venting and combustion air... -
Page 3: General
Children should be supervised to ensure that they do not play with the appliance. General Models UESA 035 through 102 are design certifi ed to the CE EN1020 standard for use in industrial and commercial installations only. All models and sizes are available for use information with either natural, propane or butane gas with operating temperature between -15°C... -
Page 4: Unit Heater Location
2. UNIT HEATER Use the minimum clearances in section 4 and the throw data in the technical data table addended when determining where to suspend the heater. LOCATION Recommended minimum height is 2.5mm. For best results, the heater should be placed with certain rules in mind. Always REMARK ensure that minimum clearances are maintained. -
Page 5: Clearances & Dimensions
(mm) overall clearances to the fl ue outlet system must be (*) Heaters can be base mounted on suitable non combustible supports 150mm. Figure 1a: Dimensions UESA 035 & 055 Rear view Side view Front view Top view Legend 1. Combustion air inlet Ø 100 2. - Page 6 Figure 1b: Dimensions UESA 083 & 102 Rear view Side view Front view Top view Legend 1. Combustion air inlet Ø 130 2. Flue connection Ø 130 with condensate drain tap 3/4” 3. External gas connection 4. Electrical connections 5. Service panel 6.
-
Page 7: Hanging The Heater
The heater is supplied with four point suspension. All points must be used. Threaded nut inserts are provided on each side of the top panel of the heater. See fi gure below. Table 2: UESA Weight (kg) Figure 2: Suspending the heater... -
Page 8: Mechanical
The unit is equipped with a nipple that extends outside the cabinet. The gas connection is 3/4”, Leak test all gas connections by brushing on a leak detecting solution. 6.1.2 Gas connections Table 3 UESA Gas connections Nat. Gas 3/4" 3/4"... -
Page 9: Flue Requirements
8) Pressure regulator adjustment screw 6.1.4 Gas conversion Reznor UESA air heaters are designed to operate on natural, propane or butane gas and will be supplied fi tted for the gas type ordered. In the event a site conversion is required it is necessary to change the burner jet and gas valve. - Page 10 C appliance must be fi tted with an individual combustion air/fl ue pipe system. Type C2 appliance, with single pipe system for supply of combustion air and evacuation of fl ue gasses, are not allowed. Table 5 UESA 035, 055 083, 102 Diameter & maximum fl ue pipe lengths Heater socket &...
- Page 11 (see fi gure 5). Important : each condensate drain must include a separate trap (no part of delivery). Table 6 UESA Condense drain rates of fl ow : Natural gas...
- Page 12 Check codes to be certain that this is permitted (condensate from the heater has about the acidity of soda pop and is not harmful to a sanitary drain). UESA heaters will produce condensate depending on size and gas type (see table 6).
- Page 13 Figure 7 Flue condensate drain tap Minimum dimensions D = minimum 130mm C = D + at least 50mm (min 185mm) 6.2.2 Flues for power vented installations (type B appliances) If the air heater is to be installed as a type B appliance, air for combustion will be taken from within the space where the heater is installed.
- Page 14 Figure 9 Approved appliances type B22 - roof B22 - wall For illustrative purposes only. For actual pipe con- nections see fi gure 8. Air supply It is important to ensure that there is an adequate air supply at all times for both combustion and heating requirements.
- Page 15 Figure 10 Approved appliances type For illustrative purposes only. For actual pipe con- nections see fi gure 11. C12b/C62 C32/C62 Figure 11 Type C appliances : combustion air and fl ue pipe sockets 1104UESAGBEN, page 15/31...
-
Page 16: Electrical Connections
7. ELECTRICAL Electrical supply SUPPLY AND The electrical installation must only be carried out in accordance with the IEE regu- CONNECTIONS lations and by an appropriately qualifi ed person. The electrical supply line to the heater should include a main isolating switch. The minimum clearance distance between the contacts must be more than 3 mm. -
Page 17: Wiring Connection
7.2 Wiring connection connection 1104UESAGBEN, page 17/31... -
Page 18: Controls
If a restriction or excessive fl ue pipe length causes the sensing pressure to be be- low the allowable level, the pressure switch will shut off the main burner. Figure 12 Combustion air pressure switch Table 7 UESA Set point Off (Pa) Set points OFF 1104UESAGBEN, page 18/31... - Page 19 8.3.2 Limit controls WARNING Never bypass the limit All units are equipped with temperature activated limit controls. The controls are fac- controls, hazardous tory set and non-adjustable. If either setpoint is reached, the corresponding limit con- conditions could result. trol will interrupt the electric power to the gas valve. These safety devices provide protection in the case of motor failure or lack of airfl...
-
Page 20: Ignition System
9. IGNITION SYSTEM This heater is equipped with a direct spark multi tray burner control relay. The con- trol relay monitors the safety devices and controls the operation of the venter motor and the gas valve between heat cycles. The time line below illustrates a normal heat cycle. Power to gas valve and ignitor Start pre-purge Sensor checks for the presence of a flame... -
Page 21: Operation
Check suspension. Unit must be secure. 10. OPERATION Check clearances from combustibles. Requirements are in section 5. Check fl ue system to ensure it is installed according to the instructions 10.1 Check installa- in section 7, fl ueing requirements. tion ... -
Page 22: Maintenance And Service
10.4 Check insta- To turn off gas supply at the appliance : lation after start- 1) Set thermostat to the lowest possible setting or ‘OFF’ position. 2) Shut off the manual service valve when the fan has stopped. 3) Switch off electric power to the appliance. •... -
Page 23: Maintenance Procedure
Figure 16b : Internal control panel assem- bly located on a removable bracket 13) Control relay (ER) 14) Terminal blocks 15) Connector 16) Pressure switch (S3 11.2 Maintenance 11.2.1 Heat exchanger maintenance procedure This heater has a T-CORE 3 TM heat exchanger (patent pending). Remove any exter- nal dirt or dust accumulation. - Page 24 Figure 18a Figure 17a Figure 18b Figure 17b burner Locking nut Orifi ce orifi ce Figure 19 Burner removal steps Remove screws attaching burner Venturi tube : slide right, rotate out- ward, pull out Disconnect manifold at orifi ce and out- side the heater, slide to the right Inspect and clean With the burner assembly removed, shine a fl...
- Page 25 Figure 20 Inspect the internal portion of the heat exchanger (with burner assembly re- moved). At the burner fl ame entrance of each tube, shine a bright light into each heat exchanger section. With the light shin- ing into the heat exchanger, observe the outside surface of the tube where dis- coloration is evident.
- Page 26 Control relay : See fi gure 23. The electronic burner relay monitors the operation of the heater including ignition. Do not open the control relay. Each heating season check the lead wires for insulation deterioration and good connections. Proper operation of the direct spark ignition system requires a minimum fl ame signal of 1.0 microamps (DC) as measured by a microam meter.
-
Page 27: Troubleshooting
Check for proper operation. Replace the access door. Figure 25 UESA 035 - 102 11.2.7 Flue and combustion air piping Check the complete system at least once a year. Inspection should include all joints, seams, concentric adapters and the fl ue terminal cap. Replace any defec- tive or heavily corroded parts. - Page 28 Trial for ignition Call for heat s there a spark Is there line voltage at spark across gap at igniter? igniter? Check connection at spark igniter Is there line Replace igniter voltage to the Replace control relay control relay? Check wiring connections Trial for ignition Call for heat...
- Page 29 General troubleshooting PROBLEM PROBABLE CAUSE REMEDY Venter motor 1. No power to unit. 1. Turn on power, check supply fuses or circuit breaker. will not start 2. No power to venter motor. 2. Check connections at burner relay and/or venter motor terminals. 3.
-
Page 30: Spare Parts List
12. SPARE PARTS DESCRIPTION UESA PART NUMBER LIST Control relay 03 25324 Spark ignitor 05 25162 Flame sensor 03 401US 195292 Limit control LC3 all, exc. 055 03 24959 03 Limit control LC3 03 24959 Limit control LC1 03 24959 04... -
Page 31: Addendum : Technical Data
ADDENDUM : TECHNICAL DATA Type UESA Gas category II2H3+ Comb. Air & Flue, type B (1) B22p Comb. Air & Flue, type C (1) C12, C32, C52, C62, C82 Connection collars Heat input Hs 37,8 58,6 88,1 107,7 Heat input Hi...
Need help?
Do you have a question about the UESA and is the answer not in the manual?
Questions and answers