
Related Manuals for Zephyr Roma Island ZRM-E36CS


Summary of Contents for Zephyr Roma Island ZRM-E36CS
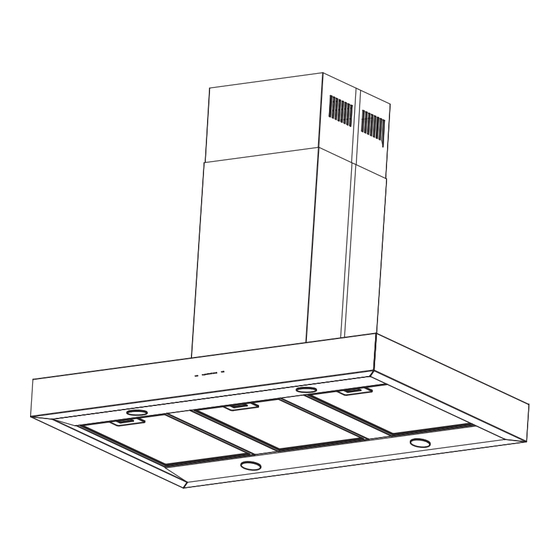
- Page 1 Roma Island ZRM-E36CS ZRM-E42CS Model number: Serial Number: APR14.0201 © Zephyr Corporation...
- Page 2 www.zephyronline.com...
- Page 3 SAFETY NOTICE ..............LIST OF MATERIALS ............INSTALLATION Ducting Calculation Sheet ........Mounting Height & Clearance ........ Ducting Options ......................Mounting the Hood 9-10 ............. Ductless Recirculating ..........FEATURES & CONTROLS ICON Touch Controls 12 - 13 ..........MAINTENANCE Hood and Filter Cleaning .........
- Page 4 www.zephyronline.com READ AND SAVE THESE INSTRUCTIONS WARNING TO REDUCE THE RISK OF FIRE OR ELECTRIC SHOCK, DO NOT USE THIS FAN WITH ANY SOLID-STATE CONTROL DEVICE. WARNING TO REDUCE THE RISK OF FIRE ELECTRIC SHOCK, OR INJURY TO PERSONS, OBSERVE THE FOLLOWING: a.
- Page 5 WARNING TO REDUCE THE RISK OF FIRE, USE ONLY METAL DUCTWORK. CAUTION attics, crawl spaces or garages. Not for use over an outdoor grill. OPERATION and loose clothing. The manufacturer declines all responsibility in the event of failure to observe the instructions given here for installation, maintenance and suitable use of the product.
-
Page 6: Parts Supplied
www.zephyronline.com MODELS: ZRM-E36CS, ZRM-E42CS PARTS SUPPLIED (2) Thick Trim Pieces (2) Top Duct Covers (1) Top Support Frame (2) Thin Trim Pieces (1) Bottom Support Frame (2) Bottom Duct Covers (1) 6” round damper (pre-installed) (4) 3/16 *1/2” mounting screws (pre-installed) (1) Hood Body w/ (1 in each corner of the blower housing) blower housing... - Page 7 Equivalent number Equivalent number Duct pieces Duct pieces length x used T otal length x used T otal 3- 1/ 4” x 10” 1 Ft. 6”- 8” Round 30 Ft. Rect., wall cap straight with damper 7” Round, 1 Ft. 6”- 8”...
- Page 8 www.zephyronline.com Use calculation worksheet to compute total duct ALWAYS, when possible, reduce the number of transitions and turns. If a long duct run is required, increase duct size from 6” to 7” or 8”. If turns or transitions are required: Install as far away from duct opening and as far apart between the two transitions as possible.
-
Page 9: Ducting Options
WARNING FIRE HAZARD NEVER exhaust air or terminate duct work into spaces between walls, crawl spaces, ceiling, attics or garages. All exhaust must be ducted to the outside, unless using the recirculating option. Use single wall rigid metal ductwork only. Some Ducting Options Roof Pitch w/ Flashing &... - Page 10 www.zephyronline.com 12” 14” STANDARD min. ducted - 28” min. recirc. - 32” max. - 39” Z1C-01RM EXTENSION min. ducted - 50 1/2” min. recirc. - 54 1/2” max. - 79” ” , 41 ” 15/16 7/8” " 3/16 "...
- Page 11 CAUTION: At least two installers are required due to the weight and size of the hood. Ceiling Joists Wood Blocking Top Support Frame Support Frame Arm FIG. B Bottom Support Frame Top Support Frame Bottom Support Frame (secures to top of blower housing) back Key Holes Blower Housing...
-
Page 12: Ductless Recirculating
www.zephyronline.com Cable Lock Top Support Frame by local codes. Check with local requirements and codes, purchase and install appropriate connector if necessary. Top Duct Covers Thick Trim Piece Cable Lock Thin Trim Piece Bottom Duct Covers FIG. E Bottom Support Frame FIG. - Page 13 Ductless recirculation is intended for applications where an exhaust duct work is not possible to be installed. When converted, the hood functions as a recirculating hood rather than an exhaust hood. Fumes and exhaust circulated back within the home. We recommend to ALWAYS exhaust air outside of the home by employing existing or installing new duct is not possible should you recourse to converting the hood into a recirculating hood.
- Page 14 www.zephyronline.com Power / Delay Off Lights On/Dim/Off Adjust 5 Speed Levels Display (speed level, delay off, filter clean/change) 1 POWER / DELAY OFF BUTTON Power Button Function Button will turn power on and off for entire hood (fan and lights). - Hood will remember the last speed and light level it was turned off at.
- Page 15 3 LIGHTS BUTTON - Lights are two levels, High and Low. - From off, press one time for High. Press again for Low. Press again to power lights off. 4 DISPLAY INDICATORS Mesh Filter Clean Reminder (always enabled) - After 30 hours of fan usage, the button indicator will begin to slowly blink indicating it is time to clean the mesh filters.
-
Page 16: Maintenance
www.zephyronline.com SURFACE MAINTENANCE: Clean periodically with hot soapy water and clean cotton cloth. Do not use corrosive or abrasive detergent or steel wool/scouring pads which will scratch and damage surface. For heavier soil use liquid degreaser. After cleaning it is recommended that you use non-abrasive stainless steel polish/cleaners, to polish and buff out the stainless luster and grain. -
Page 17: Light Bulbs
REPLACING LIGHT BULBS CAUTION: Light bulb becomes extremely hot when turned on. DO NOT touch bulb until switched off and cooled. Touching hot bulbs could cause serious burns. Make sure all power is turned off and bulbs are not hot. stops and falls out. -
Page 18: Troubleshooting
www.zephyronline.com TROUBLESHOOTING PROCEDURES FOR ZRM Issue Cause What to do After installation, 1. The power source is not turned ON. 1. Make sure the circuit breaker and the unit’s the unit doesn’t power is ON. work. 2. The power line and the cable locking connector 2. - Page 19 MAX. USE ONLY TYPE MR16, GU10, 50 W. HALOGEN LIGHT BULBS. VOLTS MAX AMPS ZRM-E36CS, ZRM-E42CS CIRCUIT DIAGRAM ACT 390 CFM - Fan Max. 405W @ 3.4A ACT 290 CFM - Fan Max. 400W @ 3.3A...
-
Page 20: Wiring Diagrams
Some local codes limit the maximum amount of CFM a range hood can move. ACT allows you to control the maximum blower CFM of hoods with of select Zephyr Ventilation range hoods without the need for expensive make up air kits. ACT enables the installer to easily set the maximum blower speed necessary for your installation. - Page 22 www.zephyronline.com DESCRIPTION PART# Replacement Parts Optional Accessories Recirculating Kit, ZRM-E36CS ZRC-02RM Recirculating Kit, ZRM-E42CS ZRC-01RM Extension Duct Cover Z1C-01RM Universal Make-Up Air Damper MUA006A To order parts, visit us online at http://store.zephyronline.com or call us at 1.888.880.8368...
- Page 23 Zephyr Corporation (referred to herein as “we” or “us”) warrants to the original consumer purchaser (referred to herein as “you” or “your”) of Zephyr products (the “Products”) that such Products will be free from defects in materials or work- manship as follows:...
- Page 24 Roma Island ZRM-E36CS ZRM-E42CS Numéro de modèle : Numéro de série : APR14.0201 © 2014 Zephyr Corporation...
- Page 25 www.zephyronline.com...
- Page 26 MISE EN GARDE DE SÉCURITÉ ......LISTE DU MATÉRIEL ............INSTALLATION Feuille de calcul pour le conduit ......Espace libre et hauteur de montage ....Options d’installation pour le conduit ............Montage de la hotte 9-10 ........... Reprise d’air sans conduit ........
- Page 27 www.zephyronline.com LISEZ ET CONSERVEZ CES INSTRUCTIONS AVERTISSEMENT POUR RÉDUIRE LES RISQUES D’INCENDIE OU DE DÉCHARGE ÉLECTRIQUE, N’UTILISEZ PAS CET APPAREIL AVEC UN TABLEAU DE COMMANDE À SEMI-CONDUCTEURS. AVERTISSEMENT POUR RÉDUIRE LES RISQUES D’INCENDIE, DE DÉCHARGE ÉLECTRIQUE OU DE BLESSURE, RESPECTEZ CES CONSIGNES : a.
- Page 28 ATTENTION POUR RÉDUIRE LES RISQUES D’INCENDIE, N’UTILISEZ QUE DES CONDUITS D’AÉRATION EN MÉTAL. ATTENTION Pour réduire les risques d’incendie et pour évacuer l’air convenablement, assurez-vous de canaliser l’air à l’extérieur de la maison. N’installez pas l’échappement du conduit dans les espaces entre les murs, le plafond, le grenier, les vides sanitaires ou le garage.
- Page 29 www.zephyronline.com ZRM-E36CS, ZRM-E42CS (3 - ZRM-E42CS) ZRC-02RM...
- Page 30 Longueur x Longueur x Pièces de conduit Pièces de conduit Total Total Nombre utilisé Nombre utilisé 3-1/ 4” x 10” 1 pi 6” 30 pi rect., droit embout mural circ./registre 6” circ., droit 1 pi 6” 30 pi chapeau de toiture circ.
- Page 31 www.zephyronline.com adaptateurs sont nécessaires, installez-les le plus loin possible de l’ouverture et le plus éloigné possible l’un de l’autre. La hauteur de montage minimale ne devrait pas être moins de 26”. La hauteur de montage maximale ne devrait pas outrepasser 34”. Il est important d’installer la hotte à...
- Page 32 AVERTISSEMENT DE RISQUE D’INCENDIE N’évacuez ou ne terminez JAMAIS l’échappement du conduit dans les espaces entre les murs, les vides sanitaires, le plafond, le grenier, ou le garage. Tous les échappements doivent être dirigés à l’extérieur de la maison, à moins que l’option de reprise d’air ne soit utilisée. N’utilisez que des conduits en métal pour cloison simple.
-
Page 33: Min. Ducted
www.zephyronline.com 12” 14” STANDARD min. ducted - 28” min. recirc. - 32” max. - 39” Z1C-01RM EXTENSION min. ducted - 50 1/2” min. recirc. - 54 1/2” max. - 79” ” , 41 ” 15/16 7/8” " 3/16 "... - Page 34 ATTENTION : Compte tenu du poids et des dimensions de la hotte, au moins deux installateurs sont nécessaires. FIG.B FIG.C FIG.A 1. Déterminez l’emplacement de montage désiré au plafond. Si nécessaire, ajoutez des blocs de bois (min. 2” x 4”) aux solives du plafond situées derrière la cloison sèche pour un montage plus solide* (FIG.
- Page 35 www.zephyronline.com FIG.E FIG.D AVERTISSEMENT : Le câblage électrique doit être effectué par une ou des personnes qualifiées selon les stipulations de tous les normes et standards en vigueur. Éteignez l’alimentation électrique à l’entrée de service avant de procéder au câblage. 5.
- Page 36 un conduit d’aération. Lorsque transformée, la hotte fonctionne comme une hotte de reprise d’air plutôt que Nous recommandons de TOUJOURS évacuer l’air à l’extérieur de la maison en utilisant le conduit en place impossible d’installer un conduit d’aération. ENSEMBLE DE REPRISE D’AIR (REQUIS SI AUCUN CONDUIT N’EST UTILISÉ) Modèle de hotte Numéro de pièce Filtres et supports par paquet...
- Page 37 www.zephyronline.com Mise en marche/Arrêt à retardement Lumières : Allumer/Veilleuse/Éteindre Choix de 5 vitesses Afficheur (vitesse, arrêt à retardement, nettoyage/changement des filtres) 1 MISE EN MARCHE/ARRÊT À RETARDEMENT Fonction de la touche de mise en marche - La touche permet d’allumer et d’éteindre toutes les fonctions de la hotte (ventilateurs et lumières). - La hotte se rappelle la dernière vitesse et le dernier niveau d’éclairage utilisés.
- Page 38 3 TOUCHE DE CONTRÔLE DES LUMIÈRES - Il existe deux intensités : haute et basse. - Lorsque les lumières sont éteintes, appuyez une fois pour les allumer à haute intensité. Appuyez de nouveau pour les mettre en veilleuse. Appuyez encore une fois pour les éteindre. 4 AFFICHEUR Rappel de nettoyage des filtres à...
- Page 39 www.zephyronline.com ENTRETIEN DES SURFACES Nettoyez régulièrement les surfaces de la hotte avec de l’eau savonneuse chaude et un chiffon de coton propre. N’utilisez pas de détergent abrasif ou corrosif, de laines d’acier ou de tampons à récurer; ils égratigneront et endommageront les surfaces. Pour les taches plus tenaces, utilisez du produit dégraissant liquide.
- Page 40 Les ampoules de remplacement sont disponibles dans les magasins spécialisés en éclairage. Procurez-vous des ampoules halogènes GU-10 50W. Consultez la page 20 du présent guide pour obtenir les numéros de pièces Zephyr.
- Page 41 www.zephyronline.com PROCÉDURES DE DÉPANNAGE POUR LA HOTTE ZRM Problème Cause Solution Après 1. Le bloc d’alimentation n’est pas allumé 1. Assurez-vous que l’alimentation du disjoncteur l’installation, et de l’appareil est allumée l’appareil ne 2. La ligne électrique et le raccord de câble ne sont fonctionne pas.
- Page 42 MAX. LES AMPOULES HALOGENES UTILISER SEUL TYPE MR16, GU10, 50 W. AMPERES VOLTS MAXIMUM ZRM-E36CS, ZRM-E42CS SCHEMA DE CIRCUIT NOIR BLANC ROUGE JUANE GRIS BRUN BLEU NOIR BLANC VERT JUANE JUANE BLANC ACT 390 pi3/min — Max. du ventilateur : 405W à 3,4 A ACT 290 pi3/min —...
- Page 43 Certains codes et règlements limitent la quantité maximale de pi3/min qu’une hotte peut extraire. La ACT permet de contrôler la quantité maximale de pi3/min qu’évacuent un éventail de hottes Zephyr, éliminant la nécessité d’acheter un dispositif d’air d’appoint dispendieux. La ACT permet à l’installateur d’ajuster facilement la vitesse maximale du ventilateur à...
- Page 45 www.zephyronline.com DESCRIPTION DE PIÈCE Pièces de remplacement Ampoule GU10 50W (chaque) Z0B-0020 Filtre à tamis en aluminium (ZRM-E36CS) (chaque) 50200053 FIltre à tamis en aluminium (ZRM-E42CS) (chaque) 50200038 Accessoires optionnels Ensemble de reprise d’air, ZRM-E36CS ZRC-02RM Ensemble de reprise d’air, ZRM-E42CS ZRC-01RM Filtres à...
- Page 46 Zephyr Corporation (désigné aux présentes sous le nom de « nous ») garantit au premier acheteur (désigné aux présen- tes sous le nom de « vous » ou « votre ») de produits Zephyr (les « Produits ») que lesdits produits sont exempts de défauts de fabrication ou de main-d’œuvre selon les conditions suivantes :...
Need help?
Do you have a question about the Roma Island ZRM-E36CS and is the answer not in the manual?
Questions and answers