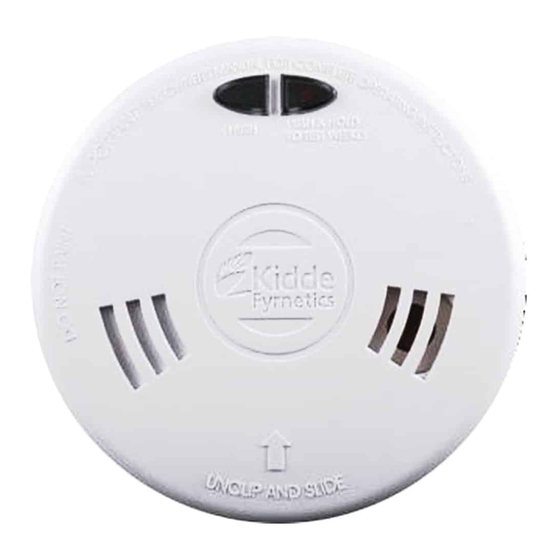
Kidde 1SF23/9HI Installer's Manual
Smoke and heat alarm
Hide thumbs
Also See for 1SF23/9HI:
- Owner's manual (10 pages) ,
- Installer's manual (9 pages) ,
- Installer's manual (9 pages)
Table of Contents
Advertisement
230V Interconnectable Mains Operated Alarms For models:
1SF23/9HI, 1SF23/9HIR, 1SF23/9HIRE, 2SF23/9HI, 2SF23/9HIR,
2SF23/9HIRE, 3SF23/9HI, 3SF23/9HIR, 3SF23/9HIRE
Thank you for purchasing a Kidde Fyrnetics alarm.
Please read through our guide in full.
Kidde Fyrnetics recommends for maximum protection that both ionisation and
photo-electric (optical) smoke alarms be installed. Ionisation technology is faster at
detecting fast flaming fires that give off little smoke. Photo-electric (optical) technology
is faster at responding to slow, smouldering smoky fires.
Heat alarms should be installed in environments where excessive steam, dust etc.
make smoke alarms impractical e.g. kitchens/boiler rooms/lofts.
Electrical rating 230V AC,
50Hz 80mA max per alarm
(maximum 80mA for originating unit
with 24 alarms interconnected).
*Kite mark is not applicable to Heat Alarms.
Kidde Safety Europe, Mathisen Way, Colnbrook, SL3 0HB, UK.
The additional Owner's Manual should be left in a safe place
DO NOT LEAVE THIS INSTALLER'S GUIDE WITH THE PROPERTY OWNER.
Contents
Installation Instructions – Introduction
Section 1.
Recommended Locations for Smoke/Heat Alarms
Section 2.
Locations to be Avoided (Smoke Alarms)
Section 3.
Installing Alarm
Section 4.
Initial Testing and Checking of Alarm
Section 5.
Interconnecting
Section 6.
Timing of Installation/Decorating
Section 7.
Decorating
Section 8.
L.E.D. Status
Section 9.
Ongoing Maintenance
Section 10.
Battery Replacement
Section 11.
Repair/Servicing
Section 12.
Troubleshooting
Section 13.
Service and Guarantee
Section 14.
Limitations of Smoke/Heat Alarms
Section 15.
www.kiddefyrnetics.co.uk
© Kidde Fyrnetics 2001
for the property owner. e.g. near Consumer Unit.
. . . . . . . . . . . . . . . . . . . . . . . . . . . . . . . . . . . . . . . . . . . .4
. . . . . . . . . . . . . . . . . . . . . . . . . . . . . . . . . . . . . . . . . . . .5
. . . . . . . . . . . . . . . . . . . . . . . . . . . . . . . . . . . . . . . . . . . . . . . . .6
. . . . . . . . . . . . . . . . . . . . . . . . . . . . . . . . . . . . . . . . . . . . . . .6
. . . . . . . . . . . . . . . . . . . . . . . . . . . . . . . . . . . . . . . .7
. . . . . . . . . . . . . . . . . . . . . . . . . . . . . . . . . . . . . . . . . . .7
. . . . . . . . . . . . . . . . . . . . . . . . . . . . . . . . . . . . . . . . . . . .7
Smoke and Heat alarm
Installer's Guide
Lic No: 7861
BS 5446: Pt. 1: 2000
. . . . . . . . . . . . . . . . . . . . . . . . . .5
. . . . . . . . . . . . . . . . . . . . . . . . . . . . .6
. . . . . . . . . . . . . . . . . . . . . . . . . . . . . . . . . . . . . . .6
. . . . . . . . . . . . . . . . . . . . . . . . . . . . . . . . . . . . . .8
. . . . . . . . . . . . . . . . . . . . . . . . . . . .8
1
*
. . . . . . . . . . . . . . . . . . . . . . . .2
. . . . . . . . . . . . . . .2
. . . . . . . . . . . . . . . . . . . . . . .3
®
Advertisement
Table of Contents

Related Manuals for Kidde 1SF23/9HI


Summary of Contents for Kidde 1SF23/9HI
- Page 1 Thank you for purchasing a Kidde Fyrnetics alarm. Please read through our guide in full. Kidde Fyrnetics recommends for maximum protection that both ionisation and photo-electric (optical) smoke alarms be installed. Ionisation technology is faster at detecting fast flaming fires that give off little smoke. Photo-electric (optical) technology is faster at responding to slow, smouldering smoky fires.
-
Page 2: Installation Instructions - Introduction
1. Installation Instructions – Introduction This alarm is designed for installation by a qualified electrician, in accordance with the latest I.E.E. Regulations and in regard to relevant Building Regulations. • Read these instructions thoroughly before proceeding. Peoples lives depend on it. •... - Page 3 • On peaked ceilings install within 900mm (36") of highest point. Sloped/Peaked Ceilings 300mm (12") Flat Ceilings Dead • Install one in every room, including occupied attics, but not in kitchens/bath rooms/shower rooms/boiler rooms/garages. 3. Locations to be Avoided (Smoke Alarms) •...
-
Page 4: Kidde Fyrnetics
Select suitable location having regard to earlier advice. • Bring house wiring through a dry lining box or Kidde Fyrnetics Surface Mount Pattress[SMK23]into back of alarm; side entry, via mini trunking is also possible by carefully knibbling away edge on terminal block cover. Make good joint, with white sealant, if necessary. -
Page 5: Section 5. Initial Testing And Checking Of Alarm
Advise the house-holder (if present) as to how to test the alarms. 7. Interconnecting • You may interconnect up to 23 Kidde Fyrnetics AC smoke, heat or CO alarms to this unit. i.e. 24 in total. • Crossing line and neutral connections or line and interconnect connections will fatally damage all interconnected alarms invalidating the guarantee. -
Page 6: Section 8. Decorating
8. Timing of Installing/Decorating • Install the base plate (and surface pattress if used) at 1st fix. • Do not install alarm itself until following trades have finished e.g. plasterers/painters/carpet fitters etc.. • Do not install if property remains damp/unheated. •... -
Page 7: Section 11. Battery Replacement
12. Battery Replacement (AC models with loose battery only) • If the alarm type has replaceable battery cells, they should be replaced annually. (If using alkaline, this can be extended to 2 years). • A chirp once every 40 seconds indicates the battery needs replacement. -
Page 8: 15. Troubleshooting
The liability of Kidde Fyrnetics, arising from the sale of this alarm or under the terms of this guarantee shall not in any case exceed the cost of replacement of the...
Need help?
Do you have a question about the 1SF23/9HI and is the answer not in the manual?
Questions and answers